Checkout.com Setup Guide Lite
Follow our setup guide to connect Checkout.com to Fivetran.
Prerequisites
To connect Checkout.com to Fivetran, you need a Checkout.com account with API access.
Contact Checkout.com Support for API access.
Setup instructions
Find account environment
Your account type determines your environment. If you have:
- a Test account, then you are using the Sandbox environment.
- a Live account, then you are using the Production environment.
Make a note of the environment. You will need it to configure Fivetran.
Create API credentials
Log in to your Checkout.com account.
In the top right corner, click Developers.
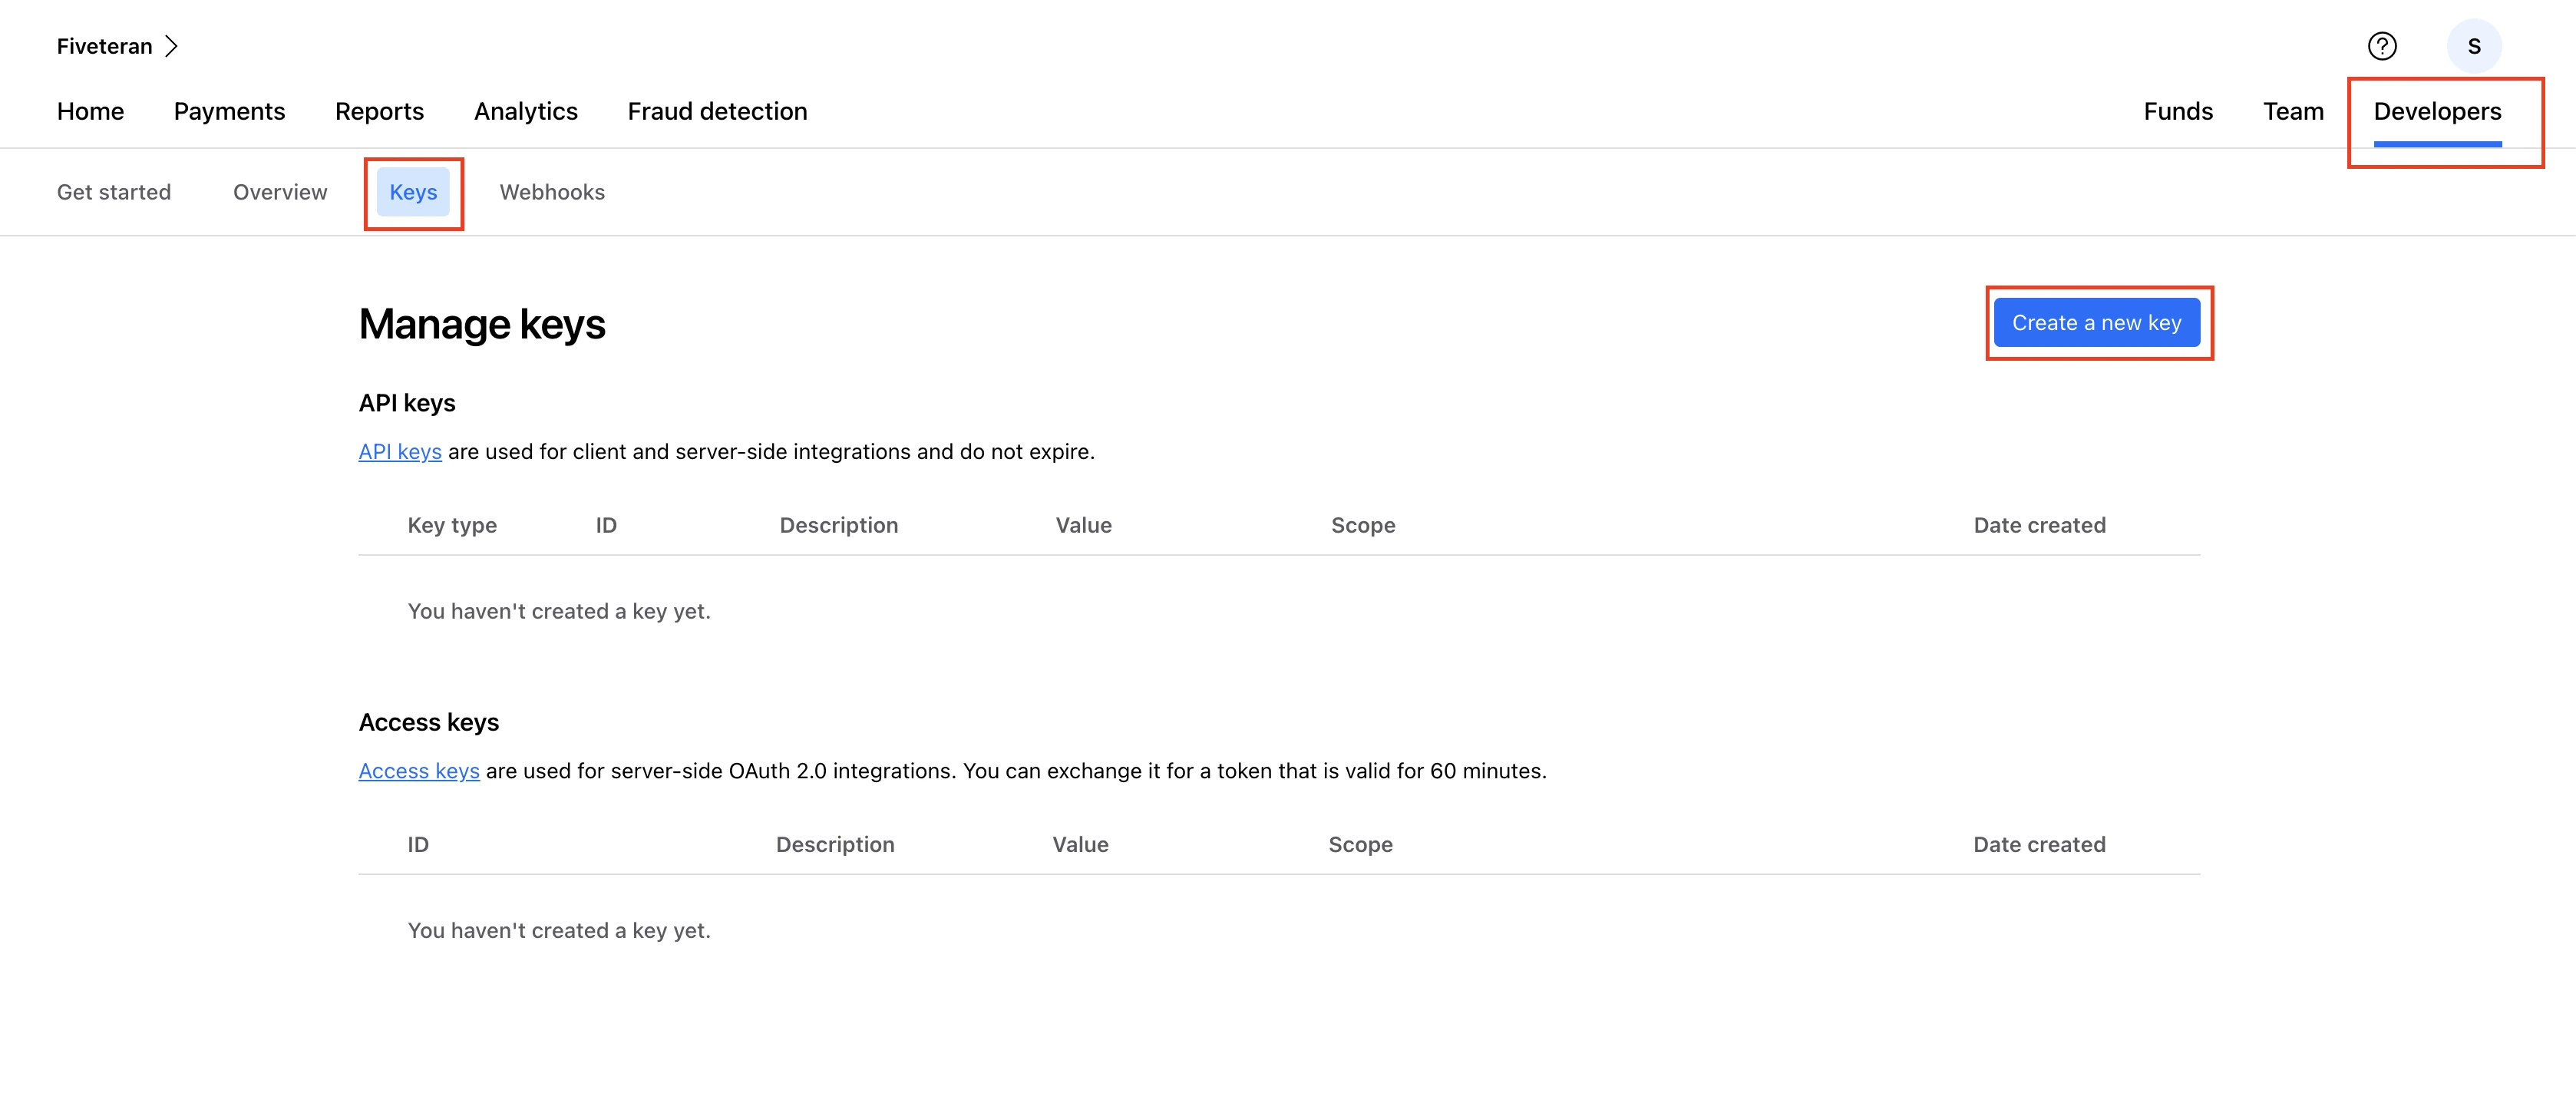
Go to the Keys tab and then click Create a new key.
In the Key details options, select Access key pair.
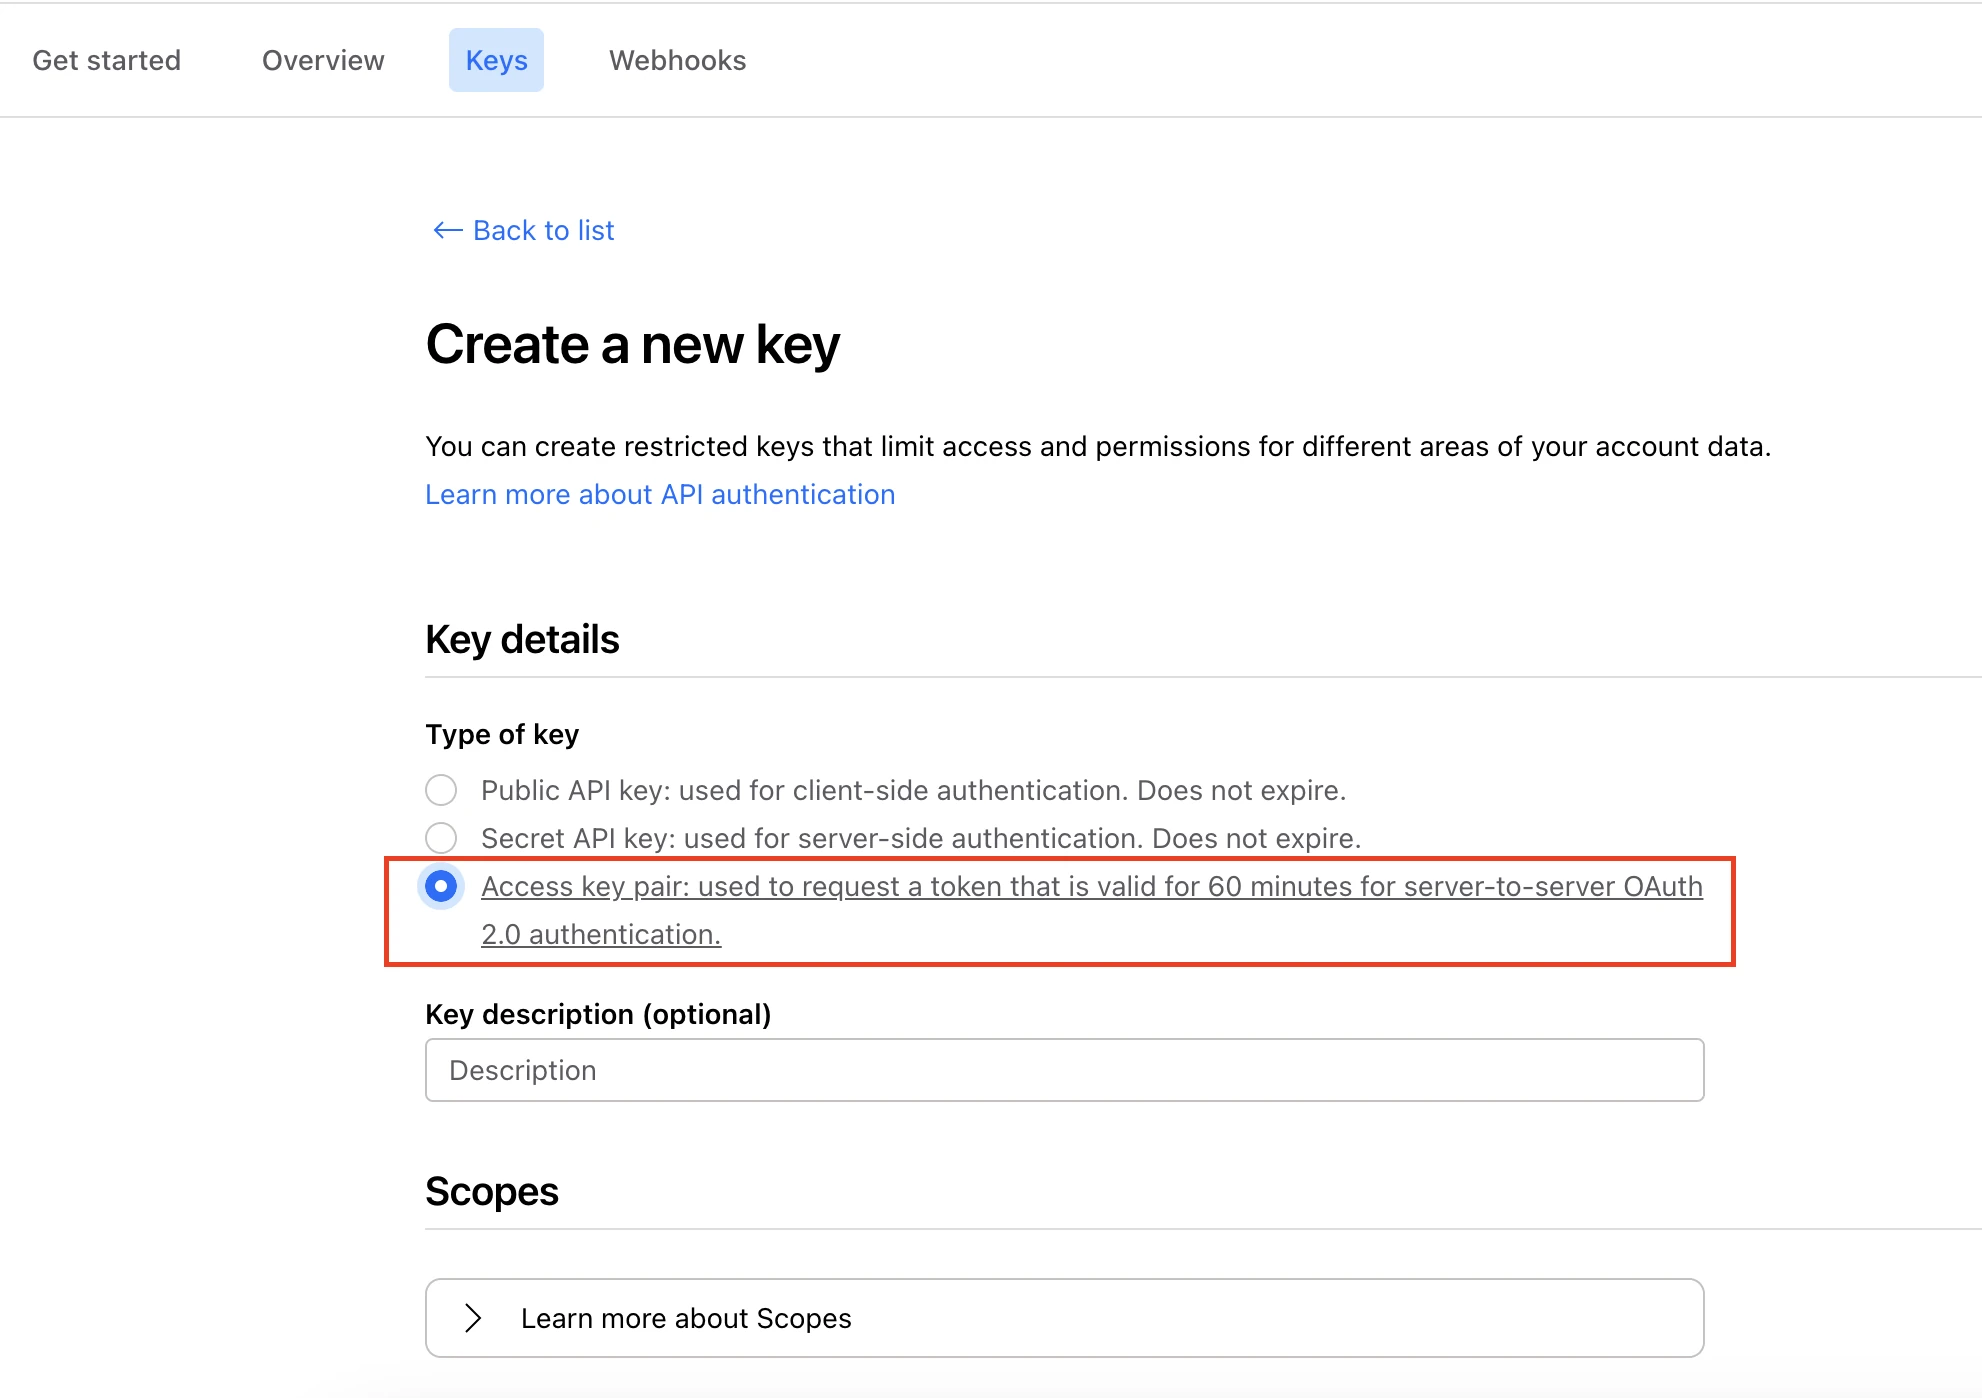
(Optional) Enter the Key description.
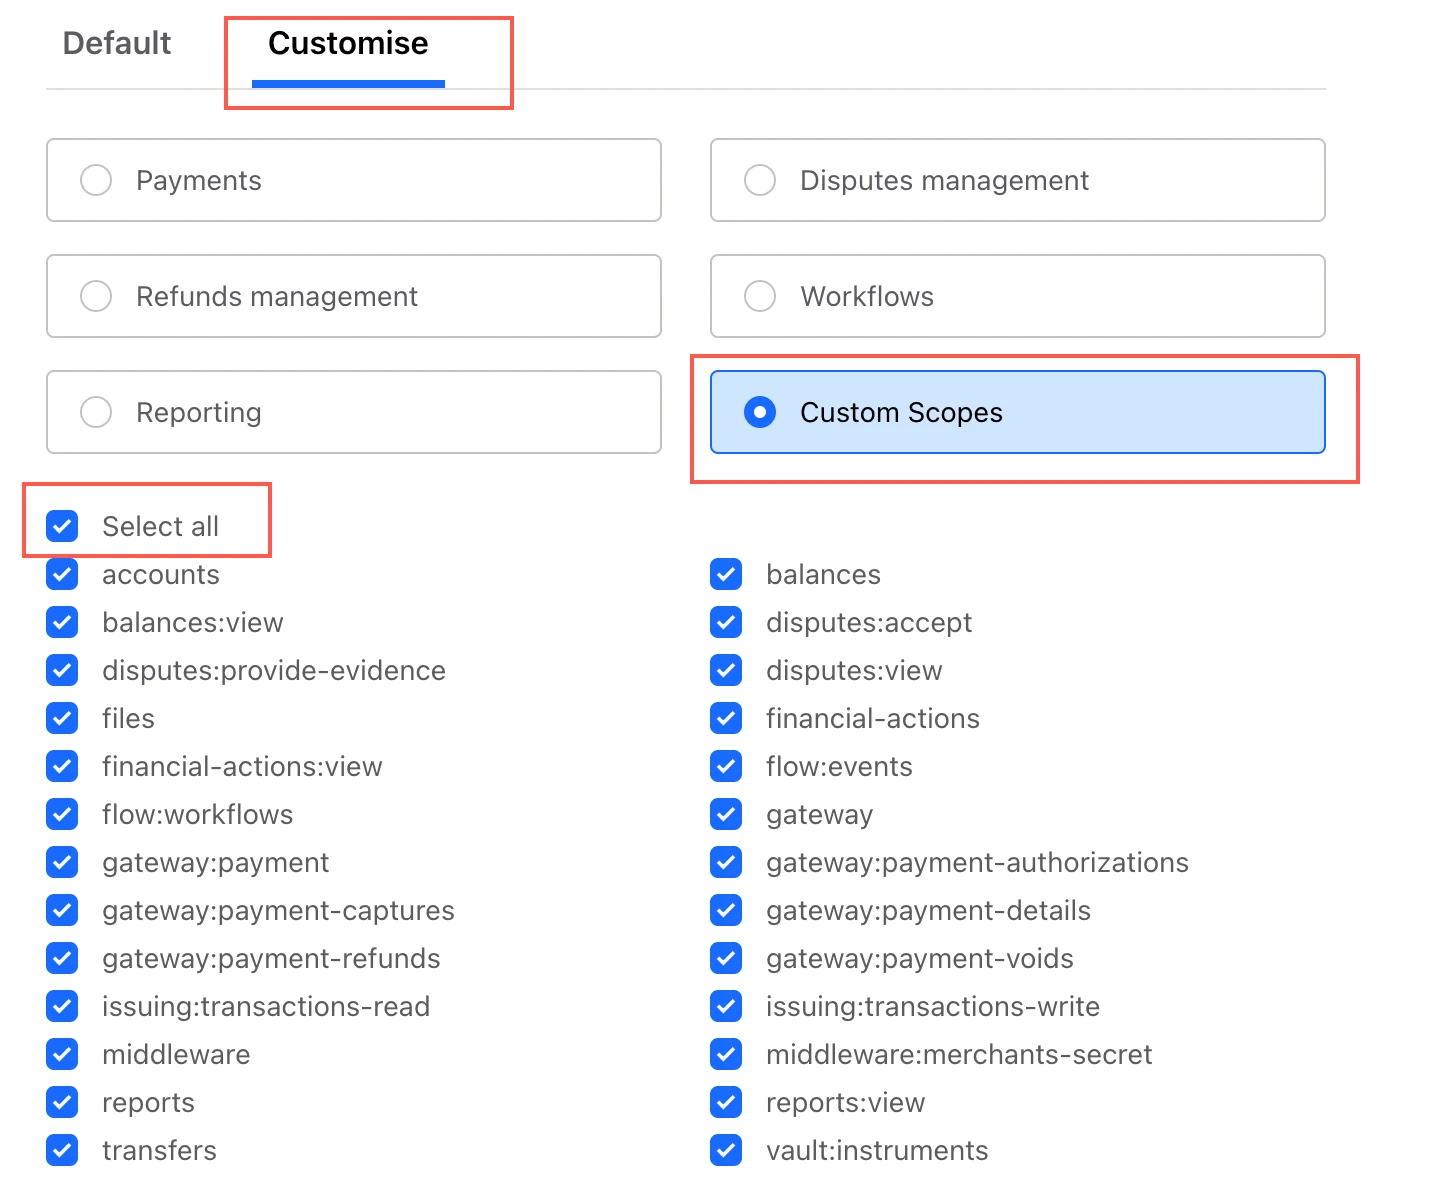
In the Scopes section, go to the Customise tab. Select Custom Scopes and select the scopes for the endpoints that you want to sync.
We recommend that you select all the scopes to avoid HTTP 401 unauthorized errors.
In the Processing channels section, set the Allow any processing channel toggle to ON.
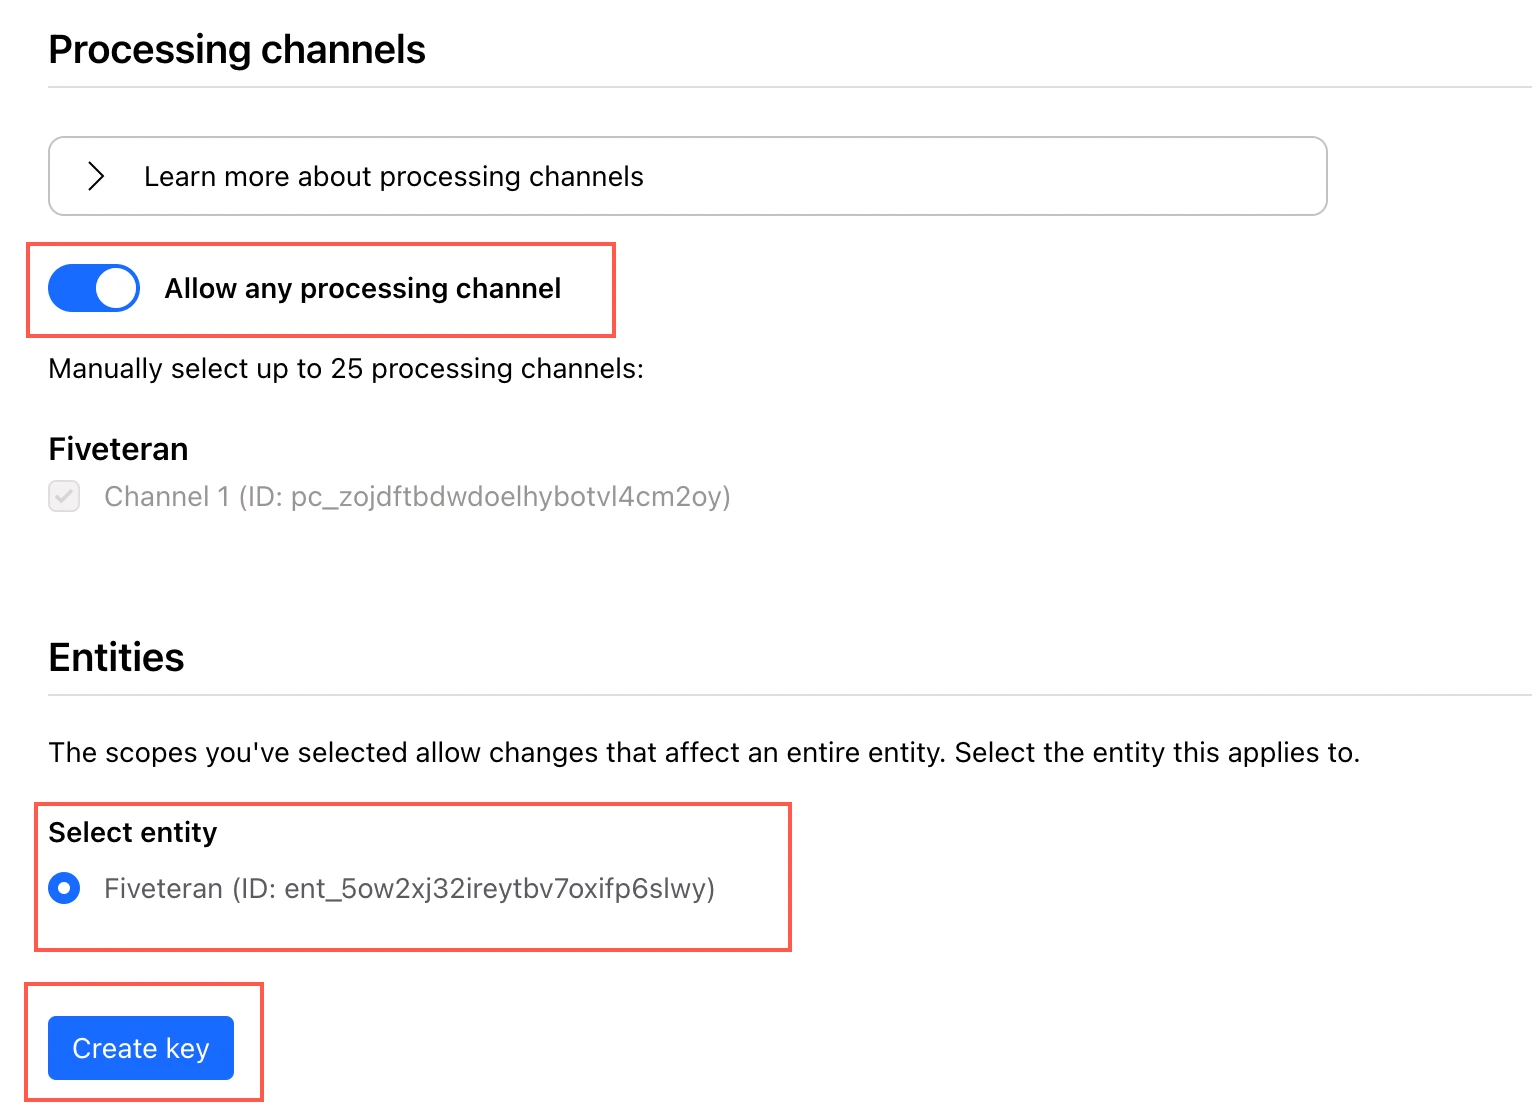
In the Entities section, select the entity.
Click Create key.
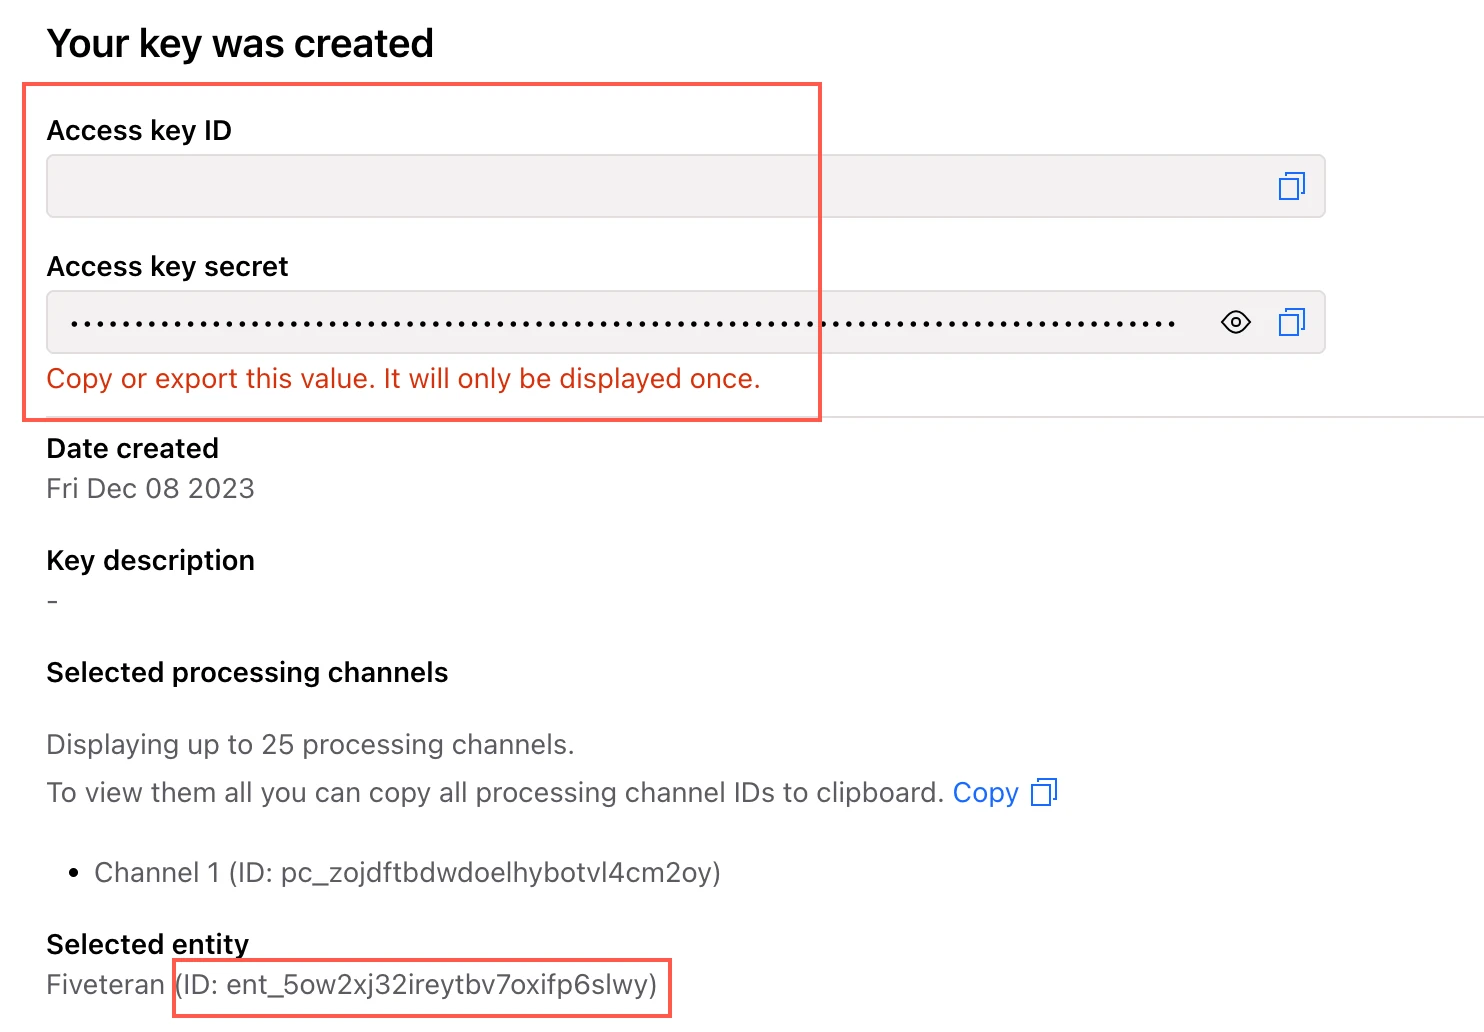
Make a note of the Access key ID, Access key secret, and the Selected entity ID. You will need them to configure Fivetran.
Finish Fivetran configuration
In the connection setup form, enter your Destination schema name.
In the Environment drop-down menu, select the environment you found in Step 1.
Enter the Access key ID, Access key secret, and Entity ID you created in Step 2.
(Hybrid Deployment only) If your destination is configured for Hybrid Deployment, the Hybrid Deployment Agent associated with your destination is pre-selected for the connection. To assign a different agent, click Replace agent, select the agent you want to use, and click Use Agent.
Click Save & Test. Fivetran will take it from here and sync your Checkout.com data.