ServiceNow Setup Guide
Follow our setup guide to connect ServiceNow to Fivetran.
Prerequisites
To connect ServiceNow to Fivetran, you need:
- A ServiceNow Service Account with access to the following tables:
sys_db_objectsys_dictionarysys_audit_deletesys_user- Any tables you want to sync
- To enable table auditing
You don't have to include the tables listed above in the connector schema. Including these tables slows the sync due to their large size.
You can grant admin and snc_read_only roles to your Service Account if you want to avoid setting up complex ServiceNow access control lists.
Setup instructions
Find your ServiceNow Instance ID
Log in to your ServiceNow account.
Look in the URL to find your Instance ID (for example,
https://InstanceID.service-now.com).
Make a note of your Instance ID. You will need it to fill in your connection setup form.
Find credentials
Select the authentication mode: OAuth or OIDC.
Find credentials for OAuth authentication
Expand for instructions
If you choose OAuth, do the following:
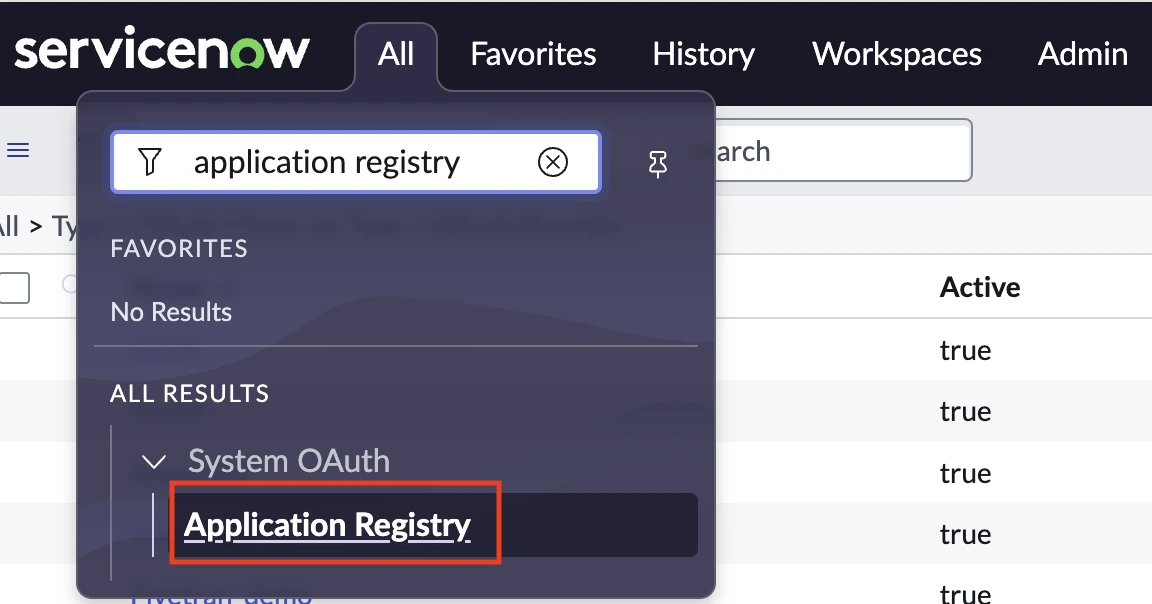
In your ServiceNow account, select OAuth -> Application Registry in the left menu.
Click New.
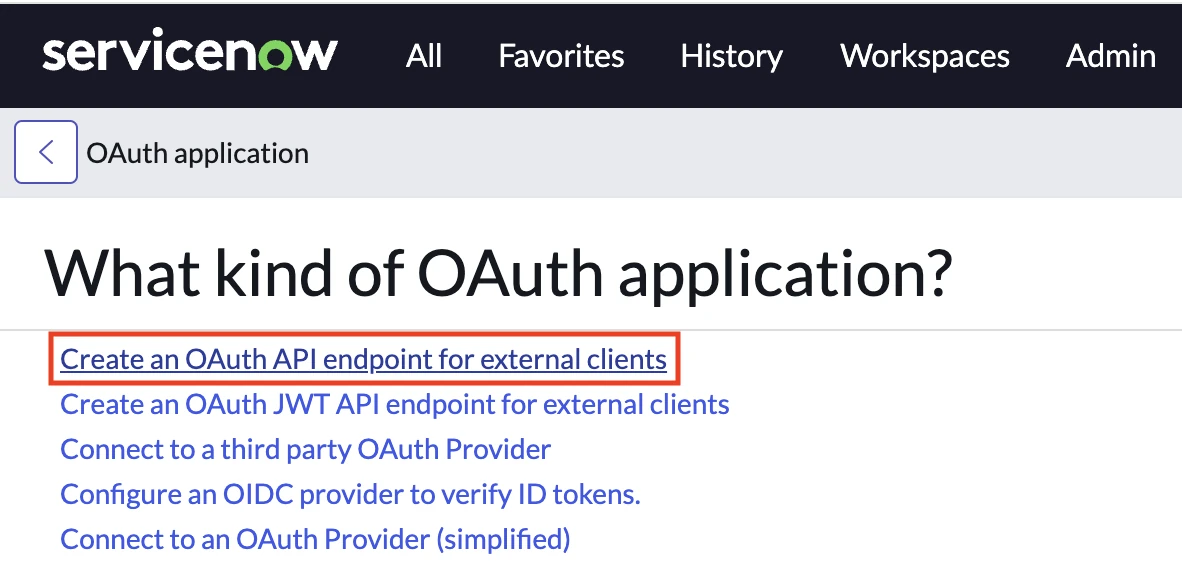
Select Create an OAuth API endpoint for external clients.
Enter an application name (we suggest
Fivetran) in the Name field.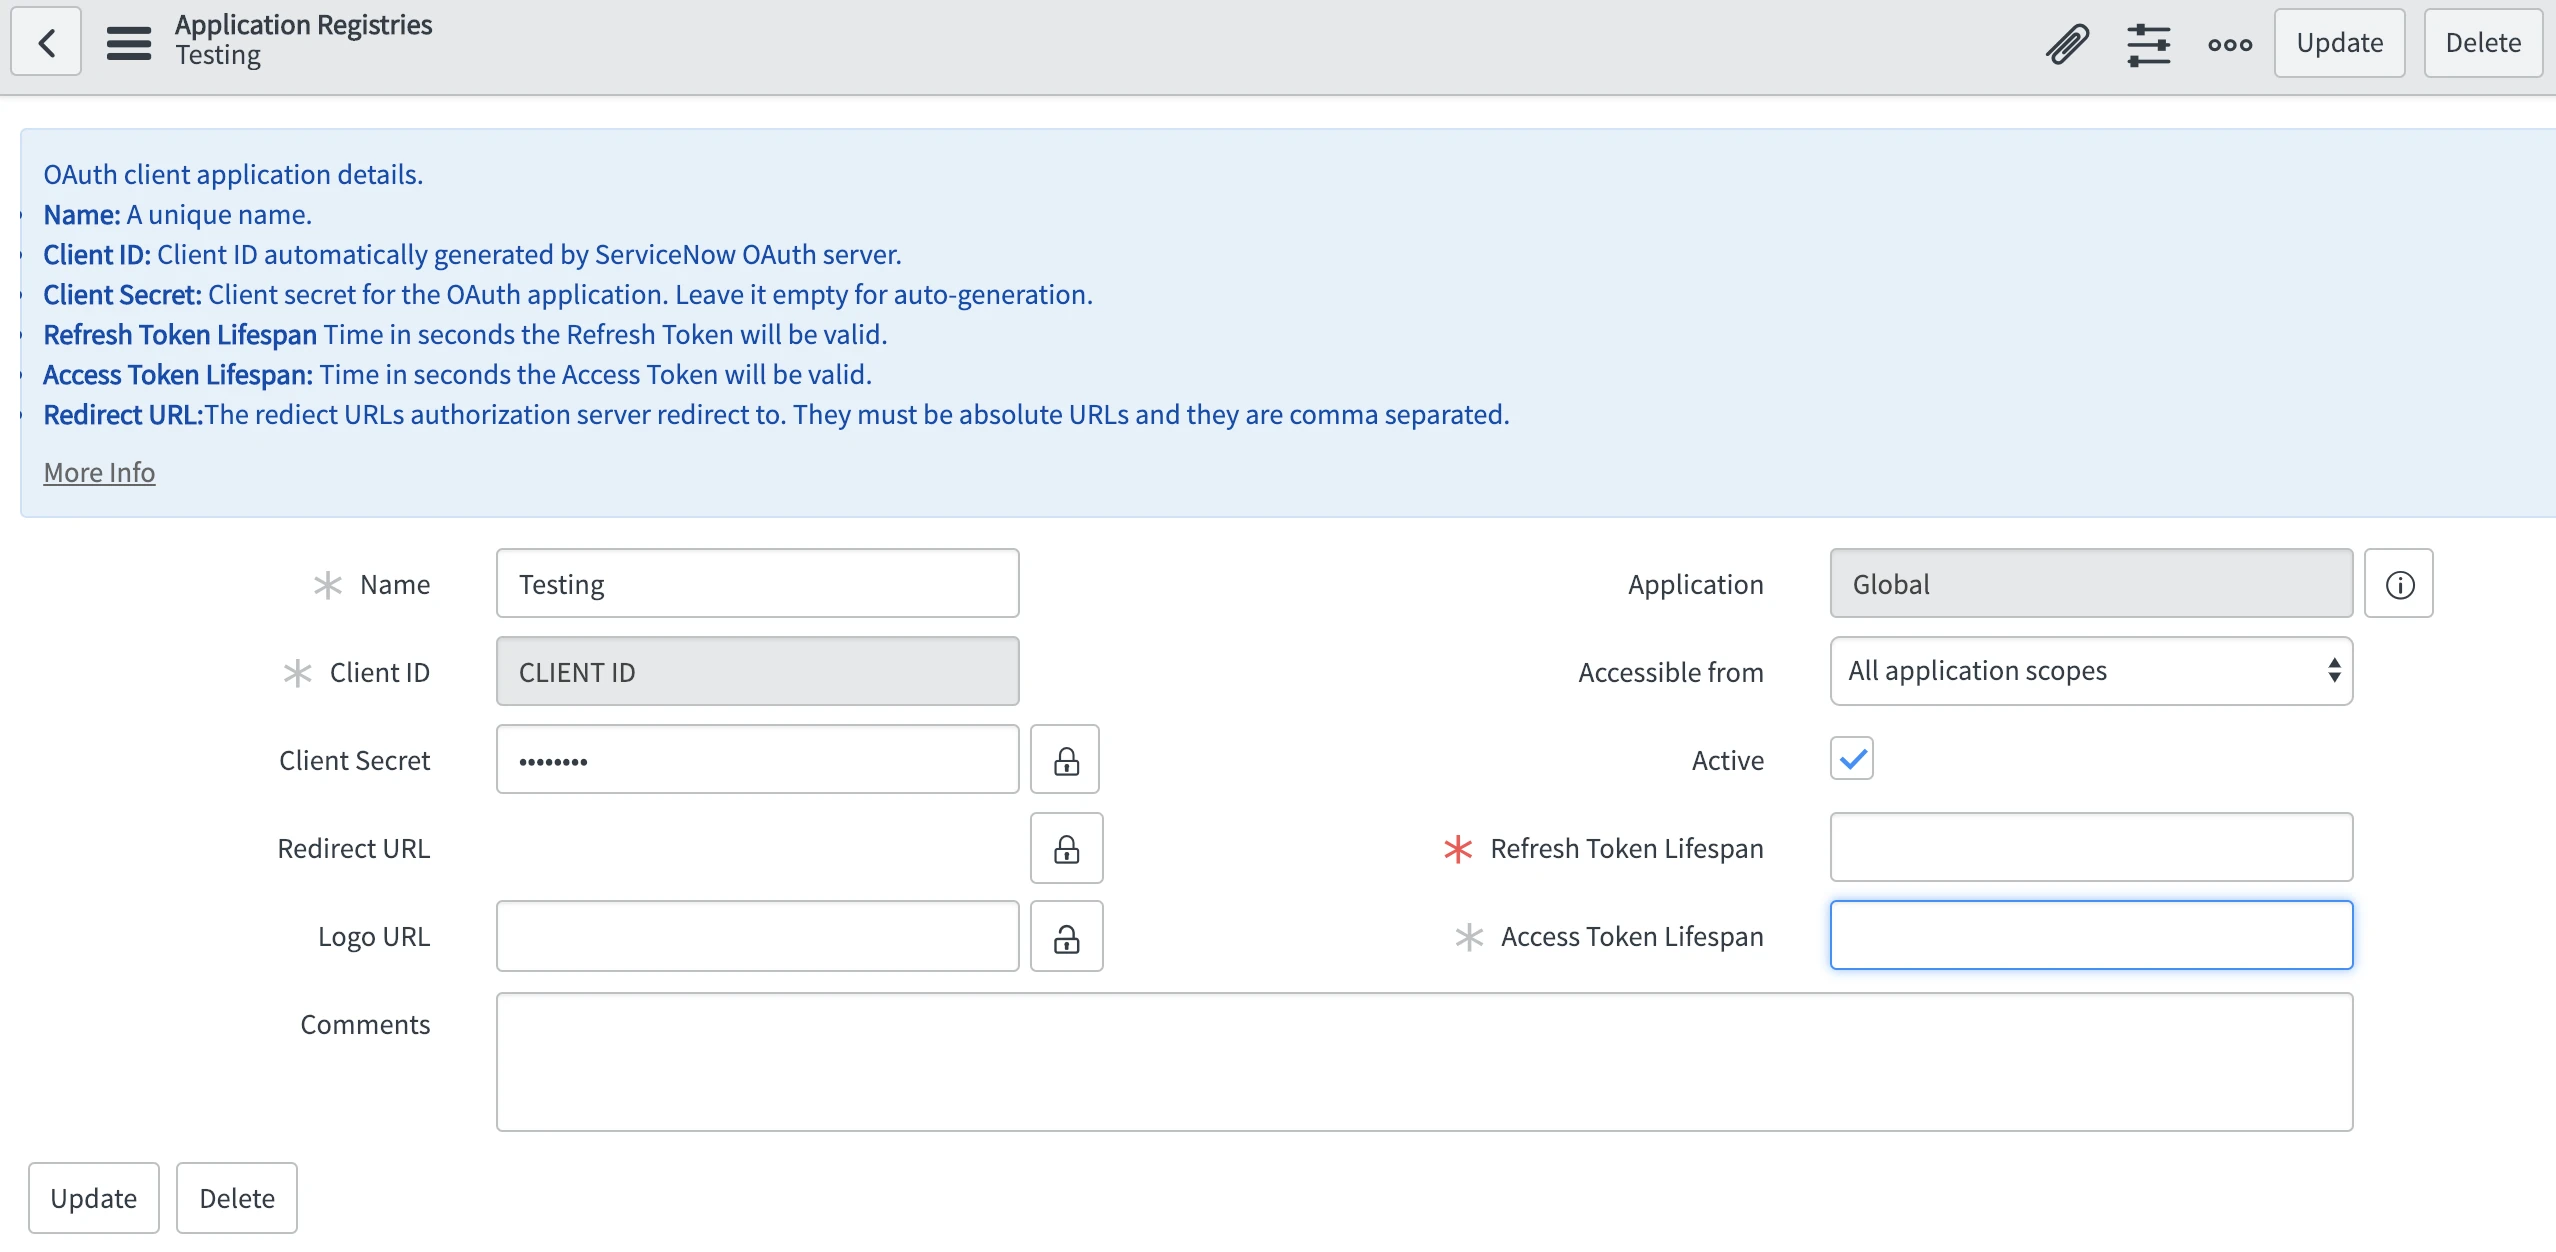
Make a note of the Client ID. You will need it to fill in your connection setup form.
Specify Client Secret and make a note of it. You will need it to fill in your connection setup form in Fivetran. Alternatively, you can leave the Client Secret field blank to automatically generate the value when you save the OAuth application data. You can see the generated client secret by clicking the Unlock button.
Leave Accessible from as the default value of All application scopes.
Make sure that the Active checkbox is selected.
Click Submit to register the application.
Go to User Profile and ensure that the integration user's timezone is GMT.

Proceed to the Finish Fivetran Configuration step.
Find credentials for OIDC authentication
Expand for instructions
If you choose OIDC, do the following:
In Okta, go to Create new application - Type - Web and configure the following settings as shown below:
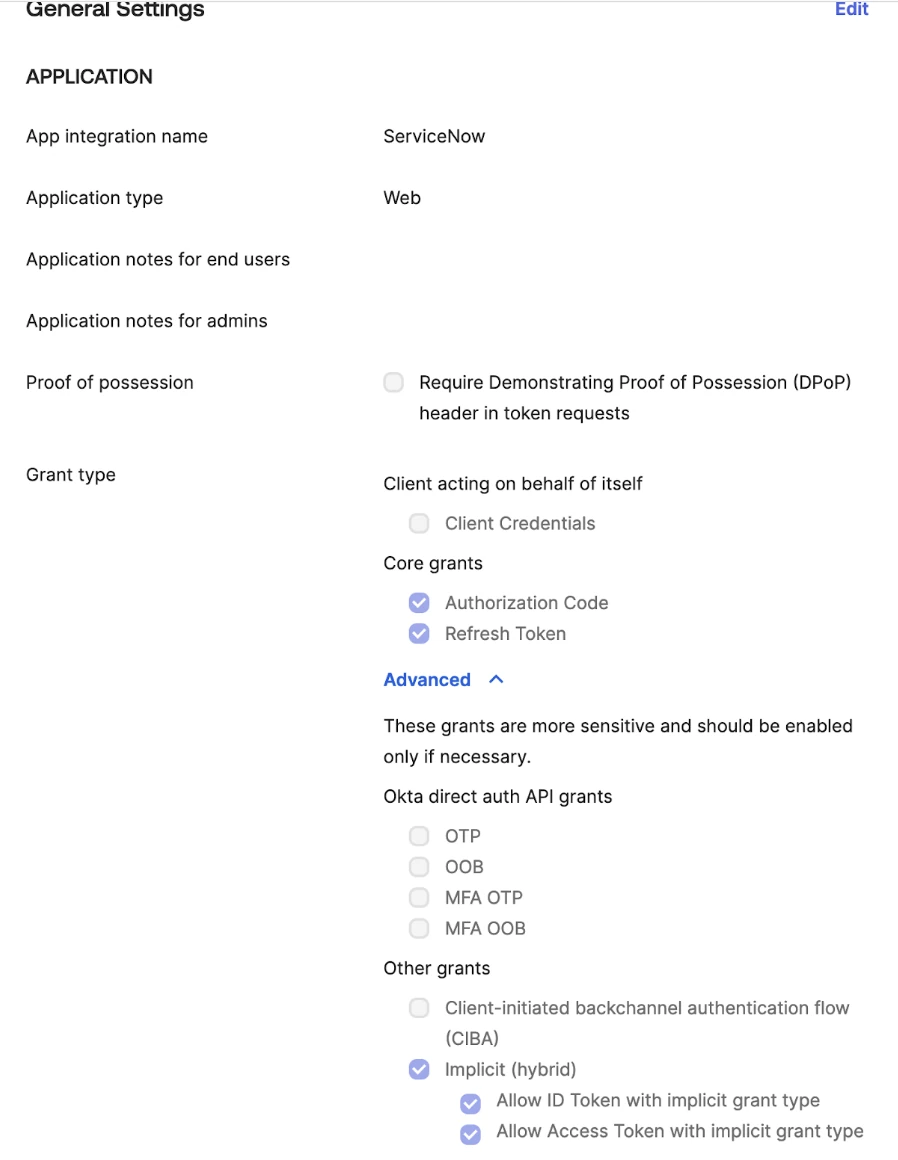

Set the login redirect to: https://fivetran.com/integrations/servicenow/oauth2/return.
Assign a user (with an email address) to the application.
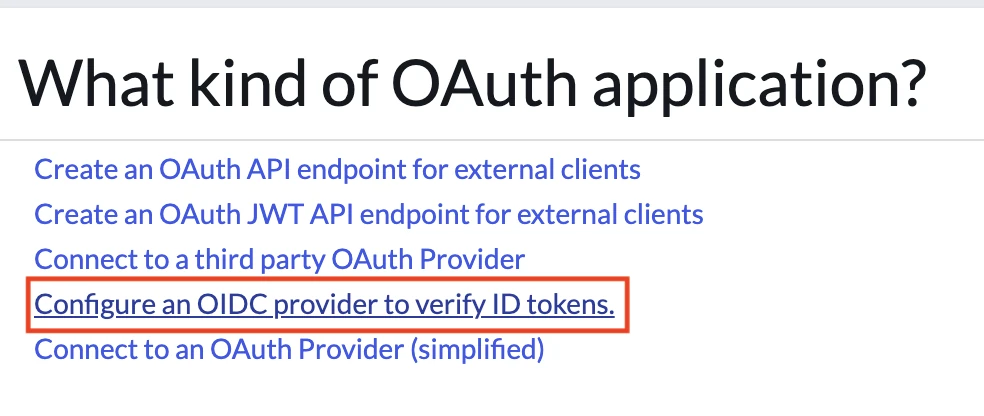
In your ServiceNow instance, go to System OAuth - Application Registry.
Select Configure an OIDC provider to verify ID tokens.
Enter Client ID and Client Secret obtained from the Okta application.
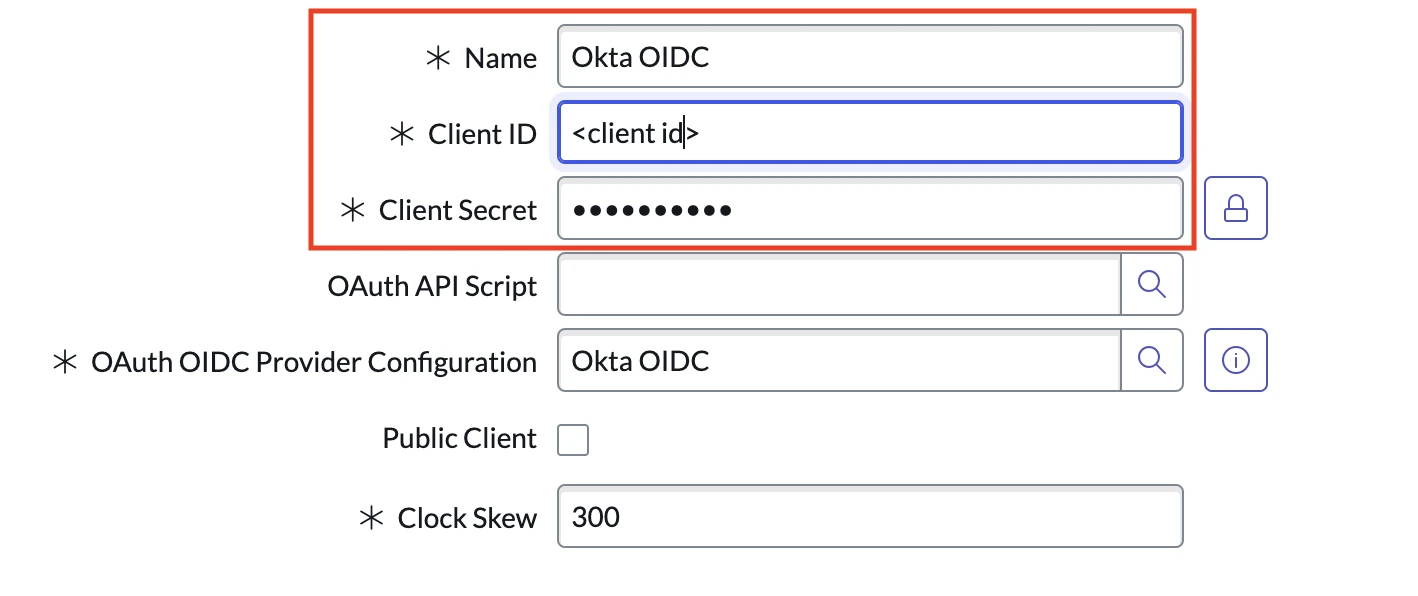
Click the magnifying glass icon beside OAuth OIDC Provider Configuration and fill out the following fields:
OIDC Provider: Provide a name (for example, Okta)
OIDC Metadata URL:
https:///.well-known/openid-configuration User Claim:
emailUser Field:
Email
We recommend disabling the Enable JTI claim verification checkbox to avoid manually revoking old tokens.

Create the user in the
sys_usertable to have an email matching the email account in OKTA (see Okta's instructions). If you are an existing ServiceNow user, ensure that it is provisioned.Proceed to the Finish Fivetran Configuration step.
Finish Fivetran configuration
In the connection setup form, enter the Destination schema name of your choice.
In the Destination schema names field, choose the naming convention you want Fivetran to use for the schemas, tables, and columns in your destination:
- Fivetran naming: Standardizes the schema, table, and column names in your destination according to the Fivetran naming conventions.
- Source naming: Preserves the original schema, table, and column names from the source system in your destination.
- The Source naming feature is not compatible with Quickstart transformations. To ensure successful syncs, we automatically disable Quickstart transformations for connections configured with Source naming.
- If you want to modify your selection, make sure you do it before you start the initial sync.
(Hybrid Deployment only) If your destination is configured for Hybrid Deployment, the Hybrid Deployment Agent associated with your destination is pre-selected for the connection. To assign a different agent, click Replace agent, select the agent you want to use, and click Use Agent.
Enter the Client ID and Client Secret you found in Step 2.
Enter the Instance ID you found in Step 1.
In the Historical sync time frame drop-down menu, select the amount of historical data you want to include in your initial sync.
- If you choose Sync data from selected date, enter a date in the Historical Sync Backwards Limit field.
Enter your Service Account Username and Password.
Fivetran uses OAuth 2.0 with the Resource Owner Password Credential (ROPC) grant flow. This flow requires your OAuth application credentials (Client ID and Client Secret) and your service account credentials (Username and Password) to generate an access token.
Enable
Include inherited columnsif you want to include columns inherited for the records.(Optional) In the Rollback window field, enter a value between 0 and 7 to specify the number of days available for rollback. The default is 0 days if no value is provided.
To learn more, read our ServiceNow Rollback Sync documentation.
Click Save & Test. Fivetran will take it from here and sync your ServiceNow data.