Invoiced Setup Guide Lite
Follow our setup guide to connect Invoiced to Fivetran.
Prerequisites
To connect Invoiced to Fivetran, you need an Invoiced account.
Setup instructions
Find environment
Log in to your Invoiced account account.
Find the environment in which your Invoiced account is hosted in your Invoiced URL and make a note of it. For example:
- If your Invoiced URL is
https://app.invoiced.com/, then your account is hosted inProduction. - If your Invoiced URL is
https://app.sandbox.invoiced.com/, then your account is hosted inSandbox.
- If your Invoiced URL is
Find webhook URL
Find the automatically-generated URL in the connection setup form and make a note of it. You will need it to register the webhook URL in Invoiced.
Register webhook URL
Log in to your Invoiced account.
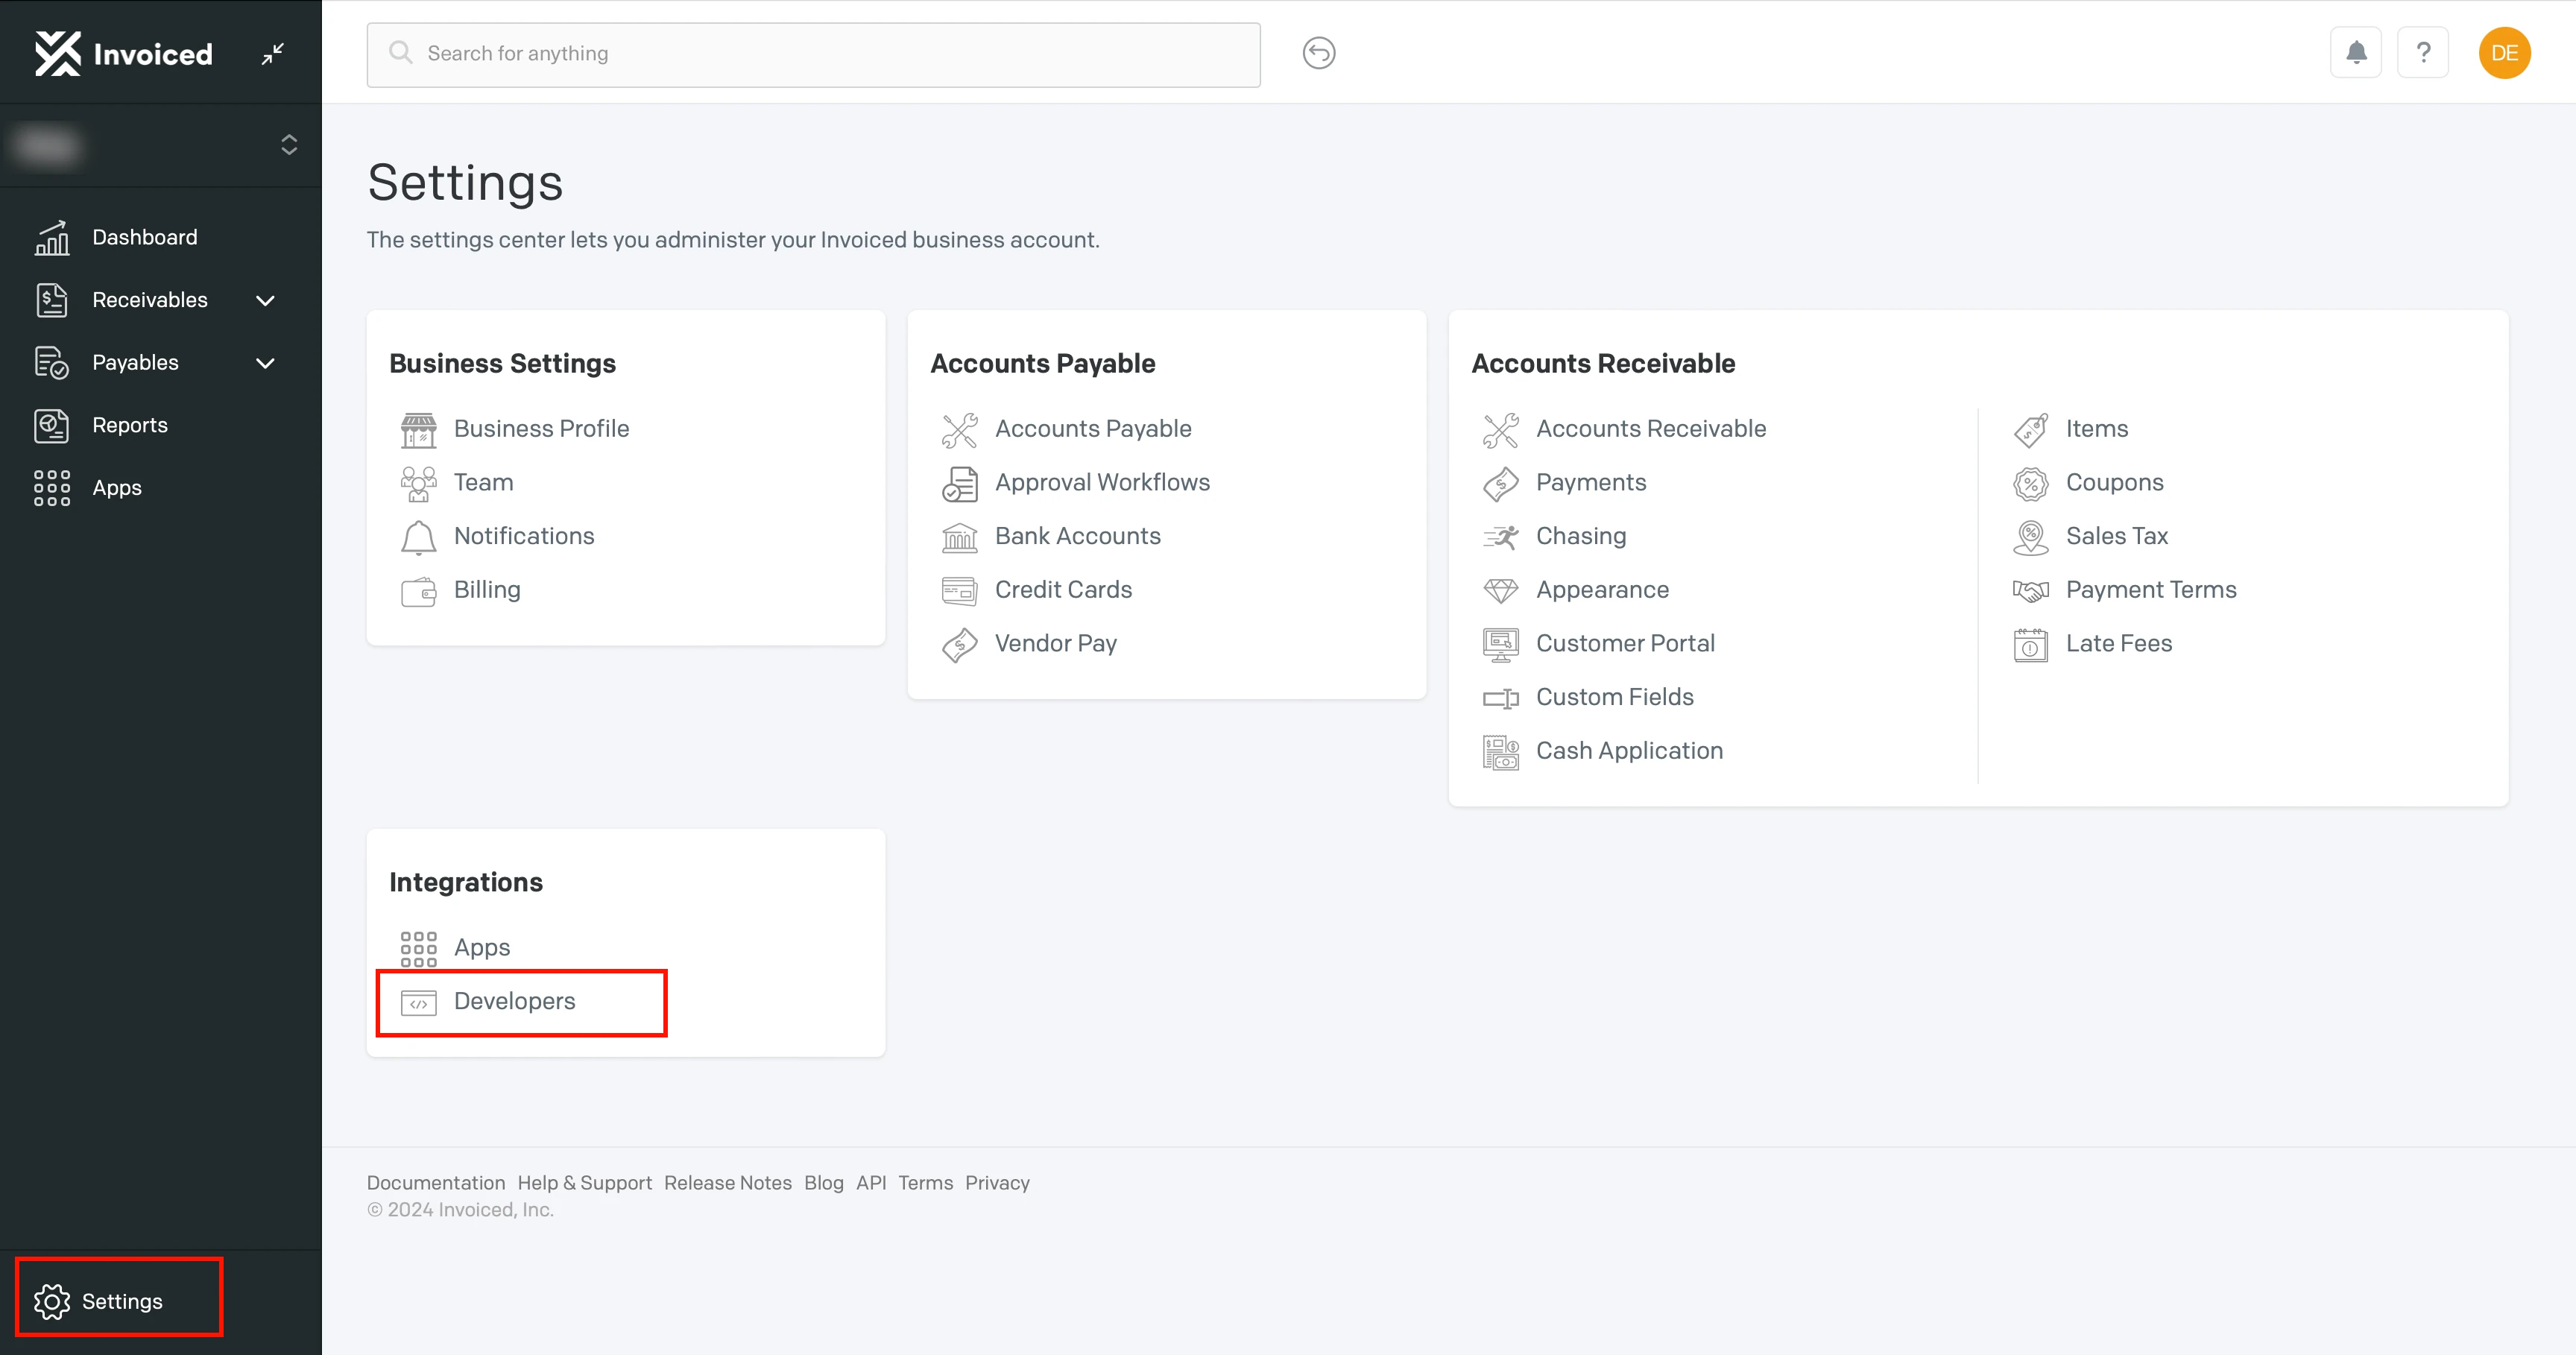
On the navigation menu, select Settings.
Go to the Integrations tab and click Developers.

Click Integrations > New Webhook.
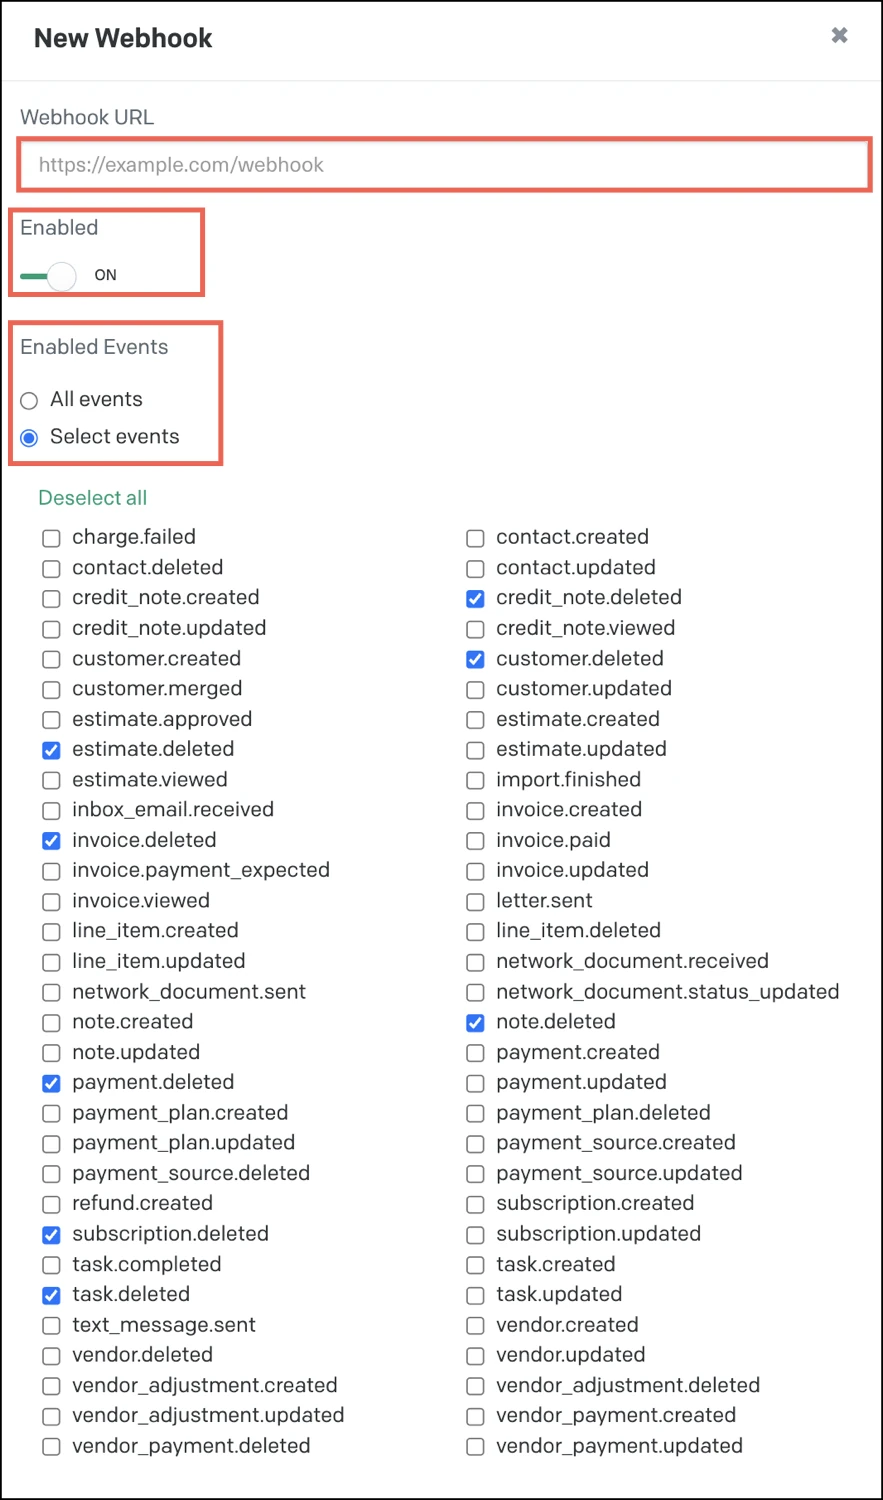
Enter the webhook URL you found.

Set the Enabled toggle to ON.
In the Enabled Events section, select Select events.
Select the following events:
- credit_note.deleted
- customer.deleted
- estimate.deleted
- invoice.deleted
- note.deleted
- payment.deleted
- subscription.deleted
- task.deleted
Click Save.
Create API key
On the navigation menu, click Settings.

Go to the Integrations tab and click Developers.
Click API Keys > New API Key.
Make a note of the API key. You will need it to configure Fivetran.
Finish Fivetran configuration
In the connection setup form, enter your chosen Destination schema name.
Select the Environment you found.
Enter the API key you created.
Click Save & Test. Fivetran will take it from here and sync your Invoiced data.