Xero Setup Guide
Follow our setup guide to connect Xero to Fivetran.
Prerequisites
To connect Xero to Fivetran, you need a Xero account with Adviser or Standard user role.
Migrate to new authentication flow
This is applicable only if you want to migrate to the new authentication process.
- In your existing connection dashboard, go to the Setup tab and click Edit connection details.
- Set the Use Custom Client ID and Secret toggle to ON.
Setup instructions
Create app
Log in to your Xero account.
In the top right corner, click New app.
In the pop-up window, provide the following details:
i. Enter the App name.
ii. In the Integration type drop-down menu, select Web app.
iii. In the Company or application URL field, enter your company URL.
iv. In the Redirect URI field, enter https://fivetran.com/integrations/xero/oauth2/return.
Click Create app.
Generate client secret
- In the navigation menu, click Configuration.
- Click Generate a secret.
- Make a note of the Client ID and Client Secret. You will need them to configure Fivetran.
(Optional) Create webhook
Webhooks allow us to capture all updates to the INVOICE table.
Select the app for which you want to set up this connection.
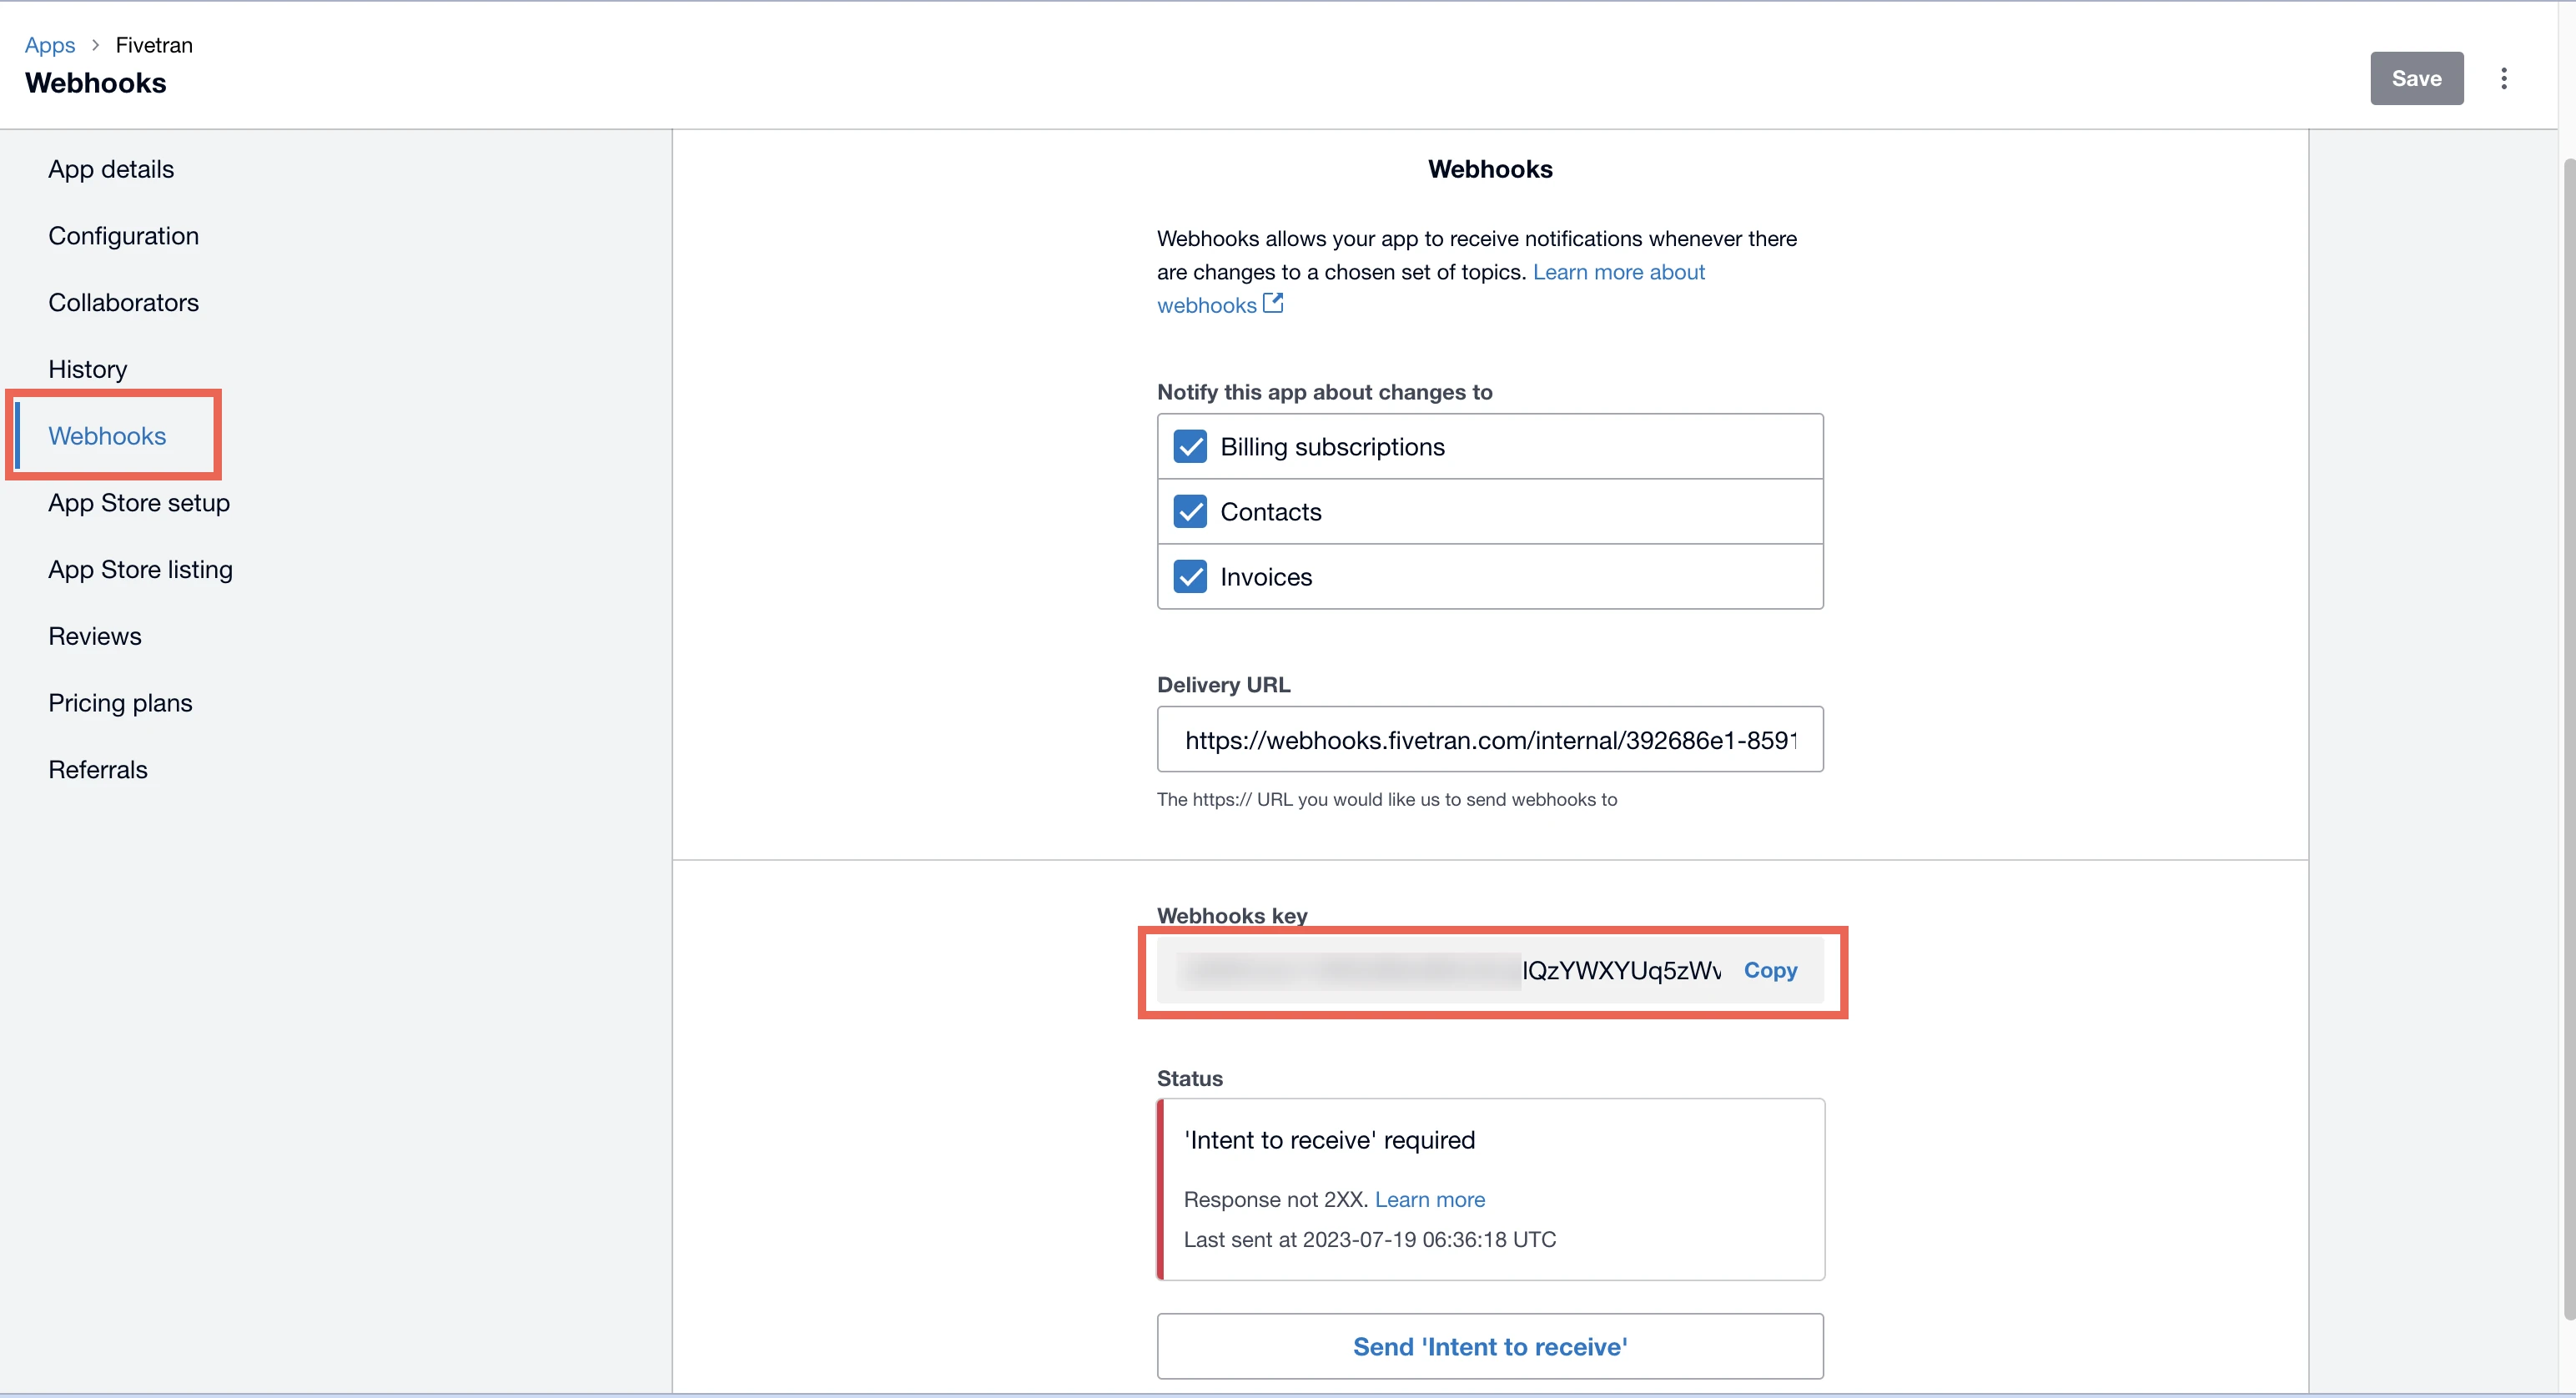
In the navigation menu, click Webhooks.

Make a note of the Webhooks key. You will need it to configure Fivetran.
Finish Fivetran configuration
In the connection setup form, enter your chosen Destination schema name.
Enter the Client ID and Client Secret you created in Step 2.
Click Authorize to authenticate the custom app access. You will be redirected to your Xero account.
Log in to your Xero account.
In the drop-down menu, select the organizations you want to sync, and then click Continue with organizations to grant custom app access to the organization data.
Fivetran cannot connect a single organization to multiple Xero connections. If you've already connected an organization to Fivetran, you will not be able to select it again.
You will be redirected back to Fivetran. In the Organization drop-down menu, select the organization of your choice.
(Optional) To use a webhook, do the following:
You cannot disable a webhook after you enable it for your connection.
i. Set the Use Webhook toggle to ON.
ii. Make a note of the webhook URL. You will need it to set up the webhook after completing the setup form.
iii. Enter the Webhook Key you found in Step 3.
Click Save & Test. Fivetran will take it from here and sync your data from your Xero account.
In case of any post-sync error, click Edit Connection, re-enter the Client secret, and re-authorize the connection. Then, proceed from Step 3.
Postrequisites
If you chose to use a webhook in the Finish Fivetran configuration step, do the following:
- Go to the Webhooks page of Xero.
- In the Delivery URL field, enter the webhook URL you found in Step 4.
- Click Save.
- Click Send 'Intent to Receive', and then wait for the Status to change to OK.