AWS Cost and Usage Reports Setup Guide
Follow our setup guide to connect your AWS Cost and Usage Reports to Fivetran.
Prerequisites
To connect your AWS Cost and Usage Reports to Fivetran, you need an AWS account with the ability to grant Fivetran the permission to read from that S3 bucket.
Setup instructions
Configure data export
- Create a standard report following the AWS instructions:
- Under Data table configurations:
- Select all the columns
You have the option to deselect any of the columns in the Fivetran schema tab once you've created the connection.
- Select the time granularity appropriate for your use case
More granular time intervals will produce more rows of data in the output file. You cannot adjust this setting once you've created the data report.
- Select all the columns
- Under File versioning, select the Overwrite existing data export file delivery option.
If you activated the report recently, it will contain data only for the current month. You can contact AWS support and request that they backfill a report with data from previous periods.
Find External ID
In the connection setup form, find the automatically-generated External ID and make a note of it. You will need it to configure AWS to connect with Fivetran.
The automatically-generated External ID is tied to your account. If you close and re-open the setup form, the ID will remain the same. You may wish to keep the tab open in the background while you configure your source for convenience, but closing it is also OK.
Create IAM policy and role
You must create an IAM policy for both the IAM Role and Access Key and Secret approaches.
For encrypted buckets, follow Amazon S3 bucket instructions to modify the AWS KMS key's policy to grant Fivetran permissions to download files from your encrypted bucket.
Open your Amazon IAM console.
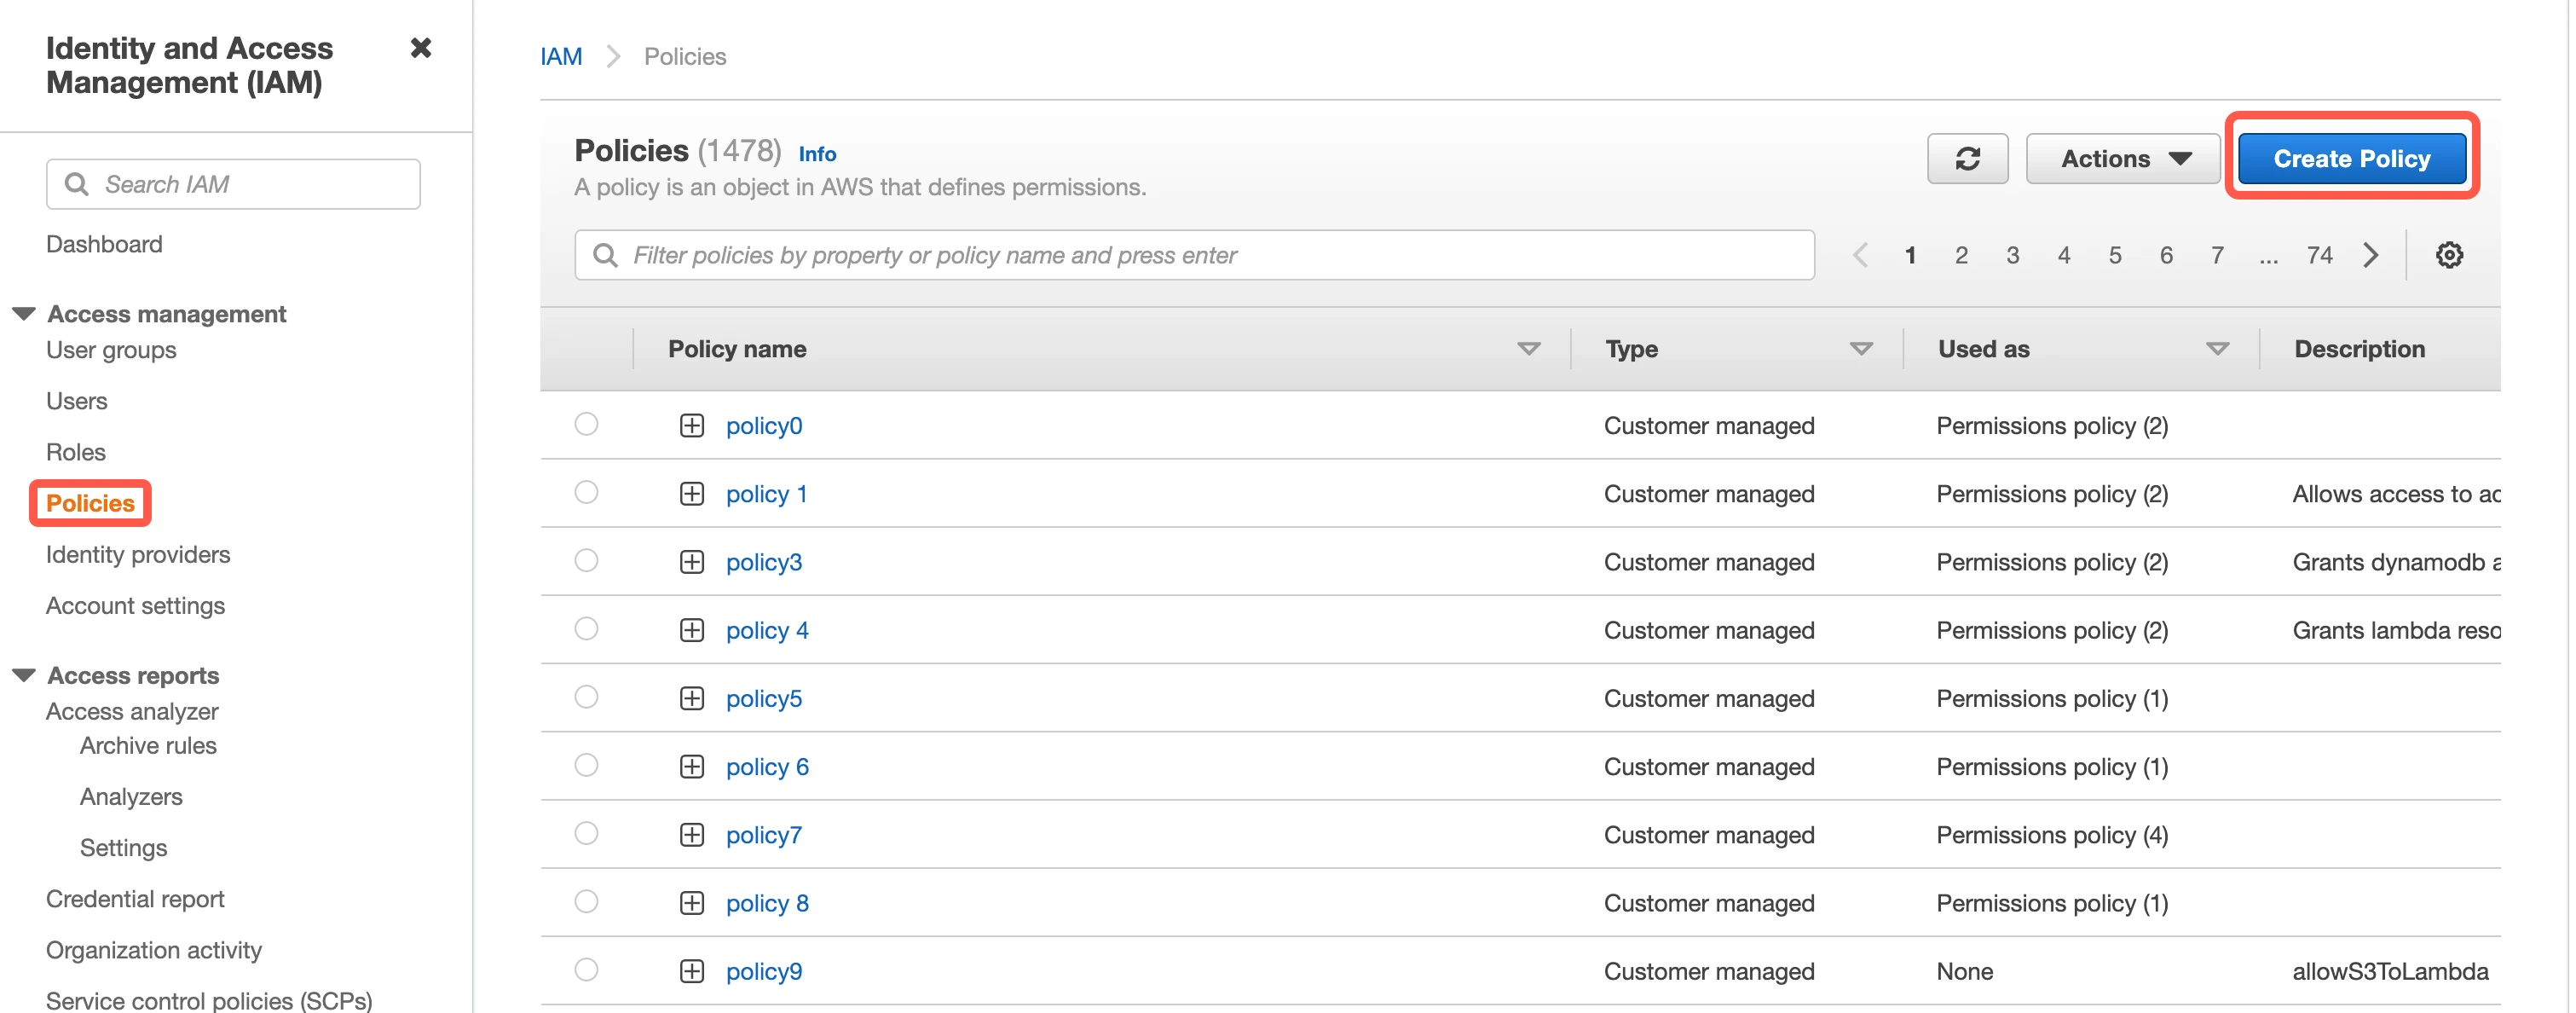
Go to Policies, then click Create Policy.
Go to the JSON tab.

Copy the following policy and paste it into the visual editor. Replace
{your-bucket-name}with the name of your S3 bucket. After that, click Next: Tags.{ "Version": "2012-10-17", "Statement": [ { "Effect": "Allow", "Action": [ "s3:GetBucketLocation", "s3:GetObject", "s3:ListBucket" ], "Resource": [ "arn:aws:s3:::{your-bucket-name}/*", "arn:aws:s3:::{your-bucket-name}" ] } ] }(Optional) If you use a customer-managed KMS key, add the following policy to the Action section of the IAM policy to provide read access to the encrypted files.
     "Action": [
         "kms:Decrypt",
         "kms:GenerateDataKey"
     ]
In the Add tags step, you can optionally add custom tags that will be associated with your bucket. Click Next: Review.
In the Review policy step, specify the name of your policy, for example "Fivetran-S3-Access", then click Create policy.

(Optional) Access using IAM role
Find External ID
In the connection setup form, find the automatically-generated External ID and make a note of it. You will need it to create an IAM role in AWS.
The automatically-generated External ID is tied to your account. If you close and re-open the setup form, the ID will remain the same. You can keep the tab open in the background while you configure your source for convenience.
Create IAM role
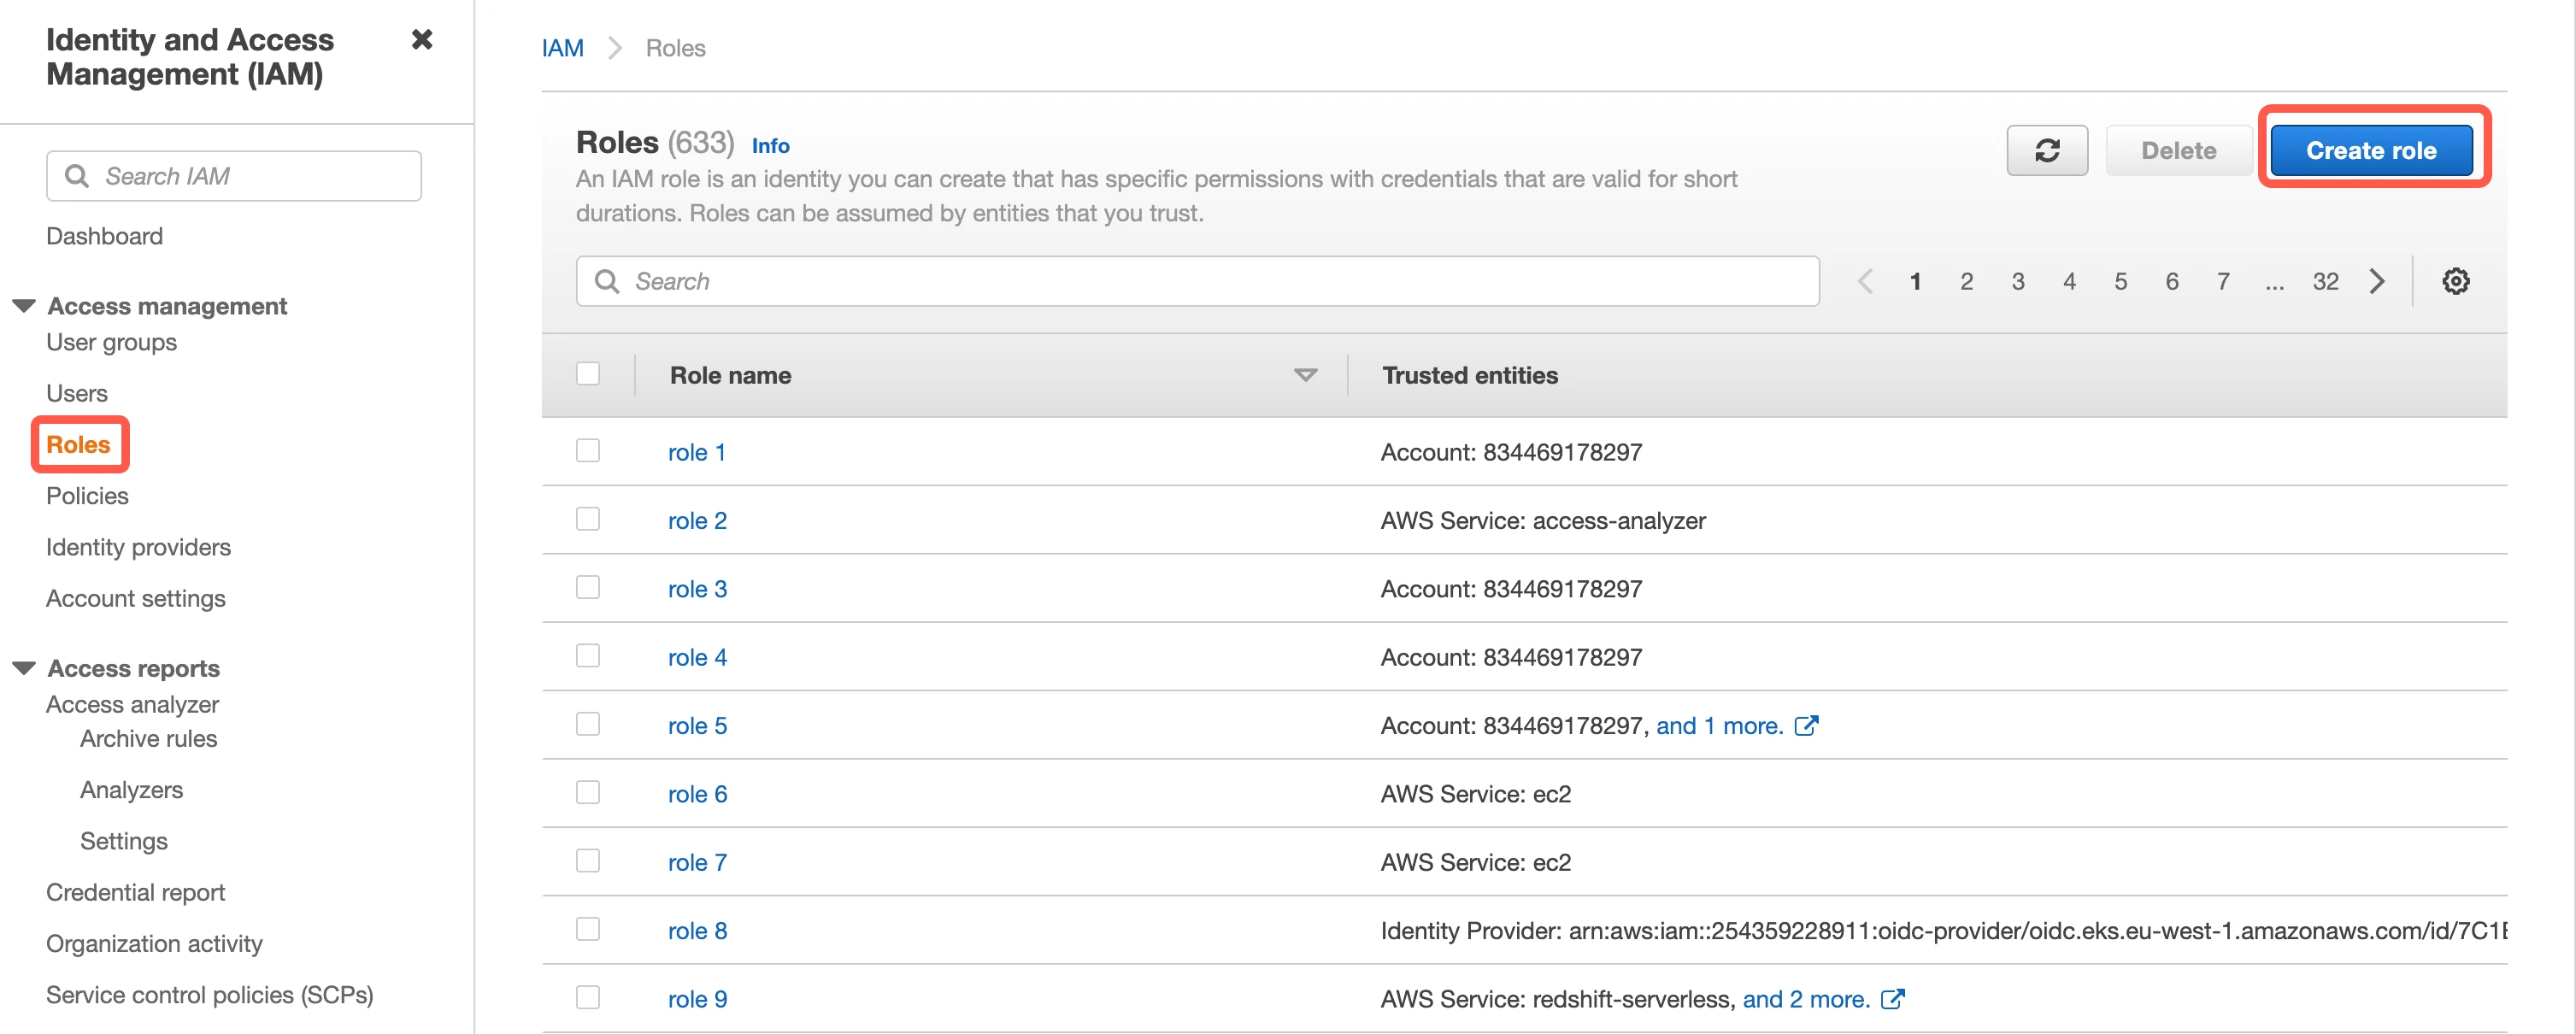
Go to Roles, then click Create role.
Select AWS account, then enter Fivetran’s AWS VPC Account ID,
834469178297, in the Account ID field.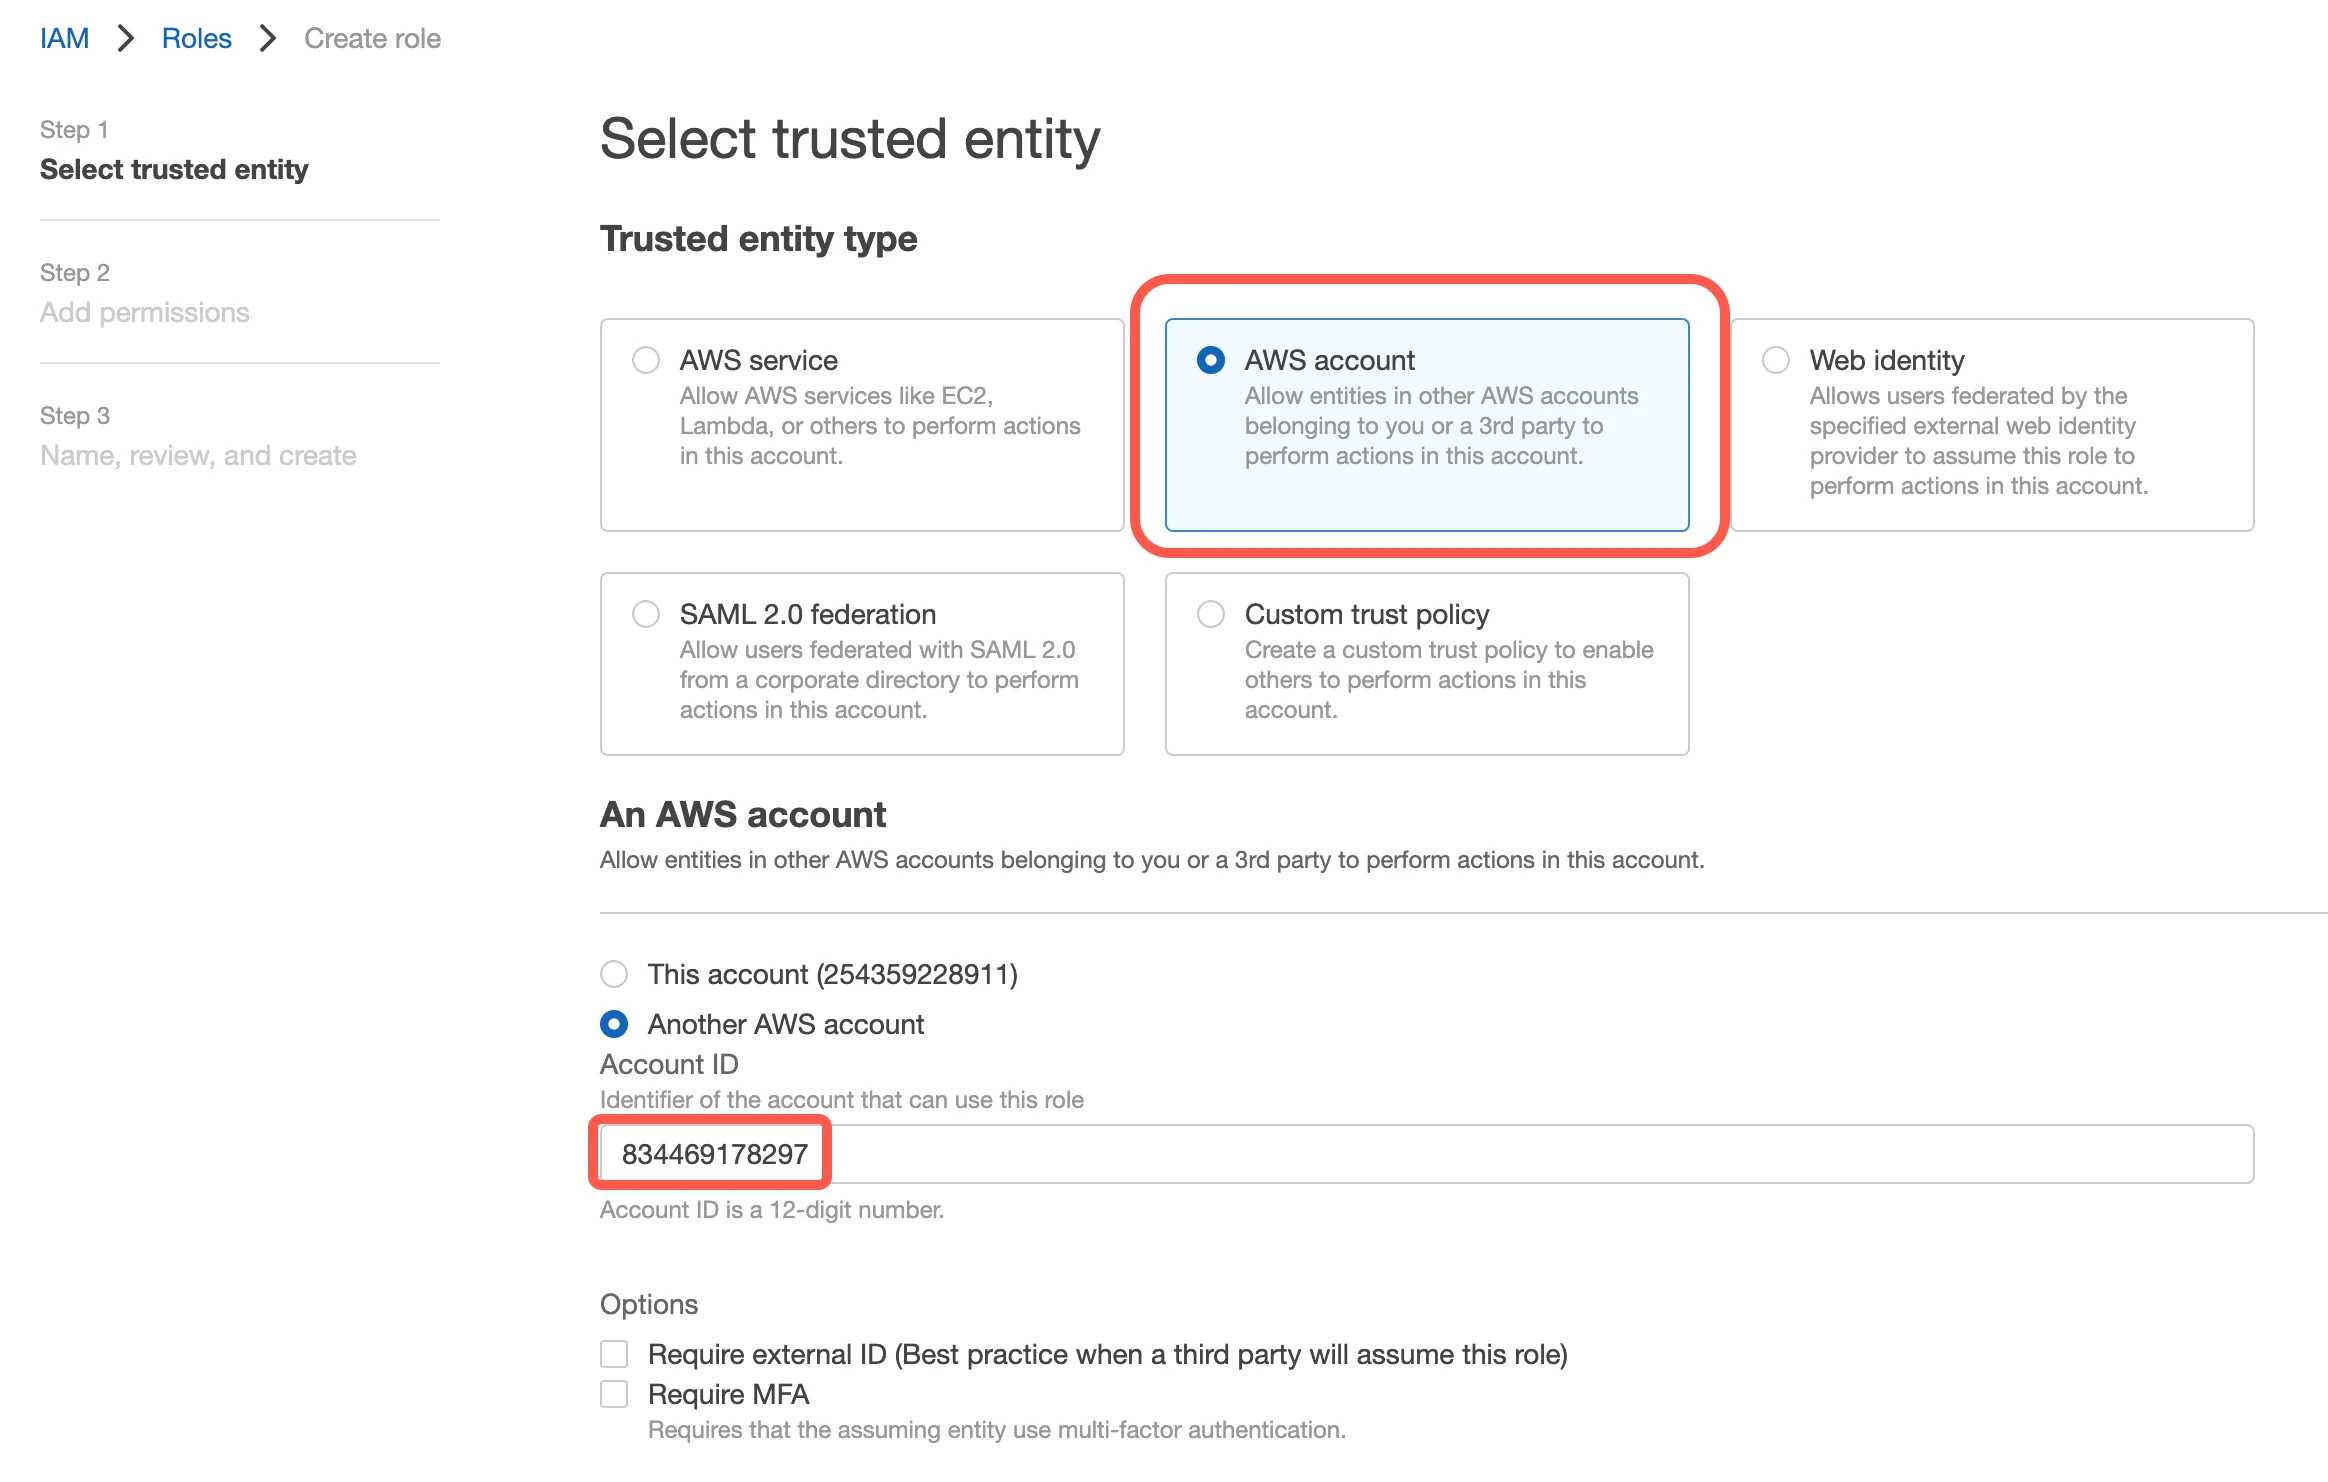
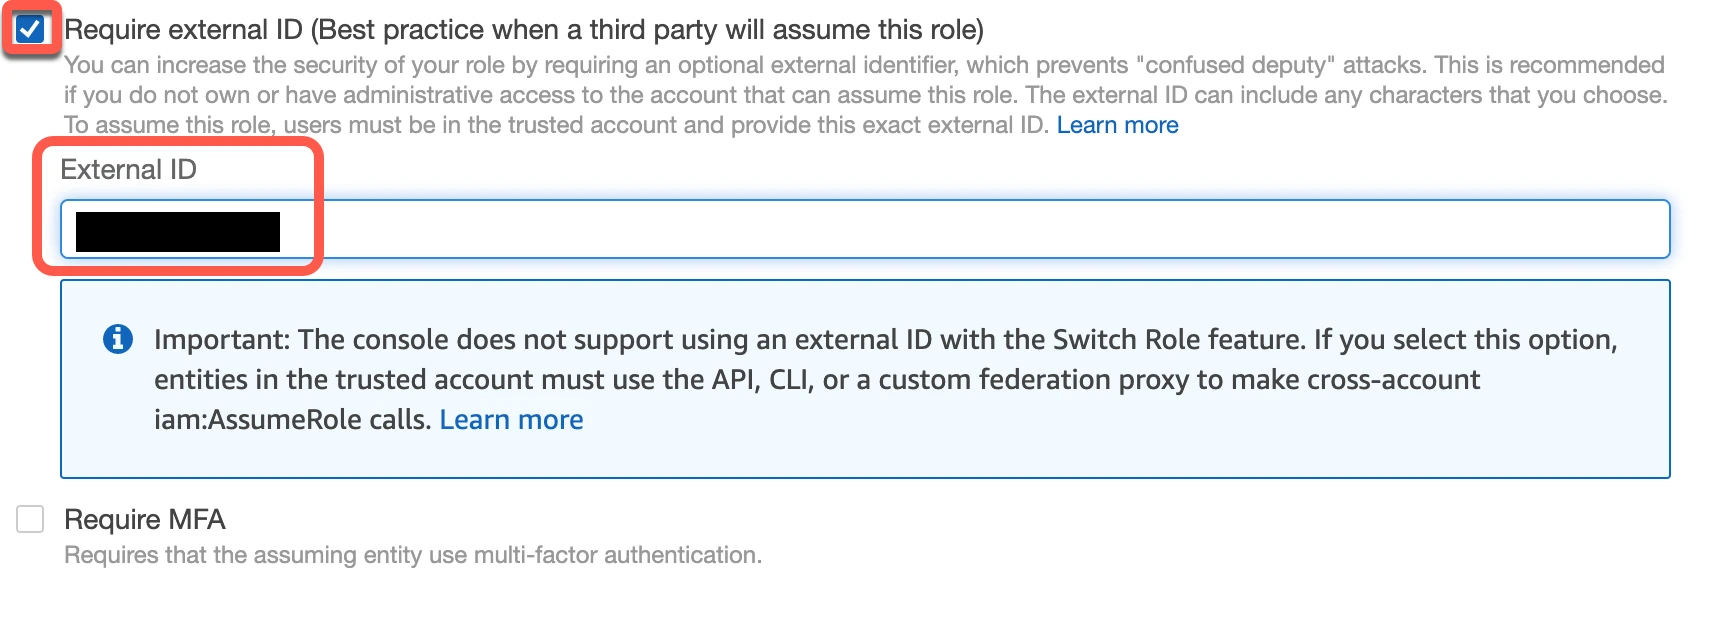
Select the Require external ID checkbox and enter the External ID you found above, then click Next.
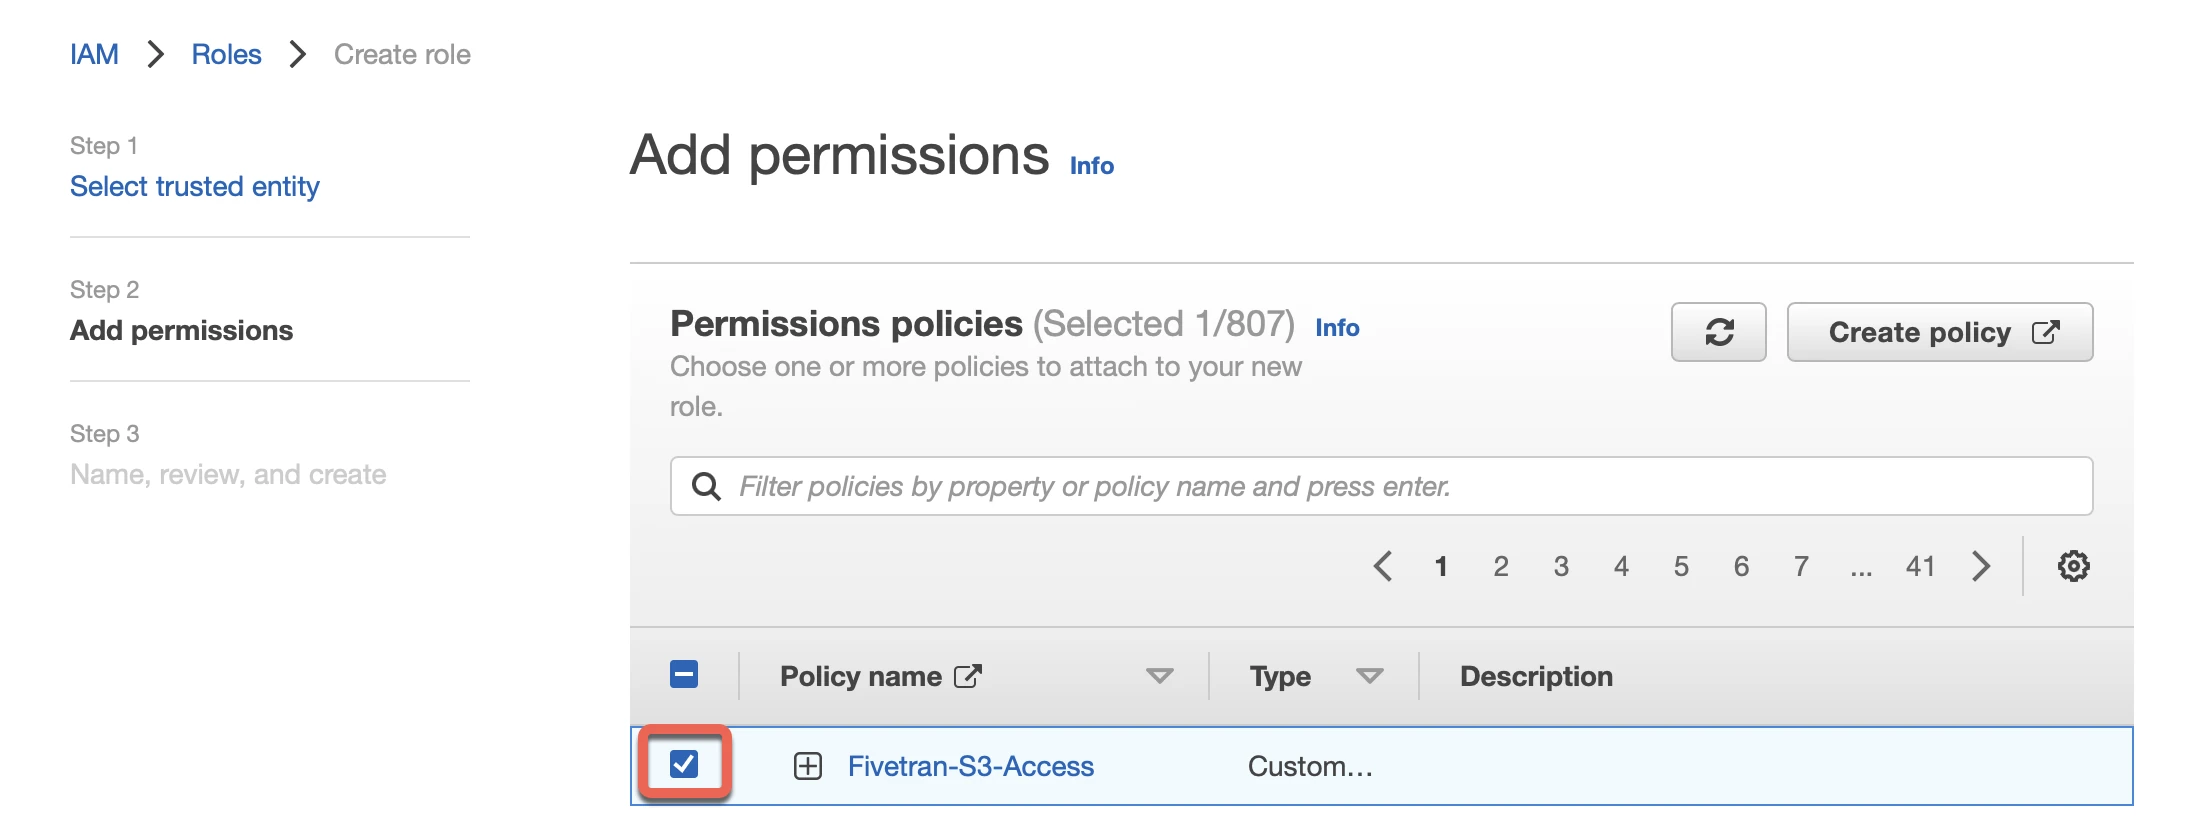
In the Add permissions step, select the "Fivetran-S3-Access" policy you created, then click Next.
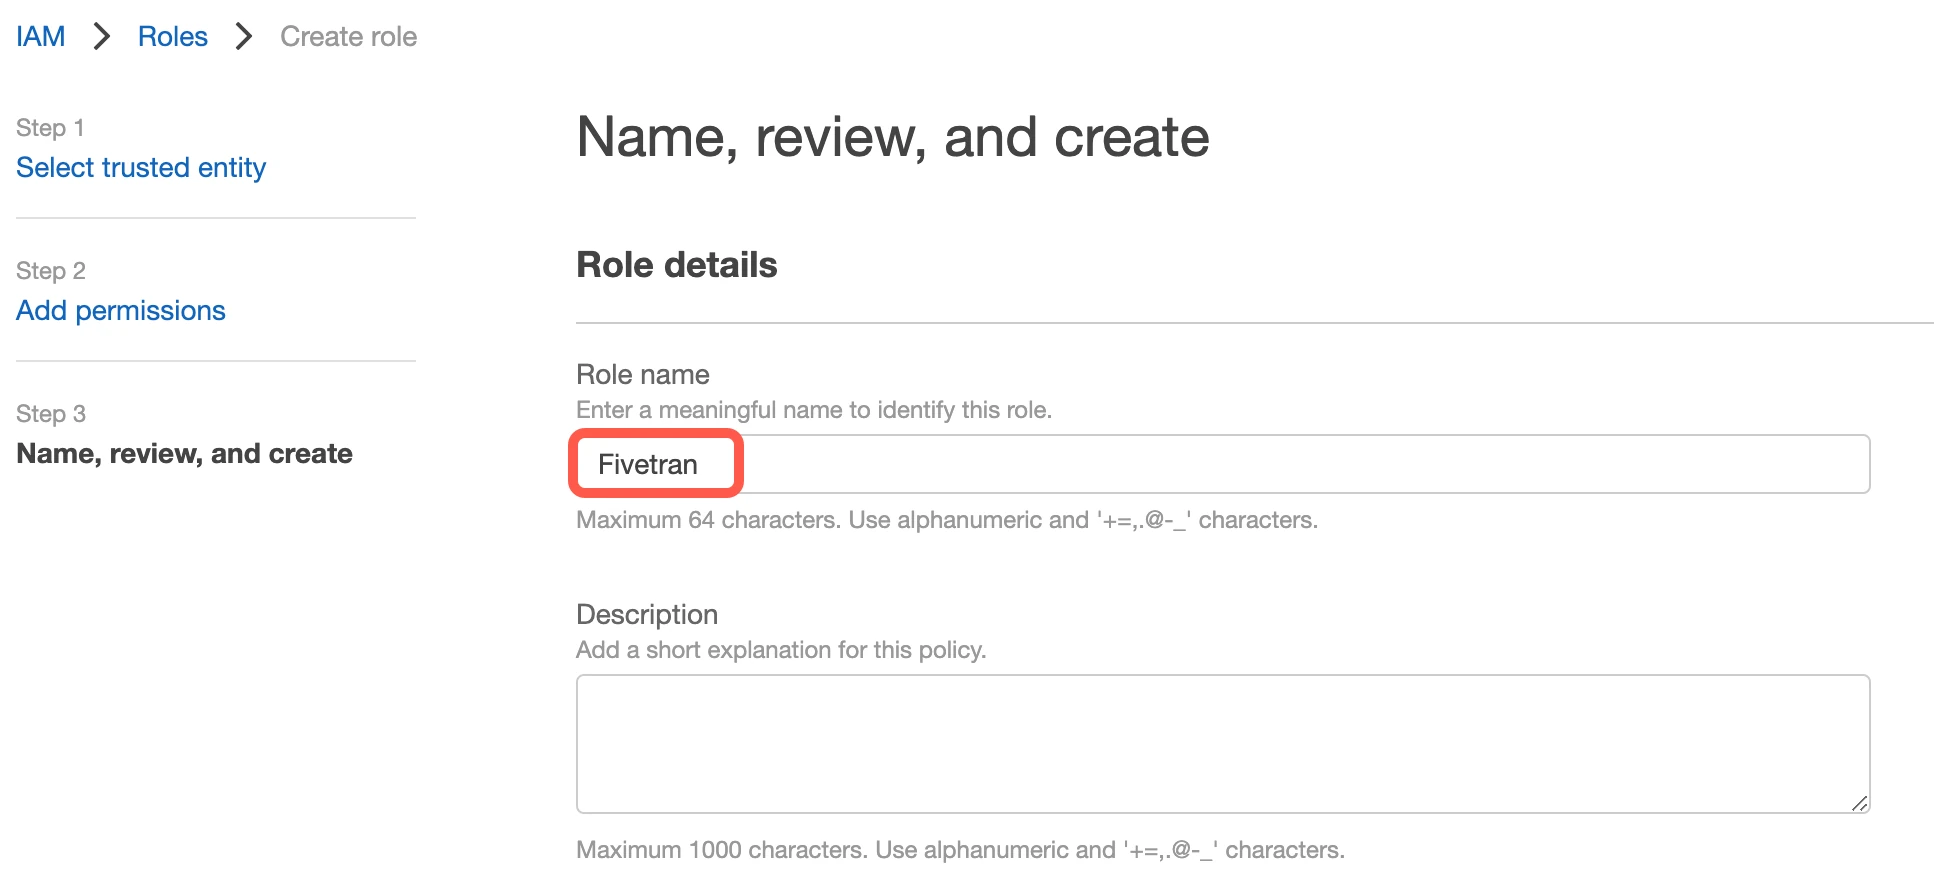
In the Name, review, and create step, specify the role name, for example "Fivetran", then click Create role at the bottom of the page.
Click the Fivetran role you created.

On the Summary page for the role, find the ARN and make a note of it. You will need it to configure Fivetran.

If you want to re-use an existing IAM role created for Fivetran account, you need to edit the trust policy for the same role. You can then add another external ID to the JSON policy or copy the following policy and paste it in your JSON tab:
    {
        "Version": "2012-10-17",
        "Statement": [
            {
                "Effect": "Allow",
                "Principal": {
                    "AWS" : "arn:aws:iam::834469178297:user/gcp_donkey"
                },
                "Action": "sts:AssumeRole",
                "Condition": {
                    "StringEquals": {
                        "sts:ExternalId": [
                            "external-id-1",
                            "external-id-2"
                        ]
                    }
                }
            }
        ]
    }
(Optional) Set permissions
You can specify permissions for the Role ARN that you designate for Fivetran. Giving selective permissions to this role will allow Fivetran to only sync what it has permissions to see.
(Optional) Access using key and secret
You can skip this step if you already have an access key and secret.
Create user
You can skip this step if you already have a user having access to the bucket.
Open your Amazon IAM console.
Go to Users, then click Add users.

Enter the User name, then click Next.
Select the Attach policies directly option, then select the "Fivetran-S3-Access" policy you created.
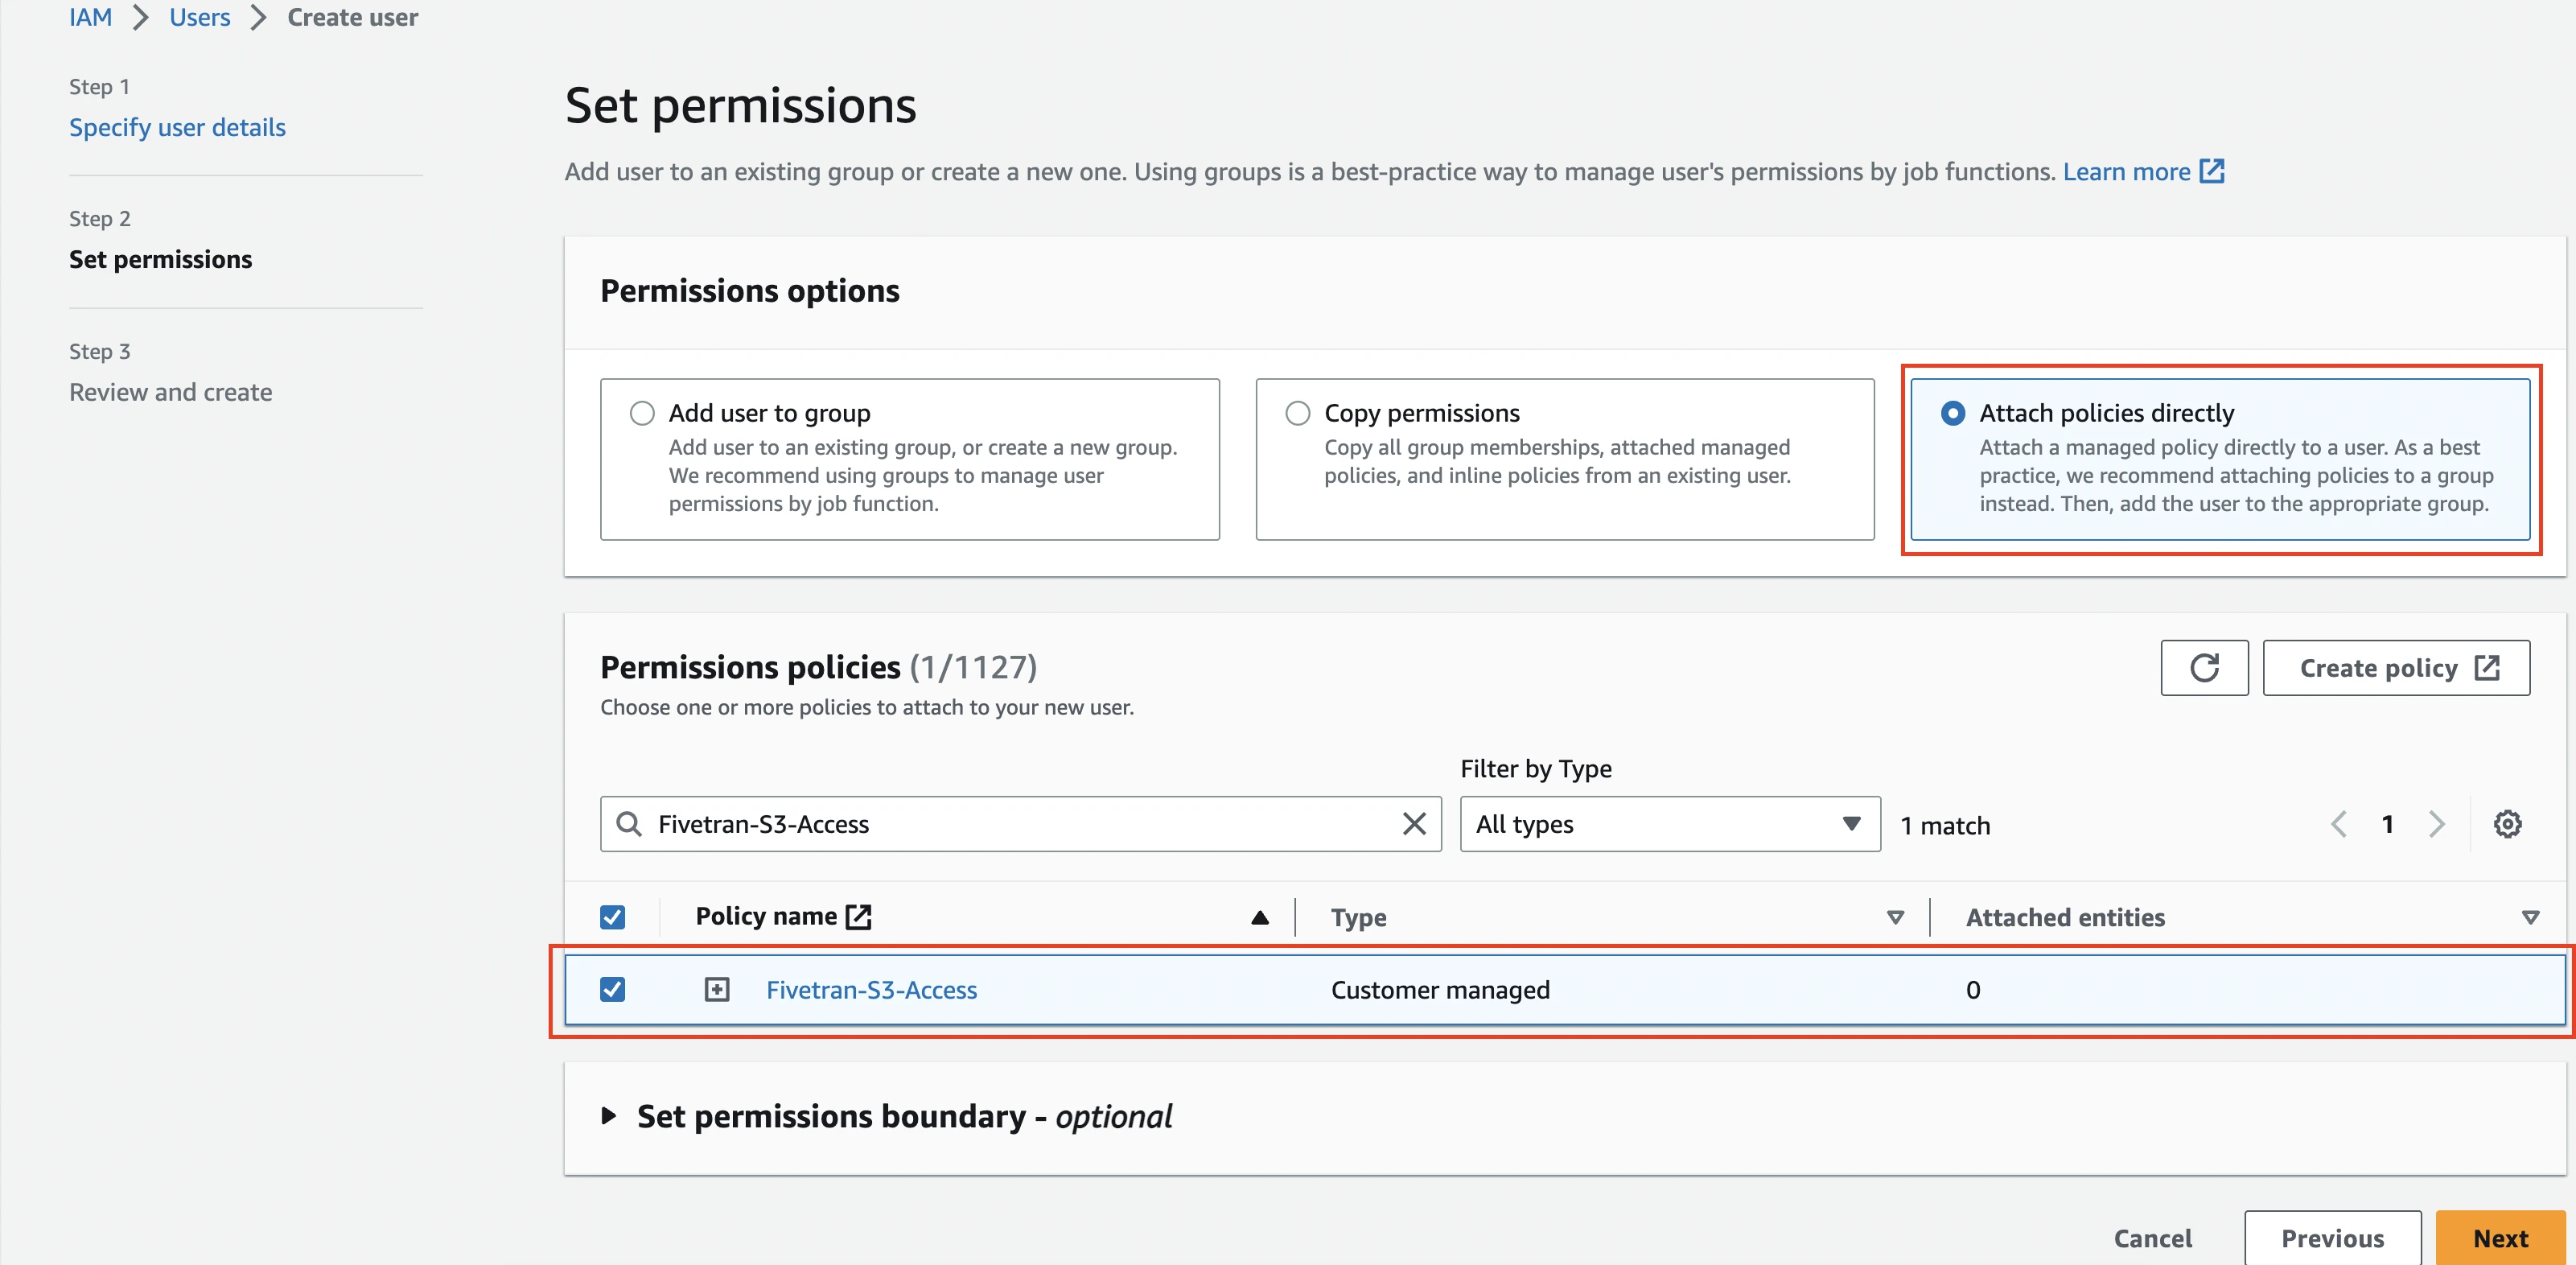
Click Next, then click Create user.
Generate access key and secret
In the Users tab, open the User you created.
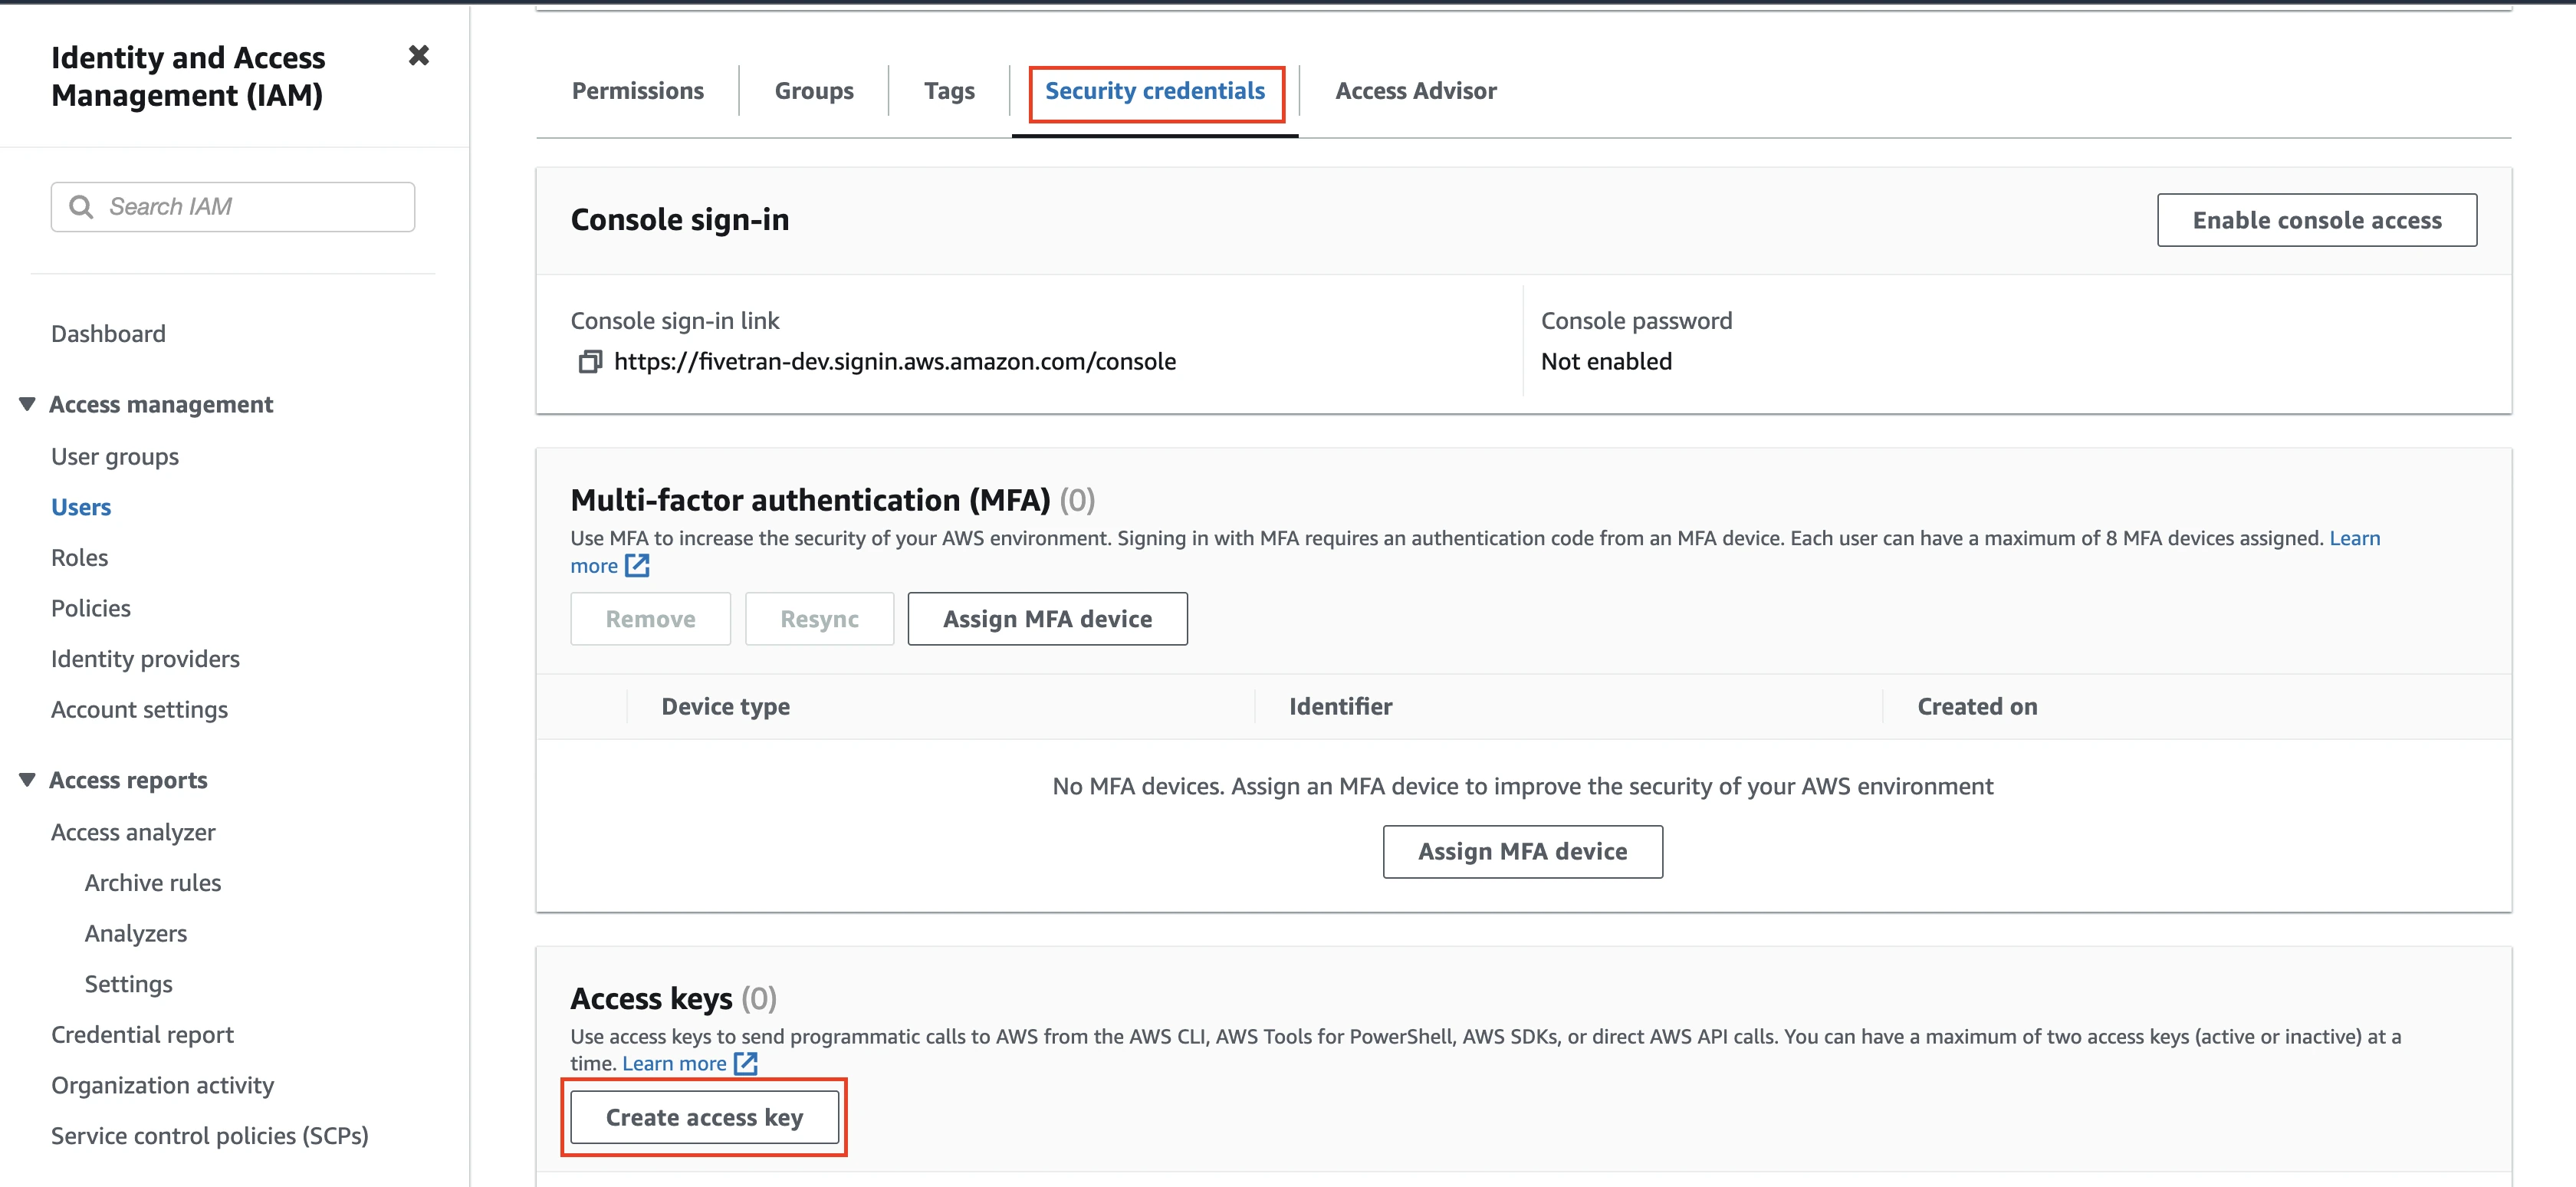
Go to Security credentials tab and navigate to the Access keys section.
Click Create access key.
From the Use Case options, select the Third-party service option and then click Next.
Enter a Description tag value and then click Create access key.
Copy the Access key and Secret access key values. You will need them to configure Fivetran.
Finish Fivetran configuration
Depending on your Access approach, do the following:
- If you selected IAM Role, enter the Role ARN you created.
- If you selected Access Key and Secret, enter the Access Key ID and Access Key Secret you created.
(Optional) S3 path prefix - Enter the S3 path prefix to specify the folder that contains your report files. We examine files under the specified folder and all of its nested subfolders for files we can sync. If you don't provide a prefix, we'll look through the entire container for files to sync.
Click Save & Test. Fivetran will take it from here and sync your data from your AWS Cost and Usage Report bucket.