Amplitude Setup Guide
Follow our setup guide to connect Amplitude to Fivetran.
Supported implementations
You can use the Amplitude connector to sync your events in the following ways:
- Retrieve the events through Amplitude API and sync them into your destination.
- Retrieve the events hosted in your S3 or Google Cloud Storage bucket using Amplitude Cloud Storage Export and sync them from the bucket into your destination.
Prerequisites
To connect Amplitude to Fivetran, you need:
An Amplitude account (required for syncing through both Amplitude API and Cloud Storage).
An Amazon S3 or Google Cloud cloud storage destination set up in your Amplitude account. (required for syncing through Cloud Storage only)
NOTE: It is recommended to keep Automatic Exports enabled for the configured destination for data freshness.
API - Setup instructions
Find API key and secret key
Log in to your Amplitude account.
In the left-hand navigation menu, click Settings.
Go to the Projects page.
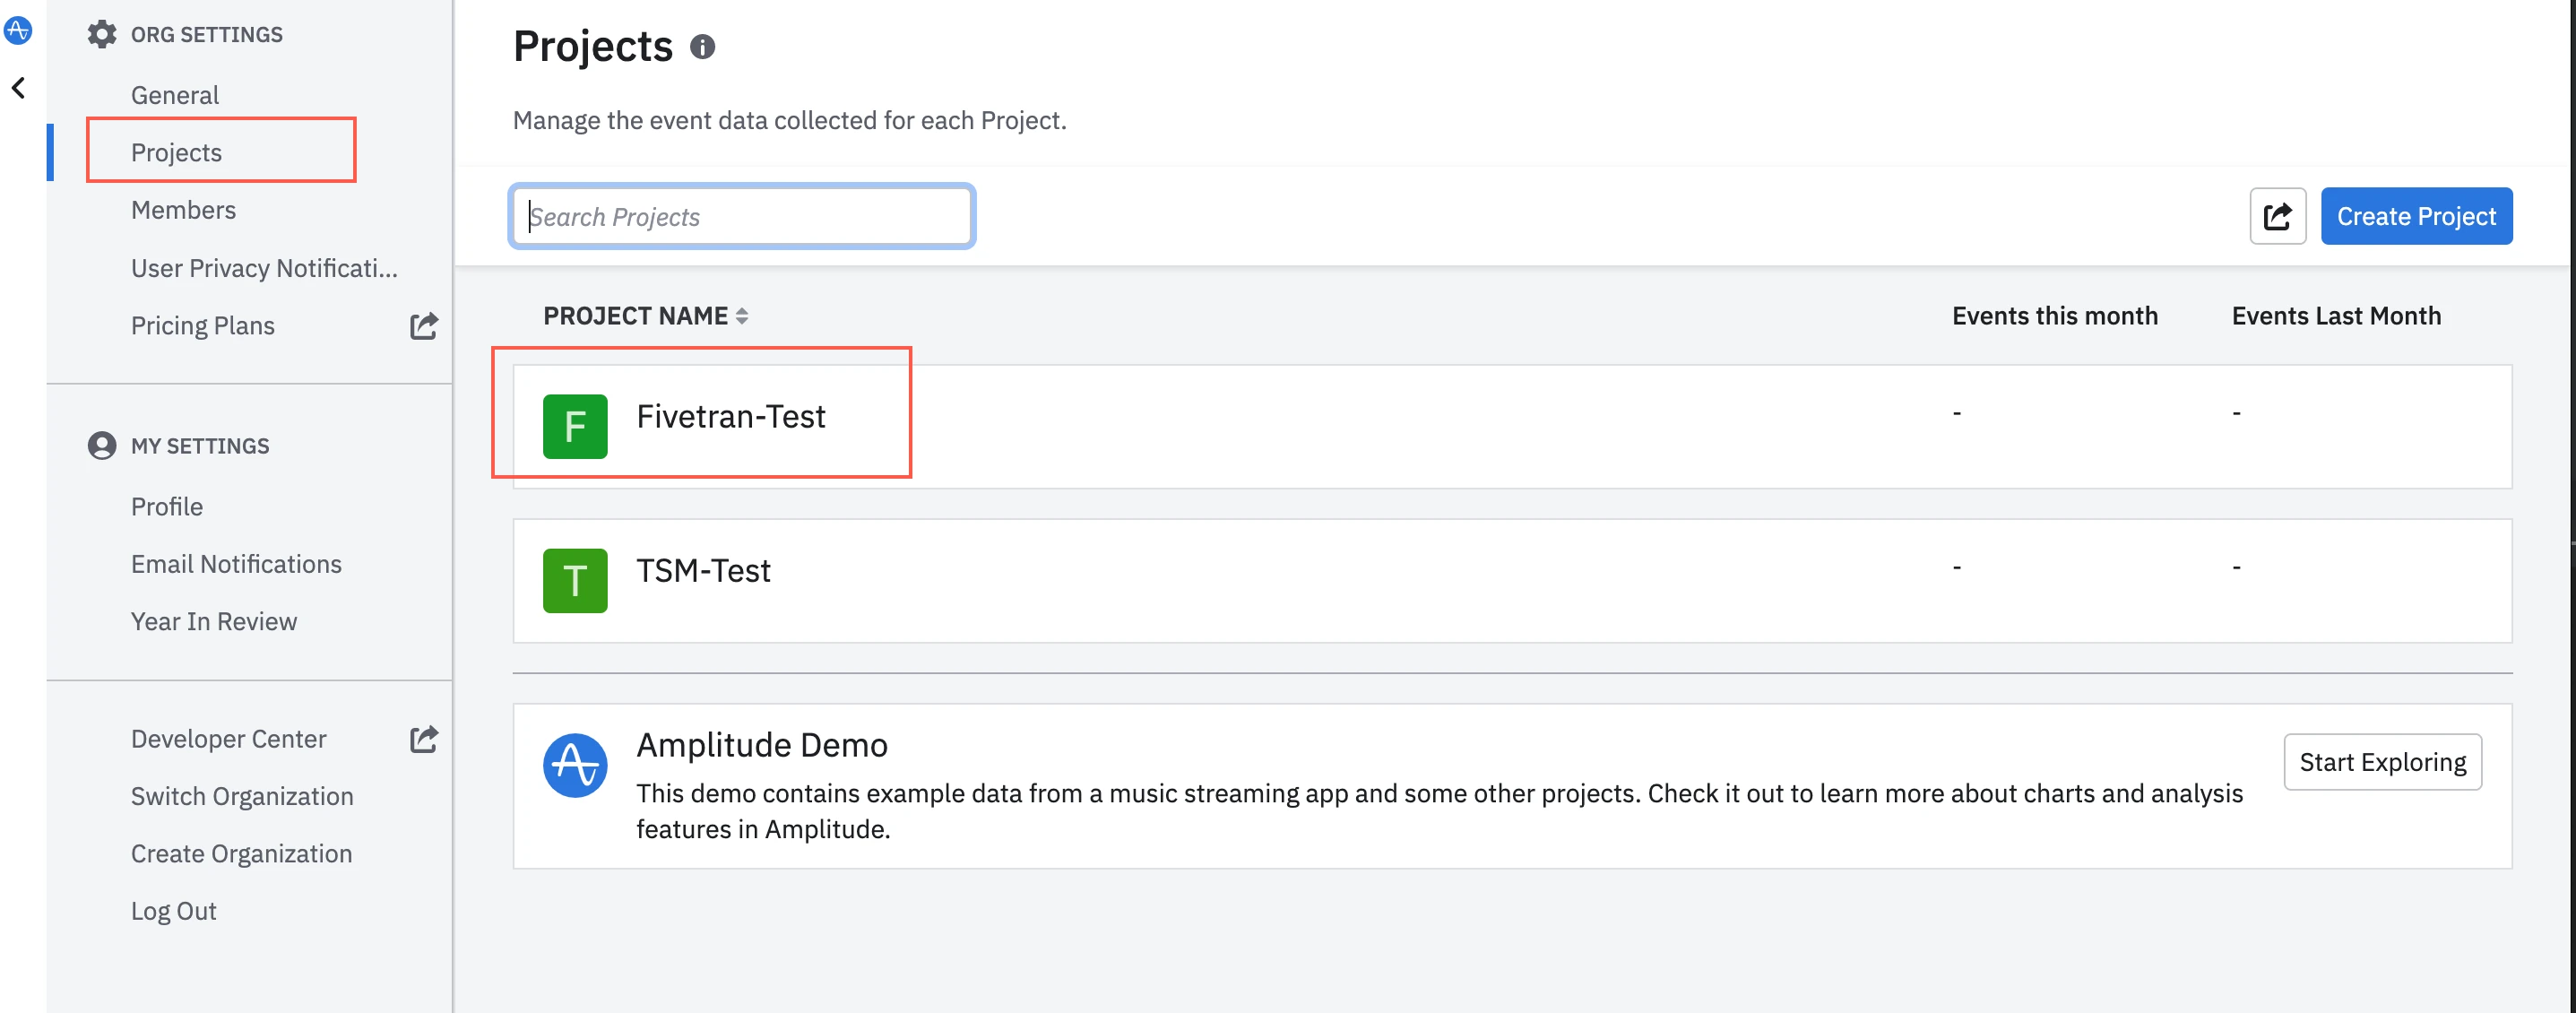
Select the project you want to use with Fivetran. Make a note of the project name. You will need it to configure Fivetran.
In your project dashboard, find the API Key and the Secret Key and make a note of them. You will need them to configure Fivetran.
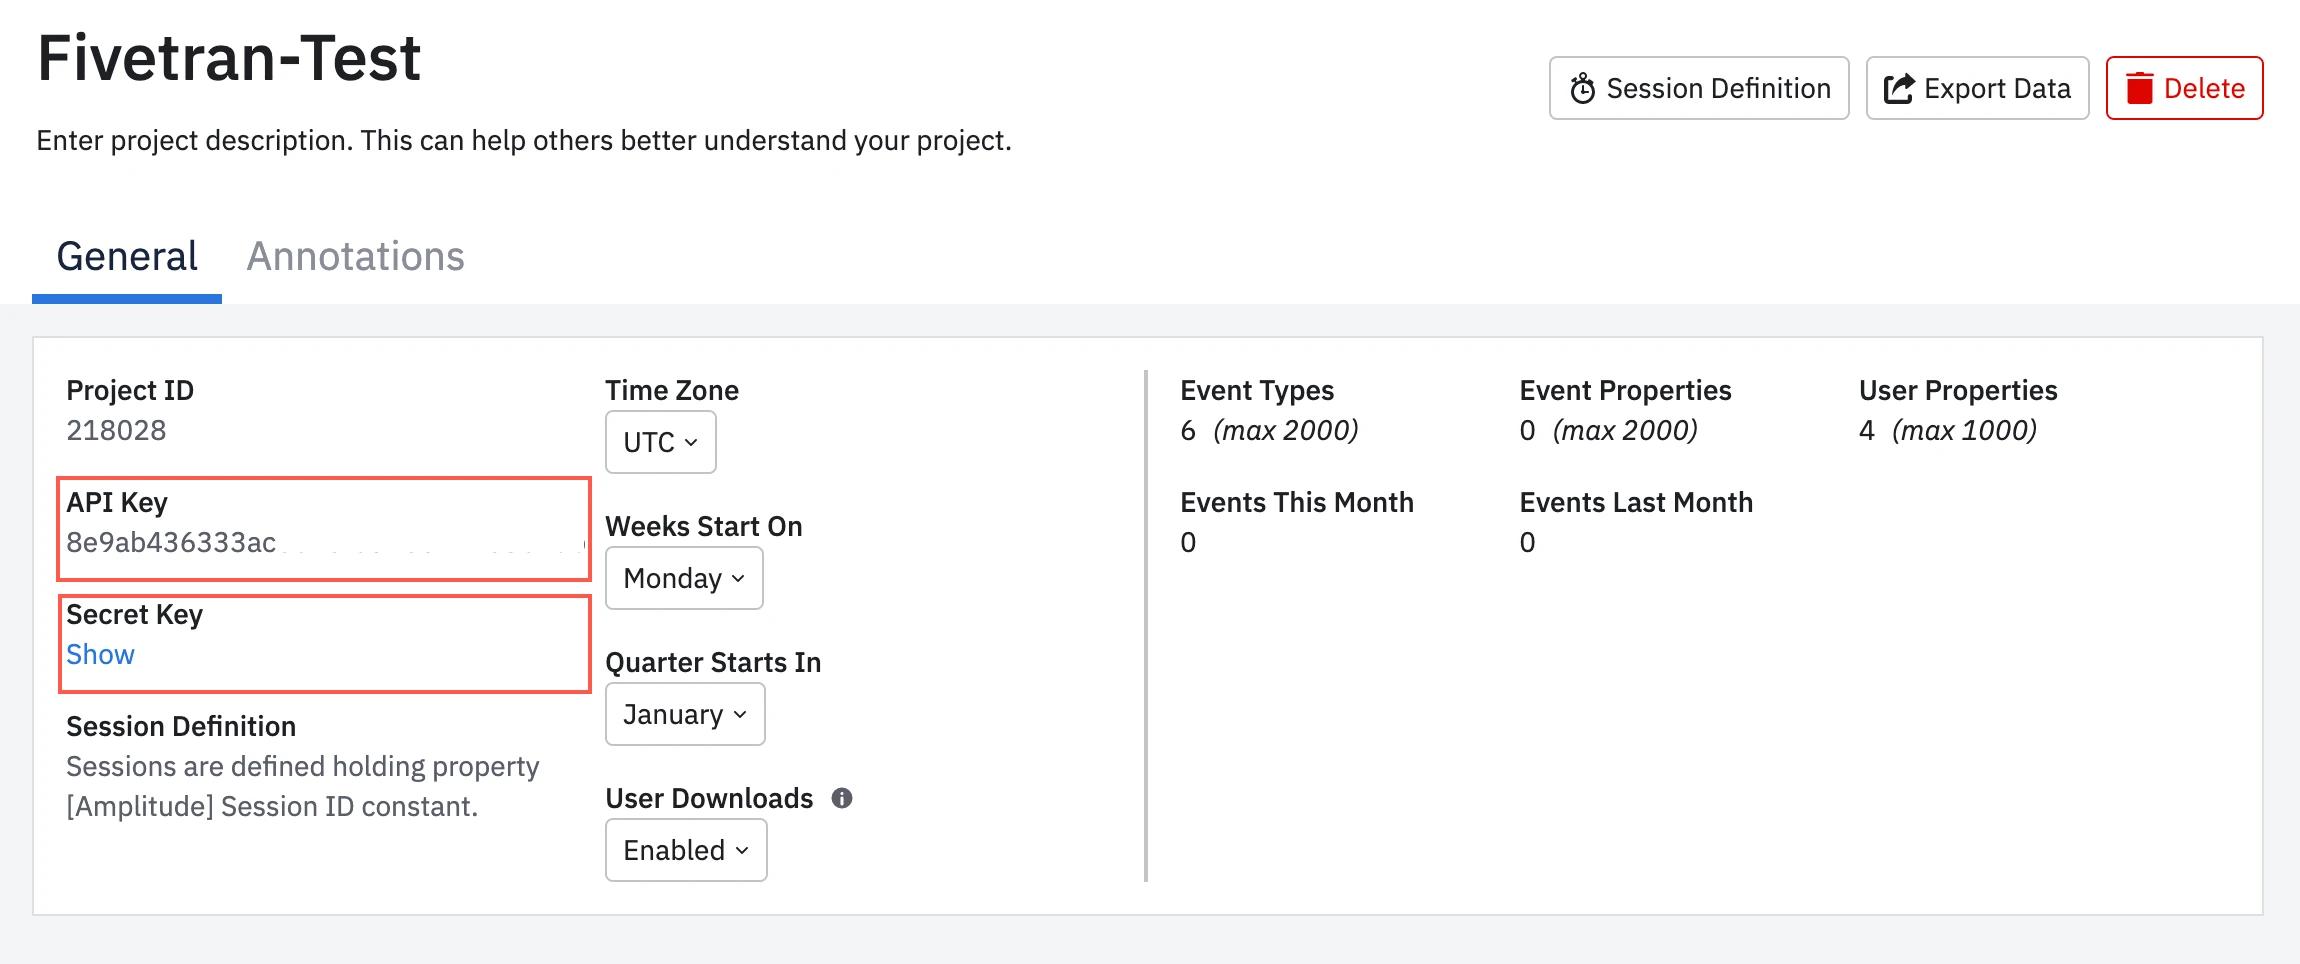
TIP: Click Show to view your Secret Key.
Finish Fivetran configuration
- In the connector setup form, enter the Destination schema name of your choice.
- Click Add Project.
- Enter the project name, apiKey, and secretKey you found in Step 1.
- Click OK.
- Click Save & Test. Fivetran will take it from here and sync your data from your Amplitude account.
S3 - Setup instructions
Find external ID
In the connector setup form, enter your chosen Destination schema name.
Enable the Use Cloud Storage toggle and select Amazon S3.
Find the automatically-generated External ID and make a note of it. You will need it to create an IAM role in AWS.
NOTE: The automatically-generated external ID is tied to your account. It does not change if you close and re-open the setup form.
Create IAM policy
Open your Amazon IAM console.
On the navigation menu, select Policies, then click Create Policy.
In the Specify permissions step, go to the JSON tab.
Copy the following policy and paste it into the visual editor. Replace
{your-bucket-name}
with the name of your S3 bucket. Click Next.{ "Version": "2012-10-17", "Statement": [ { "Effect": "Allow", "Action": [ "s3:Get*", "s3:List*" ], "Resource": "arn:aws:s3:::{your-bucket-name}/*" }, { "Effect": "Allow", "Action": [ "s3:Get*", "s3:List*" ], "Resource": "arn:aws:s3:::{your-bucket-name}" } ] }
In the Review and create step, enter your Policy name. For example, "Fivetran-S3-Access".
Click Create policy.
Create IAM role
On the navigation menu, select Roles, then click Create role.
Select AWS account, and then select Another AWS account.
In the Account ID field, enter Fivetran’s AWS VPC Account ID,
834469178297
.Select the Require external ID checkbox and enter the external ID you found in Step 1, then click Next.
In the Add permissions step, select the "Fivetran-S3-Access" policy you created in Step 2, then click Next.
In the Name, review, and create step, enter a name for the role. For example, "Fivetran".
Click Create Role.
In the Roles page, select the Fivetran role you created.
Make a note of the ARN. You will need it to configure Fivetran.
NOTE: You can specify permissions for the Role ARN that you designate for Fivetran. This allows you to limit the data sync scope to only the data that Fivetran-dedicated role's permissions allow to see.
Finish Fivetran configuration
In the connector setup form, enter your S3 Bucket name.
(Optional) In the Home Folder field, enter the home folder path of your S3 bucket. The folder path is used to specify a portion of the bucket where you'd like Fivetran to look for files. Any files under the specified folder and all of its nested sub-folders will be examined for files we can upload. If no prefix is supplied, we'll look through the entire bucket for files to sync.
In the Role ARN field, enter the ARN you found in Step 3.
Click Save & Test. Fivetran will take it from here and sync your data from your Amplitude account.
Google Cloud Storage - Setup instructions
Find email
In the connector setup form, enter your chosen Destination schema name.
Enable the Use Cloud Storage toggle and select Google Cloud Storage.
Find and make a note of automatically generated email. You will need it to grant Fivetran access to your Google Cloud Storage bucket.
Grant bucket access
Go to your Google Cloud Storage console.
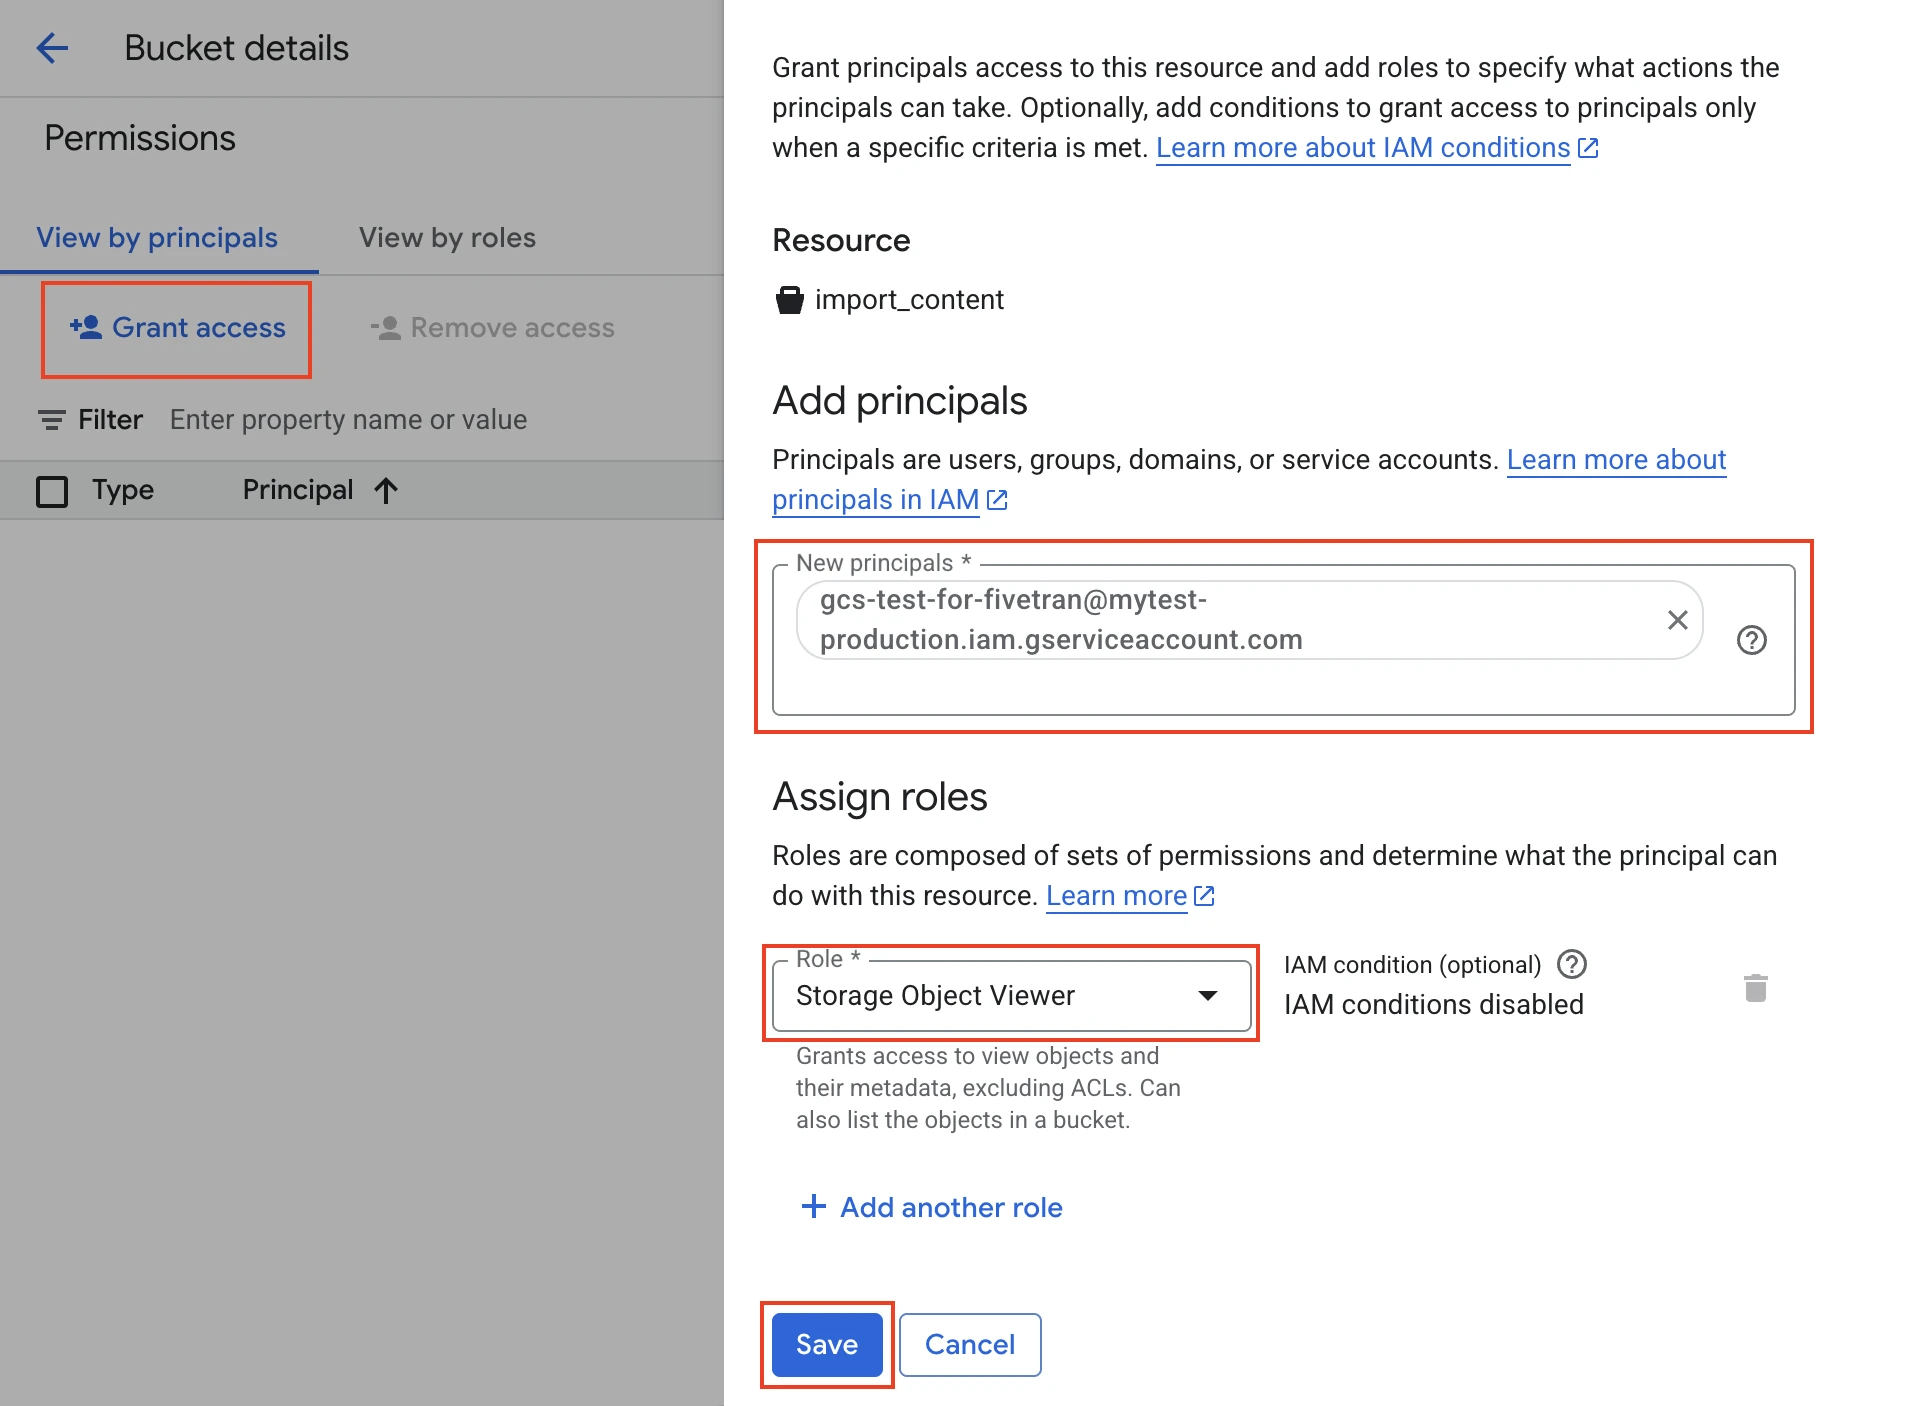
Select the bucket that you configured as the Amplitude Cloud Storage destination and click PERMISSIONS.
On the Permissions page, click +ADD PRINCIPAL.
In the Add principals section, enter the email you found in Step 1.
In the Role drop down menu, select the Storage Object Viewer role.
Click SAVE.
Make a note of your bucket name. You will need it to configure Fivetran.
Finish Fivetran configuration
In the connector setup form, enter your Google Cloud Storage Bucket name.
(Optional) In the Home Folder field, enter the path of your Google Cloud Storage bucket. The folder path is used to specify a portion of the bucket where you'd like Fivetran to look for files. Any files under the specified folder and all of its nested sub-folders will be examined for files we can upload. If no prefix is supplied, we'll look through the entire bucket for files to sync.
Click Save & Test. Fivetran will take it from here and sync your data from your Amplitude account.
Related articles
description Connector Overview
account_tree Schema Information
settings API Connector Configuration