Pendo Setup Guide
Follow our setup guide to connect Pendo to Fivetran.
Setup options
Fivetran allows you to sync data from Pendo using either an API integration or Pendo Data Sync.
Sync data using API - Setup instructions
Learn how to connect Pendo to Fivetran through an API integration.
Expand for instructions
Prerequisites
To connect Pendo to Fivetran, you need a Pendo account with the Admin privileges and Integration API access.
Setup instructions
Create Integration Key
Log in to your Pendo account with an owner/admin role.
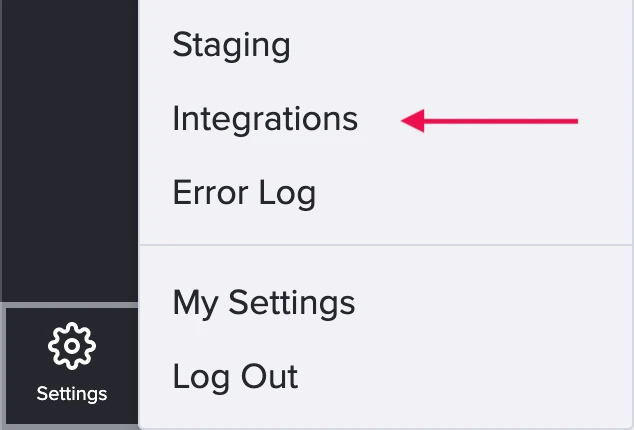
In the dashboard, click Settings.
Click Integrations.
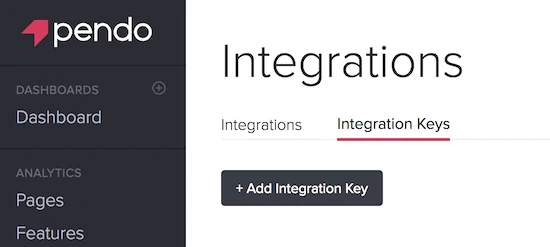
On the Integrations tab, select Integrations Keys.
Click Add Integration Key.
Enter the description in the Description field.
Select Allow Write Access to give permissions to the Integration Key.
Our connector uses the Aggregation endpoint which requires write access.
Click Create.

Make a note of your Integration Key. You will need it to configure Fivetran.

Finish Fivetran configuration
- In the connection setup form, enter your Destination schema name.
- Depending on your Pendo account, select your region: Region - US, Region - EU, Region - US1, Region - JPN, or Region - AU.
- Enter the Integration Key you created in Step 1.
- Click Verify to validate the Integration Key.
- Select the sync mode you'd like to use: Sync All App IDs or Sync Specific App IDs. If you select Sync Specific App IDs, you must also select the App IDs you would like to sync.
- Click Save & Test. Fivetran will take it from here and sync your data from your Pendo account.
Sync data through Cloud Export using Pendo Data Sync - Setup instructions
Learn how to connect Pendo to Fivetran through Pendo Data Sync. Pendo Data Sync allows you to push data out of Pendo into your cloud storage so Fivetran can sync this data to your destination.
Expand for instructions
Prerequisites
To connect Pendo to Fivetran, you must have Data Sync set up in your Pendo account. If you don't, follow the setup steps for your cloud storage service:
Amazon S3 setup instructions
Begin Fivetran configuration
In the connection setup form, enter your Destination schema name.
Enable the Use Data Sync toggle to switch to the Data Sync setup form.
Choose Amazon S3 as the cloud storage type.
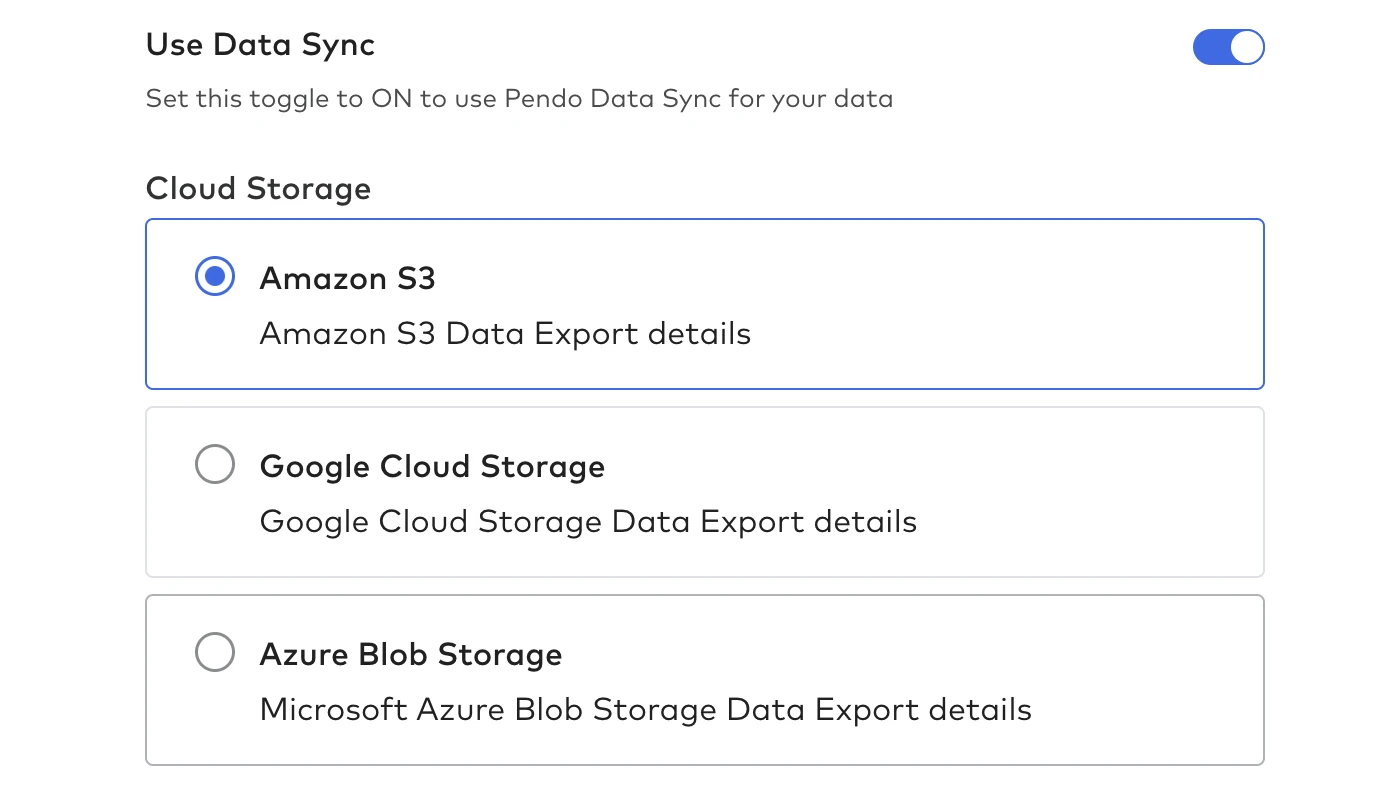
Find the automatically-generated External ID and make a note of it. You will need it to create an IAM role in AWS.
The automatically-generated External ID is tied to your account. If you close and re-open the setup form, the ID will remain the same.
Create AWS IAM policy and role
Create an IAM Policy for Fivetran:
i. Open your Amazon IAM console.
ii. Go to Access management > Policies.
iii. Select Create policy.
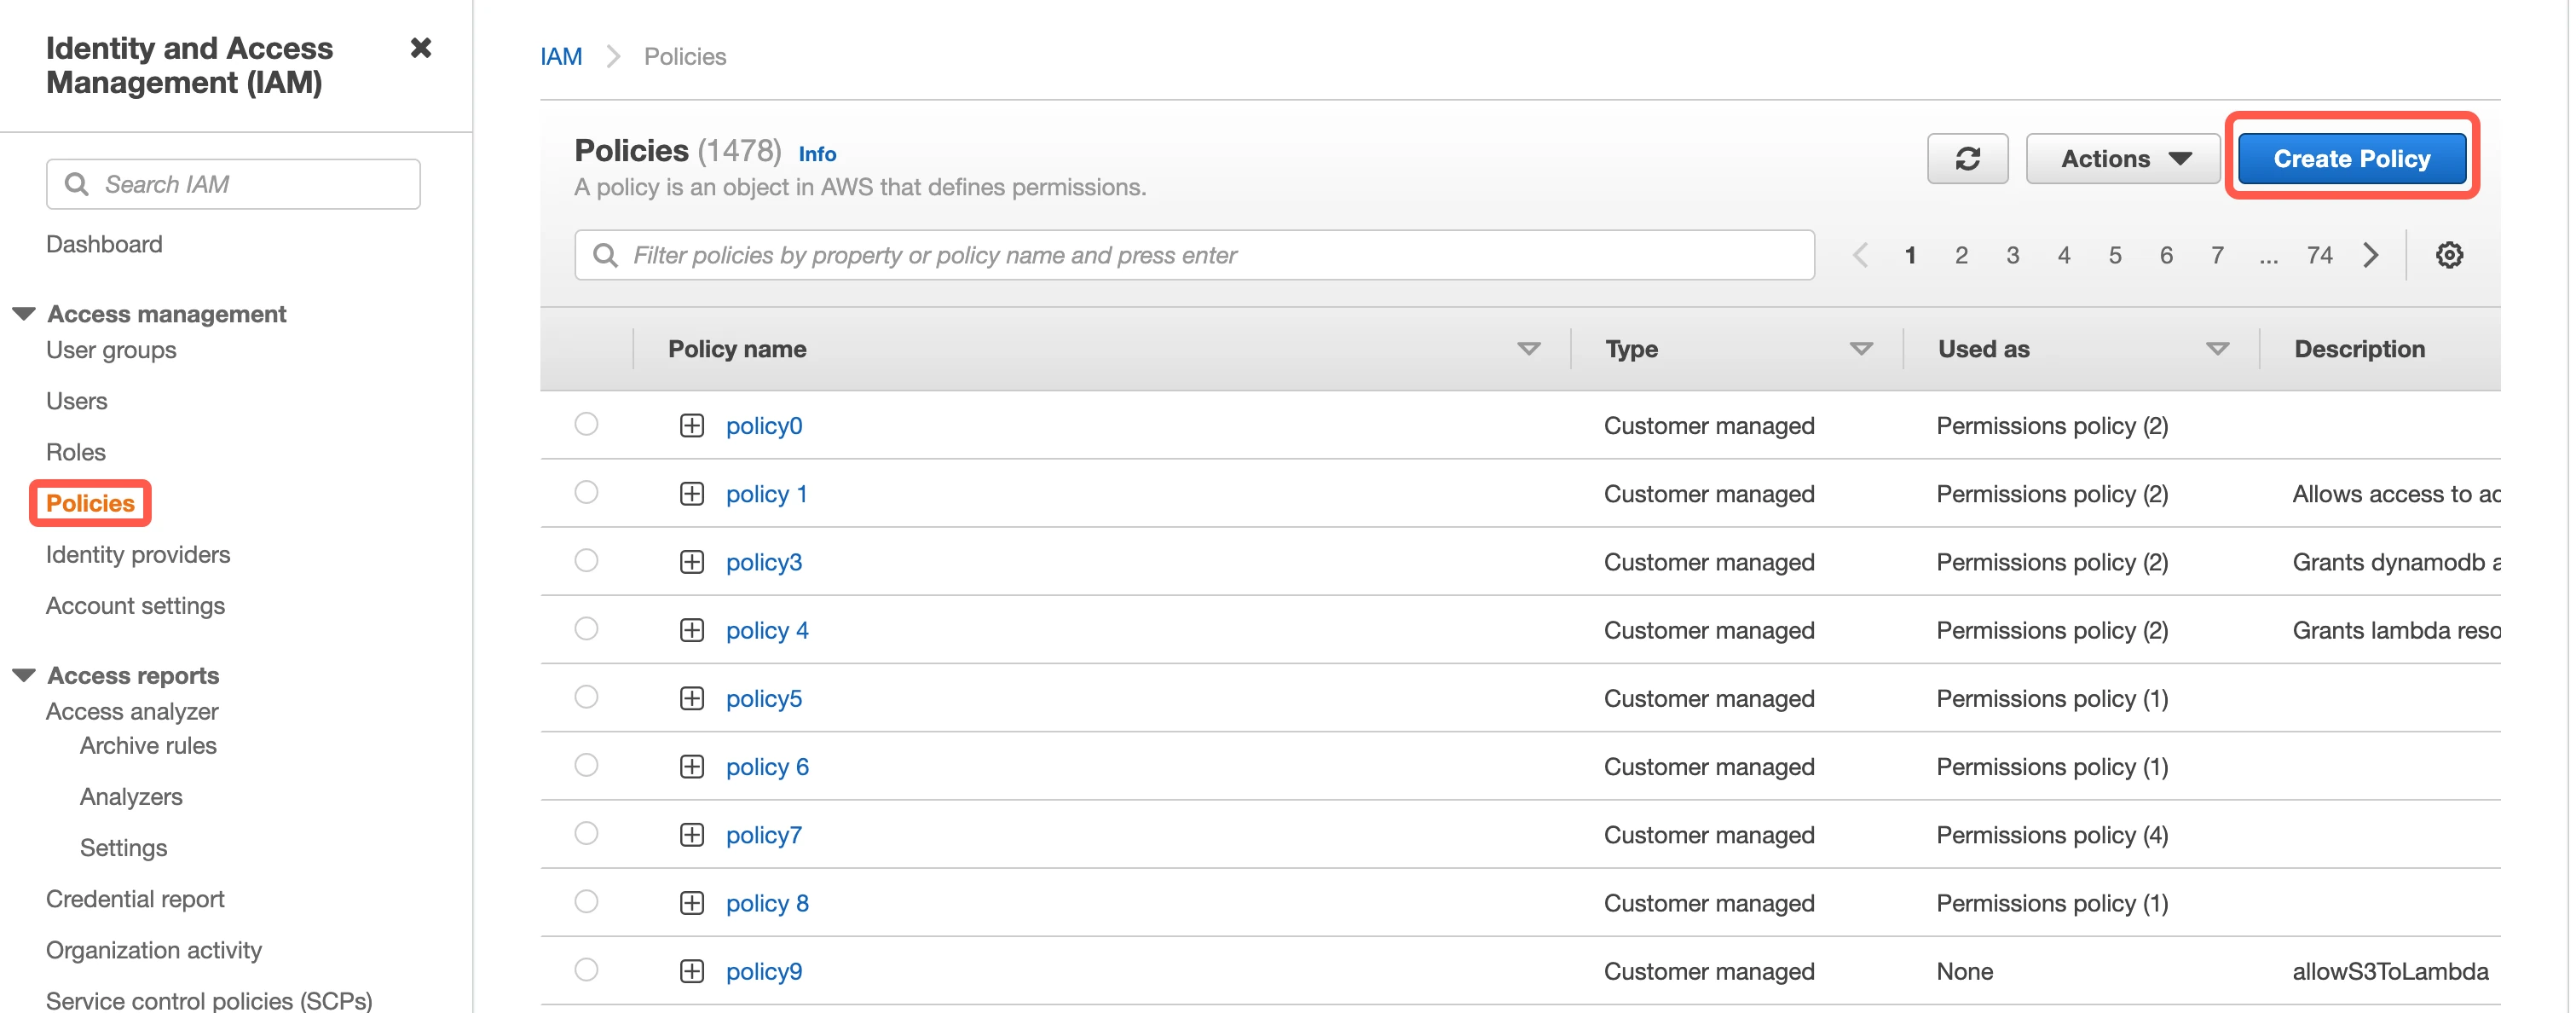 iv. In the Create policy window, go to the JSON tab.
 v. Copy the following policy and paste it in the JSON tab:
    {
    "Version": "2012-10-17",
    "Statement": [
        {
          "Effect": "Allow",
          "Action": [
    "s3:Get*",
    "s3:List*"
          ],
          "Resource": "arn:aws:s3:::{your-bucket-name}/*"
        },
        {
          "Effect": "Allow",
          "Action": [
    "s3:Get*",
    "s3:List*"
          ],
          "Resource": "arn:aws:s3:::{your-bucket-name}"
        }
      ]
    }
vi. In the Review policy step, specify the name of your policy, for example, "Fivetran-S3-Access".
vii. Click Create policy.

Create an IAM role for Fivetran:
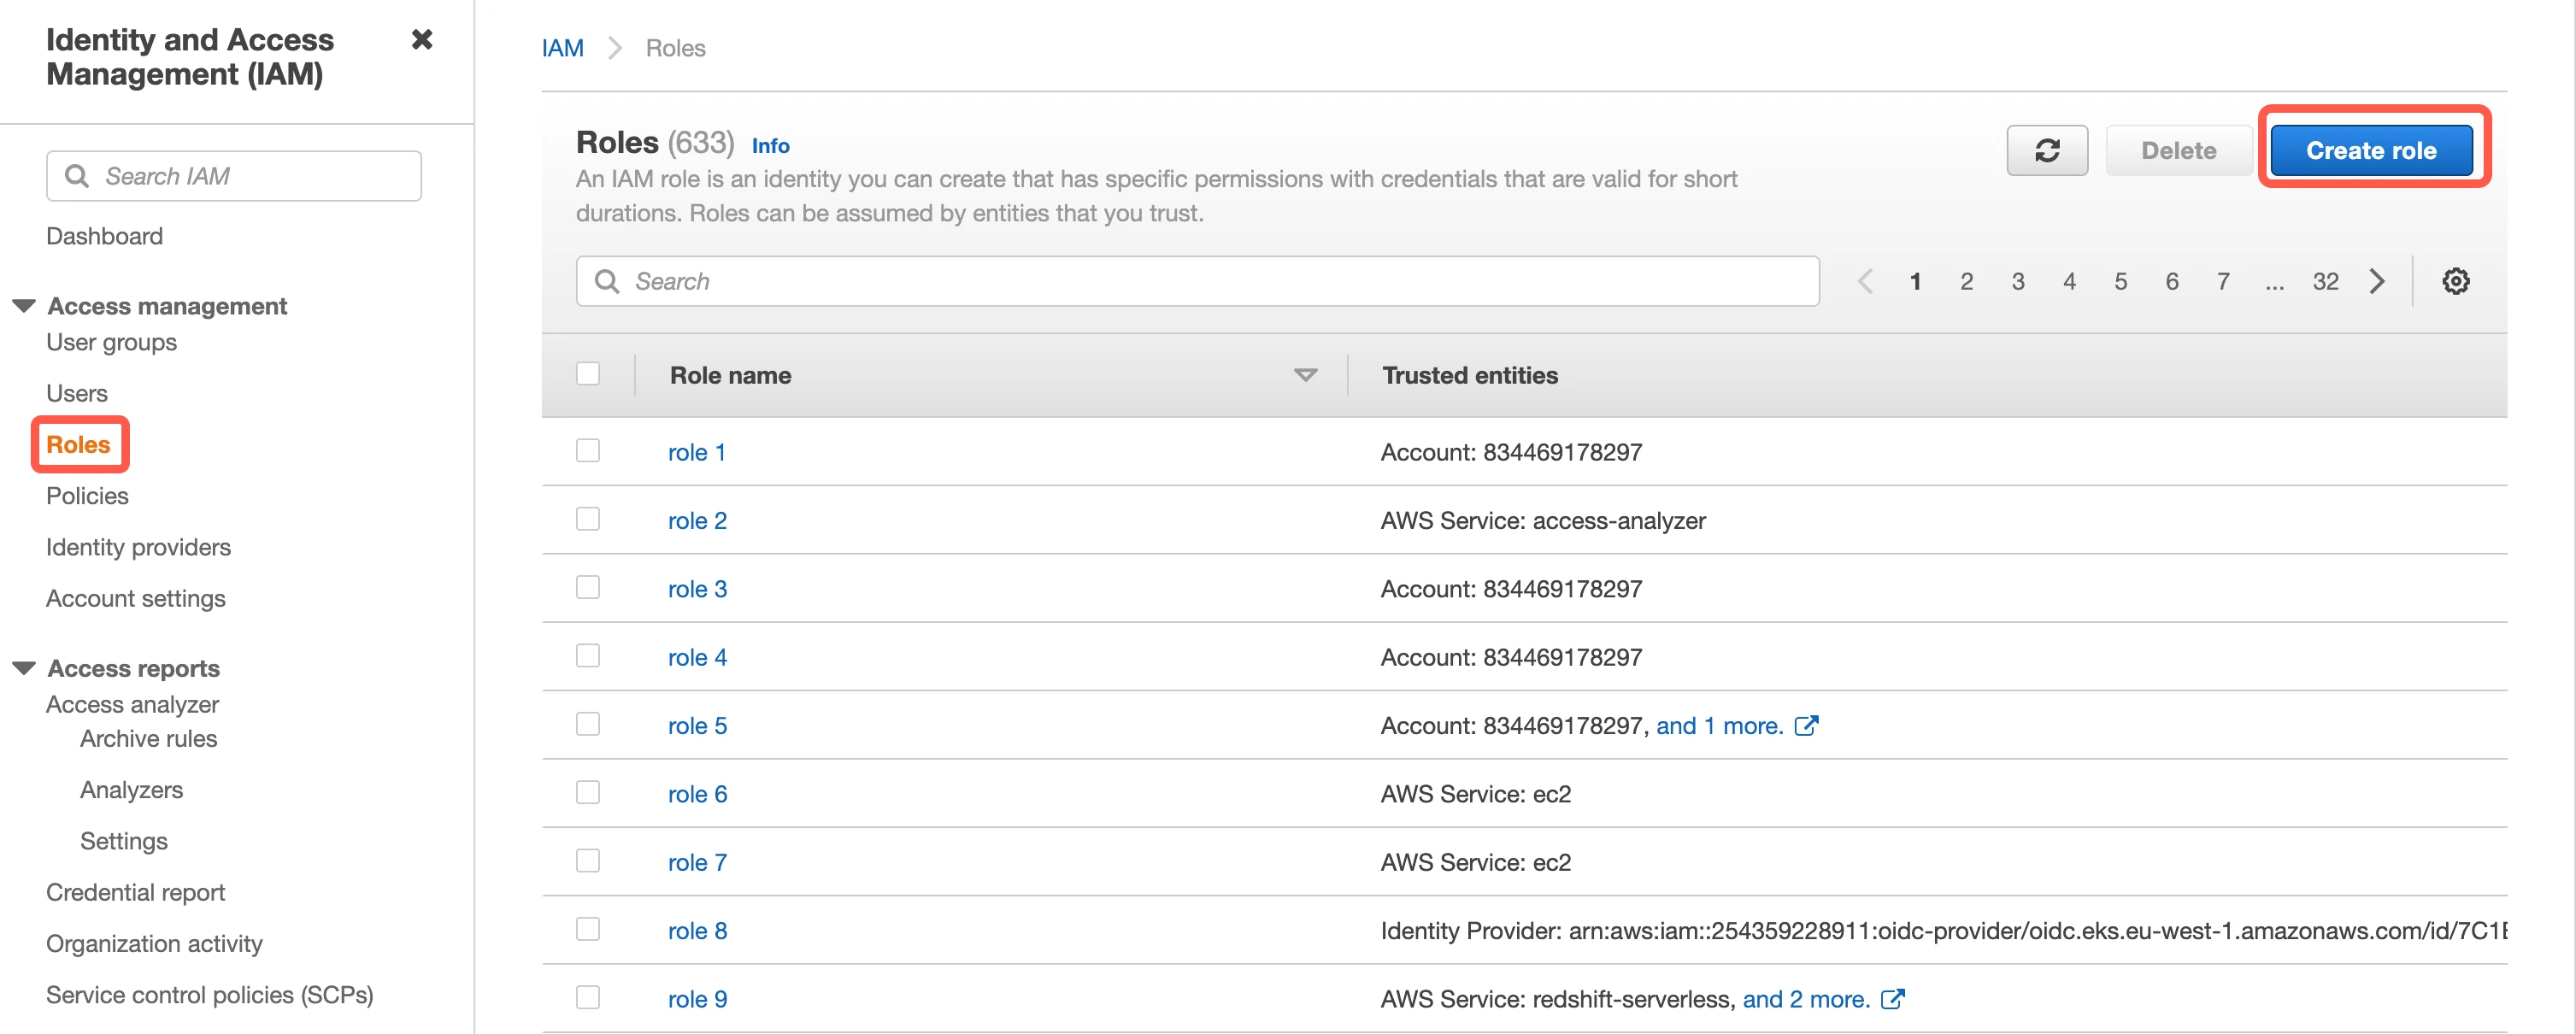
i. Go to Access management > Roles.
ii. Click Create role.
iii. In the Create role window, select AWS account > Another AWS account.
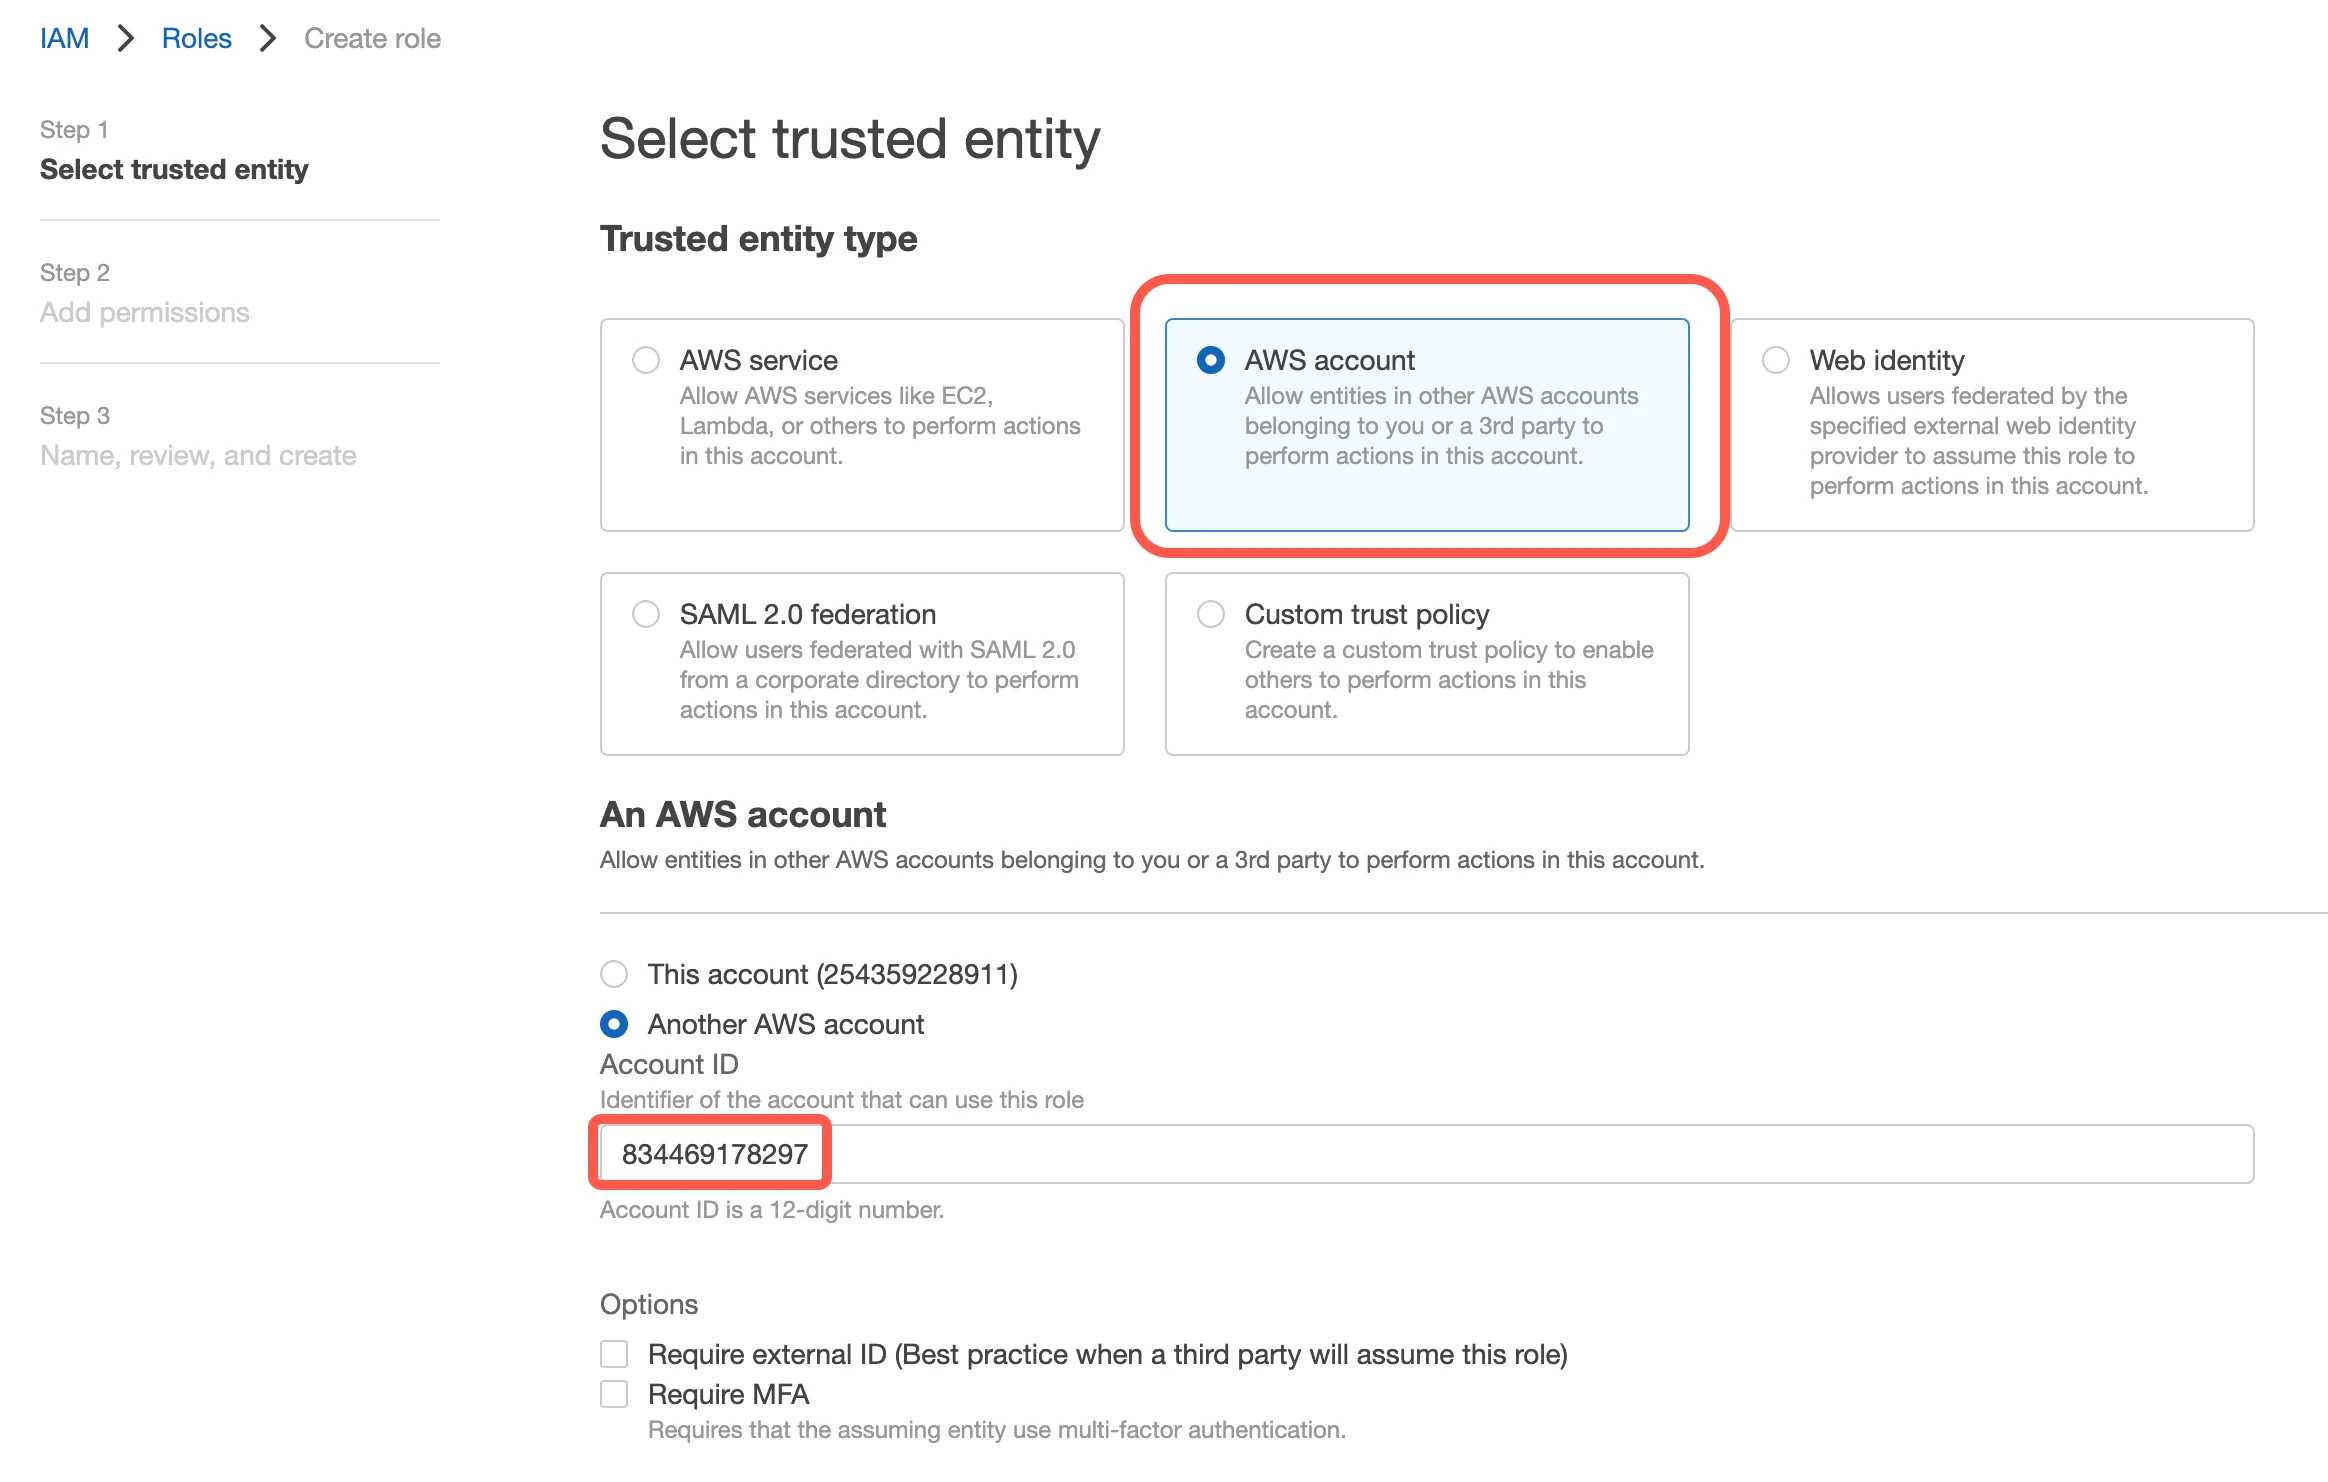
iv. In the Account ID field, enter Fivetran's account ID, 834469178297.
v. In Options, select the Require external ID checkbox.
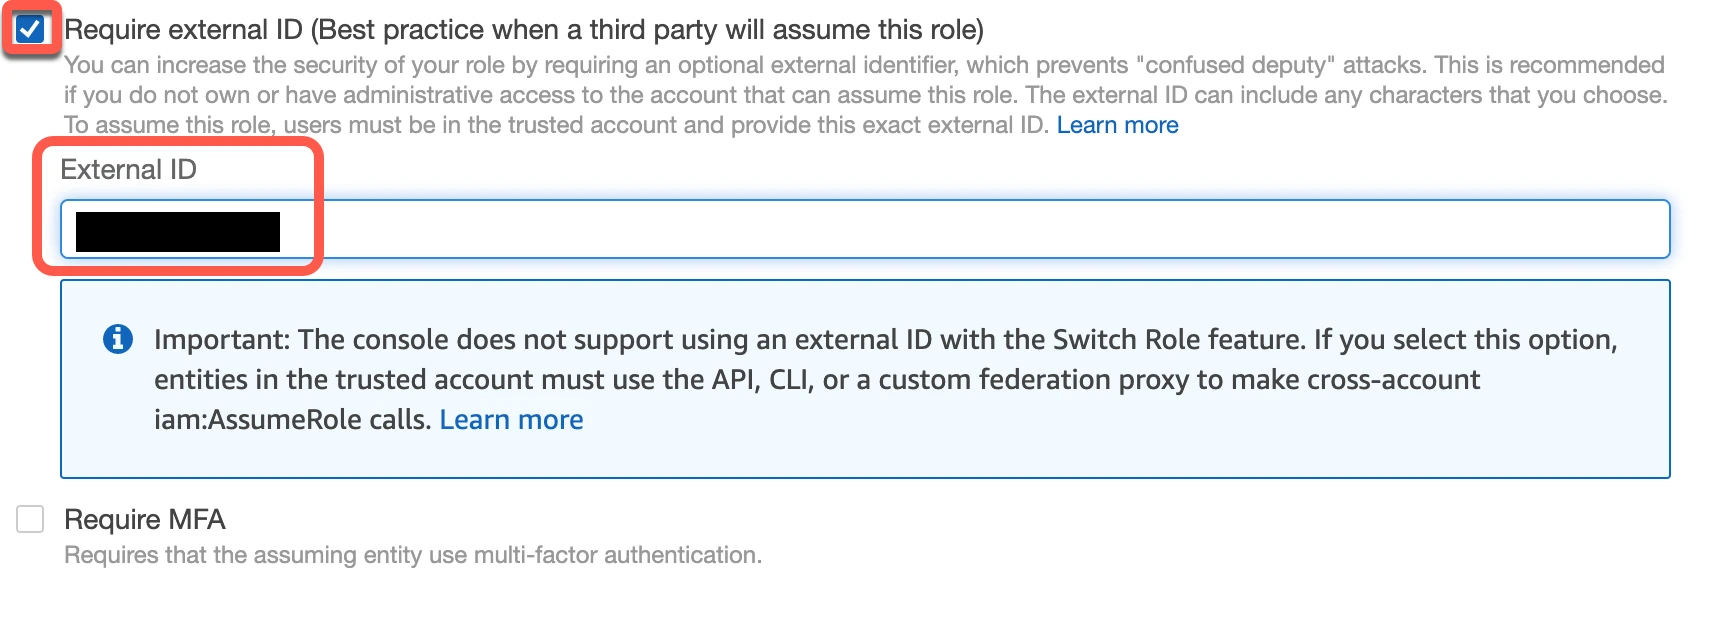
vi. Enter the External ID you found in your connection setup form.
vii. Click Next: Permissions.
viii. Select the policy that you created.
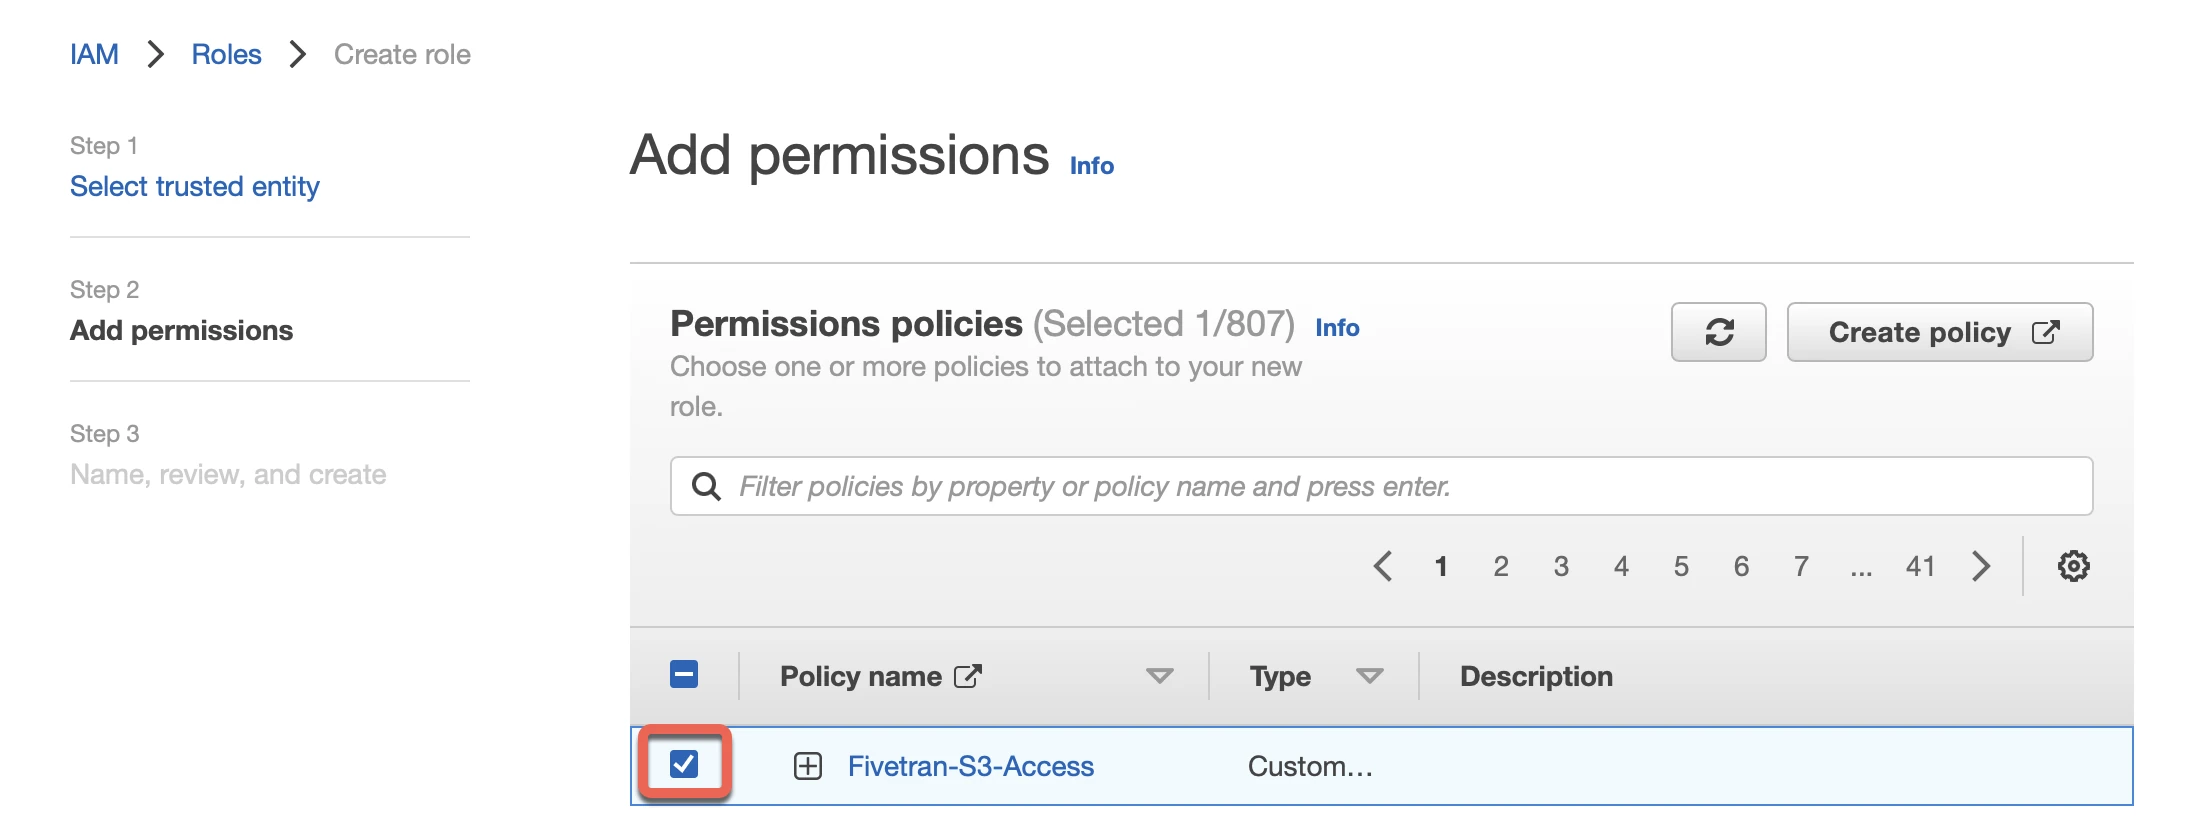
ix. Click Next: Review.
x. Name your new role "Fivetran", then click Create Role.
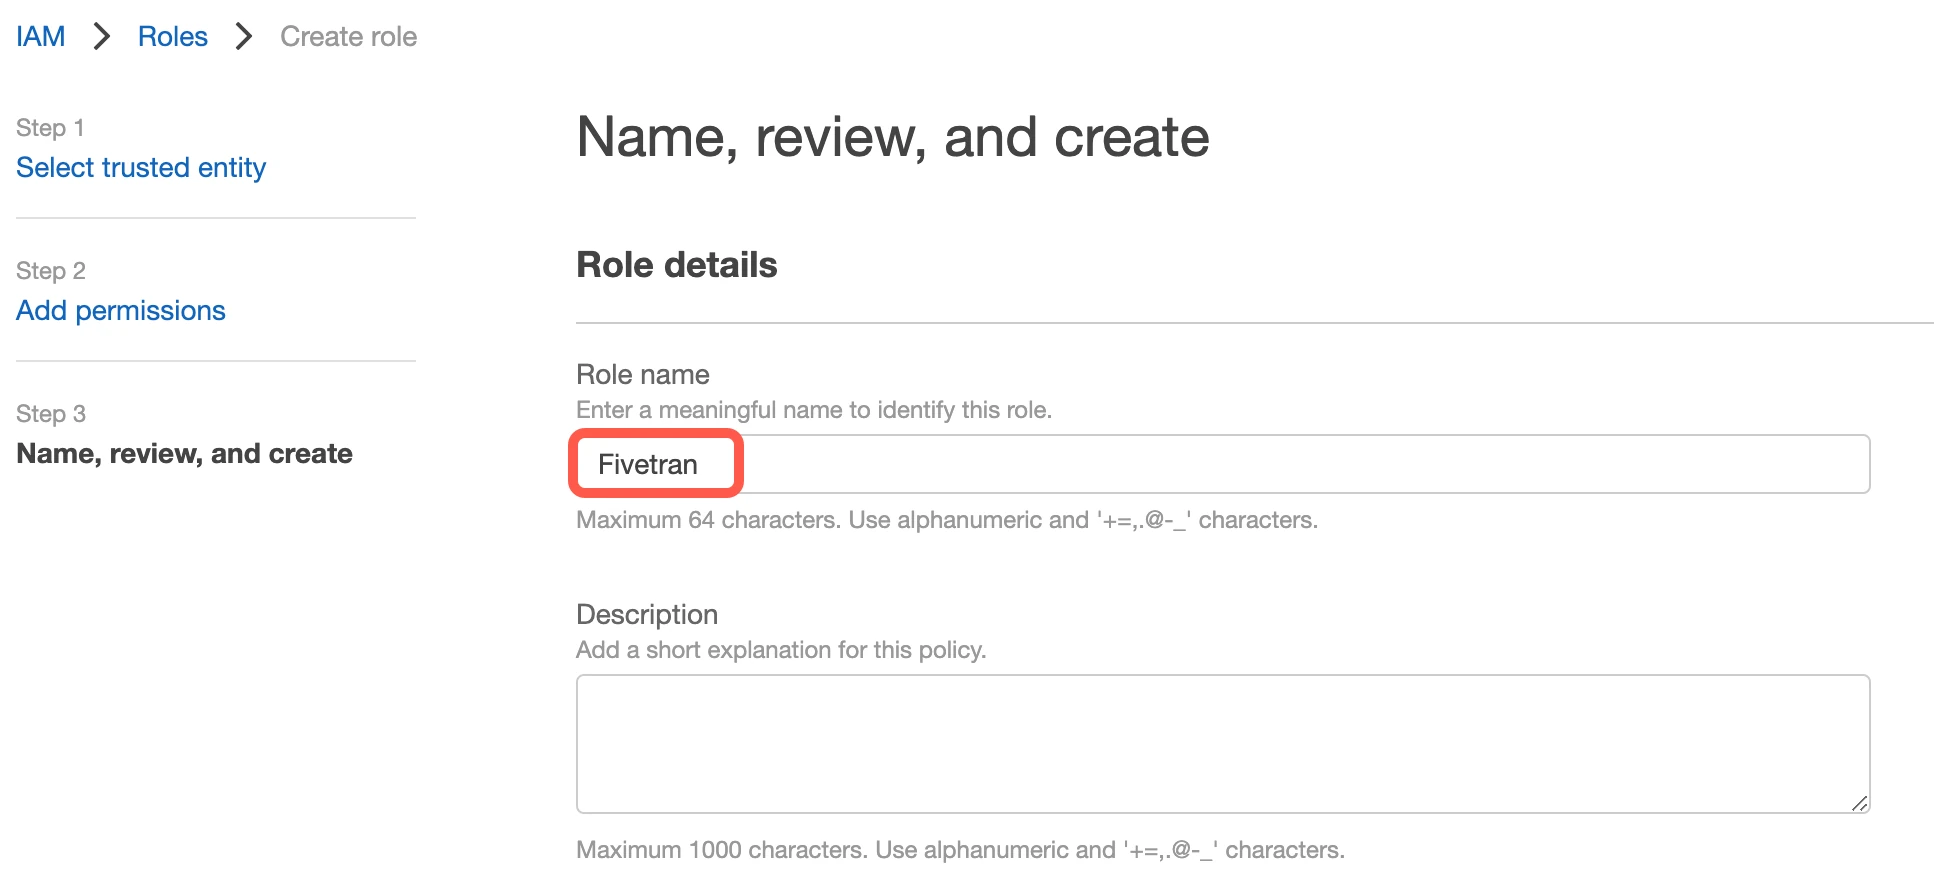
xi. Select the Fivetran role you just created.
xii. In the Summary section, make a note of the Role ARN. You will need it to configure Fivetran.

You can specify permissions for the Role ARN that you designate for Fivetran. This allows you to limit the data sync scope to only the data that Fivetran-dedicated role's permissions allow to see.
Finish Fivetran configuration
Return to your Fivetran dashboard.
Enter the following information:
- (Optional) Folder Path
- Bucket
- Role ARN
In the Historical sync time frame drop-down menu, select Sync all historic data or Sync data from selected date depeding on the amount of historical data you want to include in your initial sync.
- If you select Sync all historic data, we will sync all your historical data.
- If you select Sync data from selected date, select a date in the Historic Sync Backwards Limit field to sync your data from that date.
Click Save & Test. Fivetran will take it from here and sync your data from your Pendo account.
Azure Blob Storage setup instructions
Begin Fivetran configuration
In the connection setup form, enter your Destination schema name.
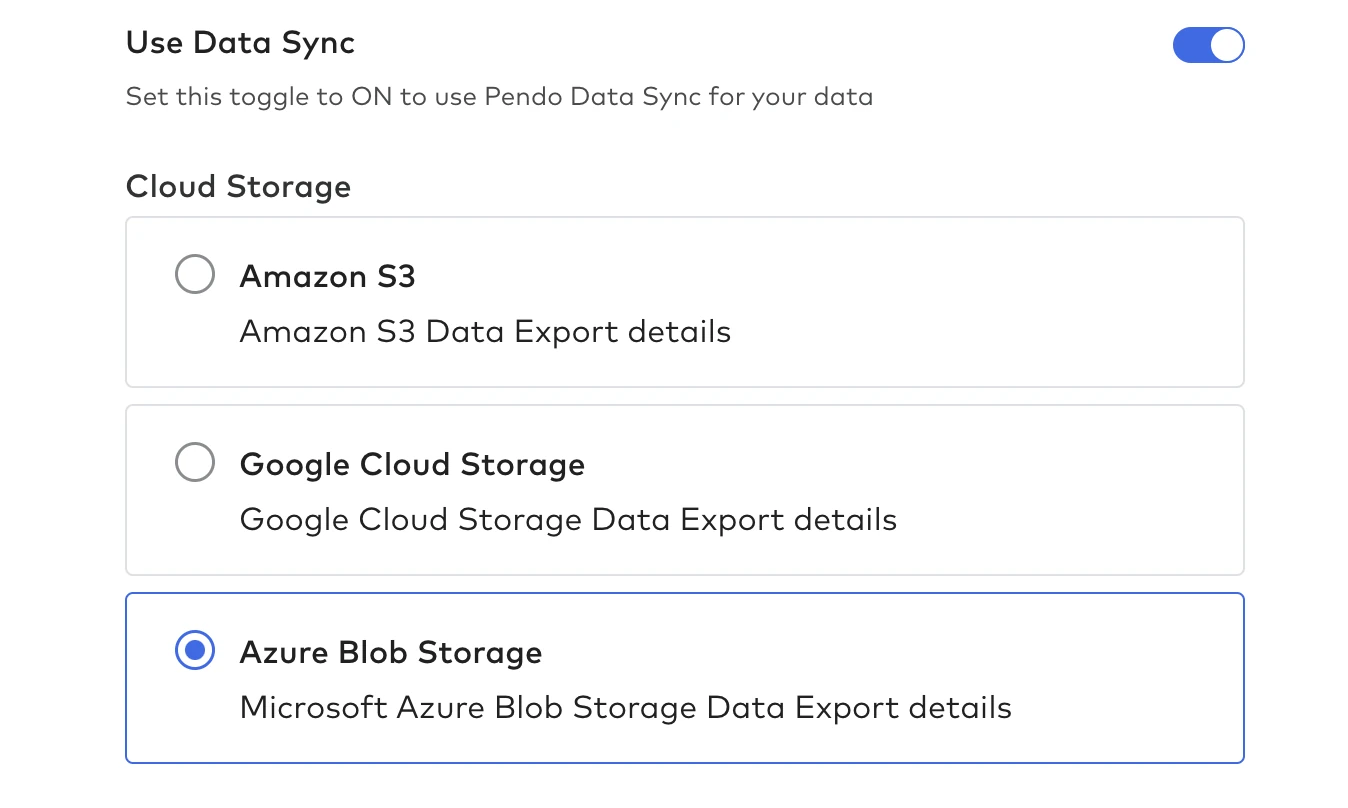
Enable the Use Data Sync toggle to switch to the Data Sync setup form.
Choose Azure Blob Storage as the cloud storage type.
Create shared access signature in Azure
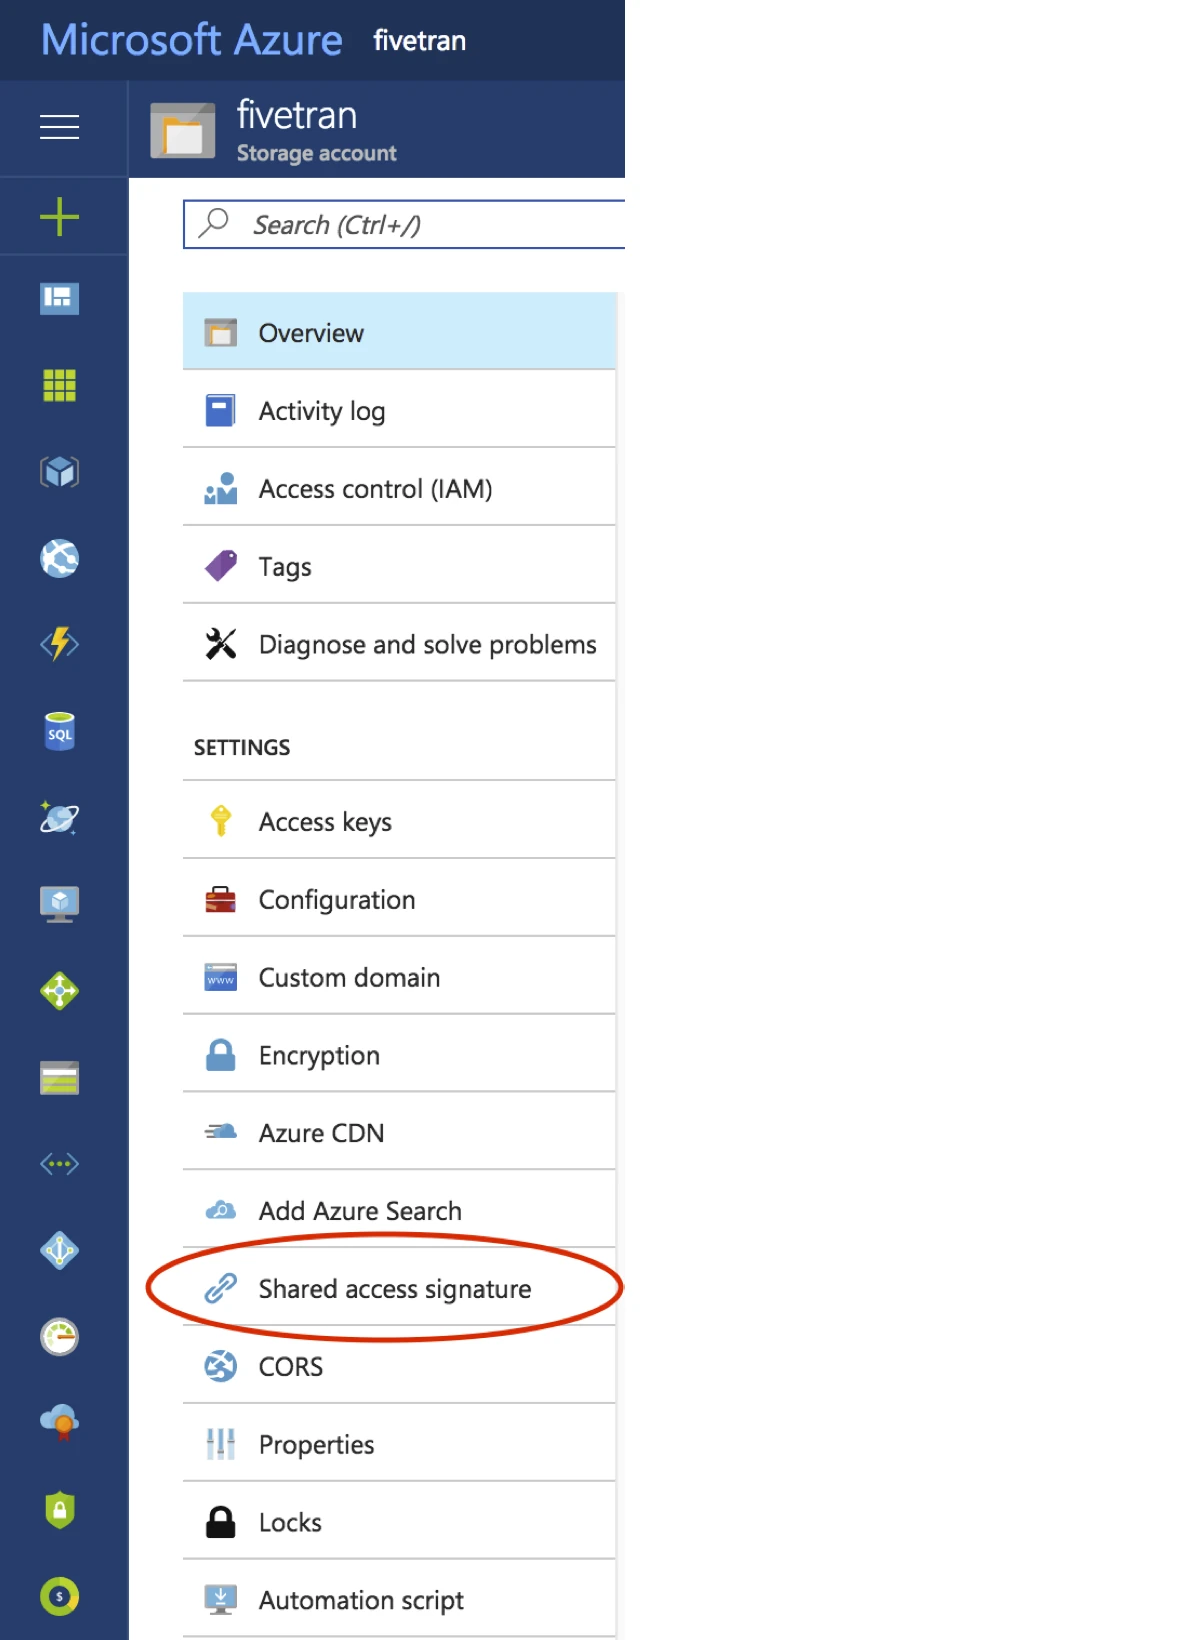
Log in to the Azure Portal.
Select your storage account.
Click Shared access signature.
You can re-use the Shared Access Signature (SAS) across multiple Fivetran connectors.
Under Allowed services, click Blob.
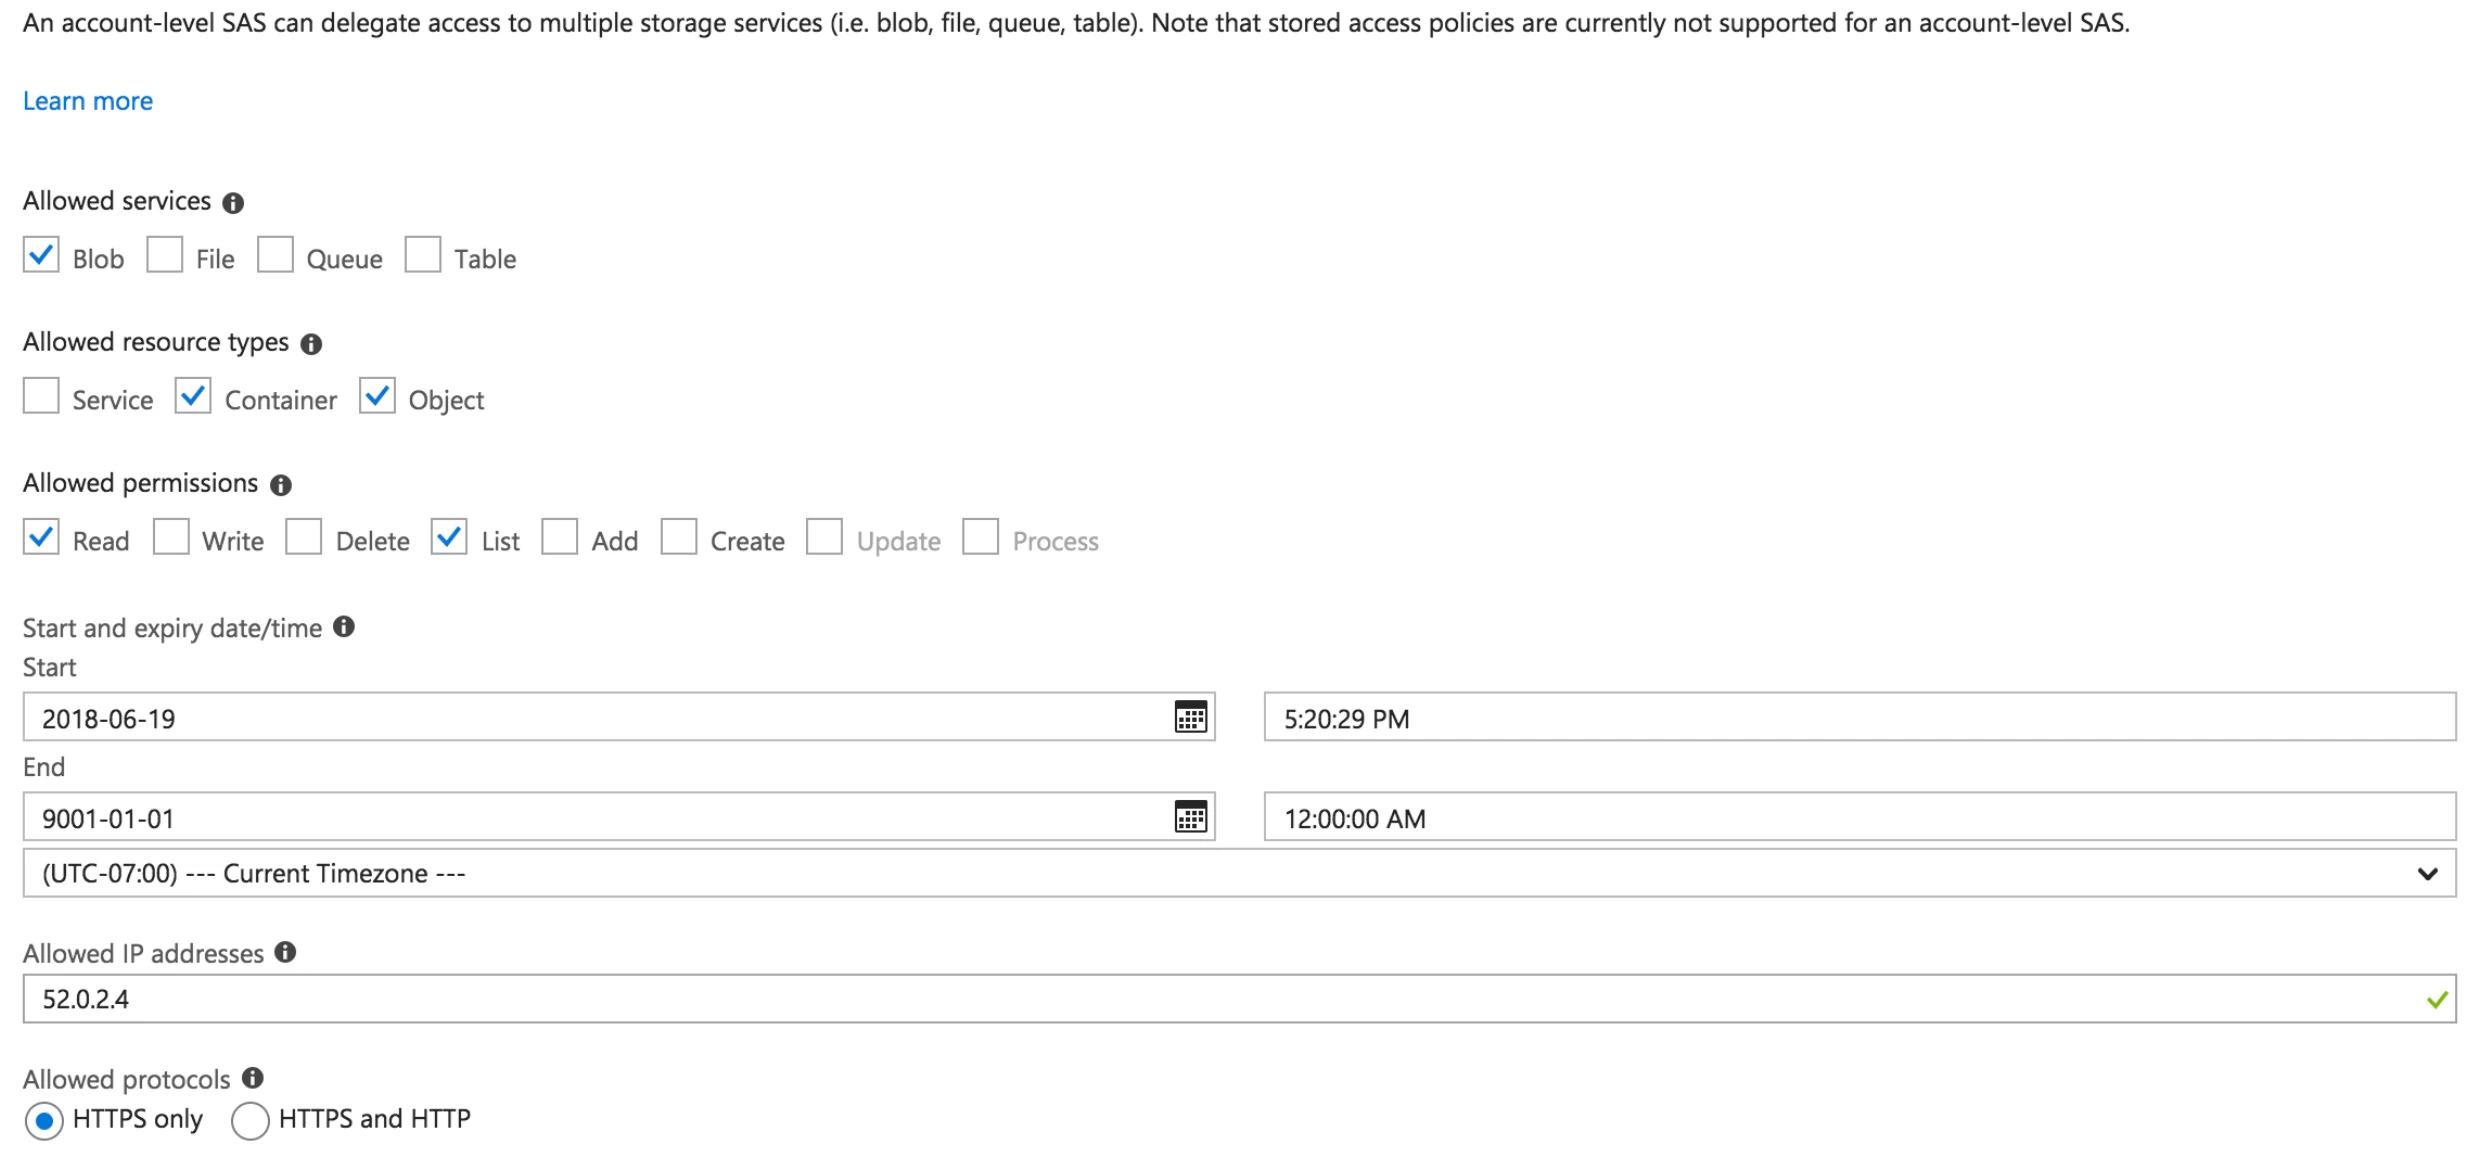
Under Allowed resource types, select Container and Object.
Under Allowed permissions, select Read and List .
Choose the appropriate start and expiry dates of your SAS.
When the SAS expires, you will have to update your Azure Blob Storage connection to resume syncing files.
(Optional) To enhance security, safelist Fivetran's IP address range under Allowed IP addresses. Azure only allows one IP range per SAS token.
Use the IP range format to safelist the IP addresses, for example,
35.234.176.144 - 35.234.176.151, because the CIDR format, for example,35.234.176.144/29, is not supported in the Azure Portal.Under Allowed protocols, select HTTPS only. We recommend to select the HTTPS option to ensure the security of your files.

Click Generate SAS and connection string.
Make a note of the Connection string value. You will need this to configure Fivetran.
Finish Fivetran configuration
Return to the tab with your Fivetran dashboard.
Enter the following information:
- (Optional) Folder Path
- Container
- Connection String
In the Historical sync time frame drop-down menu, select Sync all historic data or Sync data from selected date depeding on the amount of historical data you want to include in your initial sync.
- If you select Sync all historic data, we will sync all your historical data.
- If you select Sync data from selected date, select a date in the Historic Sync Backwards Limit field to sync your data from that date.
Click Save & Test. Fivetran will take it from here and sync your data from your Pendo account.
Google Cloud Storage setup instructions
Begin Fivetran configuration
In the connection setup form, enter your Destination schema name.
Enable the Use Data Sync toggle to switch to the Data Sync setup form.
Choose Google Cloud Storage as the cloud storage type.
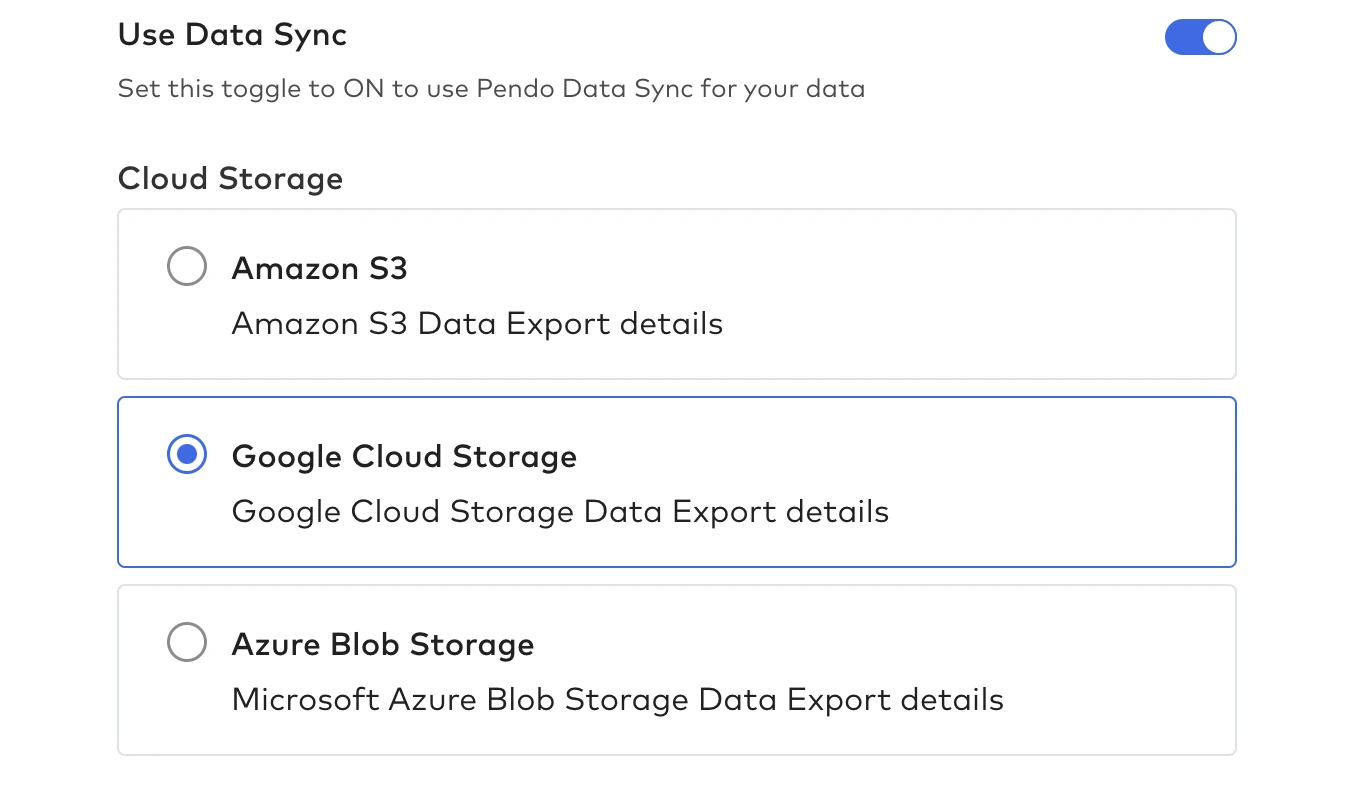
Make a note of the email address. You will need it to grant Fivetran access to your Google Cloud Storage bucket.
Grant bucket access
Go to your Google Cloud Storage console.
Find the bucket that you configured the Pendo Data Sync for.
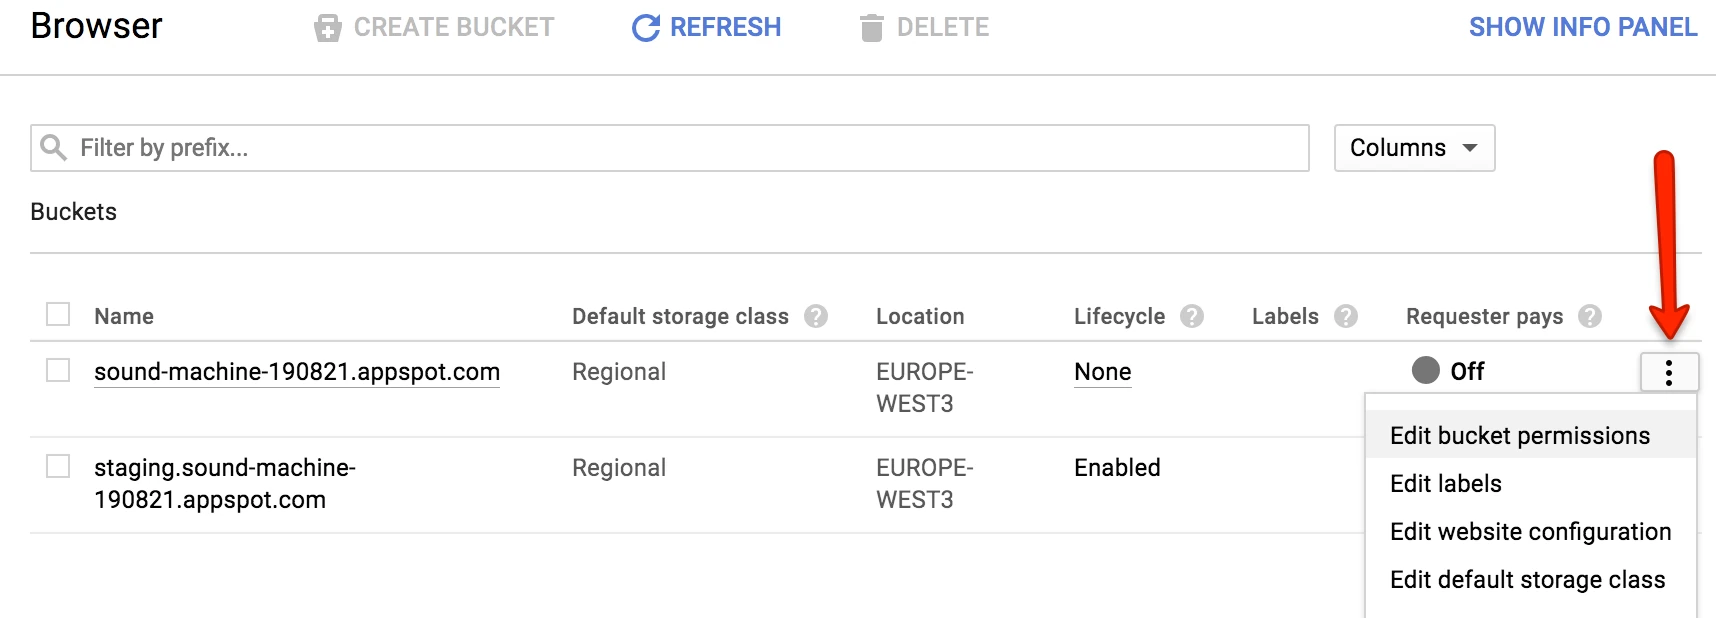
Click the three-dot menu and select Edit bucket permissions.
Grant
Storage Object Vieweraccess to the Fivetran email address you found in Step 1.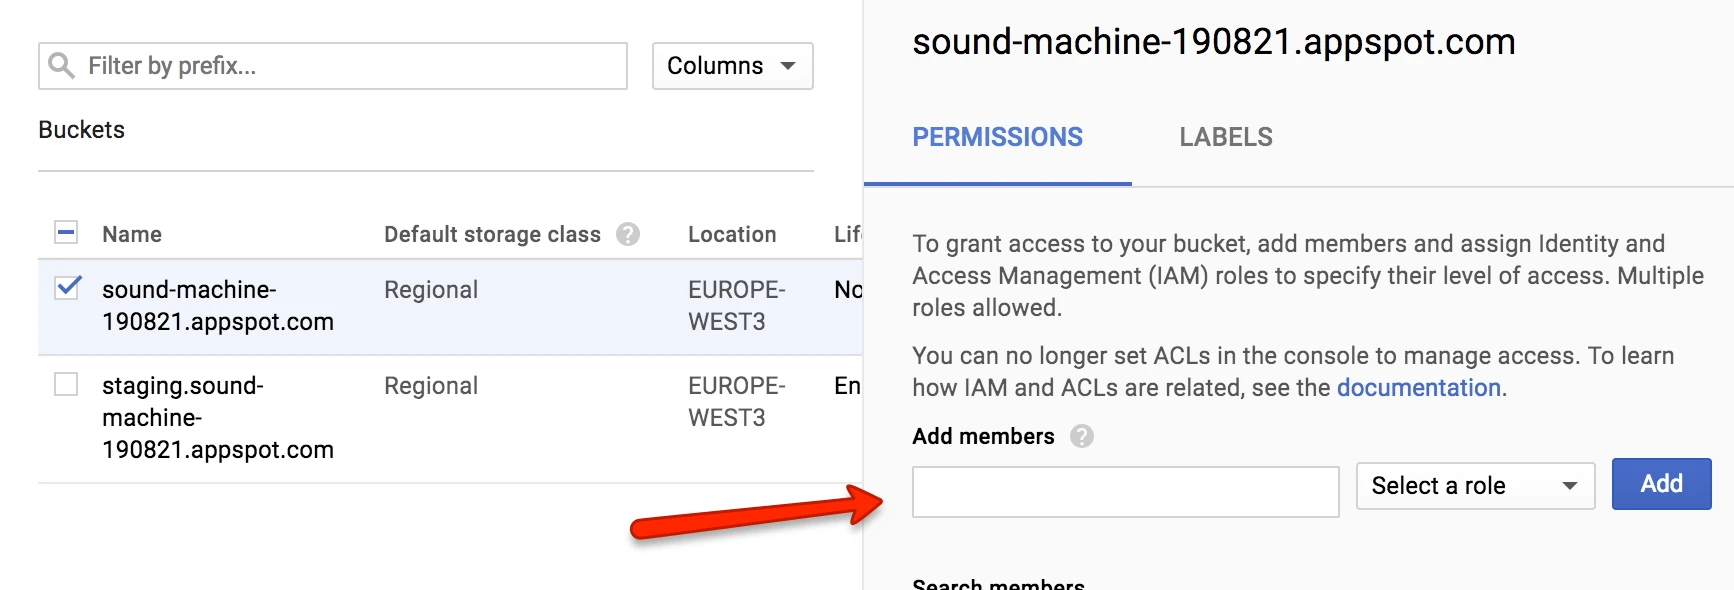
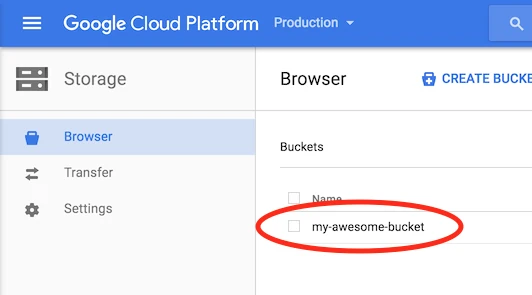
Make a note of your bucket name. You will need it to configure Fivetran.
Finish Fivetran configuration
Return to your Fivetran dashboard.
Enter the following information:
- (Optional) Folder Path
- Bucket Name
In the Historical sync time frame drop-down menu, select Sync all historic data or Sync data from selected date depeding on the amount of historical data you want to include in your initial sync.
- If you select Sync all historic data, we will sync all your historical data.
- If you select Sync data from selected date, select a date in the Historic Sync Backwards Limit field to sync your data from that date.
Click Save & Test. Fivetran will take it from here and sync your data from your Pendo account.