Jira Setup Guide
Follow our setup guide to connect Jira to Fivetran. Fivetran supports both Jira On-Premises and Jira Cloud.
Prerequisites
To connect your Jira account to Fivetran, you need:
Your Jira host name
Your Jira port number
The Jira user account that you use to connect must have the following permissions:
If you are missing any of the listed permissions, Fivetran does not sync the corresponding entities. Learn how permissions work in Jira's permissions documentation.
Entities Roles and Permissions Notes Projects
Issues
Related entities like versions, components, and boardsAdminister Projects or Browse Projects permission Learn more in Jira's Managing Project Permissions documentation. Project roles
Project role actorsAdminister Projects permission Learn more in Jira's Managing Project Permissions documentation. Users
GroupsBrowse users and groups global permission Learn more in Jira's Managing Global Permissions documentation. Entities related to Jira Service Management (formerly Jira Service Desk) Administrators or Service Desk Team project role Learn more in Jira's Service Management permissions documentation. Permission and issue security schemes
Related entities
Webhooks (for registration)Administer Jira global permission Administer Jira global permission is also required to be able to register webhooks for capturing deleted entities like issues and projects. Learn more in Jira's Managing Global Permissions documentation.
Only use an HTTPS URL with TLS version 1.2 or above.
Setup instructions
Configure Jira for authentication
Follow the configuration instructions for your chosen authentication method.
Basic
How you set up Basic authentication depends on which type of Jira installation you have.
Jira On-Premises
In the Fivetran connection setup form, set the Authentication Type to Basic.
(Optional, Private Preview only) If you want to manage your credentials outside of Fivetran, enable the Use External Secrets Manager toggle. For some connectors and destinations, this toggle only appears after you select a credential-based authentication method. See the External Secret Managers documentation for more information.
- If you have already configured External Secret Managers for your account, select one from the drop-down menu. Note that the list is filtered by the deployment model of the destination: if the destination uses SaaS Deployment, External Secret Managers configured for Hybrid Deployment won't be available, and vice versa.
- To edit the details of the selected External Secret Manager, click Edit manager details in Account Settings.
- To set up a new External Secret Manager, click Configure a new secrets manager. See the Create New External Secret Manager documentation for prerequisites and setup instructions.
- You can manage all your External Secret Managers at any time under Account Settings. See the External Secret Managers documentation for more information.
- When ESM is enabled, credential fields are replaced by ESM key fields. In each ESM key field, enter the name of the secret stored in your external secrets manager that corresponds to that credential — not the credential value itself. For more information, see External Secret Managers.
Enter your User name and Password.
Jira Cloud
In the Fivetran connection setup form, set the Authentication Type to Basic.
(Optional, Private Preview only) If you want to manage your credentials outside of Fivetran, enable the Use External Secrets Manager toggle. For some connectors and destinations, this toggle only appears after you select a credential-based authentication method. See the External Secret Managers documentation for more information.
- If you have already configured External Secret Managers for your account, select one from the drop-down menu. Note that the list is filtered by the deployment model of the destination: if the destination uses SaaS Deployment, External Secret Managers configured for Hybrid Deployment won't be available, and vice versa.
- To edit the details of the selected External Secret Manager, click Edit manager details in Account Settings.
- To set up a new External Secret Manager, click Configure a new secrets manager. See the Create New External Secret Manager documentation for prerequisites and setup instructions.
- You can manage all your External Secret Managers at any time under Account Settings. See the External Secret Managers documentation for more information.
- When ESM is enabled, credential fields are replaced by ESM key fields. In each ESM key field, enter the name of the secret stored in your external secrets manager that corresponds to that credential — not the credential value itself. For more information, see External Secret Managers.
In your Atlassian account, create a basic API token by clicking Create API token.
In the User field, enter the email address for the Atlassian account you used to create the API token.
Enter the API token in the Password field.
OAuth 1.0 (Only for Jira On-Premises)
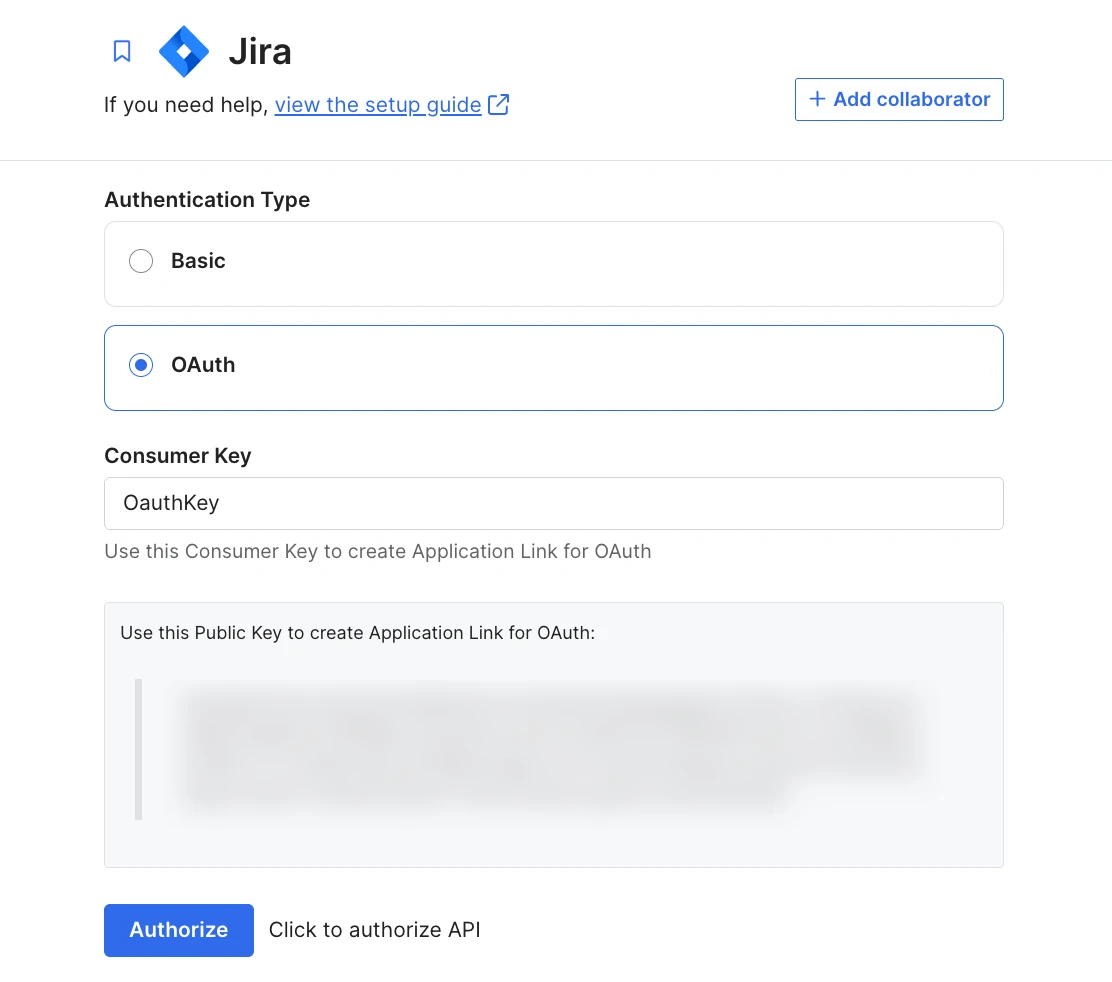
In the Fivetran connection setup form, set the Authentication Type to OAuth.
In the Consumer Key field, enter a unique key of your choice, or leave the default "OauthKey" if it's not already used by another external application in your Jira instance.
Make a note of the public key. You'll need it to create an application link in Jira.
Learn more about application links in the Jira Cloud or Jira Server documentation.
Log in to your Atlassian account.
In Jira, go to Jira Settings > Products > Integrations > Application Links.
Click Create link.
Click Direct application link in the Link type section of the Create link pop-up window.
In the Application URL section, enter
https://fivetran.com, then click Continue.A warning message will appear: "No response was received from the URL you entered." This is expected, as noted in Jira's documentation. Click Continue.
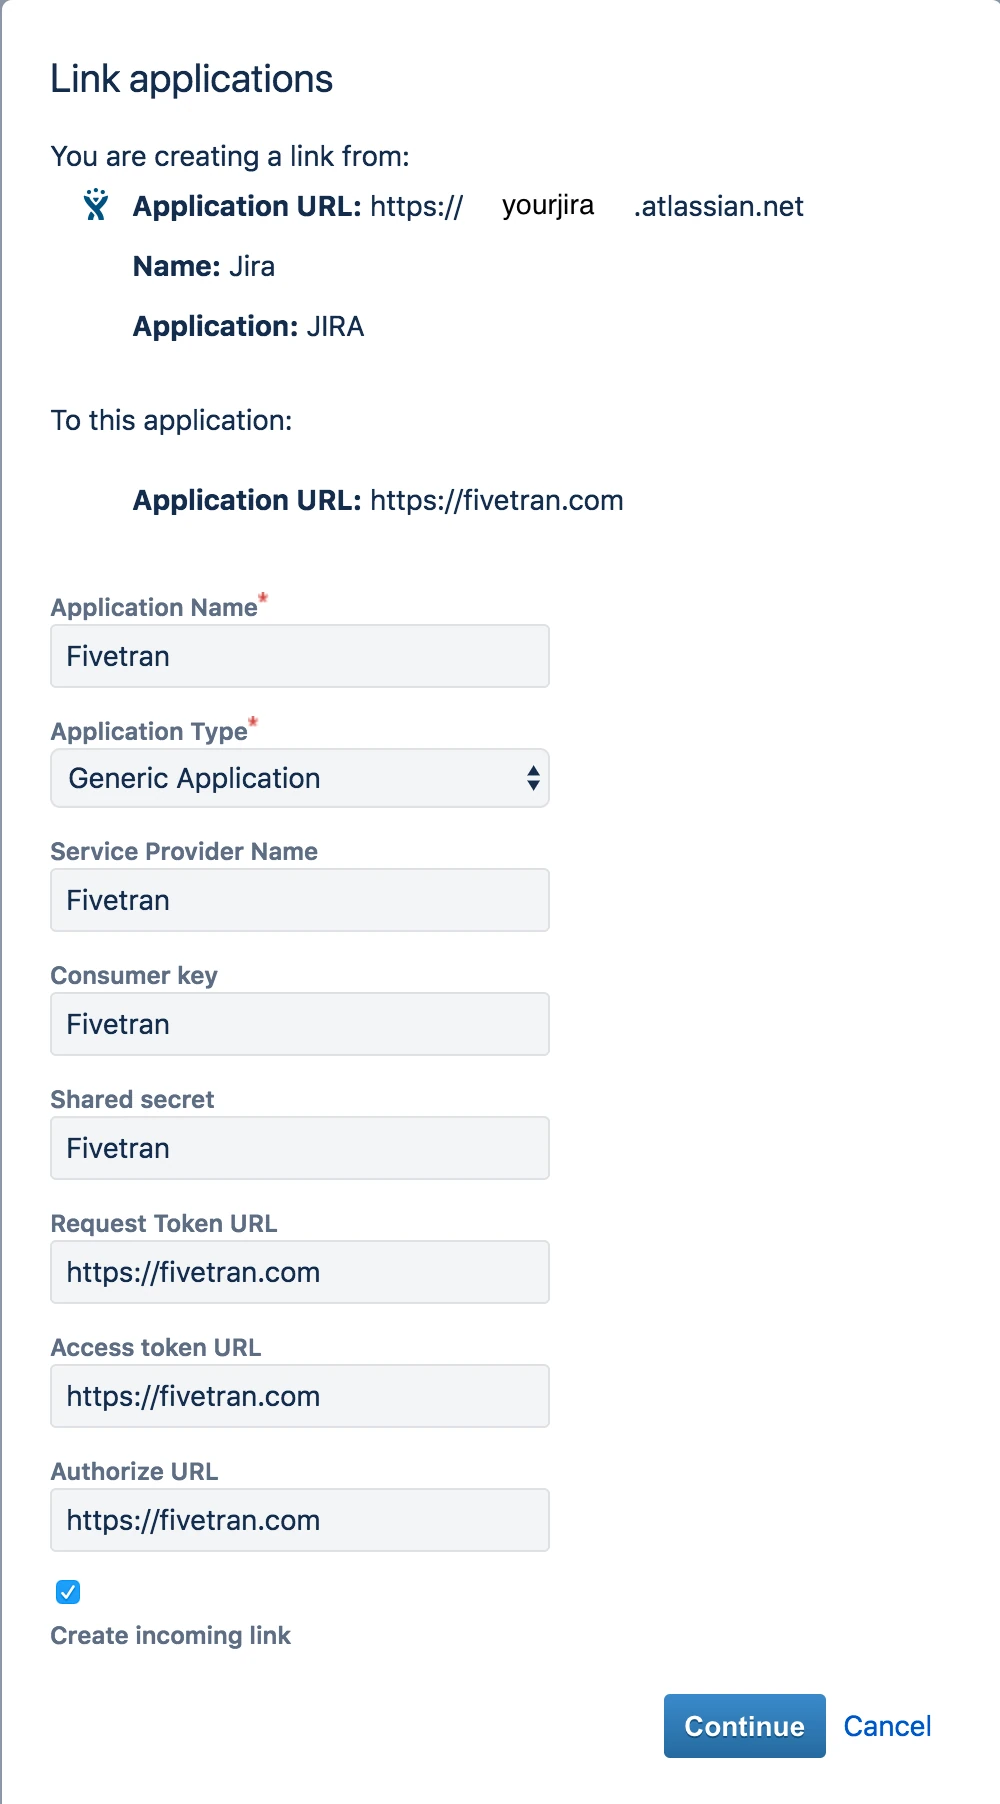
In the Link applications window, fill in the fields as follows:
Application Name: Fivetran
Application Type: Generic Application.
Leave all other fields as shown (they're not functionally required by Fivetran).
Check Create incoming link.
Click Continue.
In the next Link applications window, fill in the fields as follows:
Consumer Key: The consumer key you specified in the Fivetran connection setup form (default "OauthKey").
Consumer Name: Fivetran.
Public Key: Paste the public key from your Fivetran connection setup form.
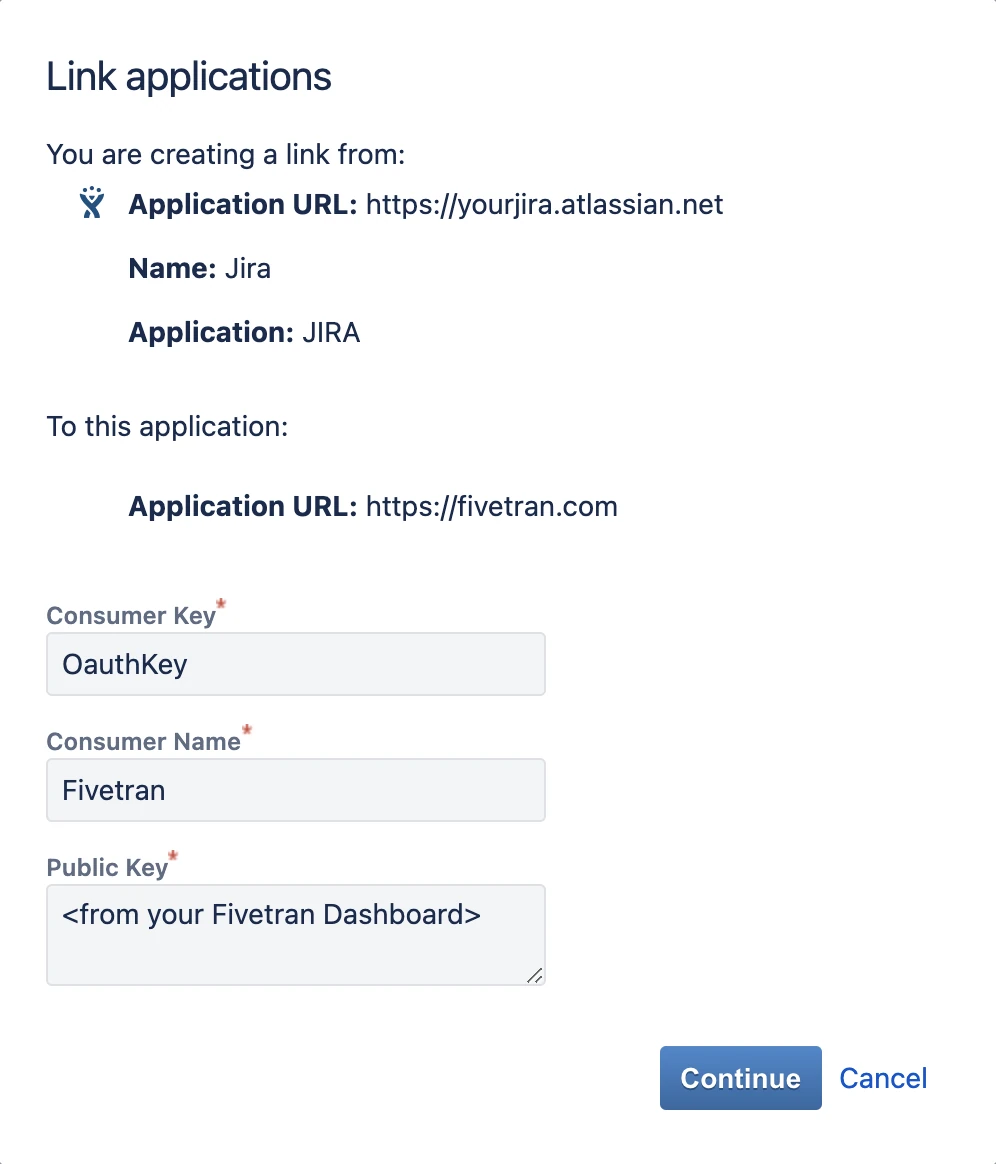
Click Continue. You should see a confirmation message: "Application Link 'Fivetran' created successfully".
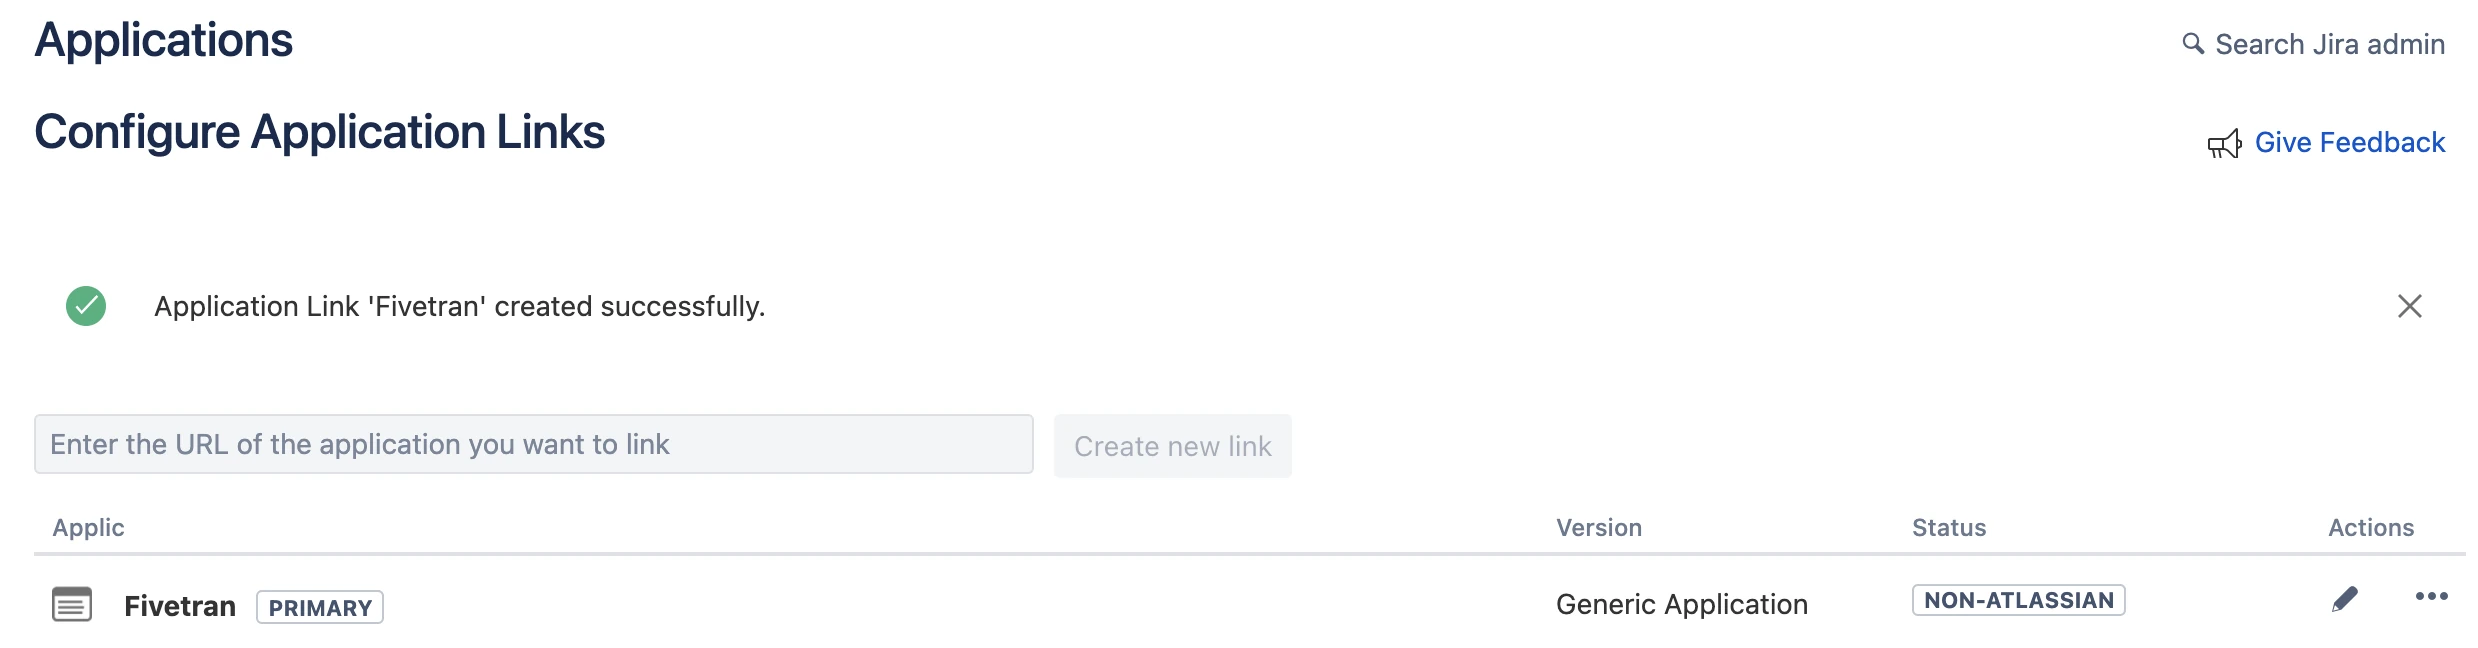
Return to your Fivetran dashboard.
Click Authorize to complete the connection.
If you see an error like
oauth_problem=XXXXX, refer to Atlassian's OAuth Troubleshooting Guide.
OAuth 1.0 is no longer available for Jira connections created after 10 October, 2025. We recommend using OAuth 2.0 (3LO).
OAuth 2.0 (3LO) (recommended authentication method, available only for Jira Cloud)
- In the Fivetran connection setup form, set the Authentication Type to OAuth.
- Click Authorize to start the OAuth 2.0 authorization flow.
- Log in with the Atlassian account that has access to the Jira Cloud instance you are connecting to.
- Review on the Permissions page, the requested scopes and click Allow access to grant Fivetran access to your Jira data.
- Upon granting access, you are automatically redirected back to the Fivetran dashboard.
No further manual configuration is required. The Jira source will start syncing data using the granted OAuth 2.0 access.
You don't need to create any Application Links in Jira or manually enter OAuth credentials. Everything is handled automatically by Fivetran via the OAuth 2.0 flow.
Service Account OAuth 2.0 (2LO)
Use this authentication method for automated, unattended access without user interaction.
Log in to Atlassian Administration and select your organization.
Go to Directory > Service accounts and click Create a service account.
Enter an alphanumeric name that's 6 to 30 characters long, and an optional description.
Assign the following roles under Apps based on the data you need to sync:
- Assets App: User role
- Jira Service Management App: User access admin role and User (agent) role
- Jira Administration App: App admin role
- Jira App: User role and User access admin role
- Projects App: App admin role
Click Create.
In the service account details page, click Create credentials.
Select OAuth 2.0 as the credential type.
Configure the following scopes:
read:webhook:jira,write:webhook:jira,delete:webhook:jiraread:board-scope:jira-software,read:issue-details:jira,read:sprint:jira-software,read:epic:jira-software,read:board-scope.admin:jira-software,read:project:jiraread:me,read:accountread:jira-user,read:jira-workmanage:jira-webhook,manage:jira-data-provider,manage:jira-configuration,manage:jira-projectread:servicedesk-request,manage:servicedesk-customerread:cmdb-schema:jira,read:cmdb-object:jira,read:cmdb-attribute:jira,read:cmdb-type:jiraread:ops-alert:jira-service-management,read:ops-config:jira-service-management,read:incident:jira-service-management
Click Create.
Copy the Client ID and Client Secret immediately and save them securely. You cannot retrieve them later.
Store the credentials securely. They cannot be recovered after you close the dialog.
In the Fivetran connection setup form, set the Authentication Type to Service Account OAuth 2.0.
Enter the Client ID and Client Secret from the previous step.
Service accounts cannot automatically manage webhooks. You must register webhooks manually using the Register webhook manually step below.
(Optional) Register webhook manually
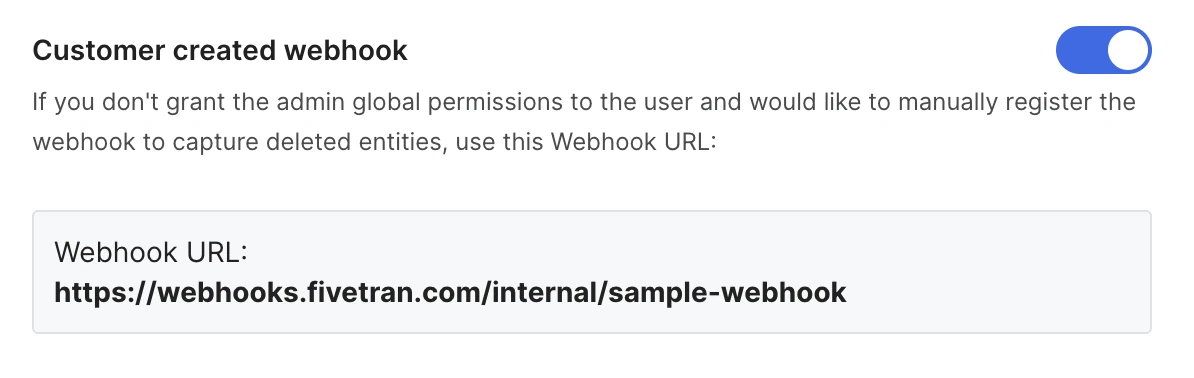
If the Jira user account you use to connect doesn't have the Administer Jira global permission, or if you're using Service Account OAuth 2.0 authentication, you must register the webhook manually to capture deleted entities:
In the Fivetran connection setup form, set the Customer Created Webhook toggle to ON.
Copy the Webhook URL displayed. You'll need it when creating a new webhook in Jira.
The steps below are based on the instructions from Jira's webhook registration documentation.
Log in to your Jira instance as a user with the Administer Jira global permission.
Go to Jira Settings > System.
Under Advanced, select WebHooks.
Click + Create a WebHook.
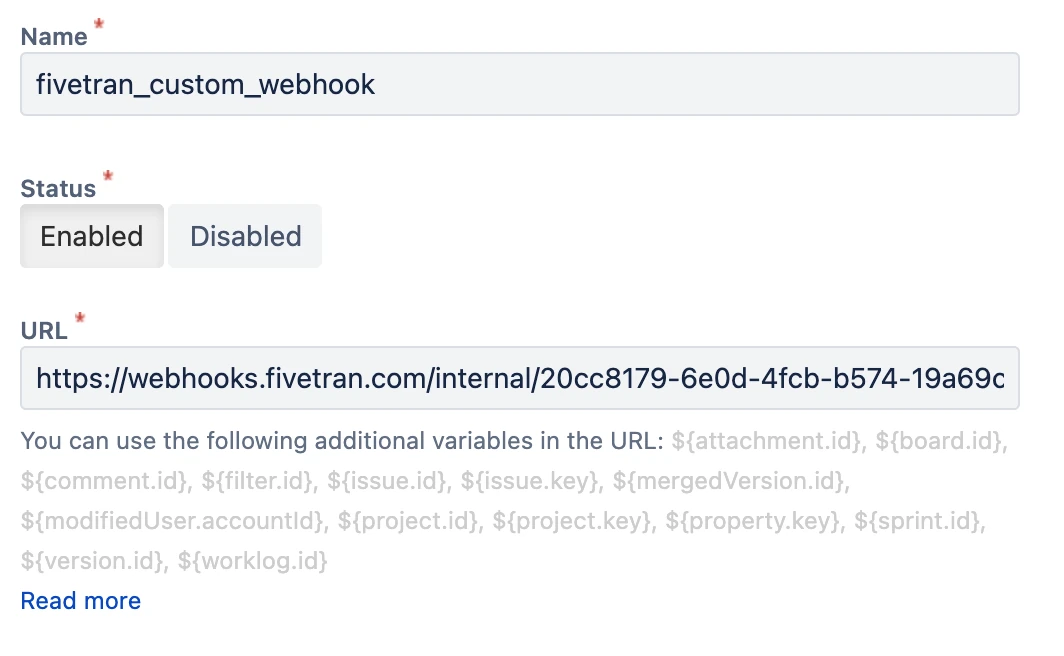
In the Name field, enter a descriptive name such as
_fivetran_custom_webhook_.Select the Status to Enabled.
In the URL field, paste the webhook URL copied from the Fivetran connection setup form.
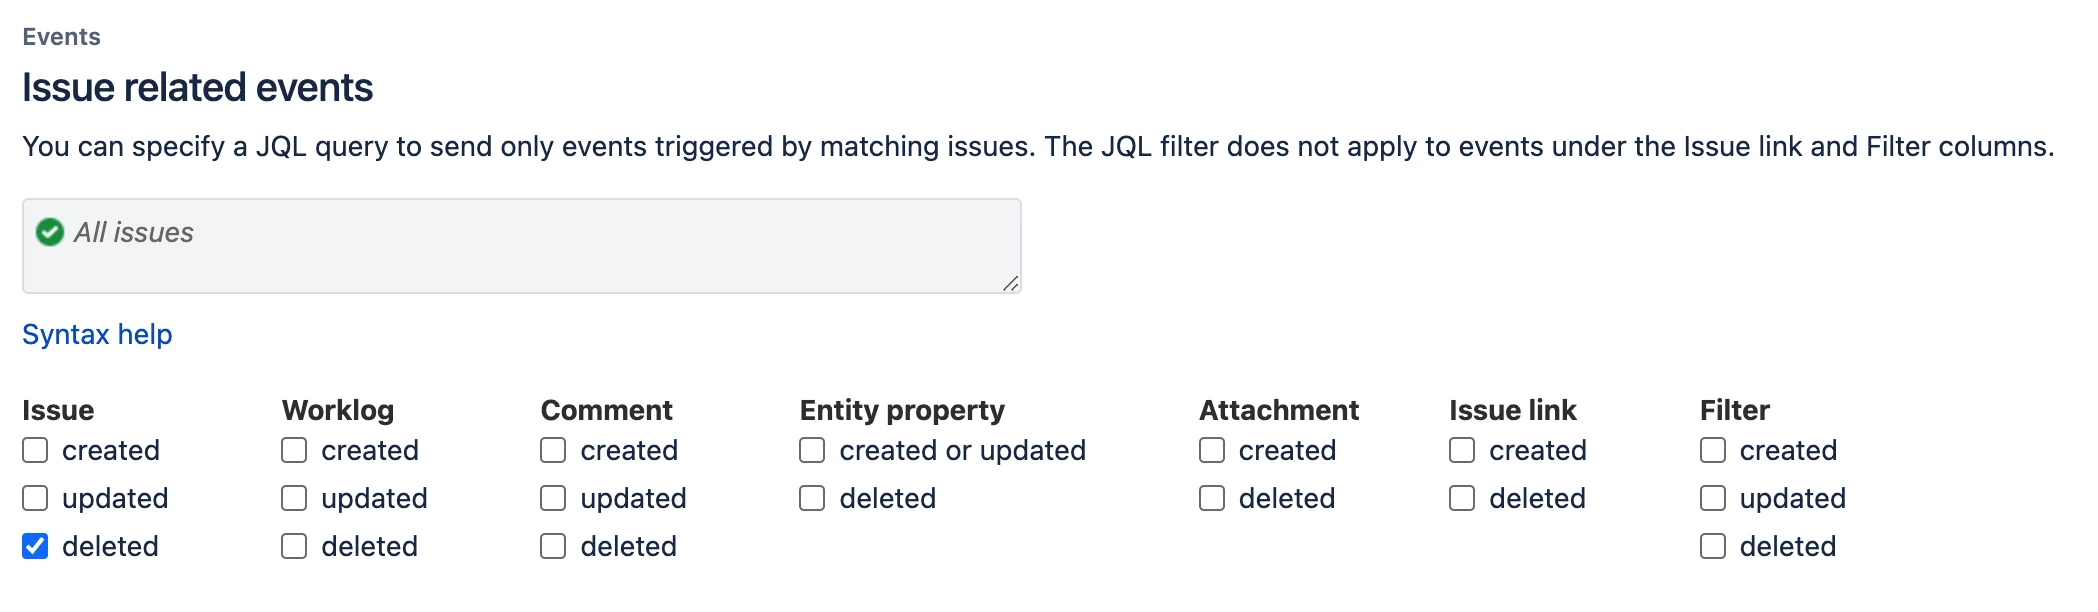
In the Issue related events section, select deleted event in the Issue column.
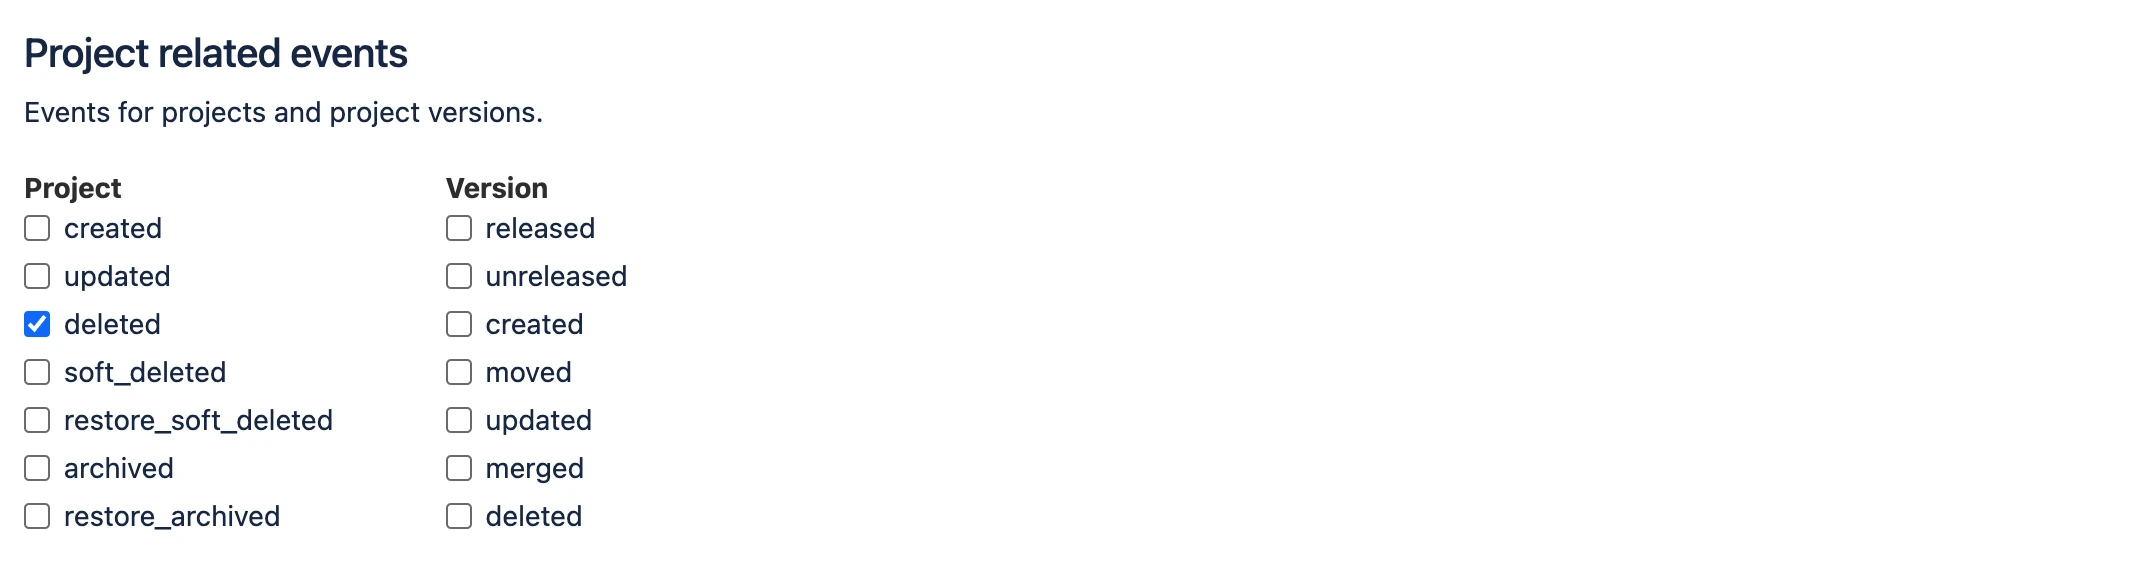
In the Project related events section, select the delete event in the Project column.
In the Jira Software related events section, select the created, deleted, and updated events in the Sprint column.

Click Create.
Finish Fivetran configuration
Follow the configuration instructions for your Jira installation type.
Jira On-Premises
- In the connection setup form, enter the Destination schema name of your choice. This is used as the connection name and cannot be modified once the connection is created.
- Enter your Jira Host (without
http,https, orwww). - Enter your Port number.
- Set the On Premise toggle to ON.
- In the Path (optional) field, enter your deployment path (for example, enter
jiraif your URL isyour-company.com/jira). Otherwise, leave it blank. - Choose the issue sync mode: From all projects or From selected projects.
- If you choose From selected projects, select the projects whose issues you want to sync.
- Click Save & Test. Fivetran will verify the connection and begin syncing your Jira data.
Jira Cloud
In the connection setup form, enter the Destination schema name of your choice. This is used as the connection name and cannot be modified once the connection is created.
Enter your Jira Host (for example,
your-company.atlassian.net, withouthttp,https, orwww).Enter your Port number.
The default port for Jira Cloud is
443.Choose the issue sync mode: From all projects or From selected projects.
- If you choose From selected projects, select the projects whose issues you want to sync.
To sync the unstructured files, set the Sync Jira files to your destination's object storage toggle to ON.
Click Save & Test. Fivetran will verify the connection and begin syncing your Jira data.