AWS Inventory Setup Guide
Follow our setup guide to connect AWS Inventory to Fivetran.
Prerequisites
To connect AWS Inventory to Fivetran, you need:
- An AWS account with Administrator privileges.
- An Amazon S3 bucket that is configured for AWS Inventory to put the files in.
If you are using a private bucket, you need an AWS account that can grant Fivetran permission to read from the bucket.
Setup instructions
Begin Fivetran configuration
In the connection setup form, find the automatically-generated External ID and make a note of it. You will need it to configure AWS to connect with Fivetran.
The External ID is tied to your account. If you close and re-open the setup form, the ID will not change. For convenience, you can keep the browser tab open in the background while you configure your source.
Create IAM policy
This step will allow Fivetran to access your EC2, ELB, S3, Config, CloudTrail, and IAM services.
Open the Amazon IAM console.
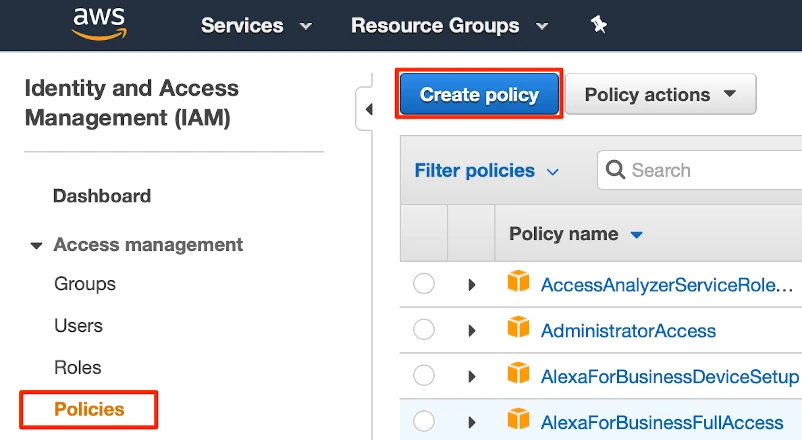
Go to Access management > Policies, and then select Create policy.
In the Create policy window, go to the JSON tab.
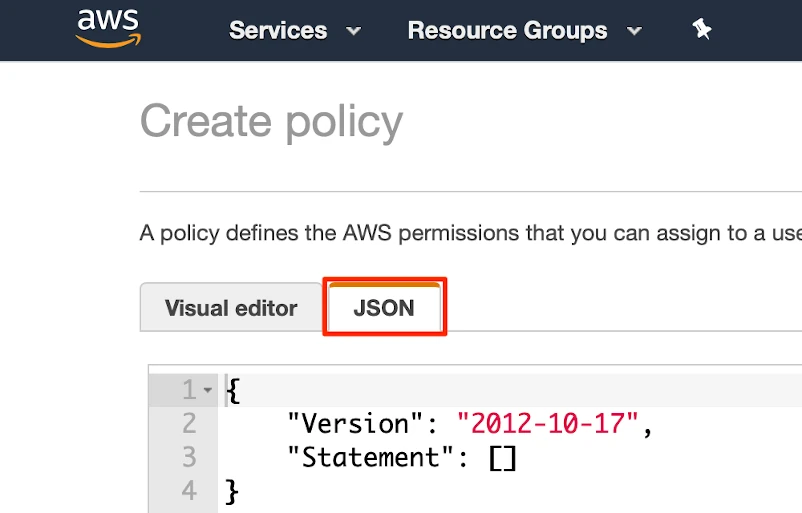
Copy the following policy and paste it in the JSON tab.
{
   "Version": "2012-10-17",
   "Statement": [
       {
           "Sid": "VisualEditor0",
           "Effect": "Allow",
           "Action": [
               "iam:GenerateCredentialReport",
               "iam:GetPolicyVersion",
               "iam:GetAccountPasswordPolicy",
               "ec2:DescribeInstances",
               "ec2:DescribeRegions",
               "cloudtrail:GetTrailStatus",
               "s3:Get*",
               "iam:ListMFADevices",
               "cloudtrail:GetEventSelectors",
               "s3:List*",
               "iam:ListVirtualMFADevices",
               "elasticloadbalancing:DescribeLoadBalancers",
               "kms:GetKeyRotationStatus",
               "iam:ListAttachedUserPolicies",
               "iam:GetCredentialReport",
               "iam:ListAccessKeys",
               "iam:ListPolicies",
               "iam:ListEntitiesForPolicy",
               "iam:ListUserPolicies",
               "ec2:DescribeSecurityGroups",
               "cloudtrail:DescribeTrails",
               "ec2:DescribeImages",
               "kms:ListKeys",
               "iam:ListPolicyVersions",
               "config:DescribeConfigurationRecorders",
               "iam:ListGroupsForUser",
               "ec2:DescribeVpcs",
               "iam:ListAccountAliases",
               "iam:ListUsers",
               "iam:GetLoginProfile",
               "iam:GetAccountSummary",
               "route53:ListHostedZones",
               "route53:ListResourceRecordSets"
           ],
           "Resource": "*"
       }
   ]
}
Click Review policy.
Name the policy "fivetran-inventory."

Click Create policy.
Create IAM role
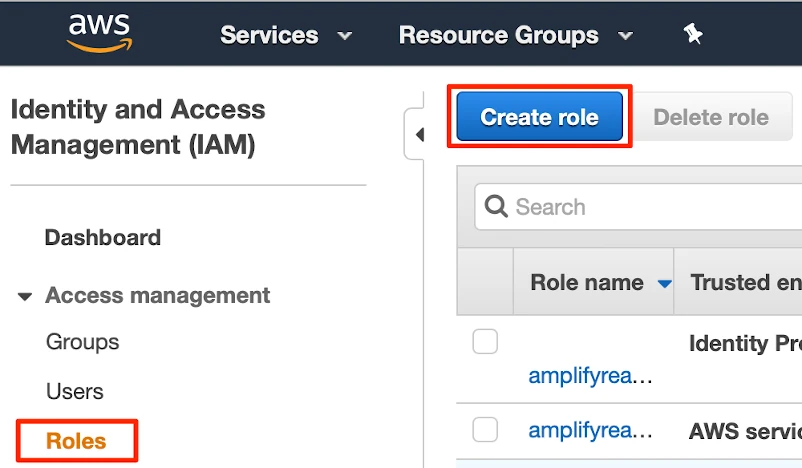
Go to Access management > Roles, and then select Create role.
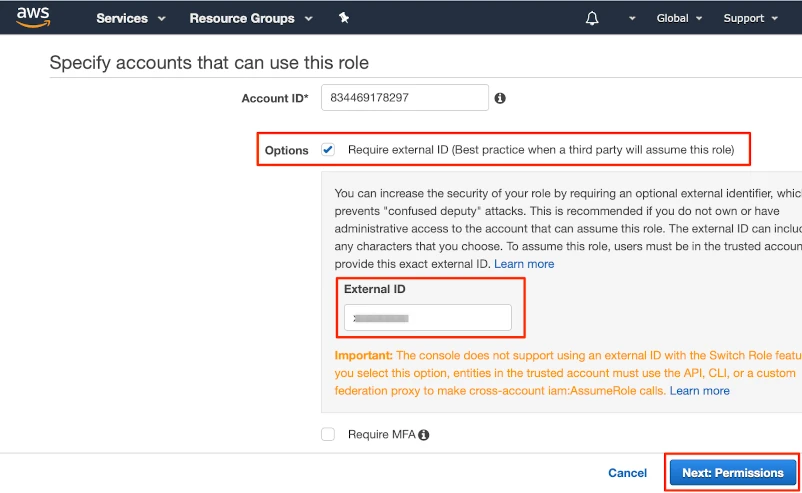
In the Create role window, select Another AWS account, and then in the Account ID field, enter Fivetran's account ID,
834469178297.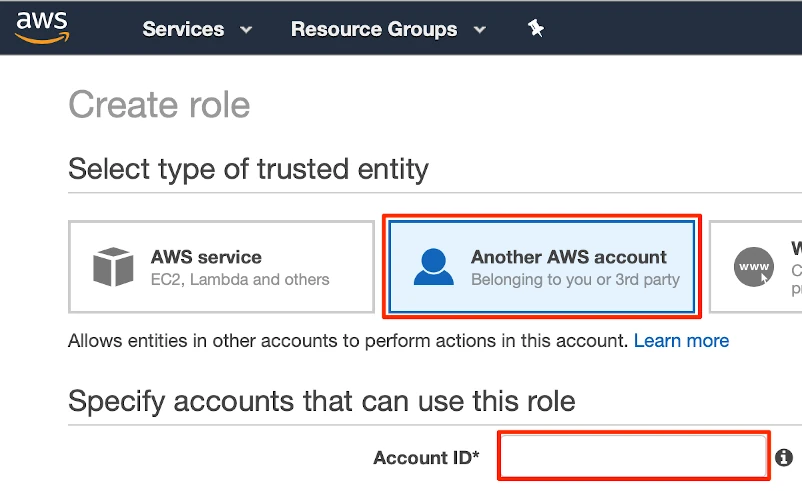
In Options, select the Require external ID checkbox.
In the External ID field, enter the External ID you got from the Fivetran AWS Inventory setup form.
Click Next: Permissions.
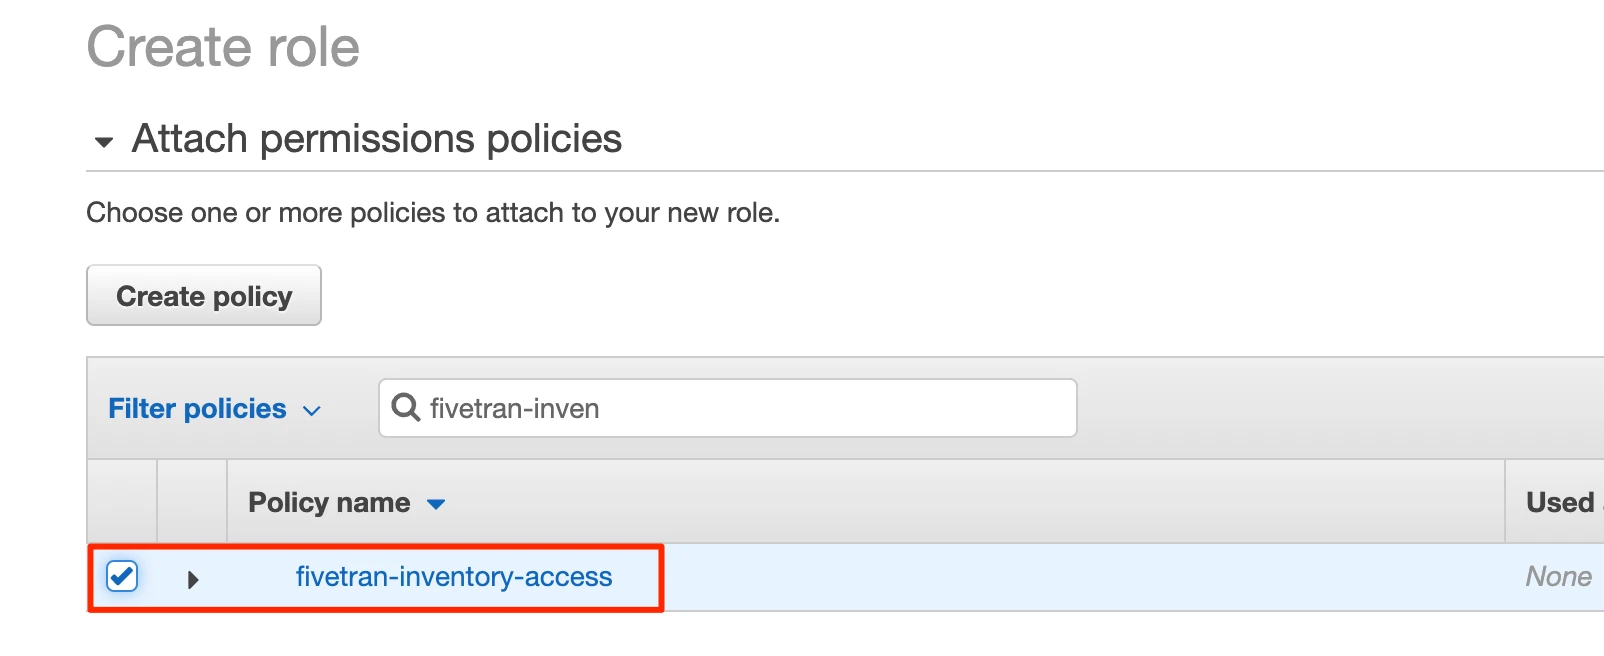
Select the "fivetran-inventory" policy that you created in Step 2.
Click Next: Tags. Entering tags is optional, but you must click through the step.
Click Next: Review.
Name your new role "Fivetran" and then click Create role.

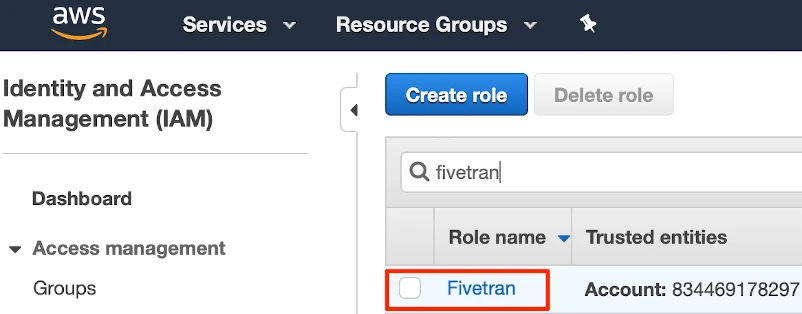
Select the Fivetran role that you just created.
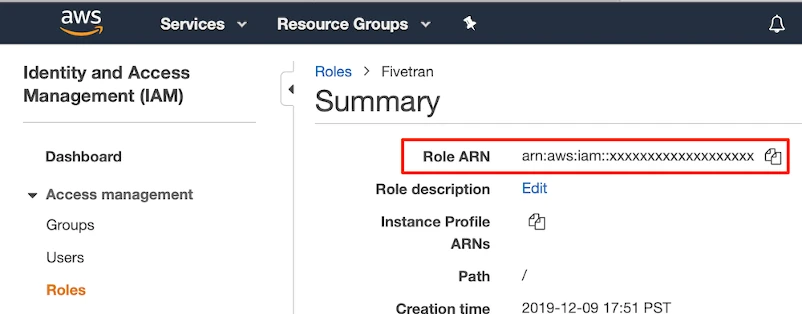
In the Summary section, make a note of the Role ARN value. You will need it to fill in your Fivetran AWS Inventory setup form.
(Optional) Set permissions
You can specify permissions for the Role ARN that you designate for Fivetran. Grant selective permissions to this role to allow Fivetran to sync only what it has permissions to see.
Finish Fivetran configuration
Return to the browser tab with your Fivetran dashboard.
Enter the Destination schema name of your choice.
Enter the Role ARN you found in Step 3.
Enter your Config Bucket name.
(Optional) Enter the Bucket Prefix if you used one when setting up the bucket for AWS Inventory.
Click Save & Test. Fivetran will take it from here and sync your AWS Inventory data.