Oracle Fusion Cloud Applications - CRM Setup Guide
Follow our setup guide to connect your Oracle Fusion Cloud Applications - CRM to Fivetran.
Prerequisites
To connect your Oracle Fusion Cloud Applications - CRM to Fivetran, you need:
- An Oracle Cloud account
- An active Oracle Cloud Fusion subscription
- Access to the Application Console
- Security Manager role to access the Security Console
Setup instructions
Find server URL
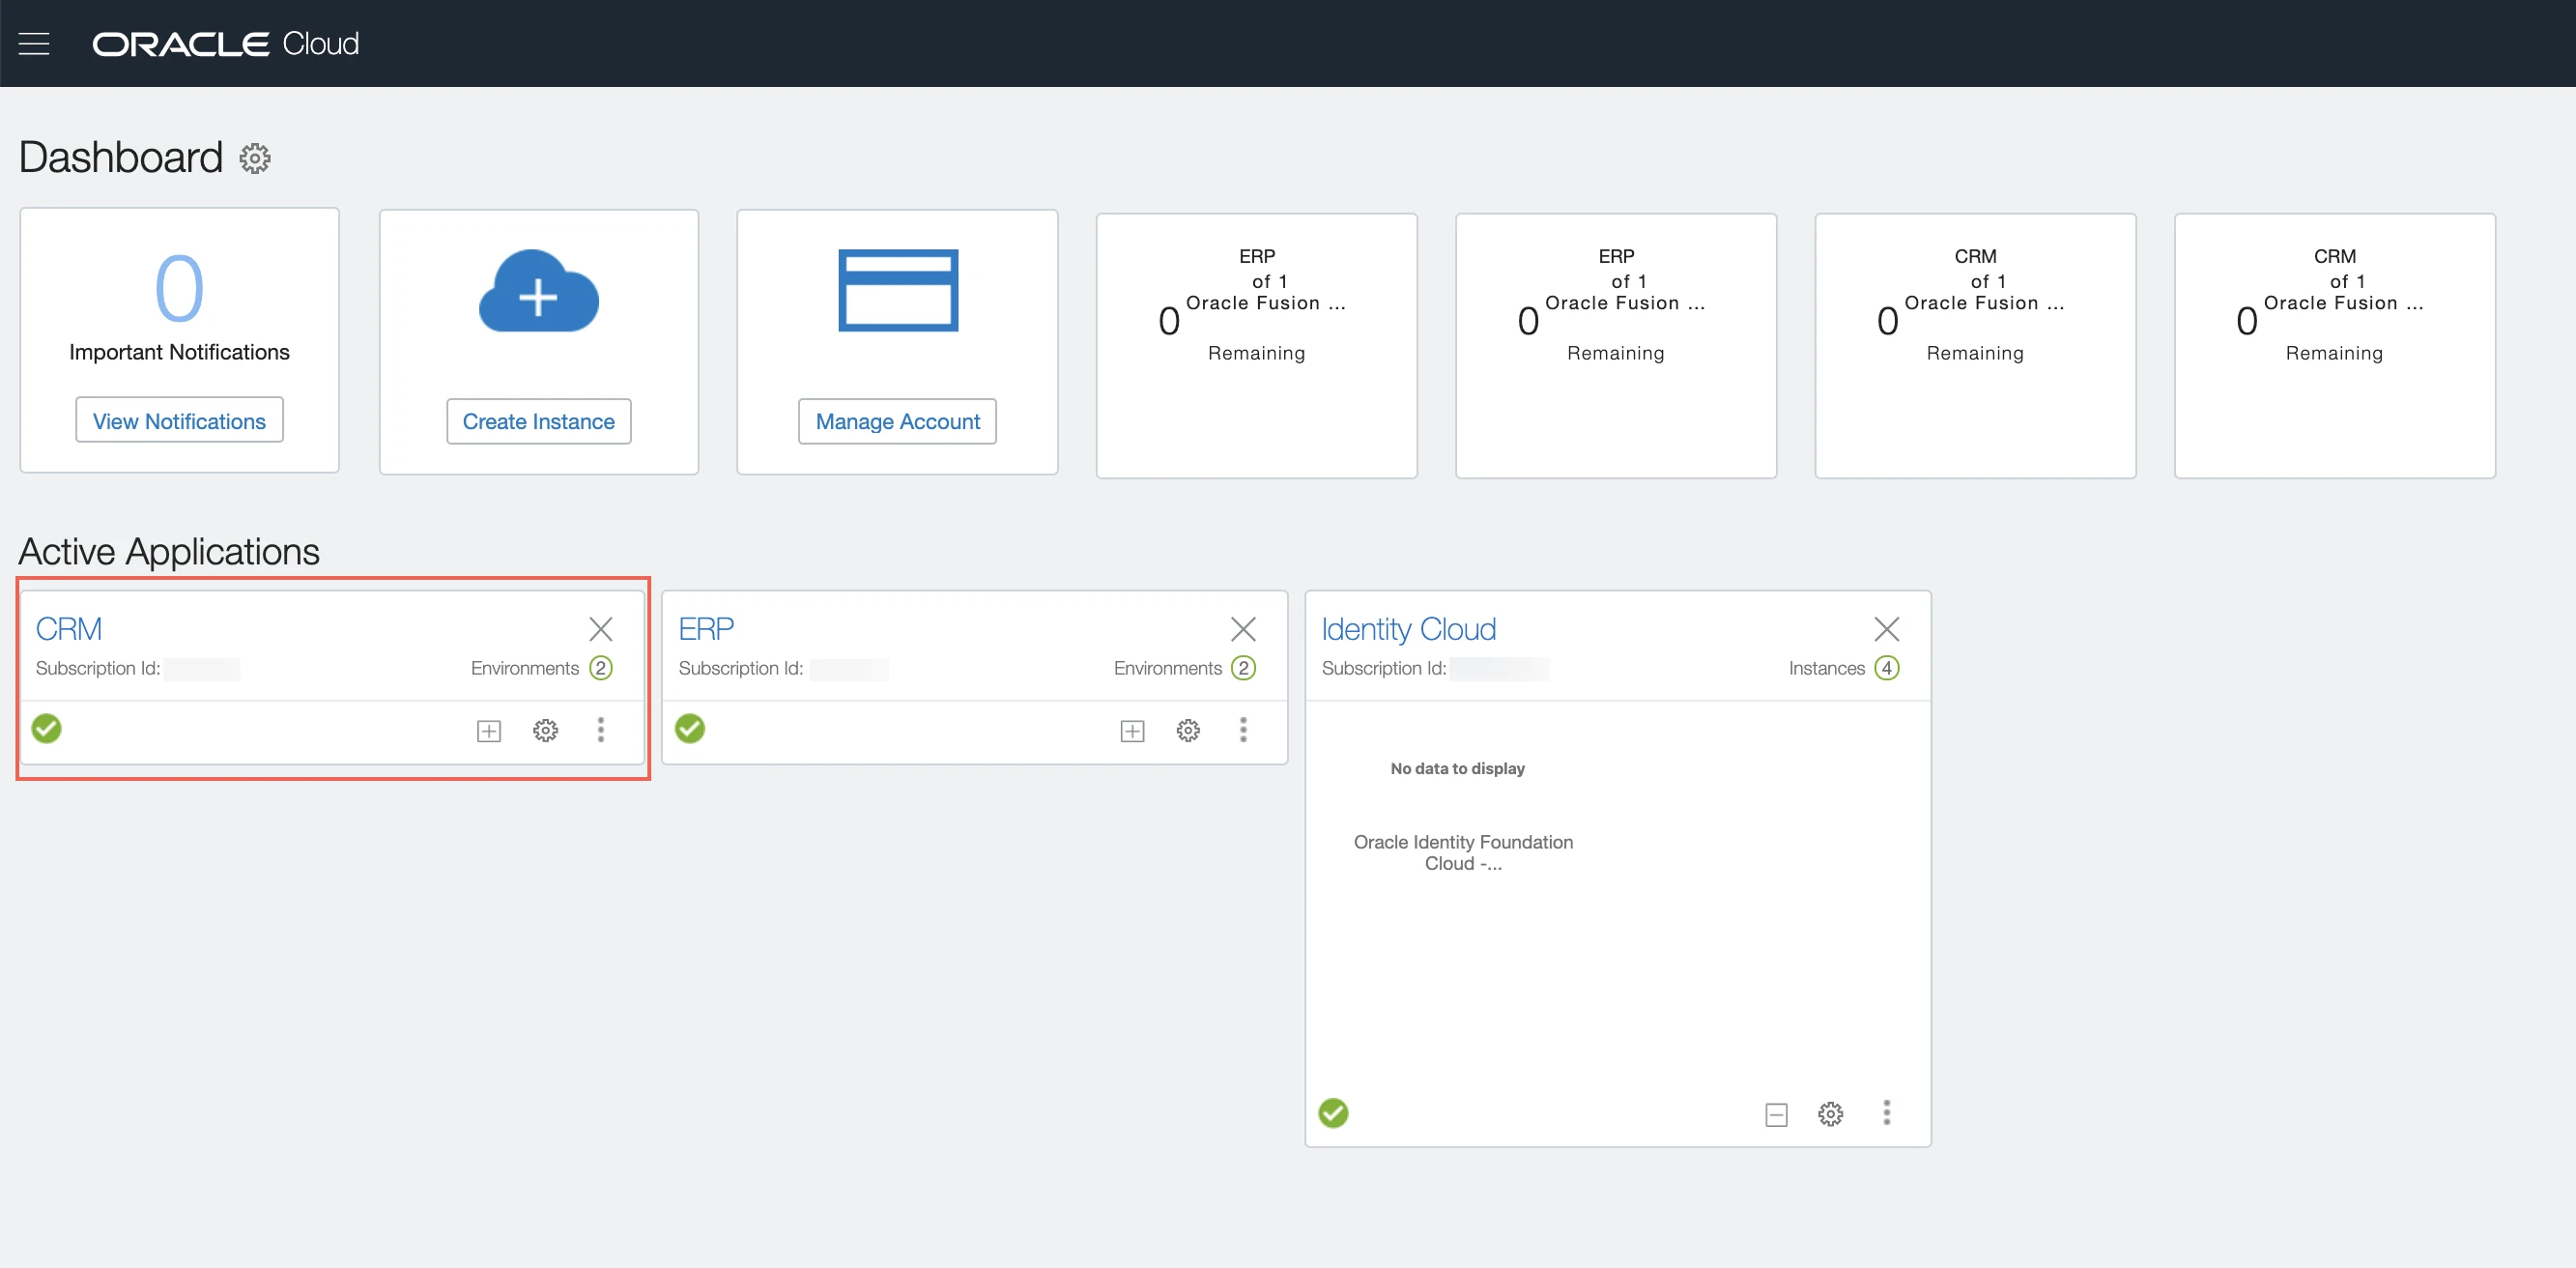
Log in to Oracle Cloud.
Go to the Application Console.
Find your Oracle application instance. If you don't have an instance, follow Oracle's instructions to create one.
In the application instance details, find and make a note of the Service Environment URL (for example,
https://servername.fa.us2.oraclecloud.com). You will need this to configure Fivetran.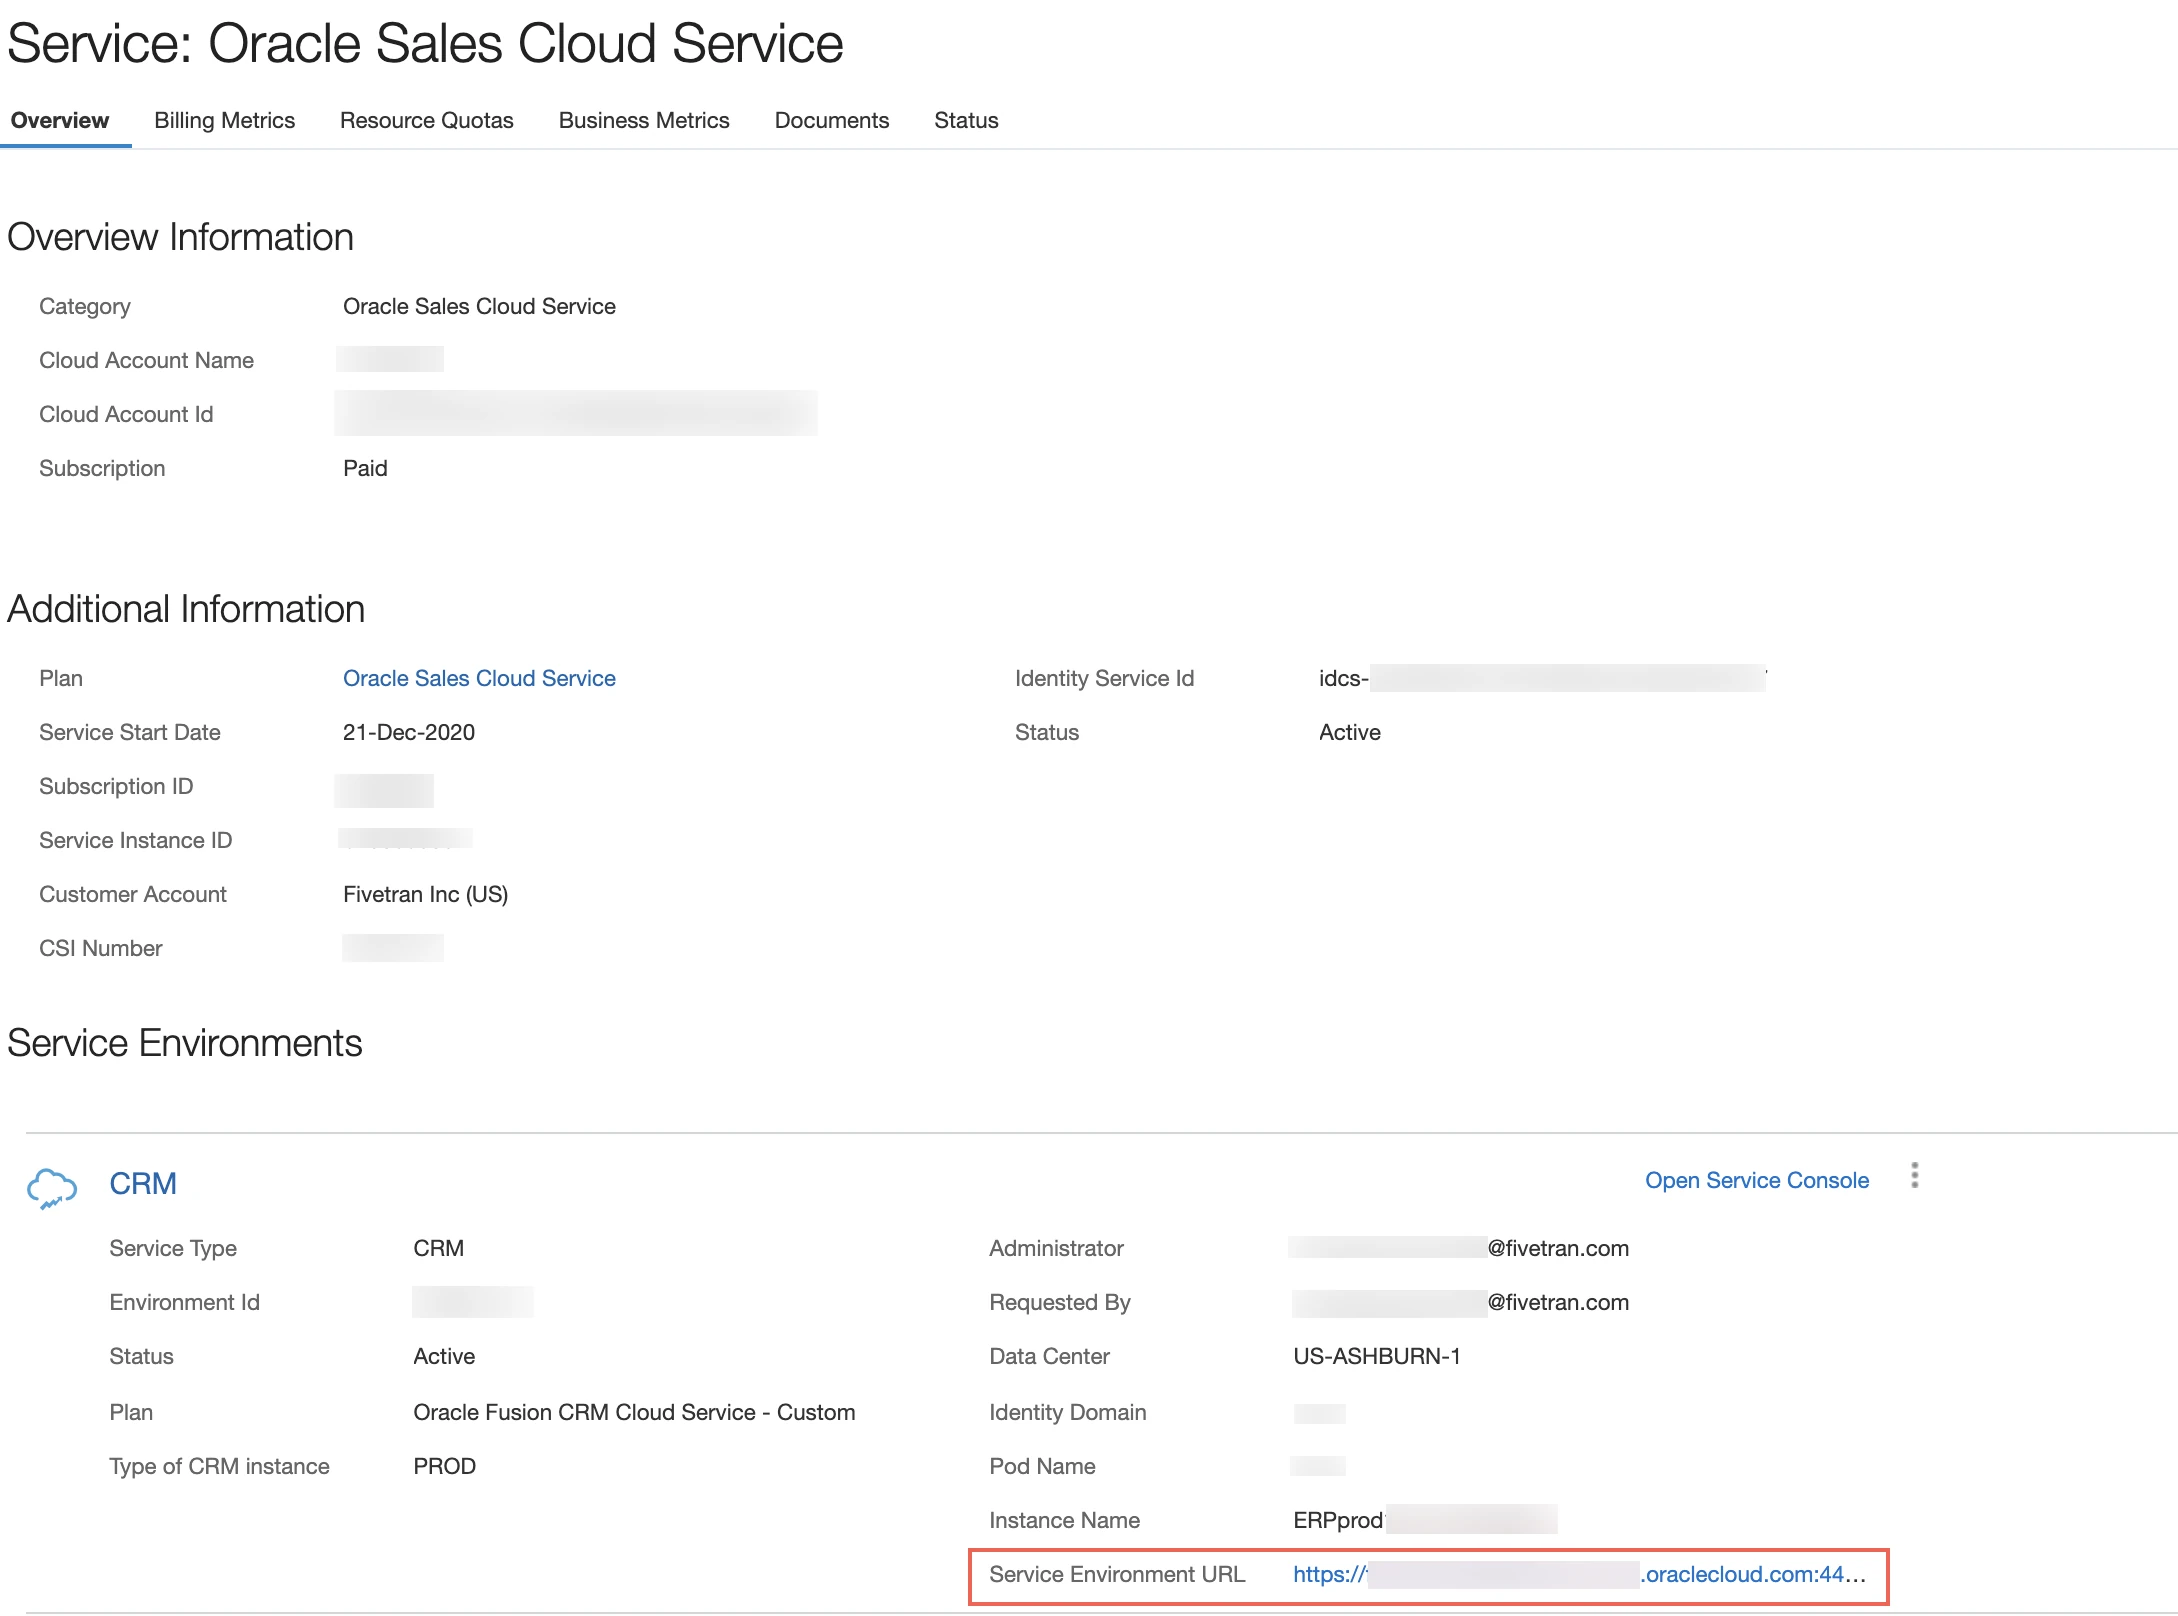
Create User
Expand for Basic Authentication Steps
Log in to the Oracle Fusion Cloud Application instance for which you want to sync the data.
You must have the Security Manager role to create a user.
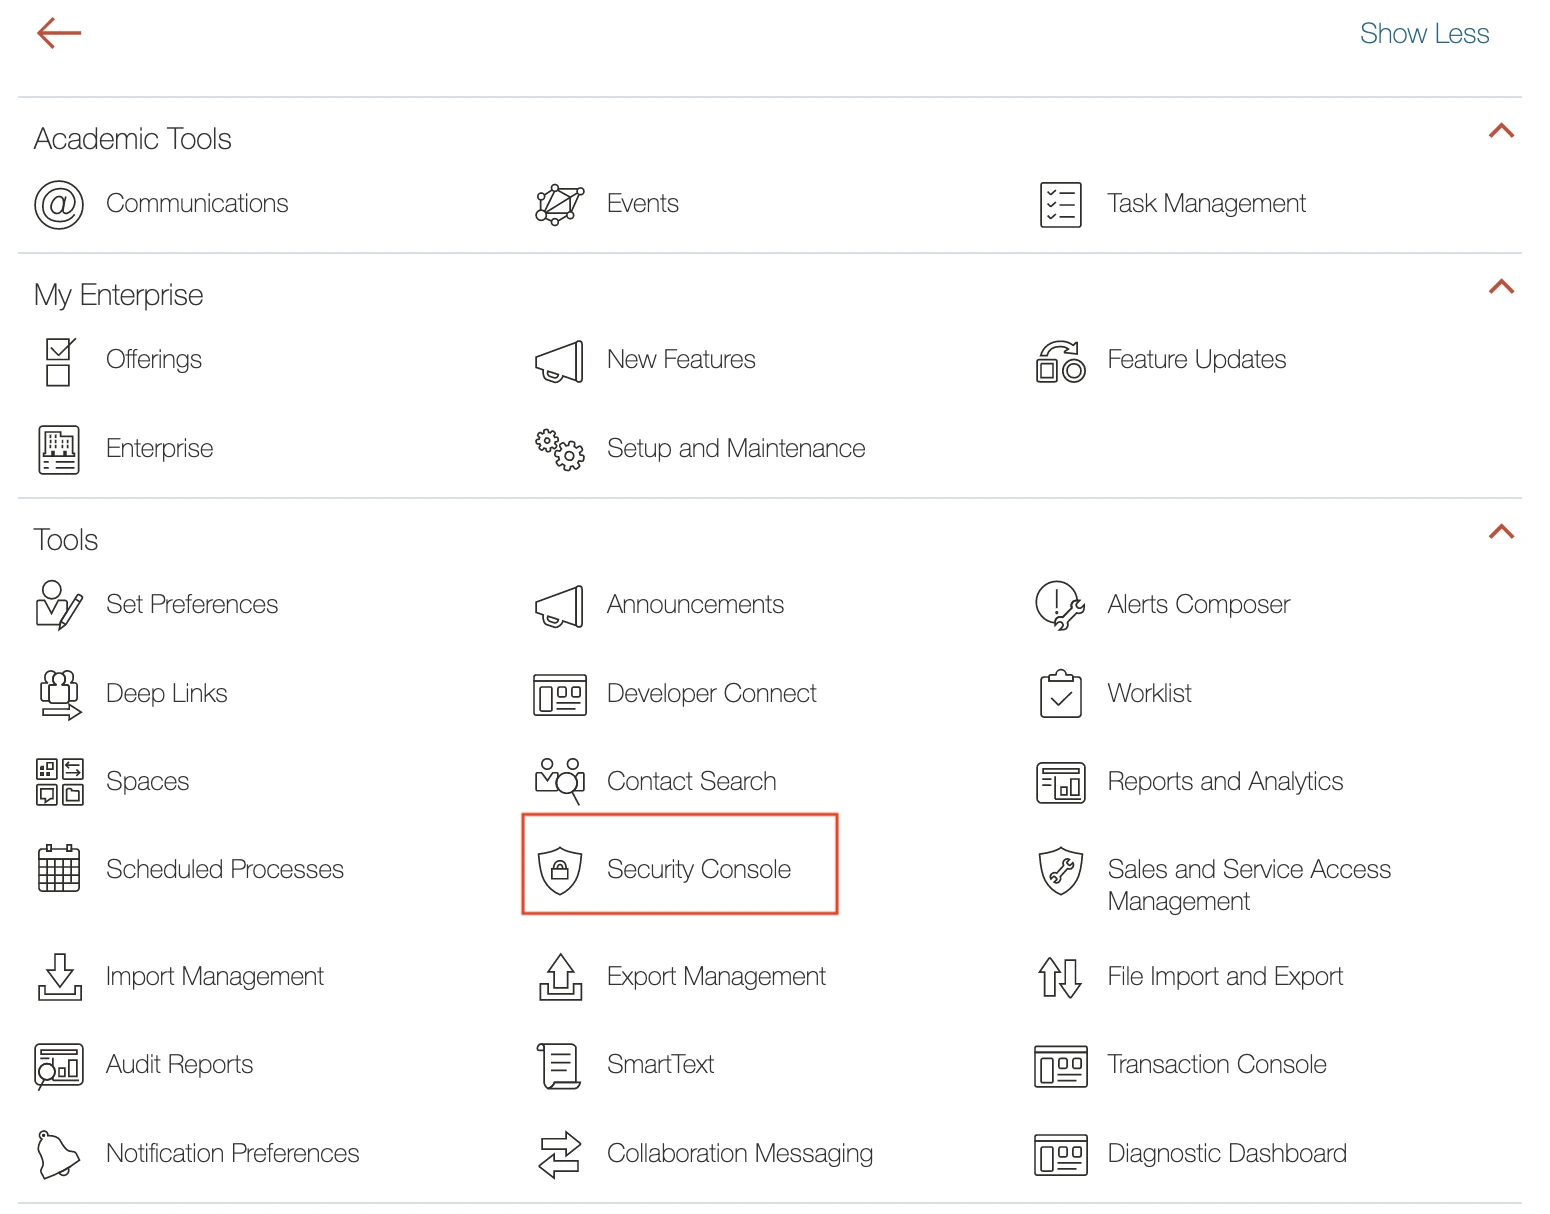
On the left-hand navigation pane, click Tools > Security Console.
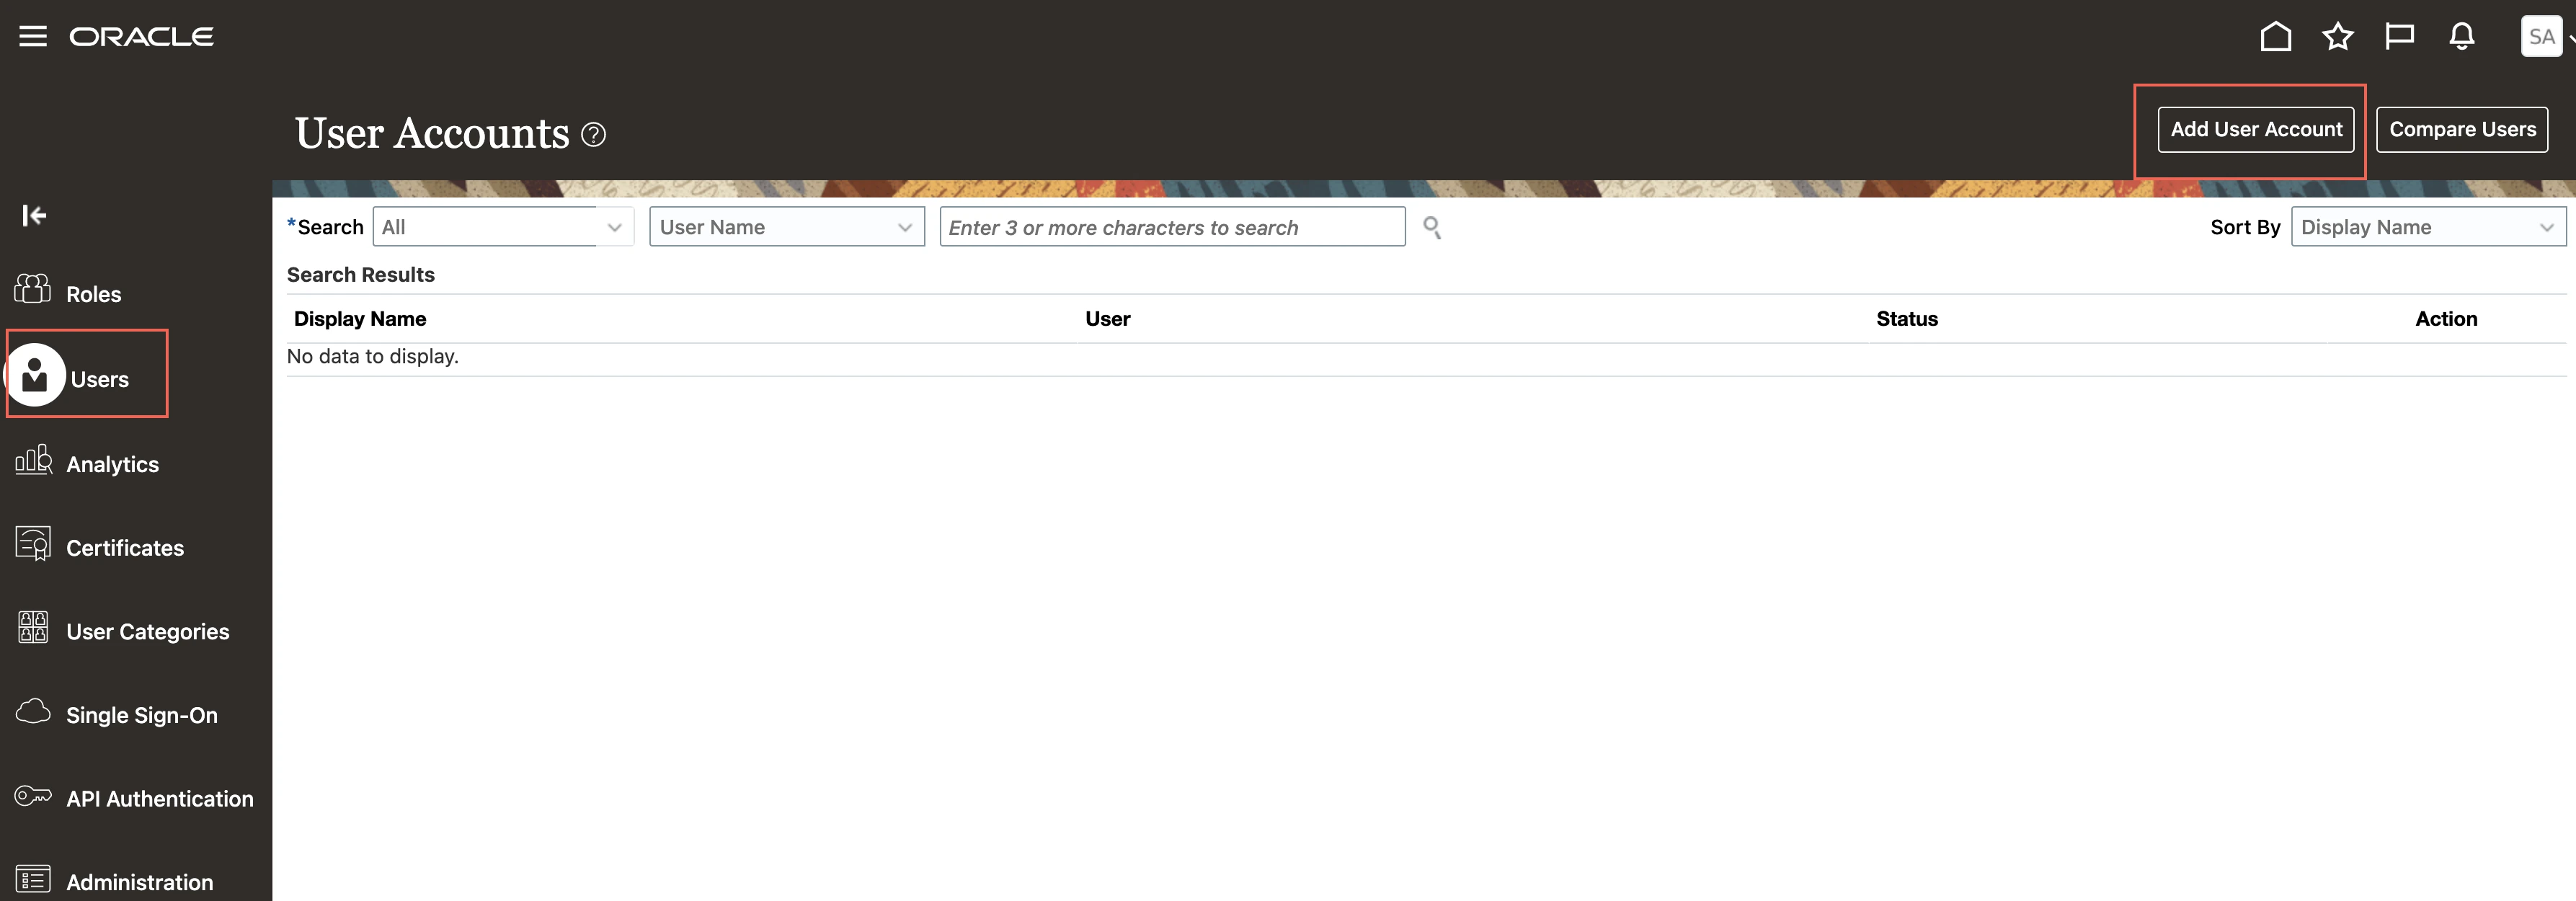
Go to the Users page and click Add User Account.
On the Add User Account page, enter the User details. Make a note of the User Name and Password. You will need them to configure Fivetran.
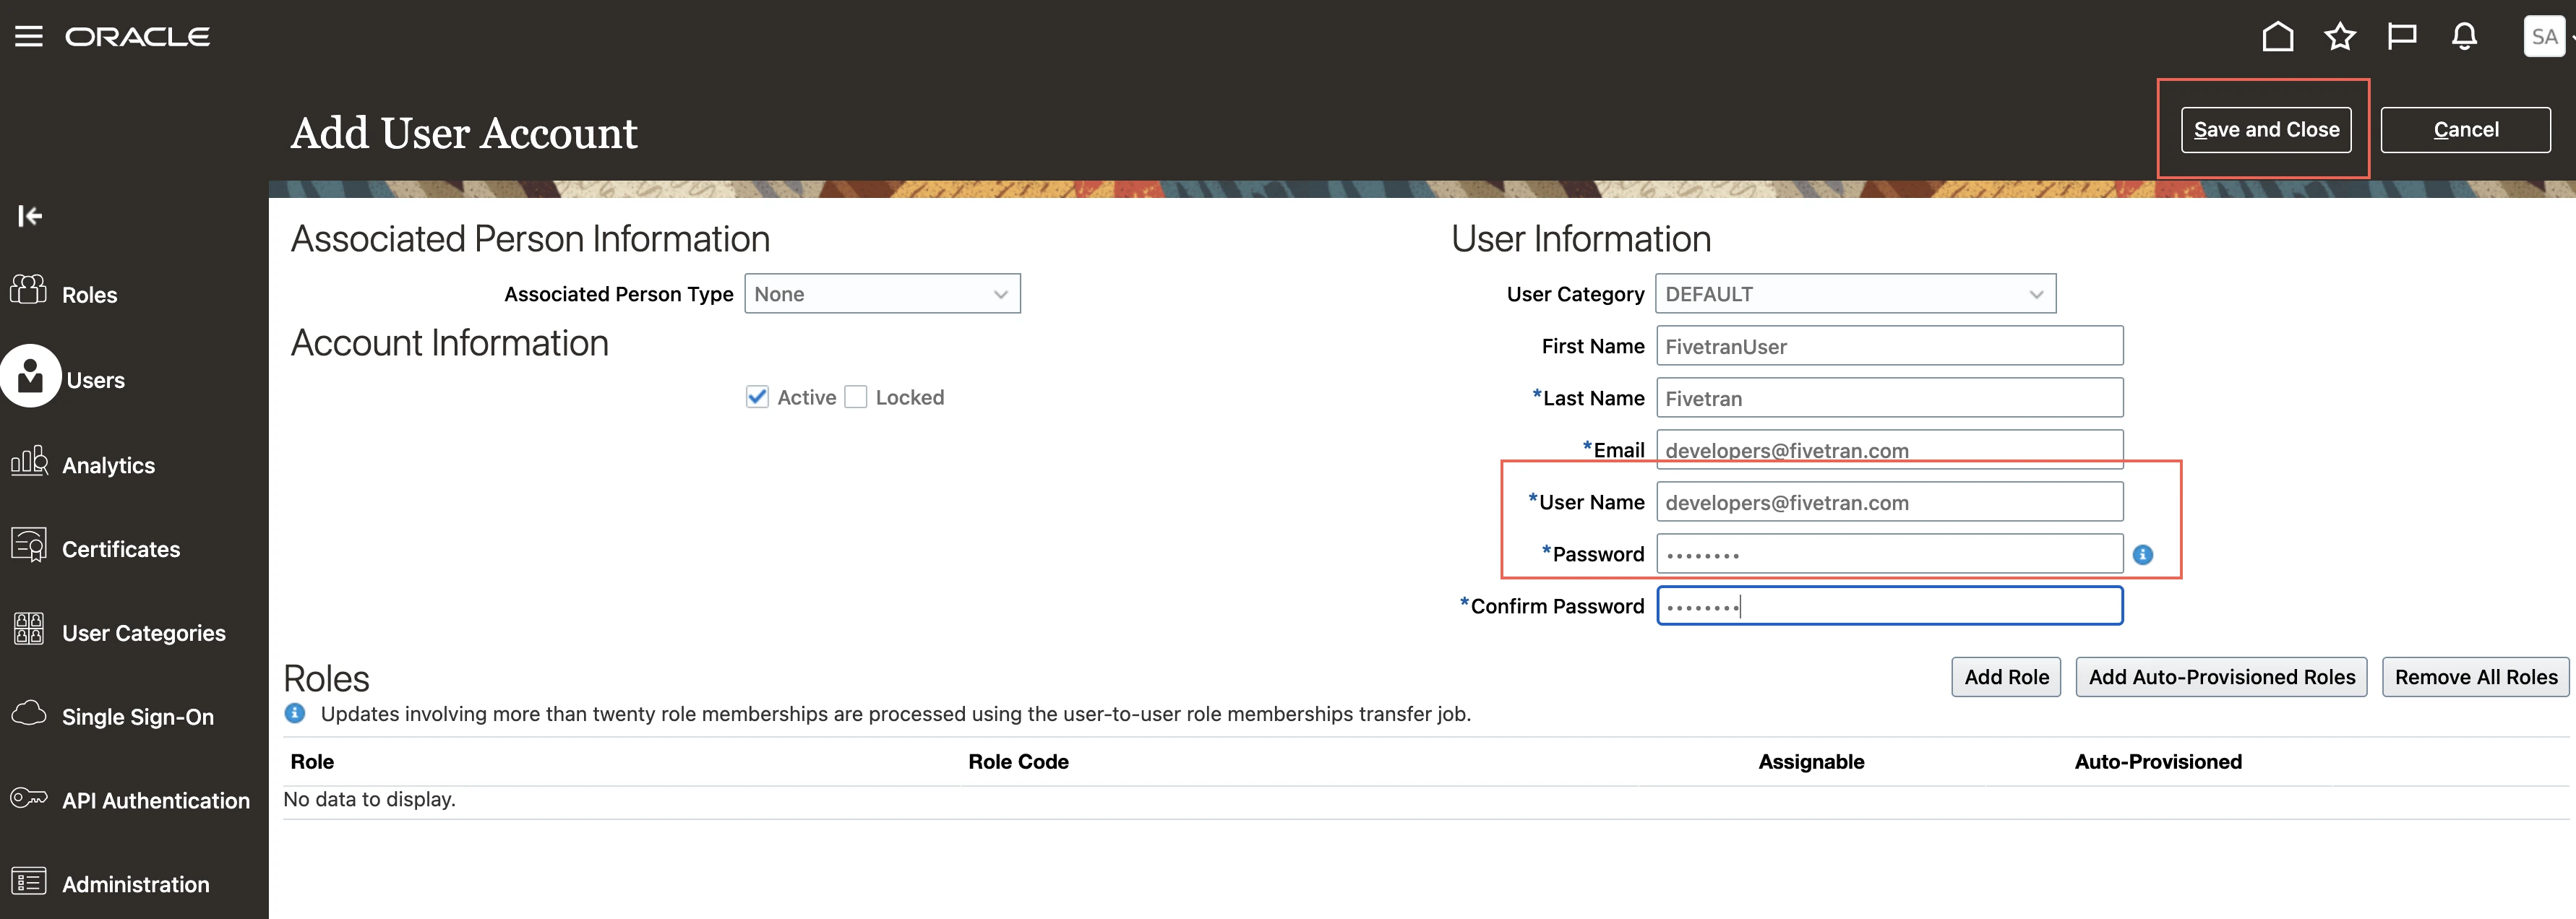
Click Save and Close.
Expand for JWT Authentication Steps
Open your terminal.
Generate a private key (private.key) using the following command. (Make sure you are using OpenSSL and not LibreSSL)
openssl genrsa 2048 | openssl pkcs8 -topk8 -out private.key -nocrypt
Using the created private key, create an X509 certificate (.cer file) containing the public key using the following command and fill in the required details.
openssl req -new -x509 -key private.key -out publickey.cer -days 365
Log in to the Oracle Fusion Cloud Application instance for which you want to sync the data.
You must have the Security Manager role to create a user.
On the left-hand navigation pane, click Tools > Security Console.
Go to the Users page and click Add User Account.
On the Add User Account page, enter the User details. Make a note of the User Name. You will need it to configure Fivetran.
Go to the API Authentication page and click Create Oracle API Authentication Provider.
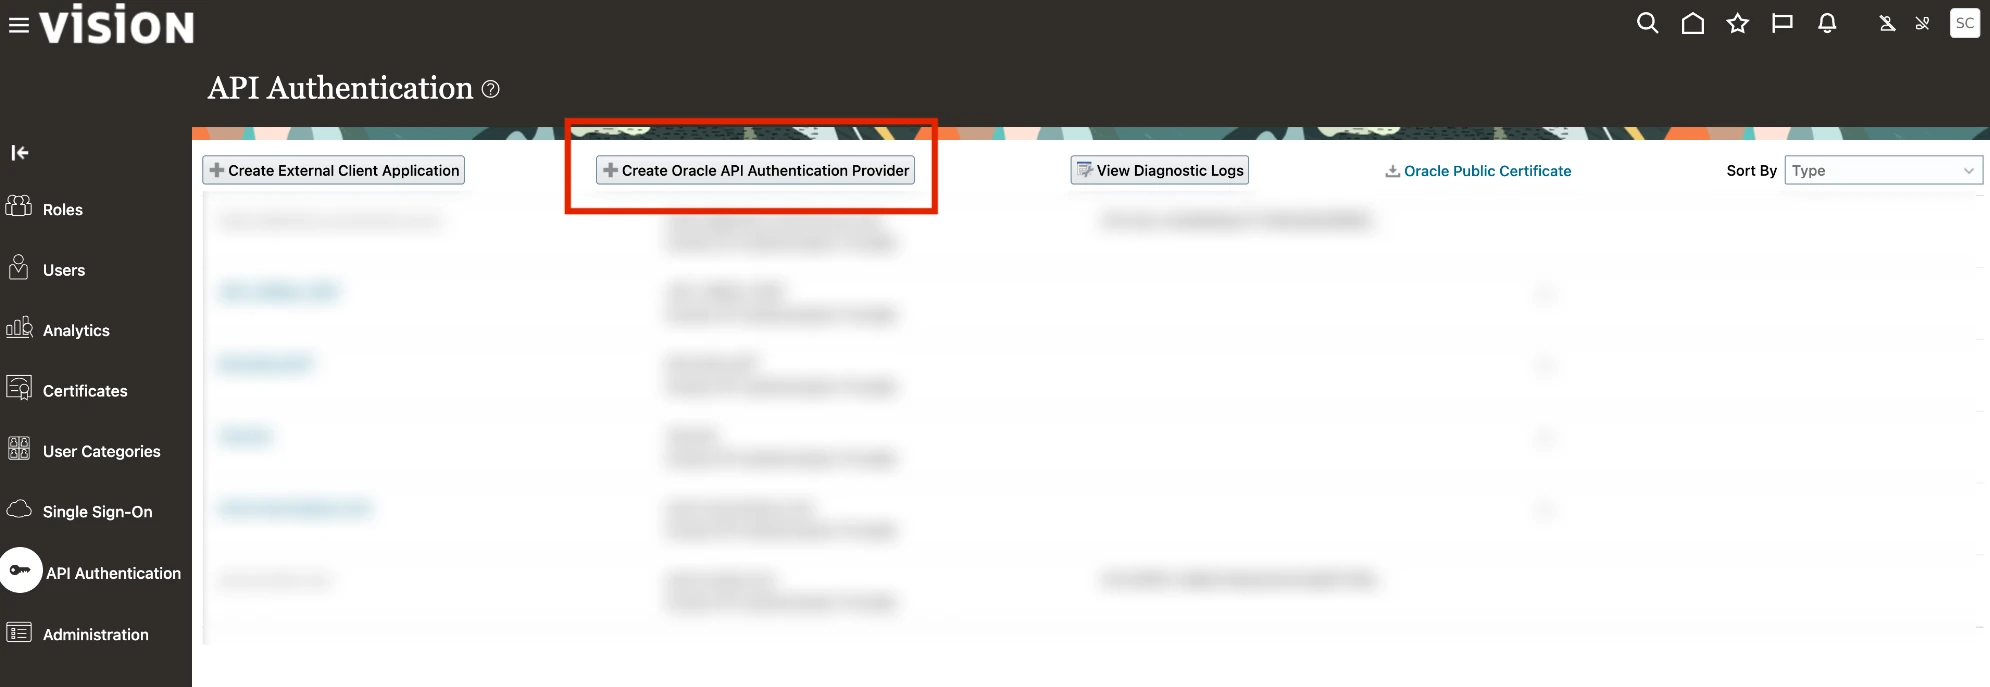
On the newly opened Oracle API Authentication Provider Details page, click Edit and enter the following information.

Field Name Values Trusted Issuer Issuer Name Token Type JWT Make a note of the Issuer Name. You will need it to configure Fivetran.
Click Save and Close.
Next Select the Inbound API Authentication Public Certificates from the left-hand menu.

Click on Add New Certificate and complete the Certificate Alias name.

Select Browse for the Import Public Certificate and navigate to the location of the publickey.cer file created in the earlier step.
Click Save.
Select Done which will return you to the API Authentication overview page.
Create BICC and UCM roles
Log in to the Oracle Fusion Cloud Application instance for which you want to sync the data.
You must have the Security Manager role to create a role.
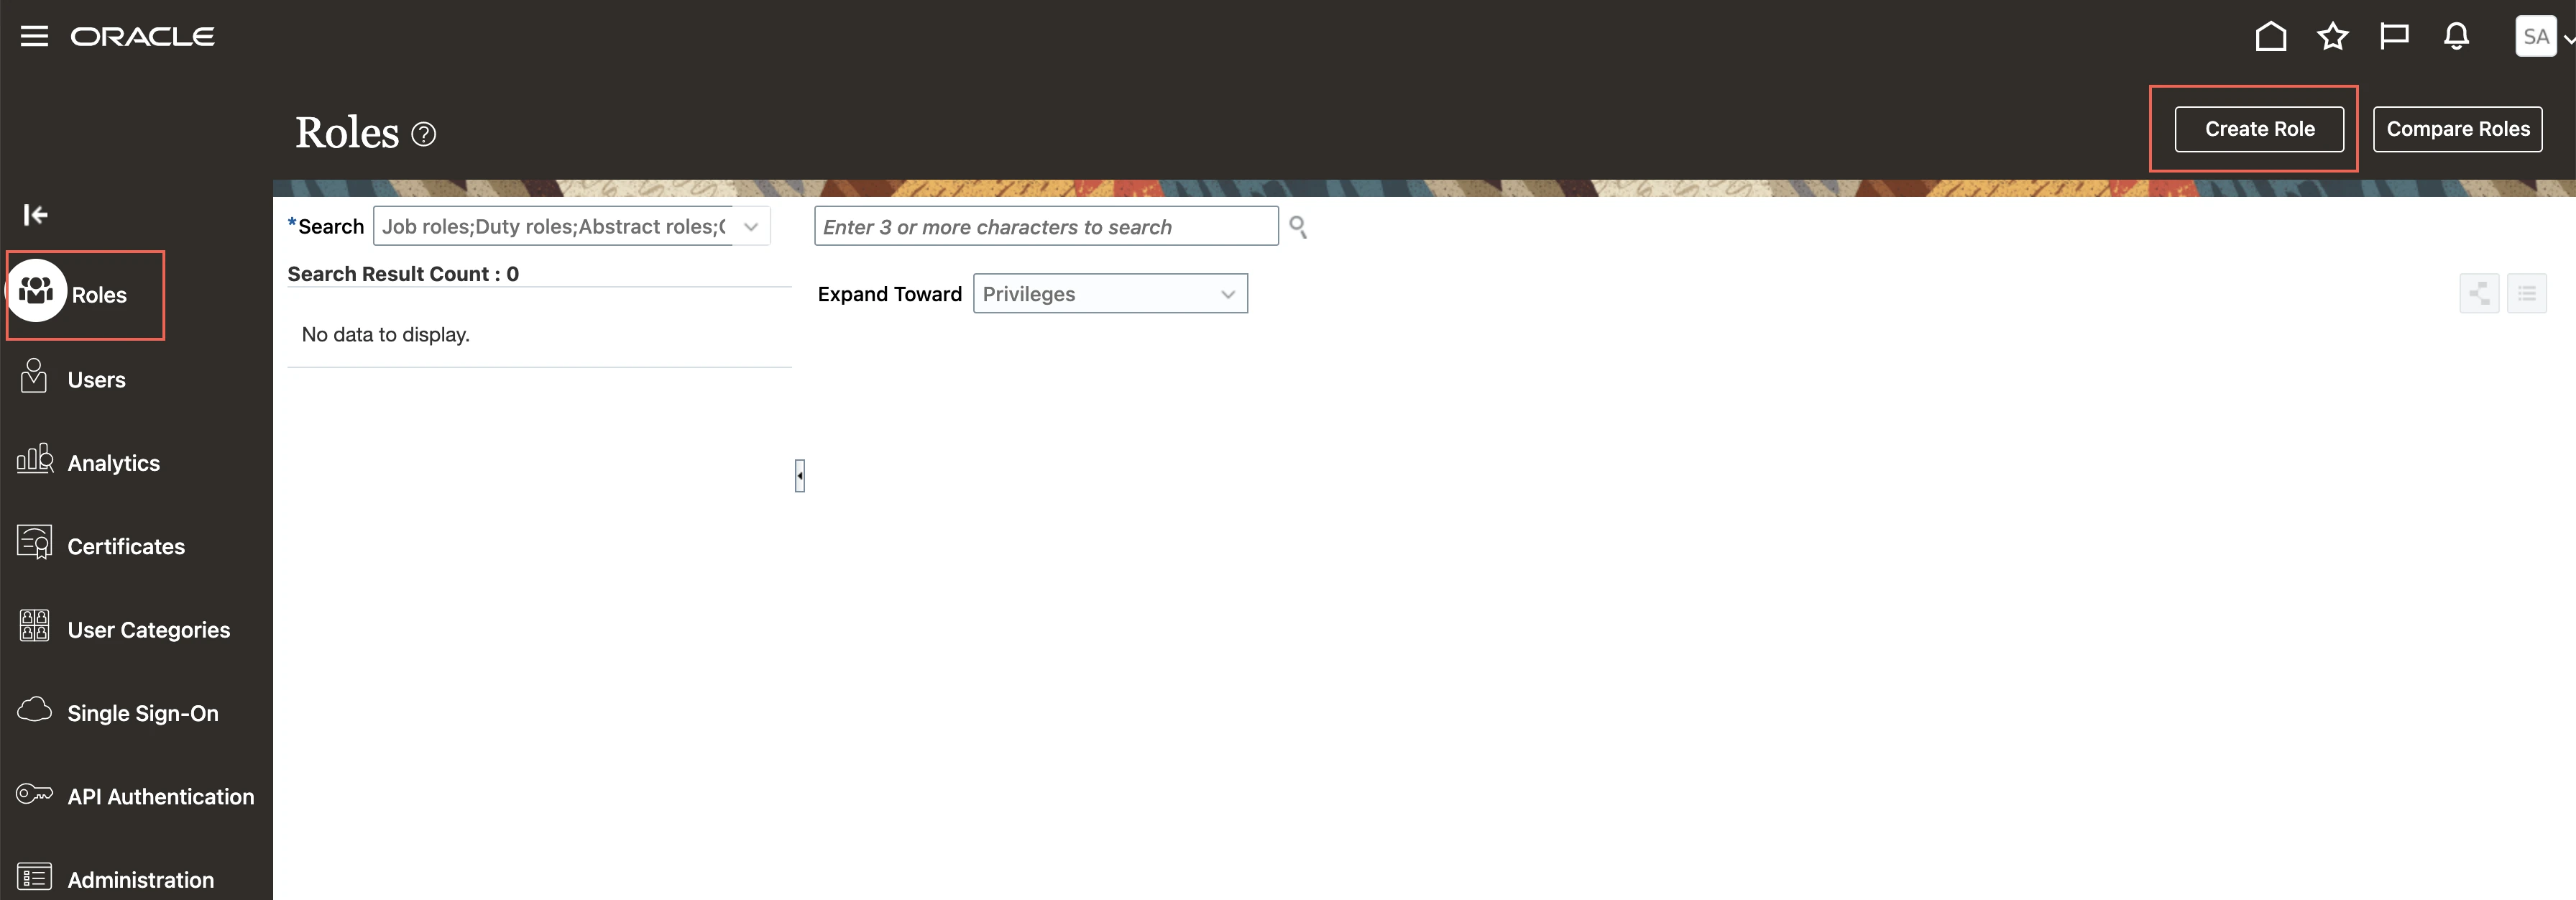
Go to Tools > Security Console.
Go to the Roles page and click Create Role.
On the Basic Information page, enter the following role details and click Next.
Field Name Values Role Name For example, BICC_FIVETRAN_ROLE, UCM_FIVETRAN_ROLE Role Code For example, BICC_ADMIN_FIVETRAN, UCM_ADMIN_FIVETRAN Role Category BI - Abstract Role Predefined Role Clear the checkbox Description (Optional) Description for the role On the Function Security Policies page, click Next.
On the Data Security Policies page, click Next.
On the Role Hierarchy page, click Add Role.
In the Add Role Membership dialog box, search for the following roles:
- ESS Administrator Role: To create and manage schedules for global data extracts or jobs
- BIA_ADMINISTRATOR_DUTY: To get job information, describe datastore, and perform other BICC related operations
- OBIA_EXTRACTTRANSFORMLOAD_RWD: To view and download extracted files from UCM
Click Add Role Membership.
Close the Add Role Membership dialog box and click Next.
On the Segregation of Duties page, click Next.
On the Users page, click Add User and enter the user you created in Step 2 and then click Next.
On the Summary page, review the details and then click Save and Close.
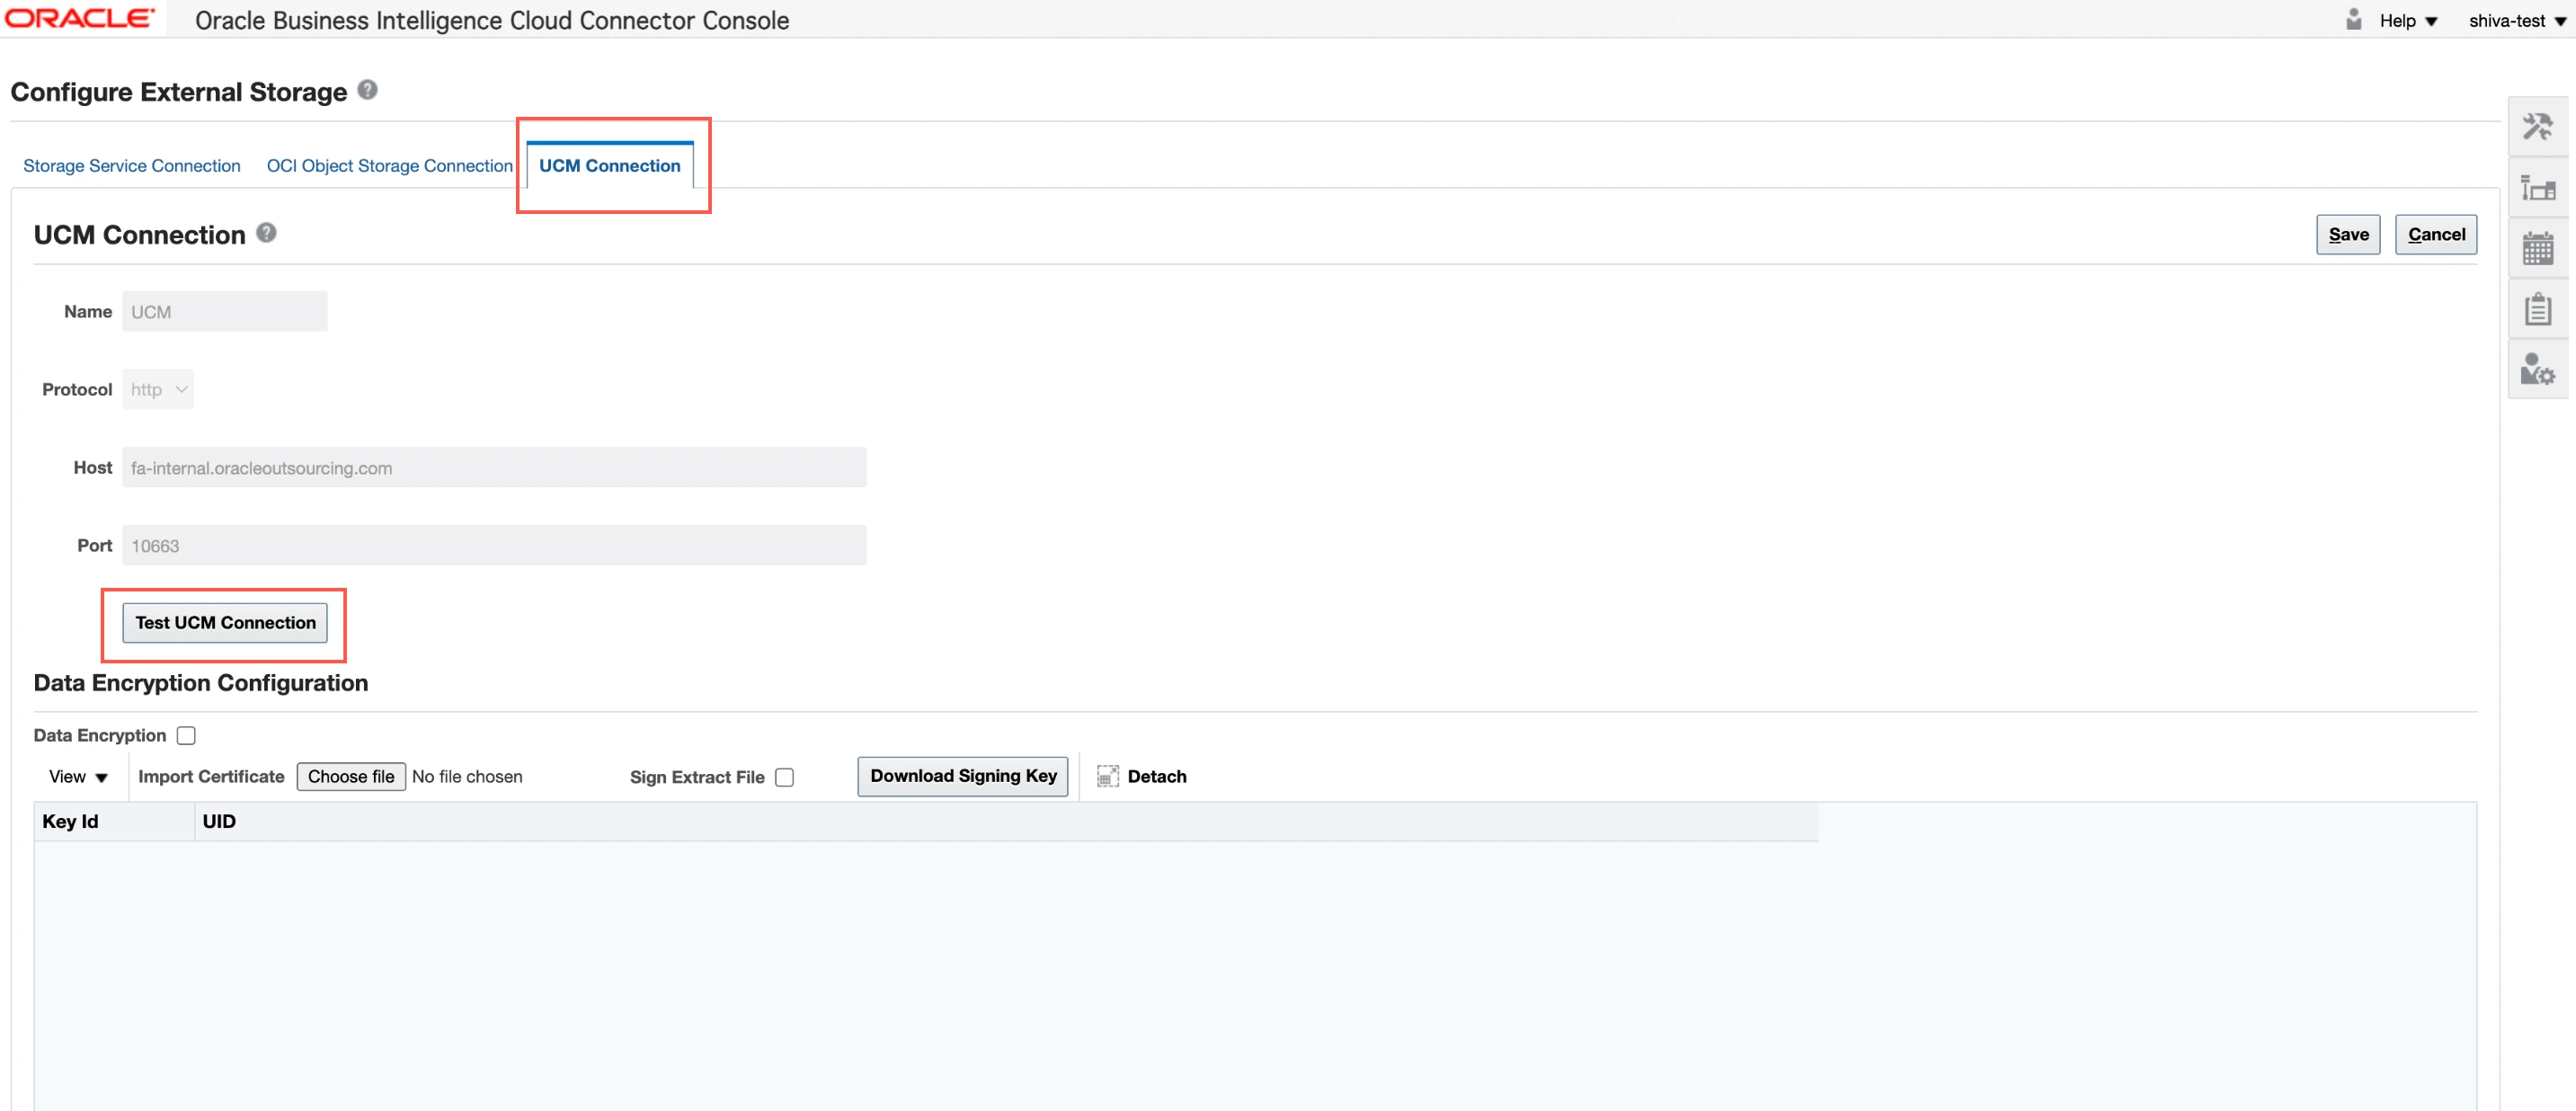
Configure UCM storage for BICC
Go to the BI Applications Configuration Manager URL. Use the Server URL you found in Step 1. For example, if the server URL is
https://my-oracle-fusion-cloud.oraclecloud.com, usehttps://my-oracle-fusion-cloud.oraclecloud.com/biacm.Log in using the User Name and Password you created in Step 2.
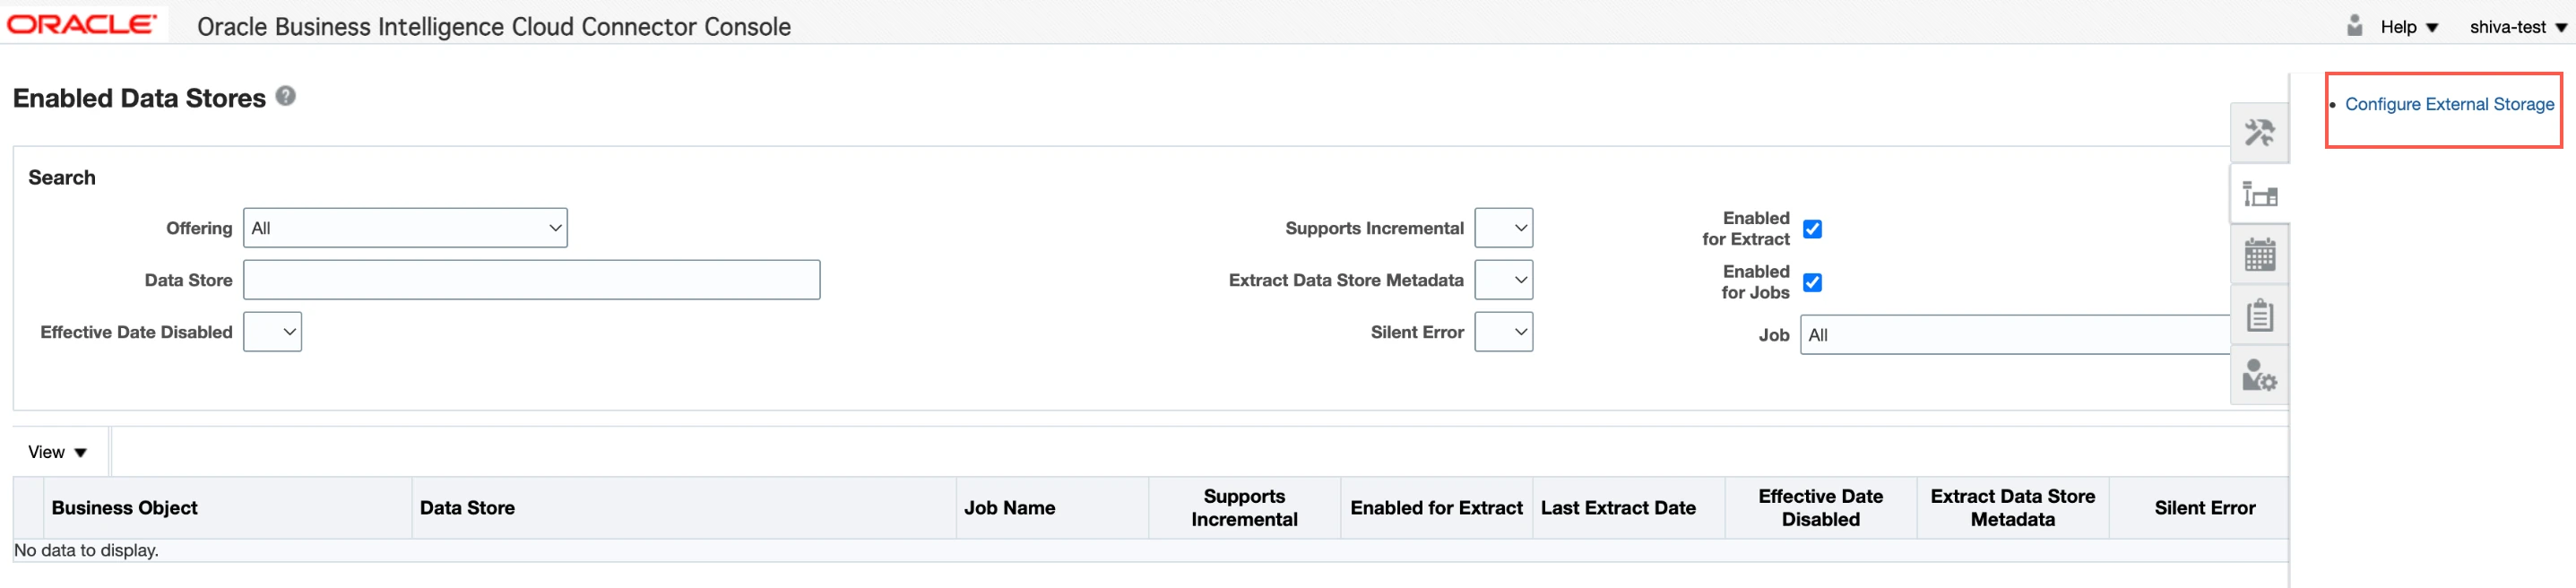
Click Configure External Storage
Go to UCM Connection tab and click Test UCM Connection. You should receive an External Storage Connection Succeeded message. Click OK
Select columns for extraction
Log in to BI Applications Configuration Manager URL using the Server URL you found in Step 1. For example, if the server URL is
https://my-oracle-fusion-cloud.oraclecloud.com, usehttps://my-oracle-fusion-cloud.oraclecloud.com/biacm.Log in using the User Name and Password you created in Step 2.
Click Manage Offerings and Data Stores.
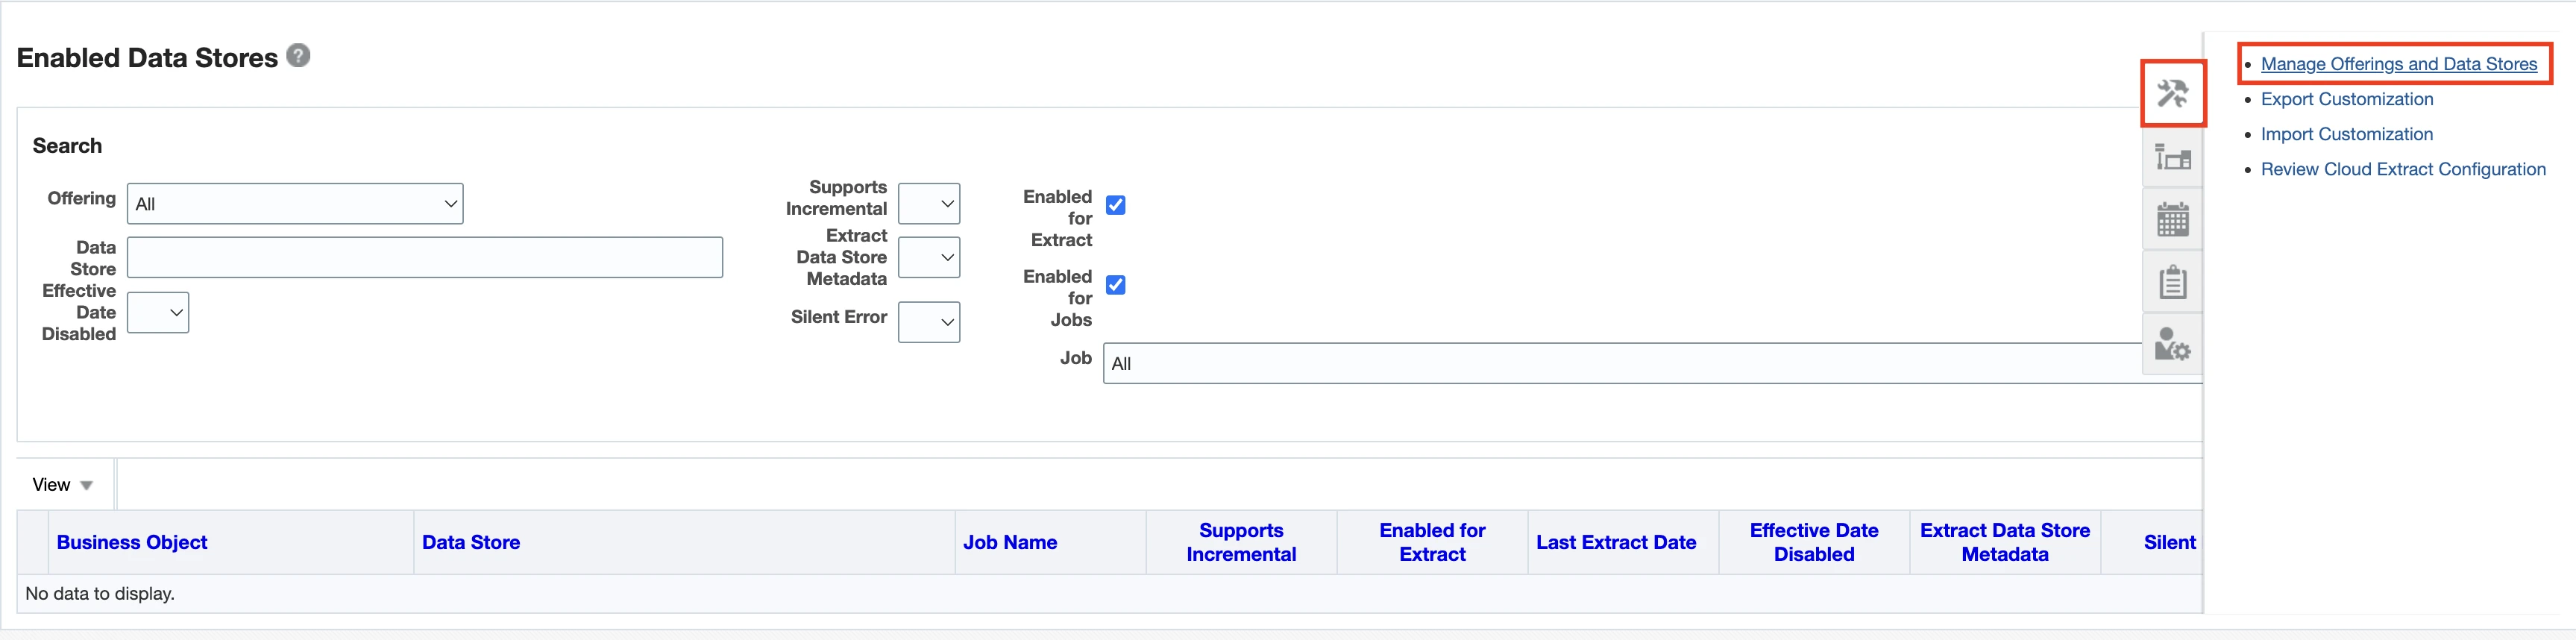
Go to the offering associated with the custom objects.
Select your custom data store.
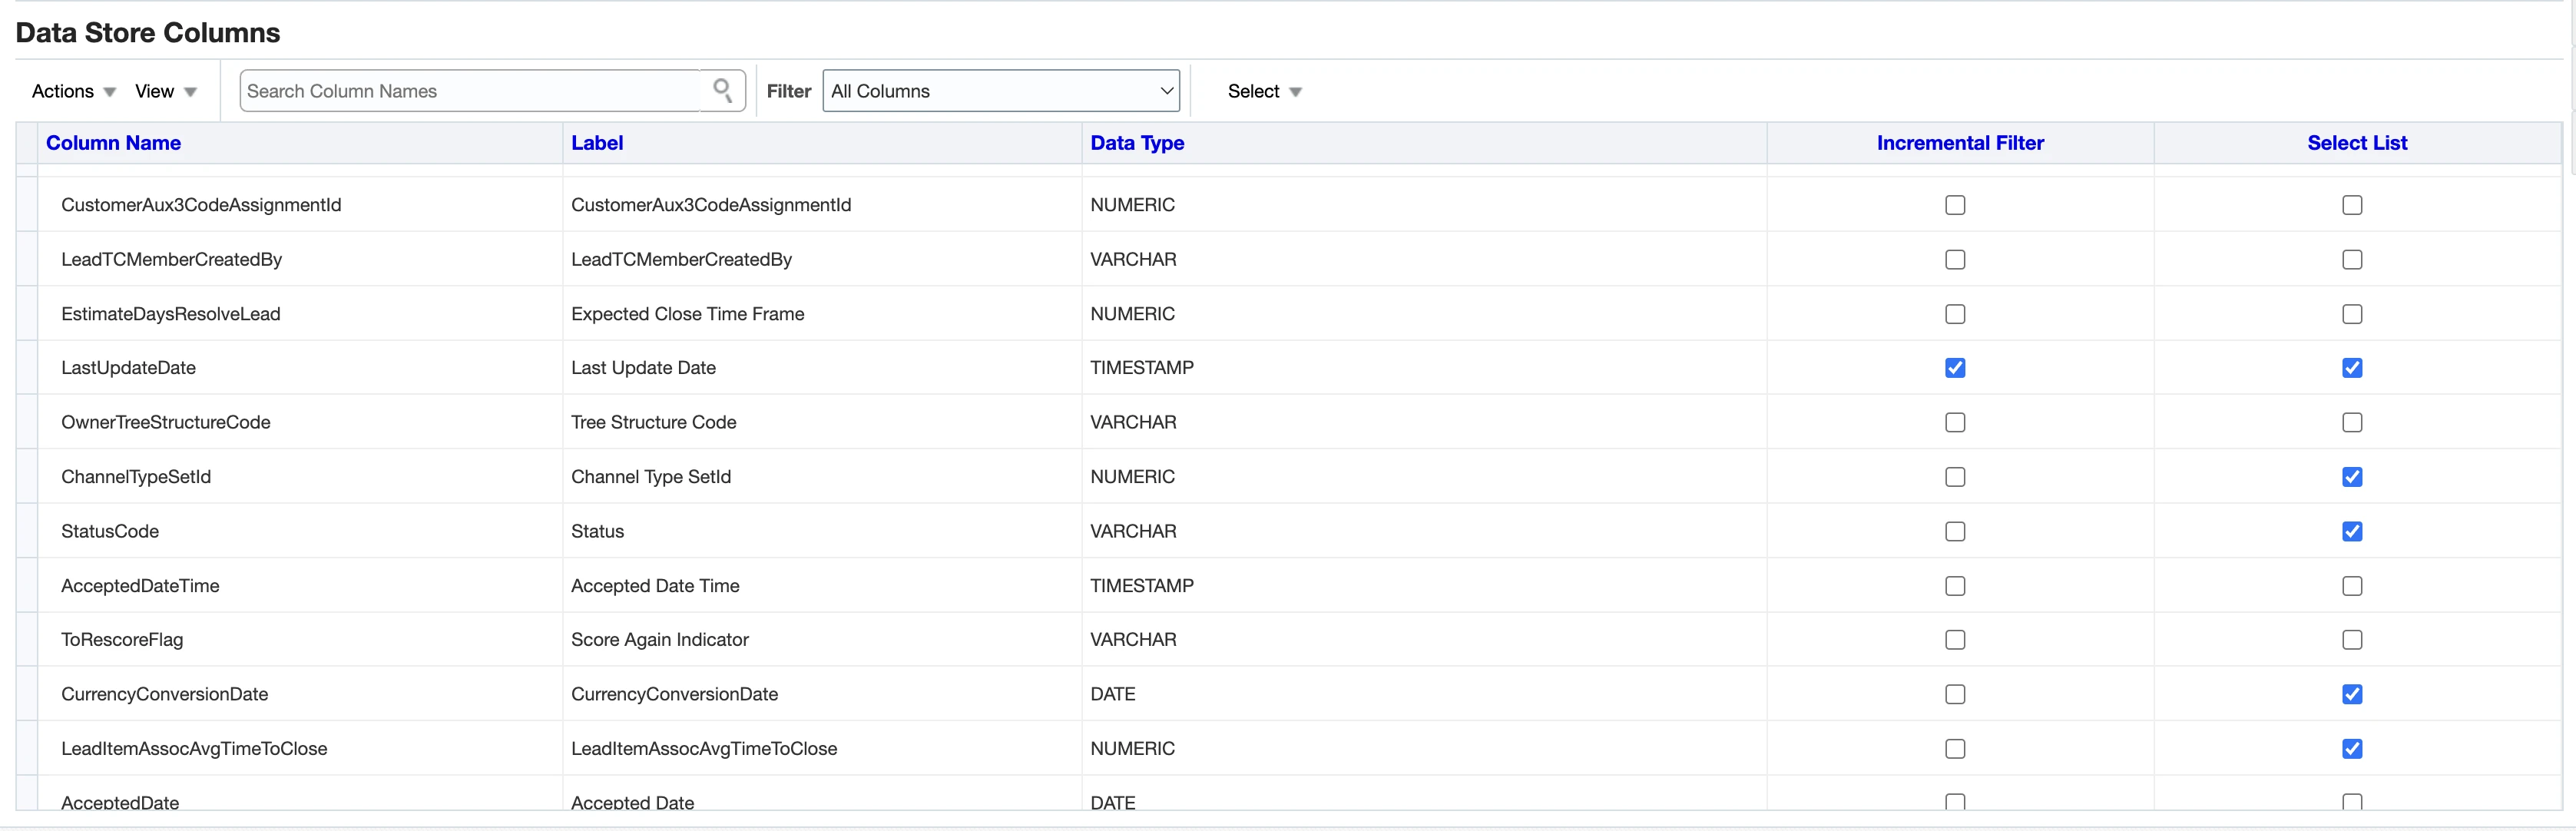
Go to the Edit Columns tab.
Select the checkbox in the Select List column for all the columns you want to sync.
We sync only the columns for which you select the checkbox in the Select List column.
Click Save.
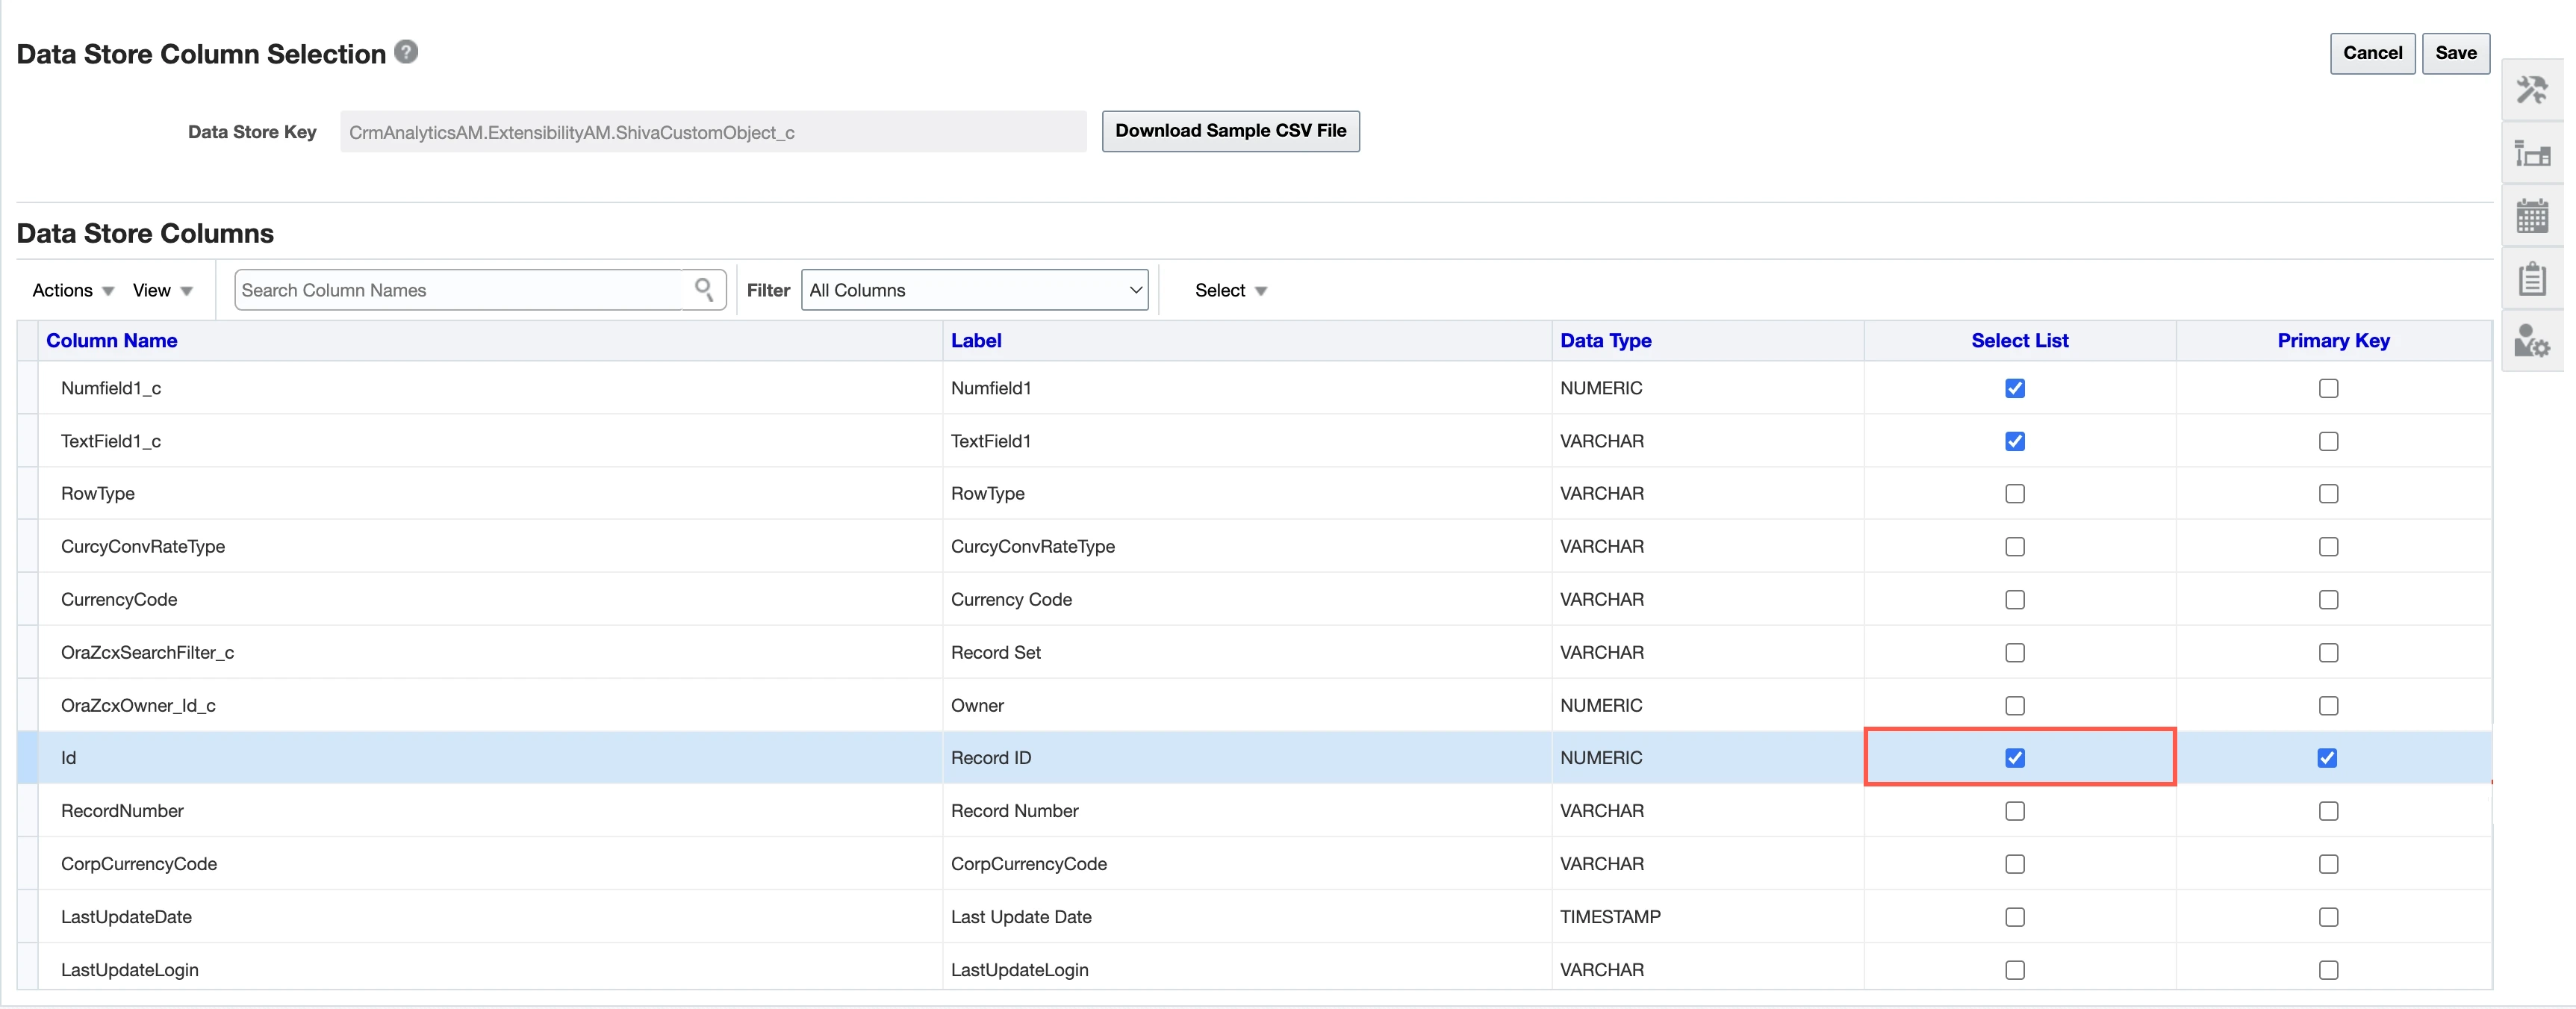
(Optional) Select primary keys for custom objects
We exclude tables without a defined primary key from the syncs.
In the Data Store Column Selection page, select the Primary Key columns.
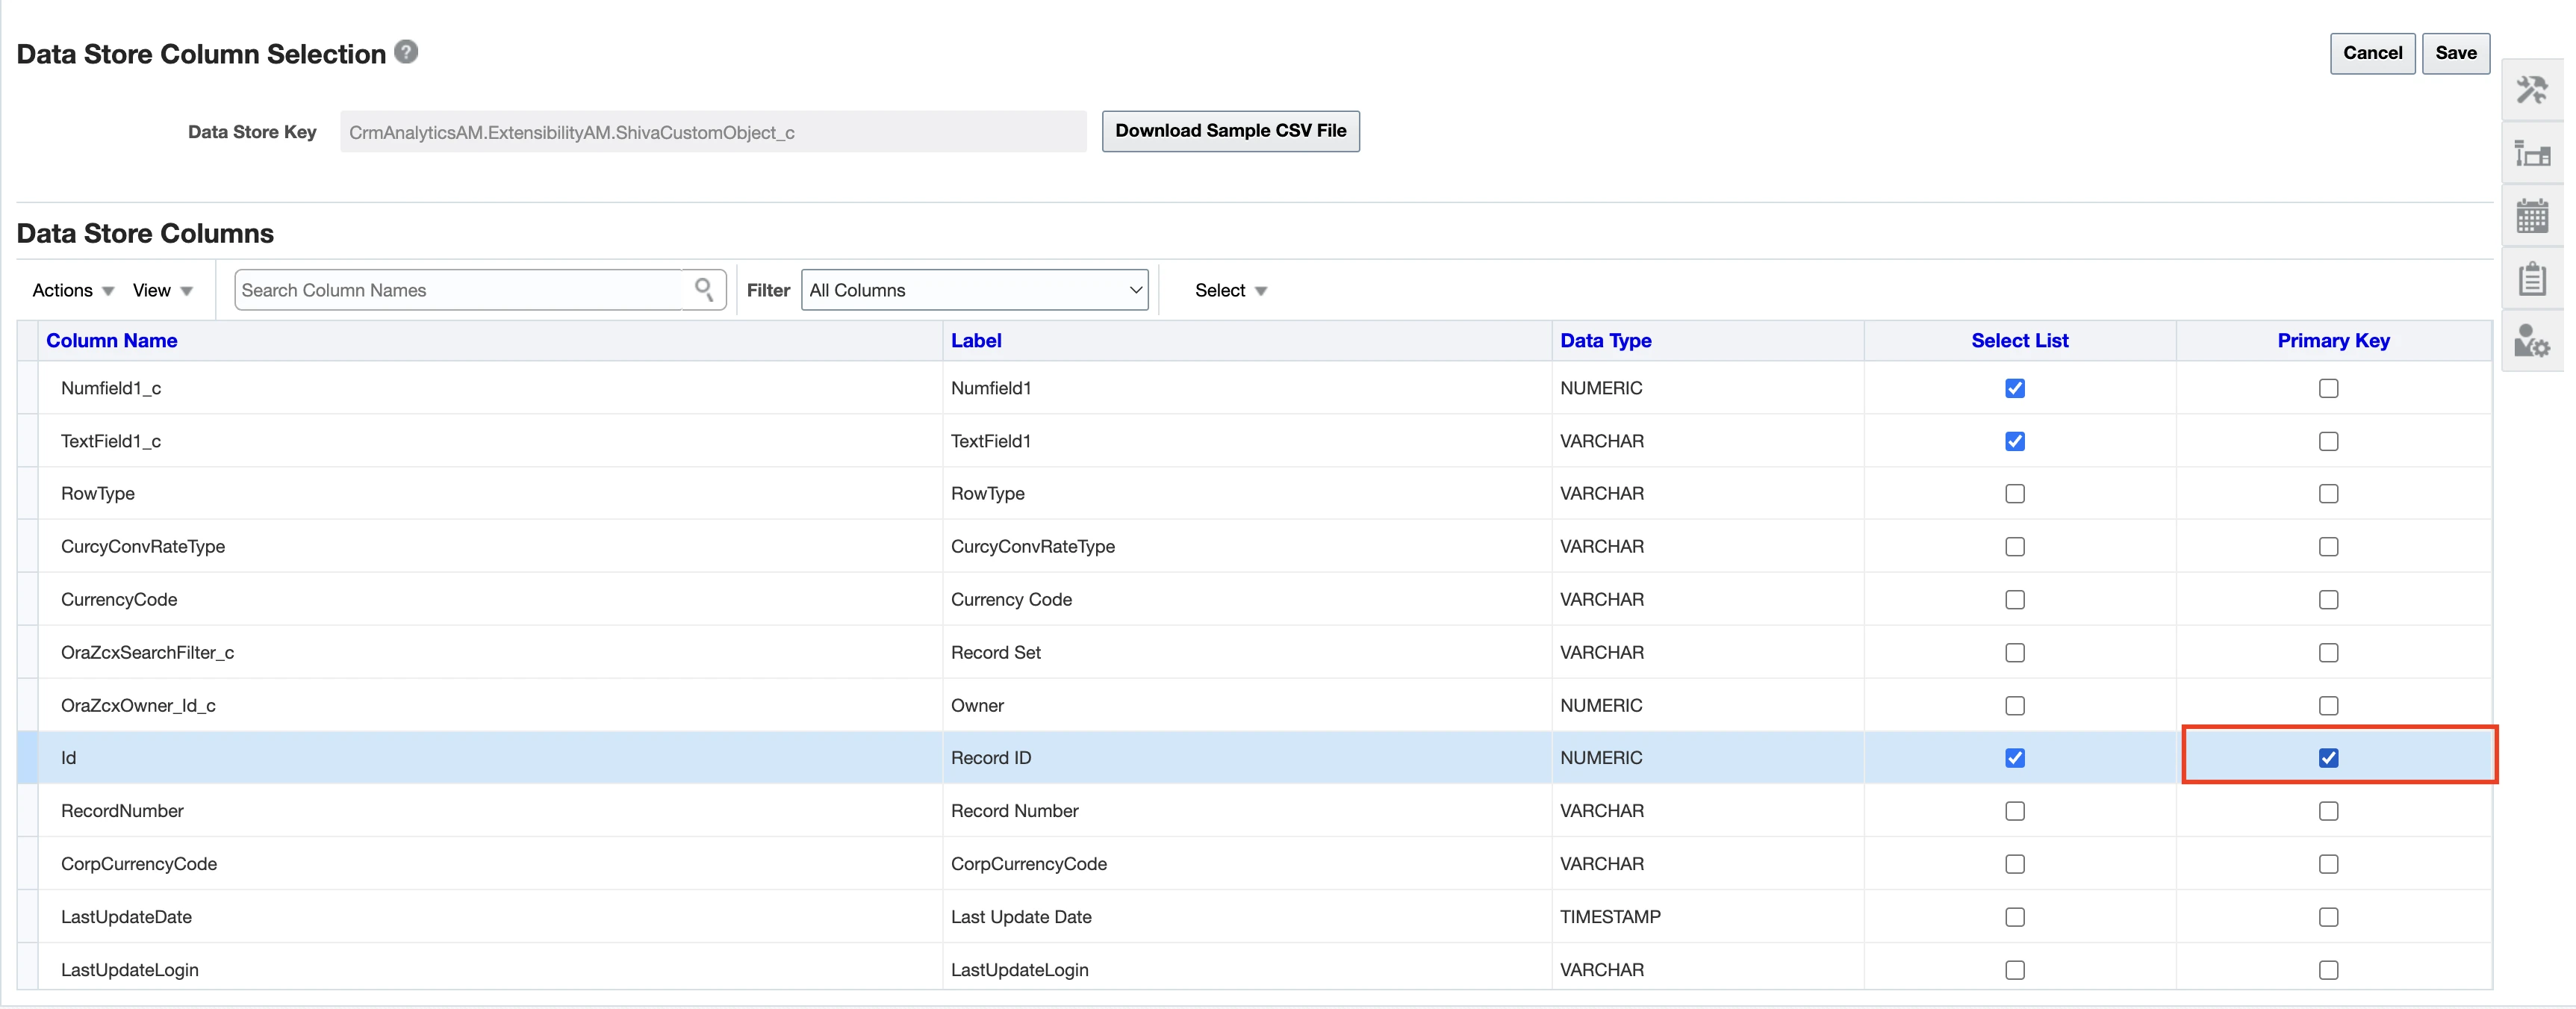
Click Save.
(Optional) Add custom object to an offering
We exclude tables from the syncs if they are not part of an offering.
To add a datastore for an offering, see Oracle's documentation.
(Optional) Configure incremental filters
To configure incremental filters:
Follow steps 1-6 as described in the Select primary keys for custom objects section.
Make sure to check both the Incremental Filter and Select List checkboxes for the columns that you want to be incremental. Also, make sure that these columns have the TIMESTAMP data type.
Click Save.
Finish Fivetran configuration
Expand for Basic Authentication Steps
- In the connection setup form, enter a Destination schema prefix.
The prefix applies to each replicated schema and cannot be changed once your connection is created.
(Hybrid Deployment only) If your destination is configured for Hybrid Deployment, the Hybrid Deployment Agent associated with your destination is pre-selected for the connection. To assign a different agent, click Replace agent, select the agent you want to use, and click Use Agent.
- Enter the Server URL that you found in Step 1.
The Server URL must follow the
https://<instance_name>.oraclecloud.comformat. - Enter the User Name and for the user you created in Step 2.
- Select the Authentication Method as Use Basic Authentication
- Enter the Password for the user you created in Step 2.
- (Optional) In the Delete Capture Frequency drop-down menu, select the frequency for capturing deletes.
- Click Save & Test. Fivetran will take it from here and sync your data from your Oracle Fusion Cloud applications.
Expand for JWT Authentication Steps
- In the connection setup form, enter a Destination schema prefix.
The prefix applies to each replicated schema and cannot be changed once your connection is created.
(Hybrid Deployment only) If your destination is configured for Hybrid Deployment, the Hybrid Deployment Agent associated with your destination is pre-selected for the connection. To assign a different agent, click Replace agent, select the agent you want to use, and click Use Agent.
- Enter the Server URL that you found in Step 1.
The Server URL must follow the
https://<instance_name>.oraclecloud.comformat. - Enter the User Name and for the user you created in Step 2.
- Select the Authentication Method as Use JWT Authentication.
- Enter the Issuer you created in Step 2.
- Upload the private.key you created in Step 2.
- Upload the publickey.cer you created in Step 2.
- (Optional) In the Delete Capture Frequency drop-down menu, select the frequency for capturing deletes.
- Click Save & Test. Fivetran will take it from here and sync your data from your Oracle Fusion Cloud applications.