Data Extensions in Salesforce Marketing Cloud link
Follow our setup guide to connect your Salesforce Marketing Cloud data extensions to Fivetran. We use our SFTP connector to sync the data extensions.
Prerequisiteslink
To connect the Salesforce Marketing Cloud data extensions to Fivetran, you need the following:
- A Salesforce Marketing Cloud account with Administrator or Marketing Cloud Administrator role
- The following business rules must be enabled for the Salesforce Marketing Cloud account:
- DATA_EXTRACT_ACTIVITY
- EnhancedFTP
- FILE_TRANSFER_LOCATIONS
NOTE: Contact Salesforce support to enable the business rules for your account.
Setup instructionslink
Create FTP userlink
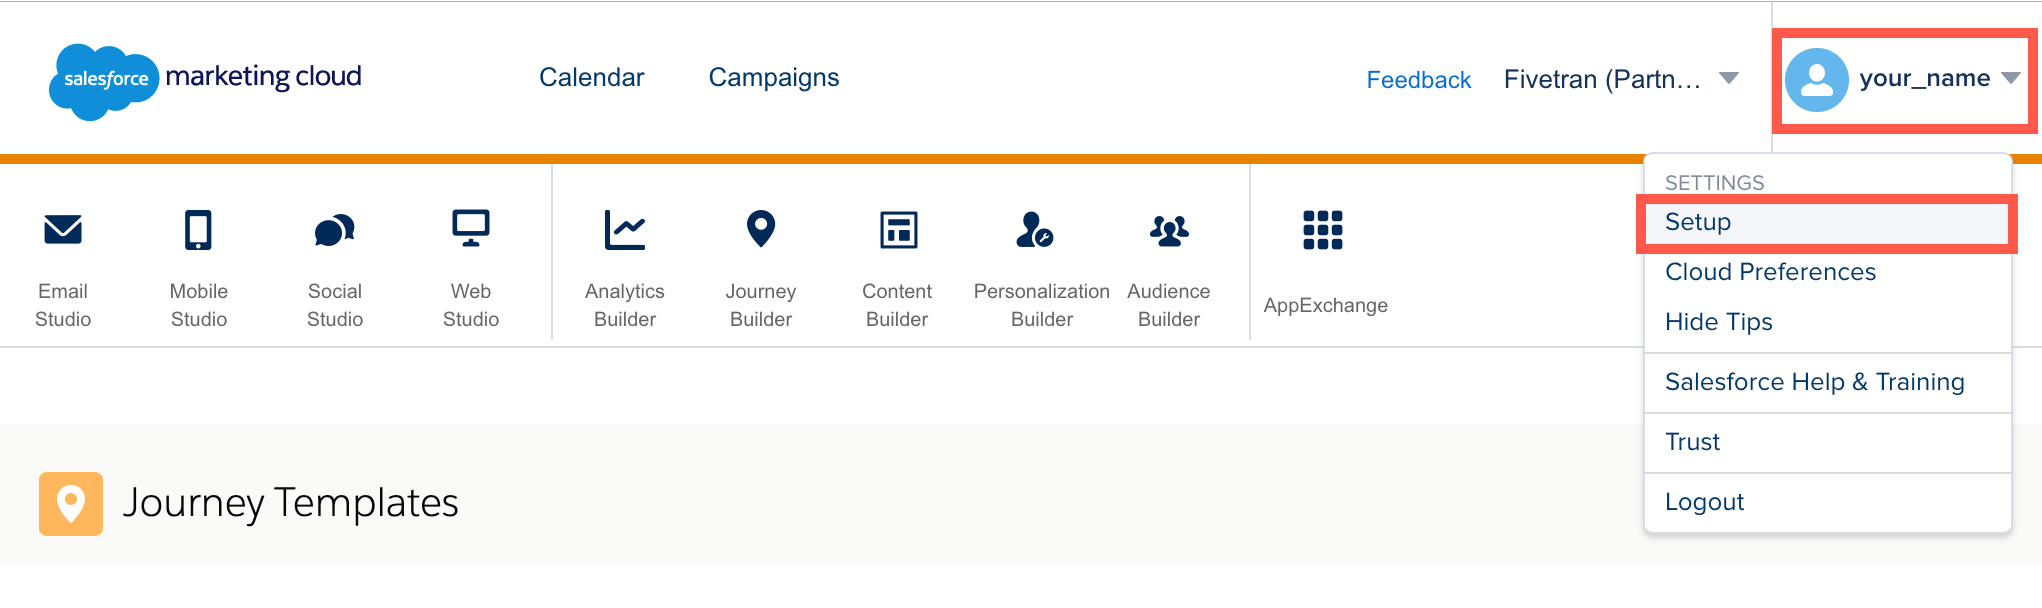
Log in to your Salesforce Marketing Cloud account.
In the top-right corner, click your username, and then select Setup.
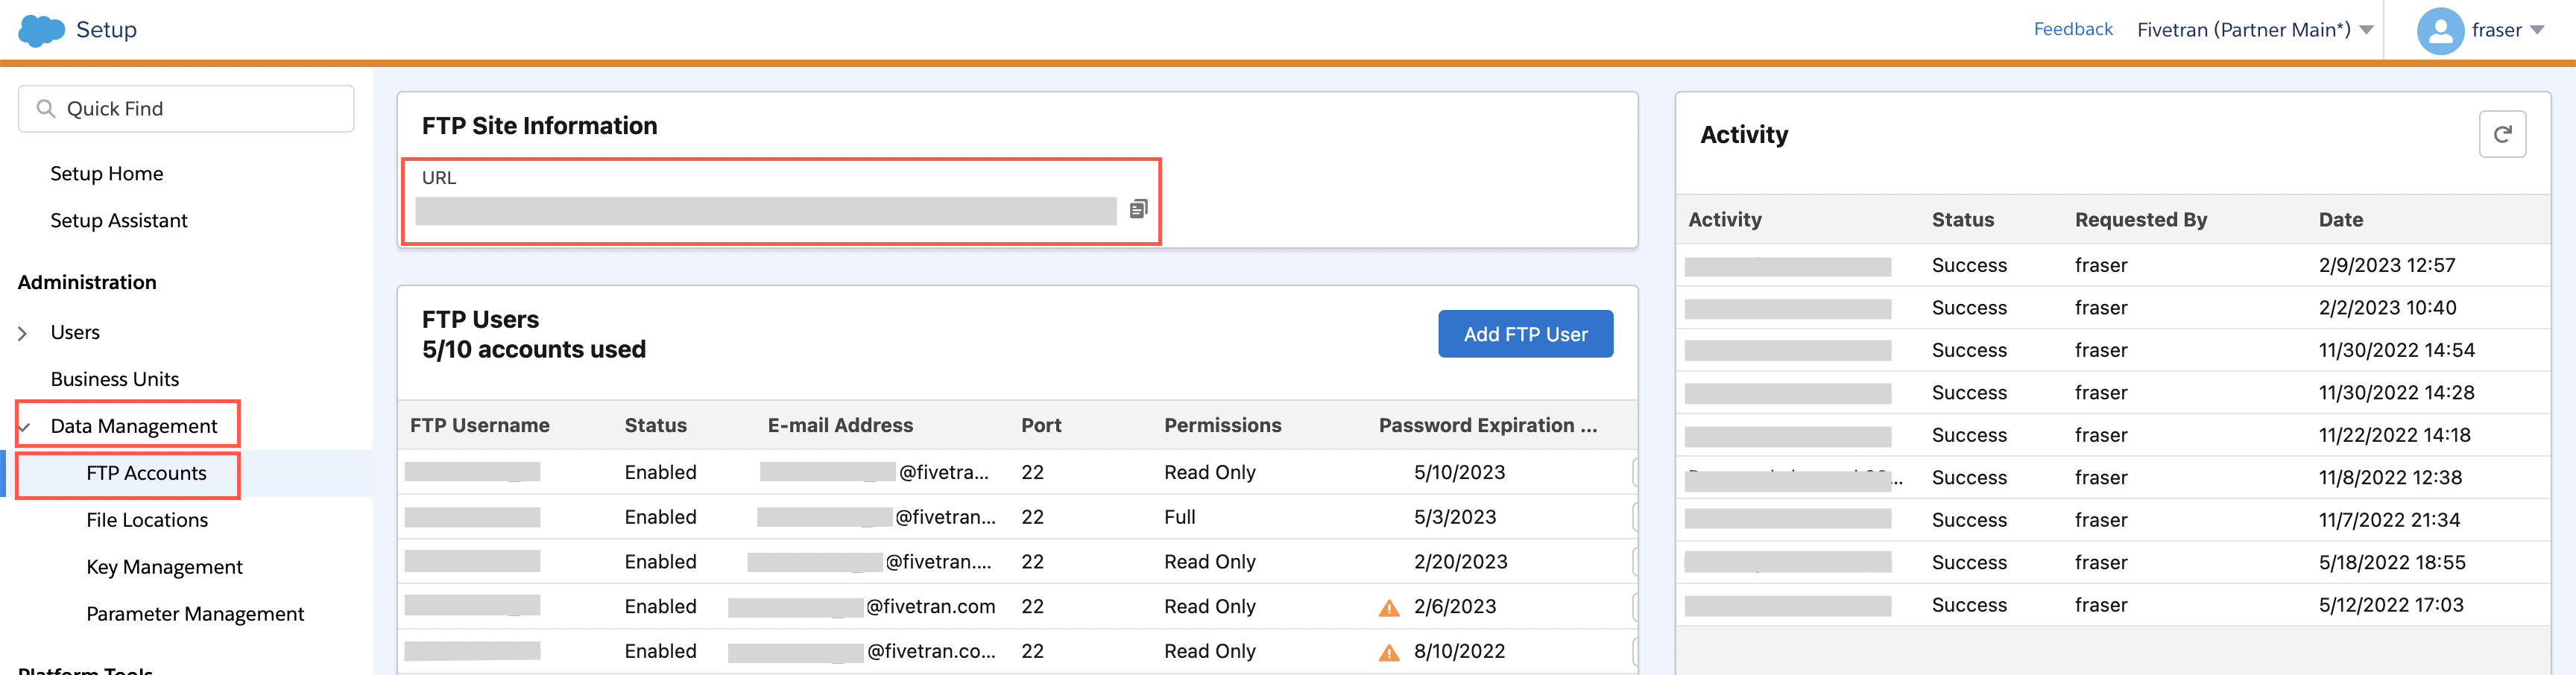
In the navigation menu, go to Data Management > FTP Accounts.
Make a note of the host URL that appears in the FTP Site Information section. You will need it to configure Fivetran.
Click Add FTP User.
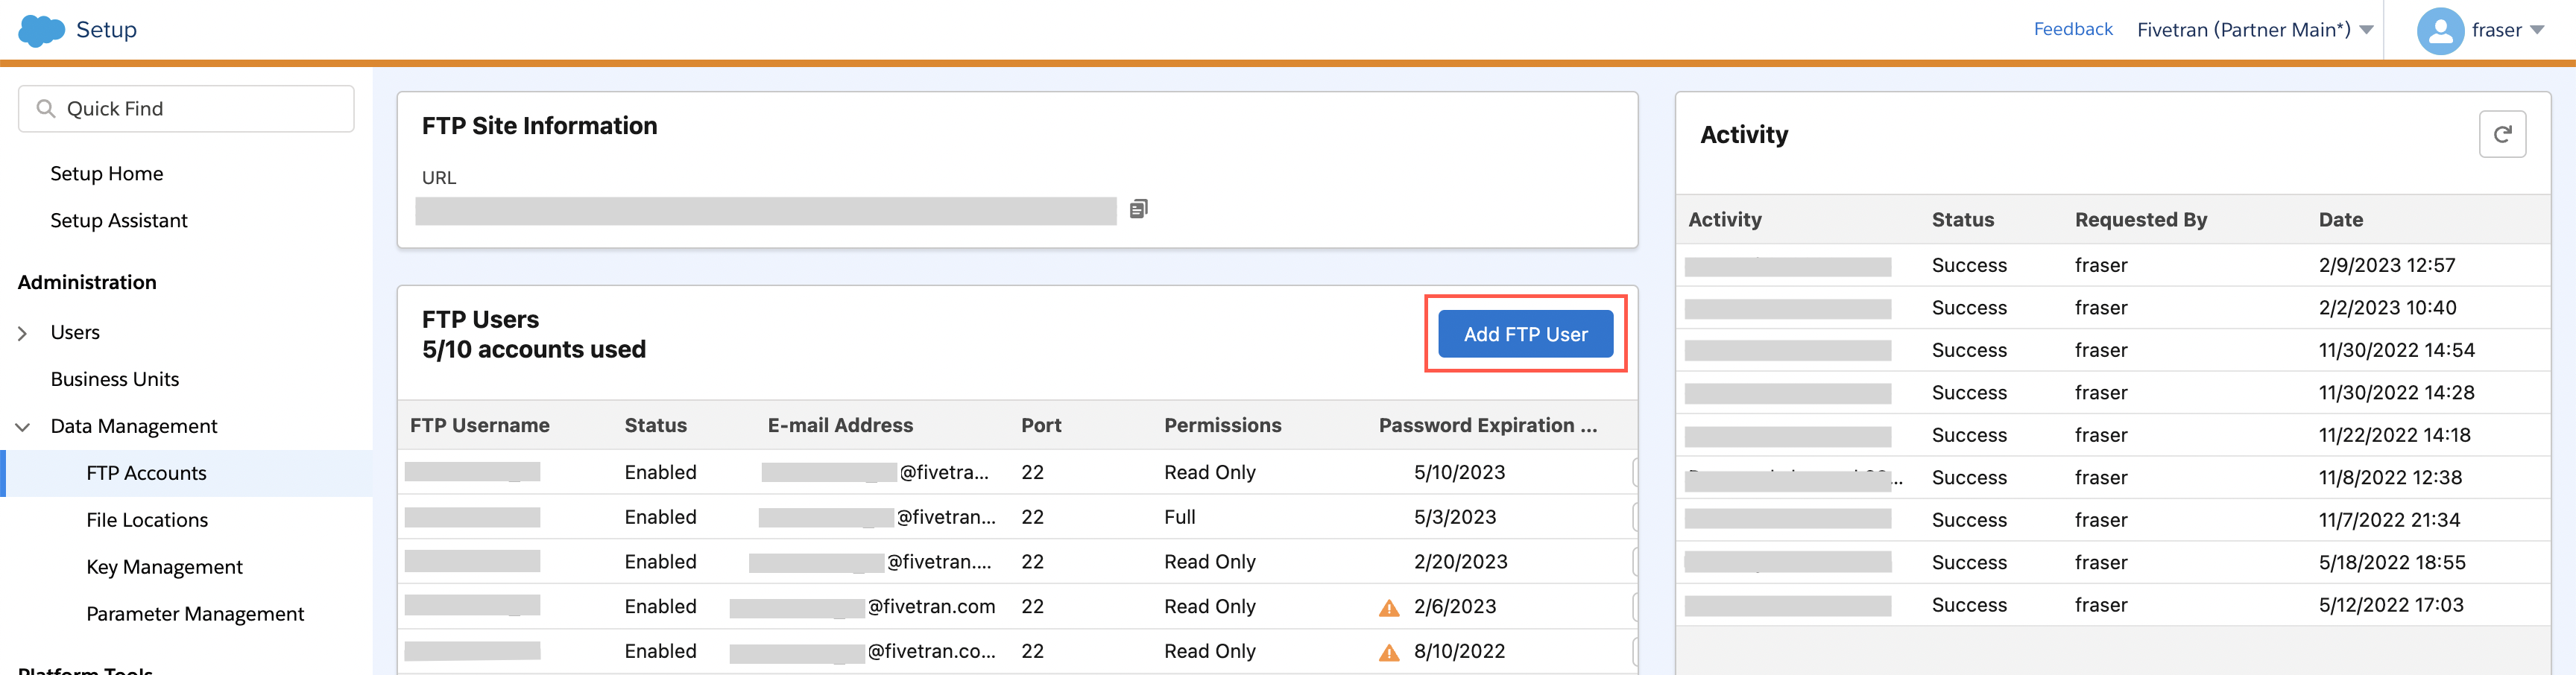
Make a note of the default FTP Username. You will need it to configure Fivetran.
Enter an E-mail Address for the new FTP user.
Enter a Password for the user and make a note of the value. You will need it to configure Fivetran.
In the User Permissions section, select Read Only.
Click Next.
In the Authentication Options section, select Password.
Click Save.
Create file locationlink
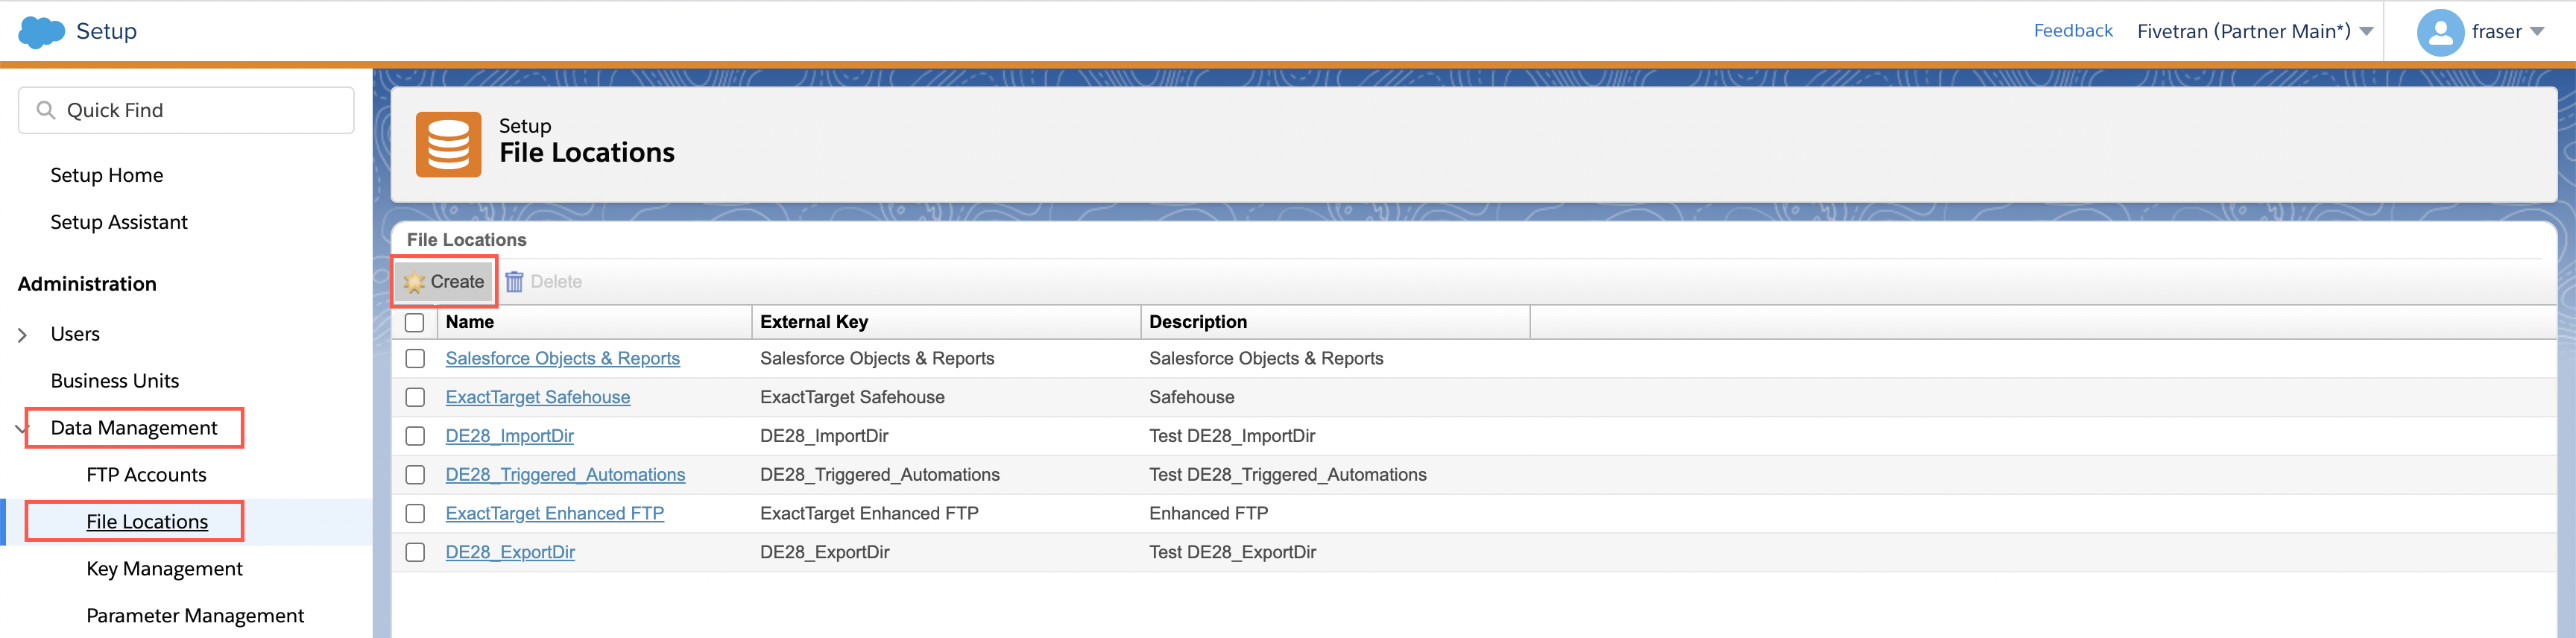
In the navigation menu, go to Data Management > File Locations.
Click Create.
Enter a unique Name for the file location.
Enter a unique External Key that identifies the file location.
From the Location Type drop-down menu, select Relative location under Marketing Cloud FTP Site.
Specify the Relative Folder Path of the subfolder you want to store your files in. For example,
folder\subfolder.NOTE: If required, you can connect to the FTP account you created in Step 1 and create a subfolder in the FTP location. You can then specify the path to the same subfolder in the Relative Folder Path field.
Make a note of the folder path. You will need it to configure Fivetran.
Click Save.
Find external keylink
In your Salesforce Marketing Cloud account, click Email Studio, and then select Email.

Click Subscribers, and then select Data Extensions.
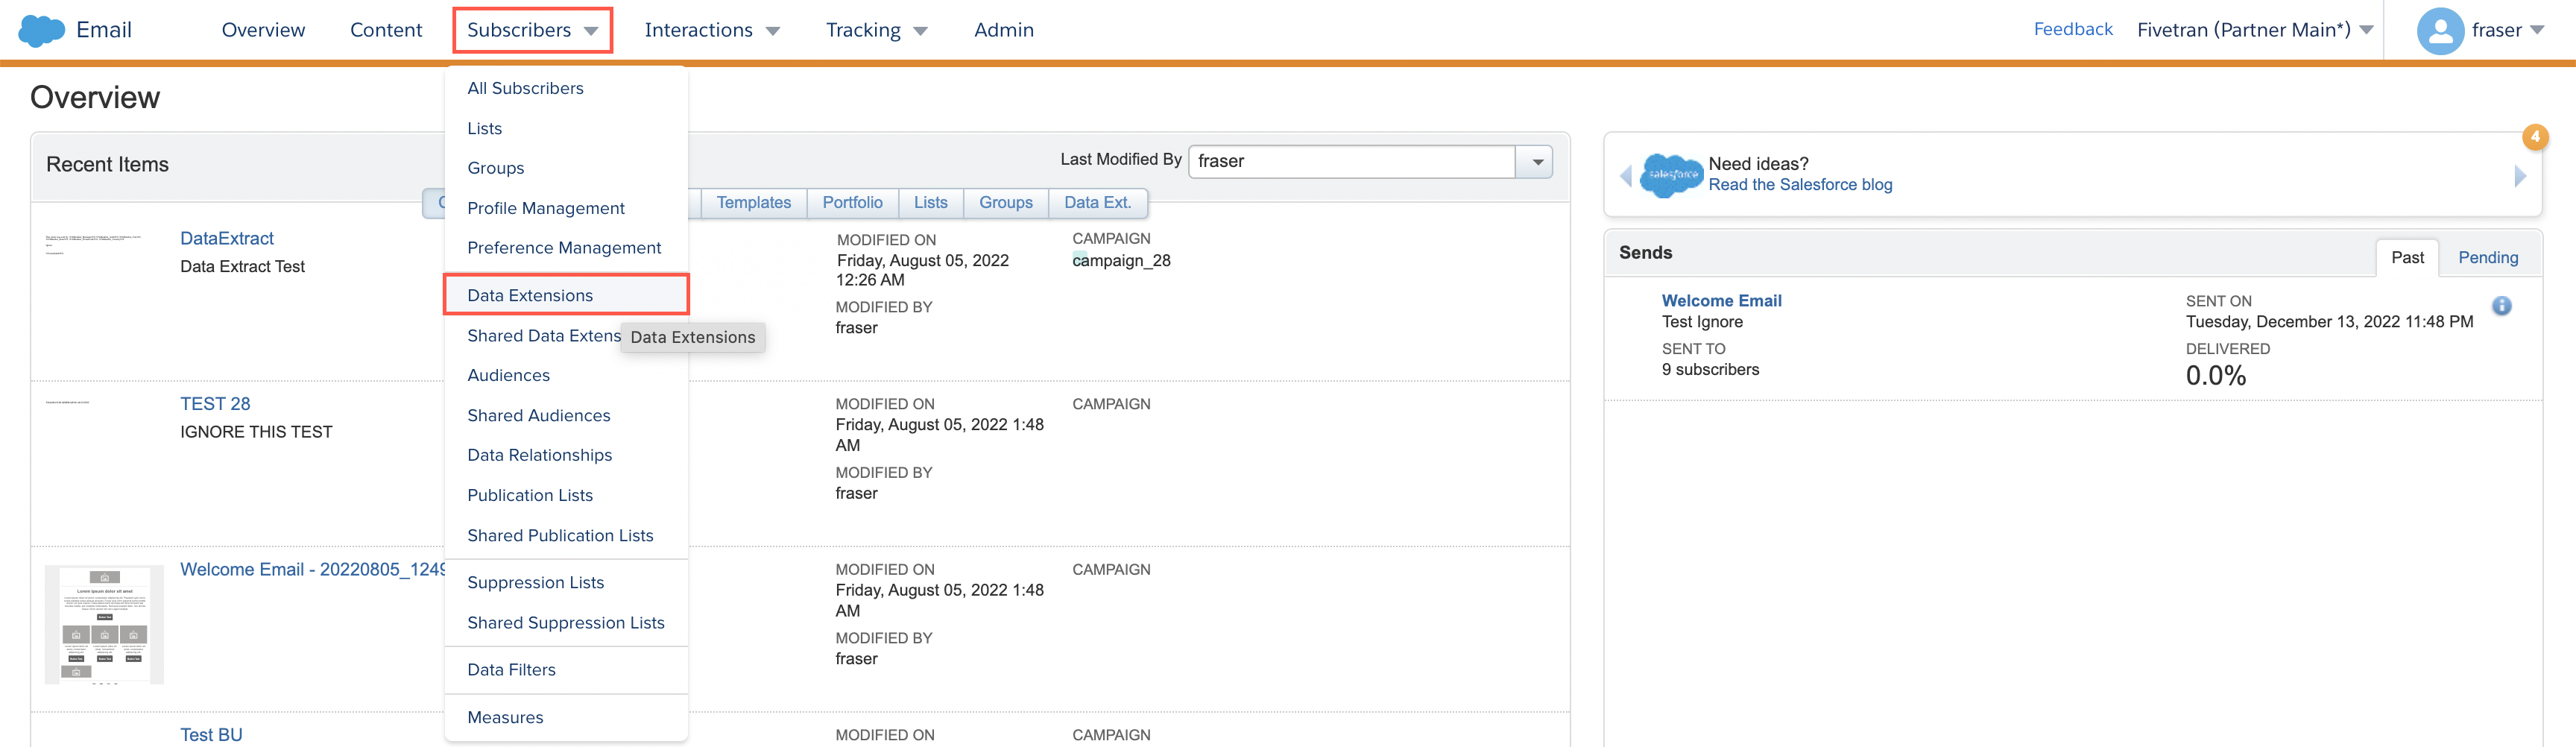
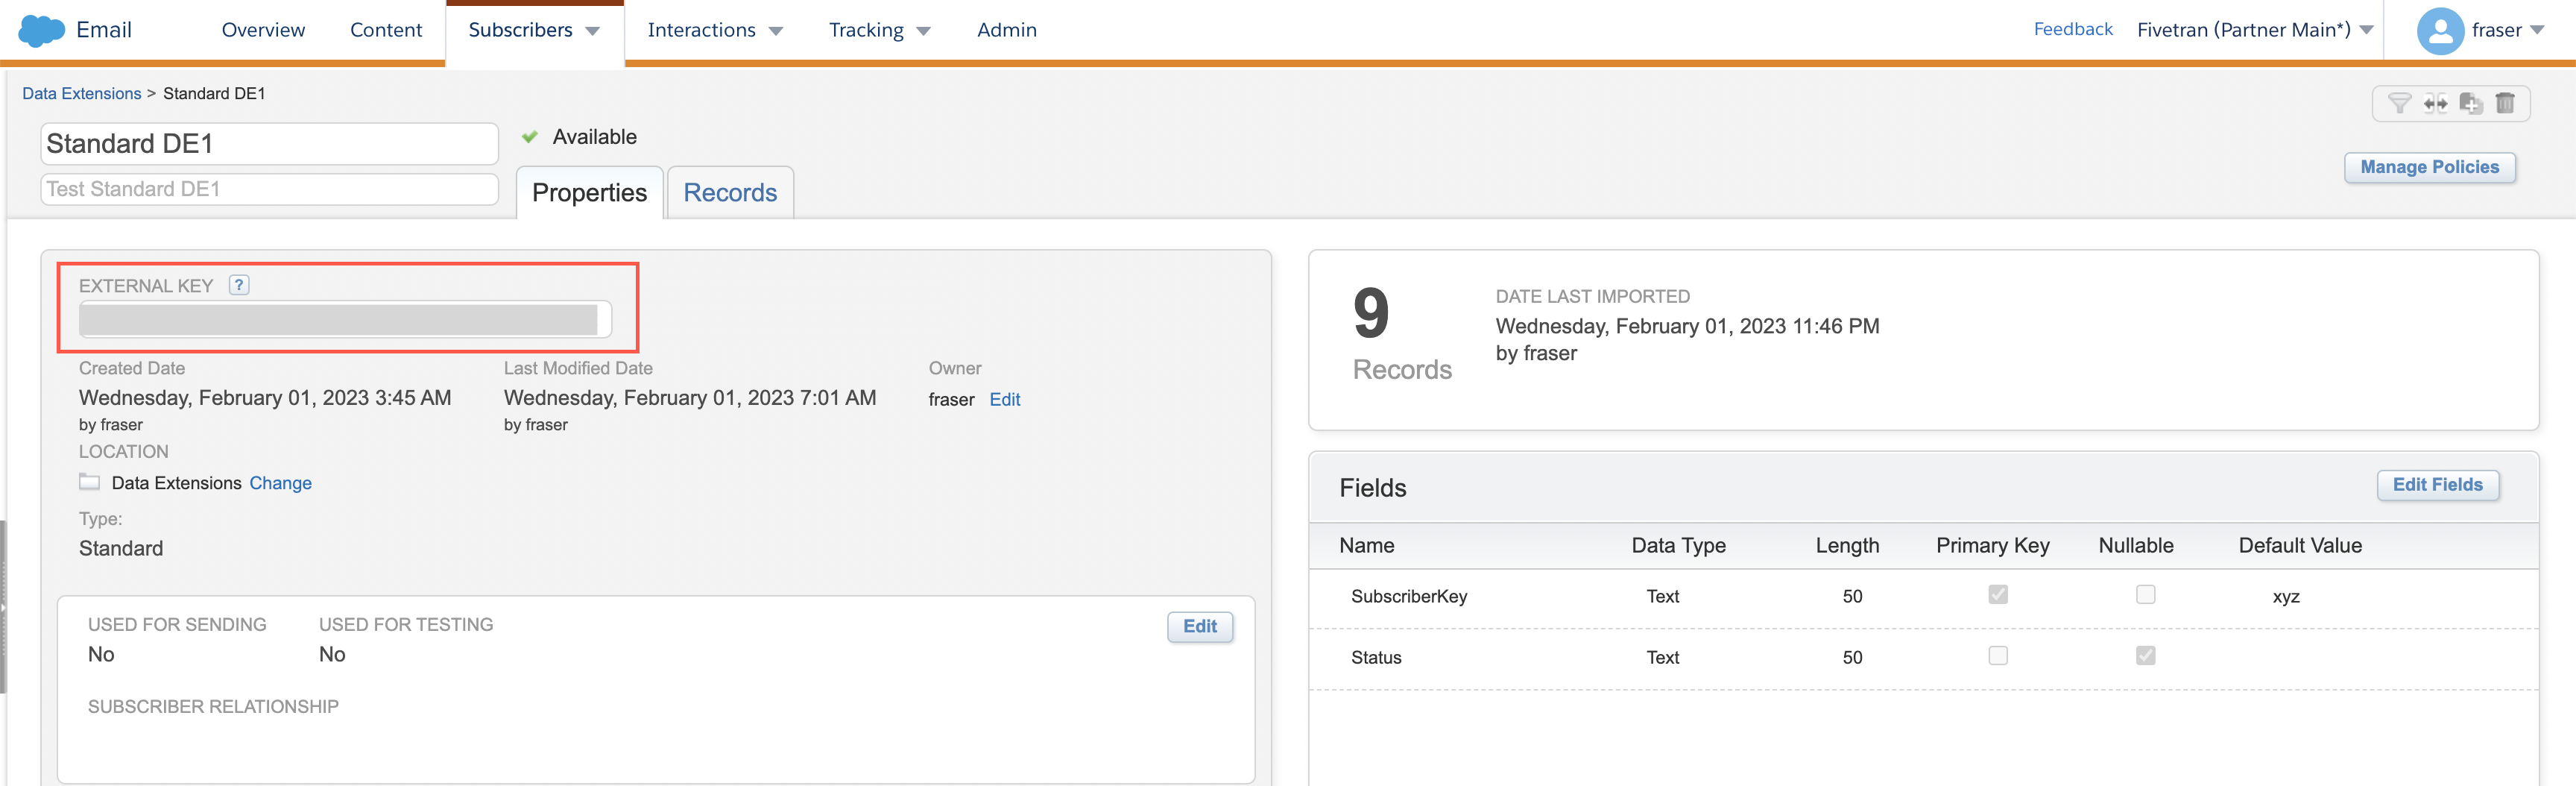
Select your Data Extension.
Make note of the External Key. You will need it to create a data extract activity.
Create data extract activity link
In your Salesforce Marketing Cloud account, click Journey Builder, and then select Automation Studio.

Go to the Activities tab.

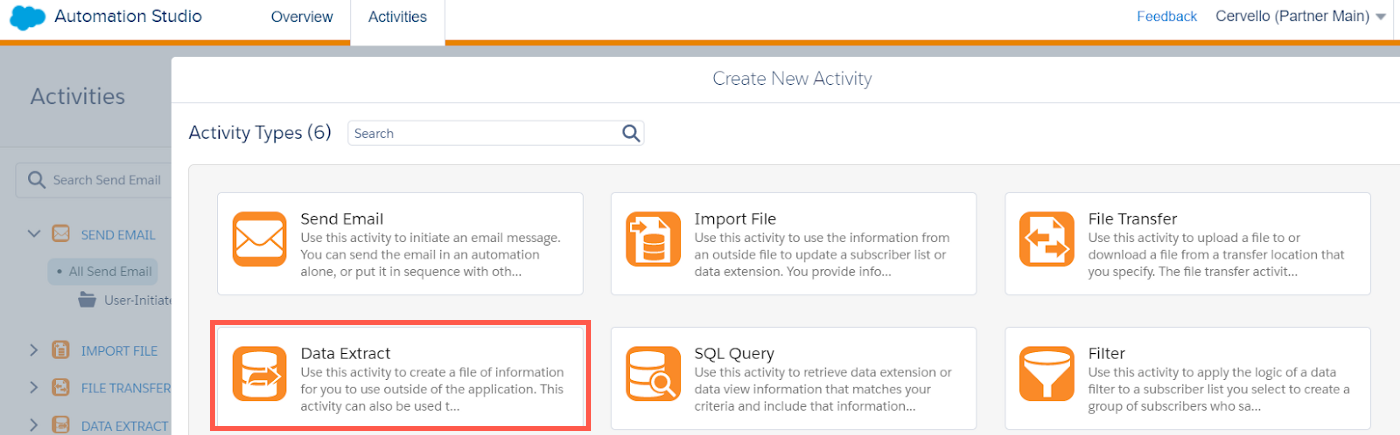
Click Create Activity.

Select the Data Extract activity type, and then click Next.
In the Properties page, enter a unique Name for the activity.
Enter a File Naming Pattern so that the activity knows what to name the file it creates. For example,
DE_%%Year%%%%Month%%%%Day%%_%%Hour%%.csv. Make note of the naming pattern. You will need it to create a file transfer activity.In the Extract Type drop-down menu, select Data Extension Extract.
Click Next.
In the Column Delimiter field of the Configuration page, enter
,.In the DECustomer Key field, enter the External Key you found in Step 3.
(Optional) If you want to extract the column headers, select the Has Column Headers checkbox.
Click Next.
In the Summary page, review the configurations and properties of the data extract activity, and then click Finish.
Create file transfer activitylink
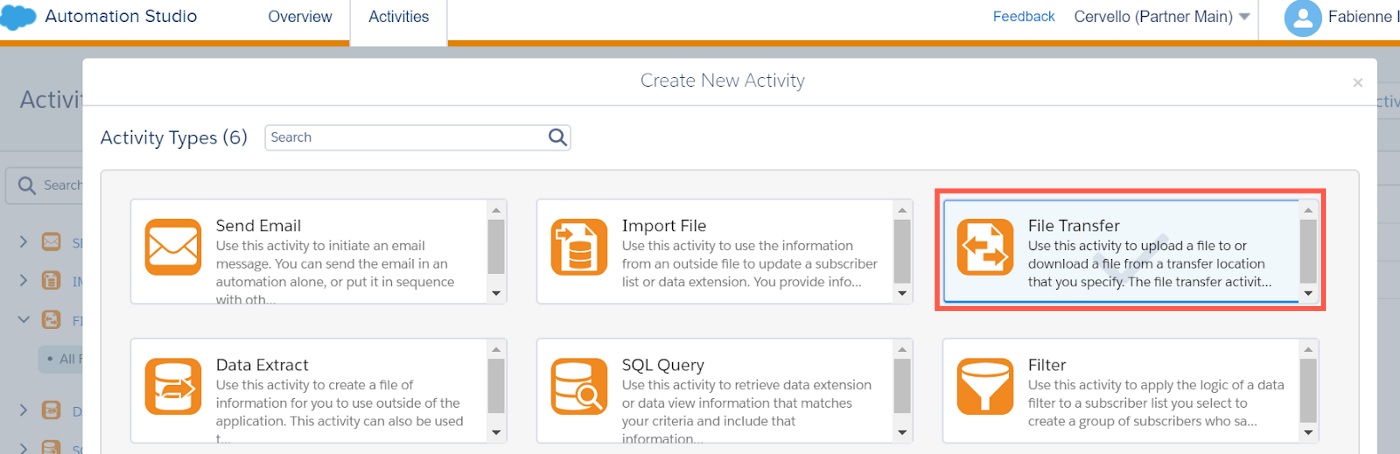
Click Create Activity.
Select the File Transfer activity type, and then click Next.
In the Properties page, enter a unique Name for the activity.
Select the Move a File From Safehouse file action.
Click Next.
In the Configuration page, enter the File Naming Pattern you found in Step 4.
In the Destination drop-down menu, select the file location you created in Step 2.
In the Transfer Settings options, make sure that the Encrypt File checkbox is cleared.
In the Customer Public Key drop-down menu, select SFTP.
In the Summary page, review the configurations and properties of the file transfer activity, and then click Finish.
Create automation link
Go to the Overview tab, and then click New Automation.

From the STARTING SOURCES section, drag Schedule onto your canvas.
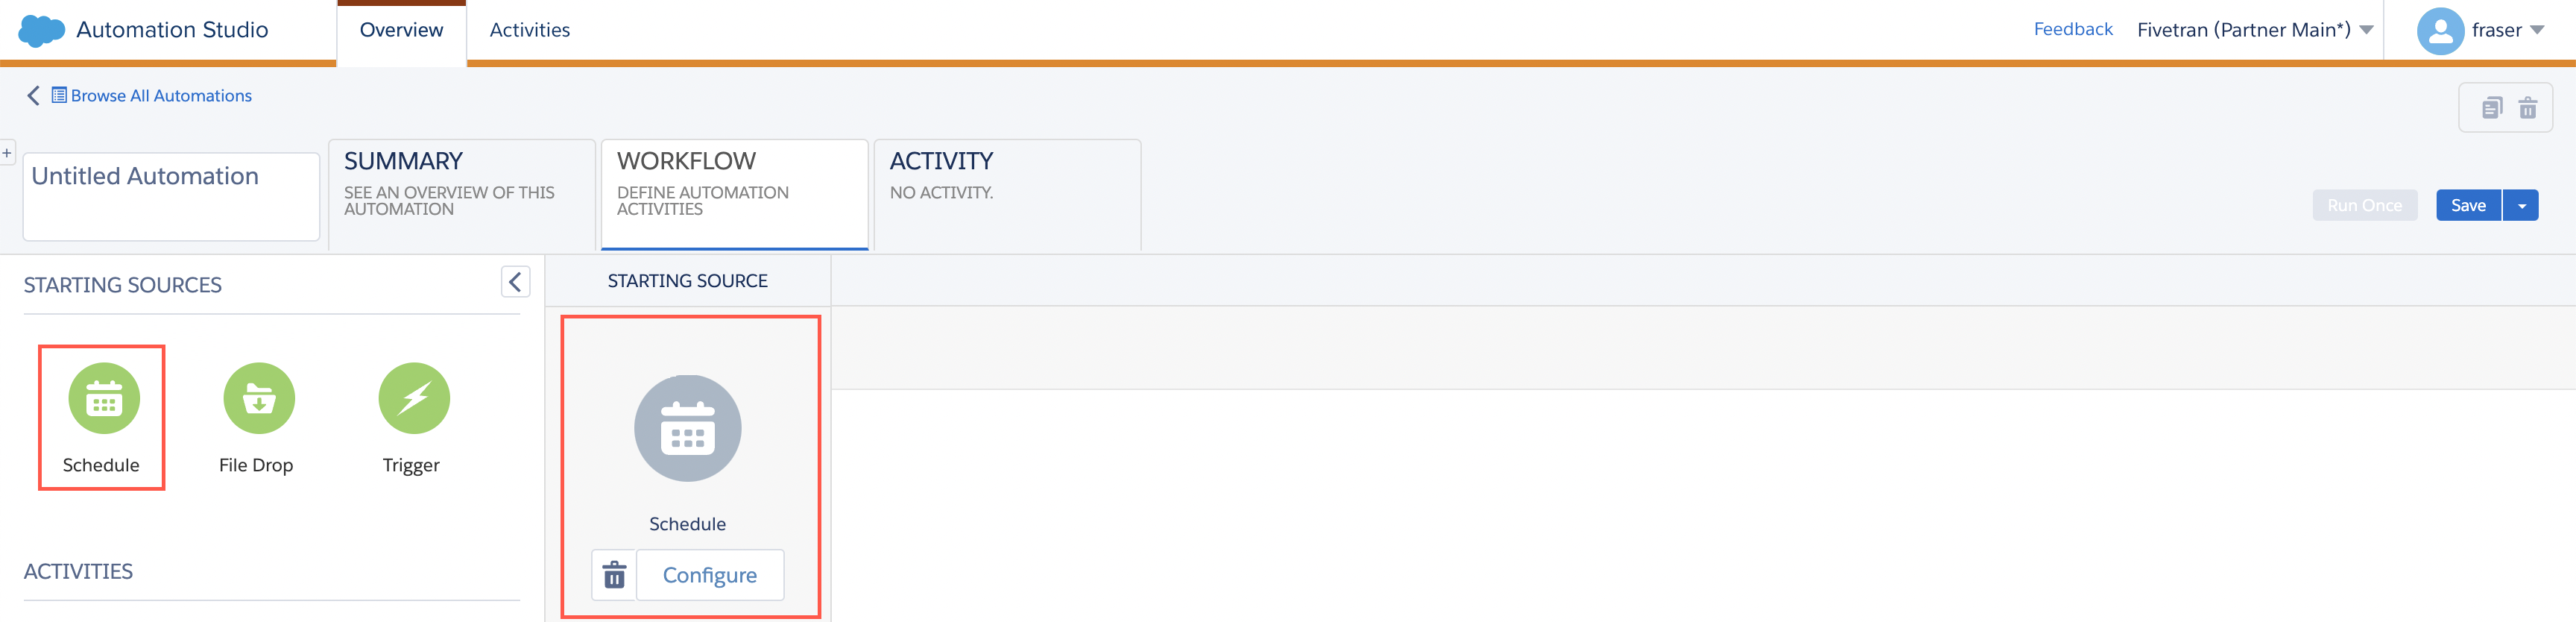
Click Configure.
In the Define Schedule page, specify a Start Date, Time Zone, and the Repeat frequency for the schedule.
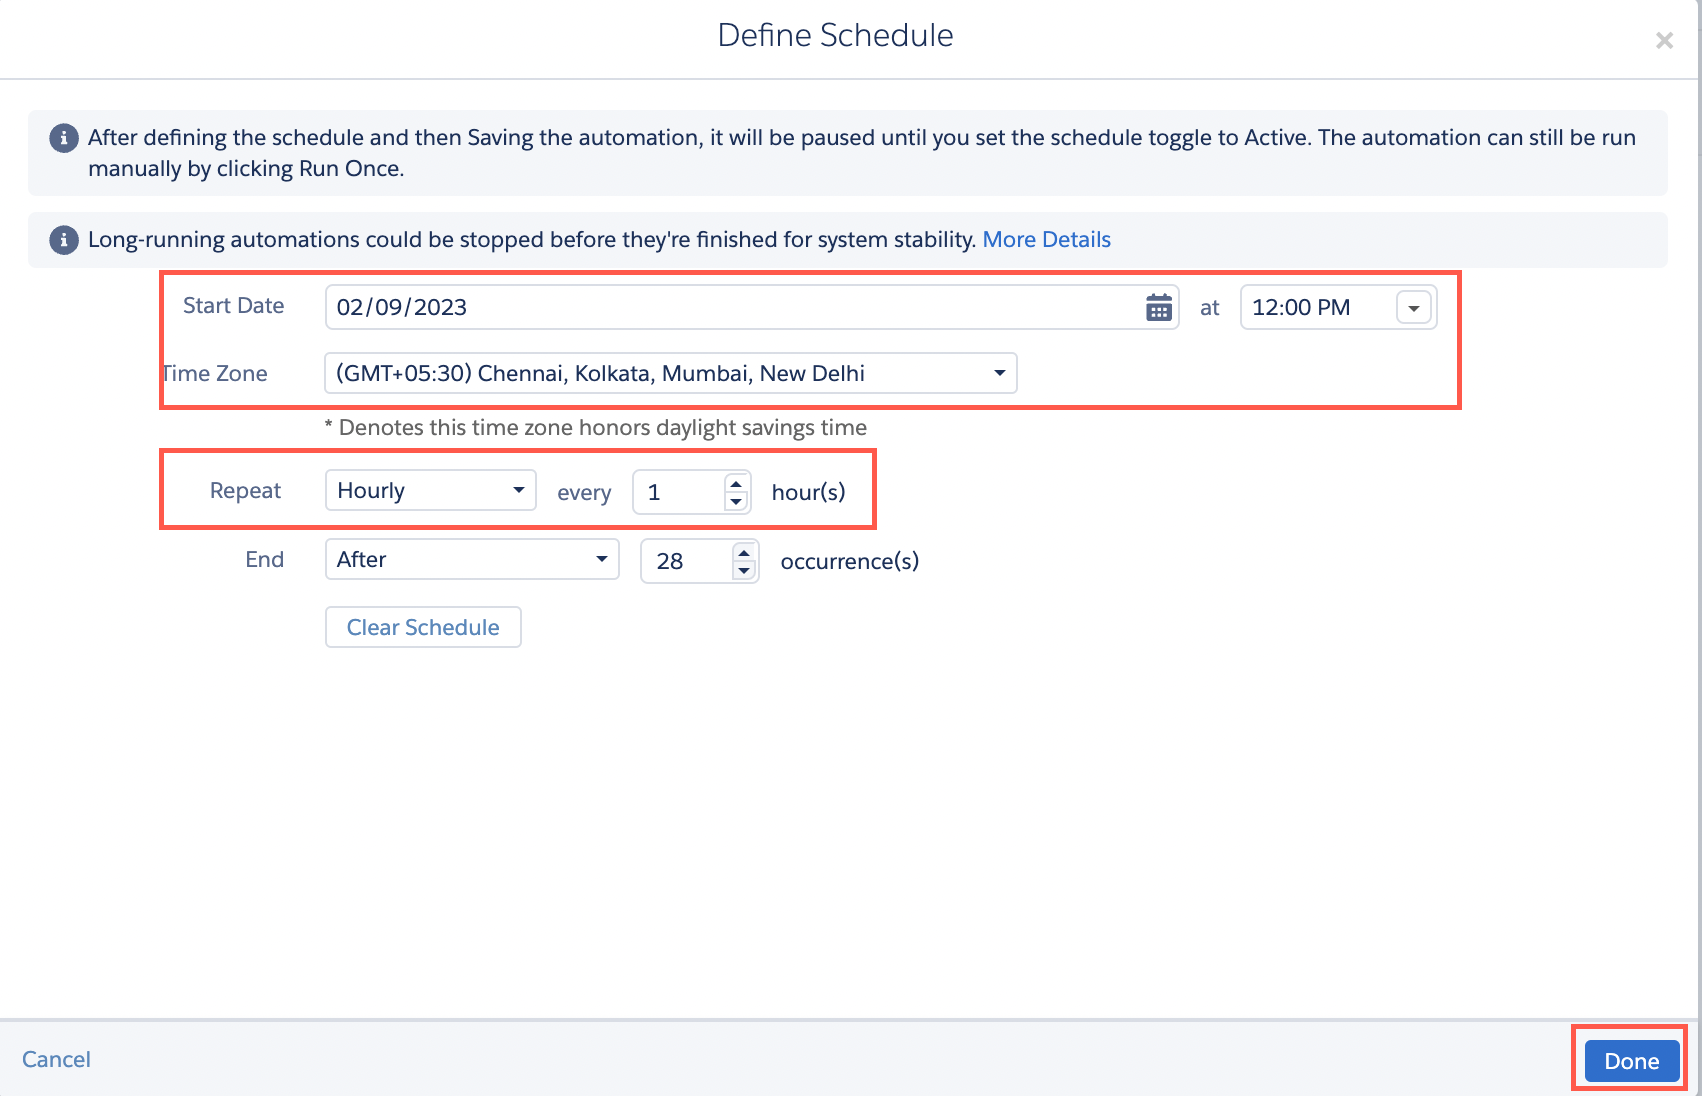
Click Done.
From the ACTIVITIES section, drag Data Extract onto your canvas.
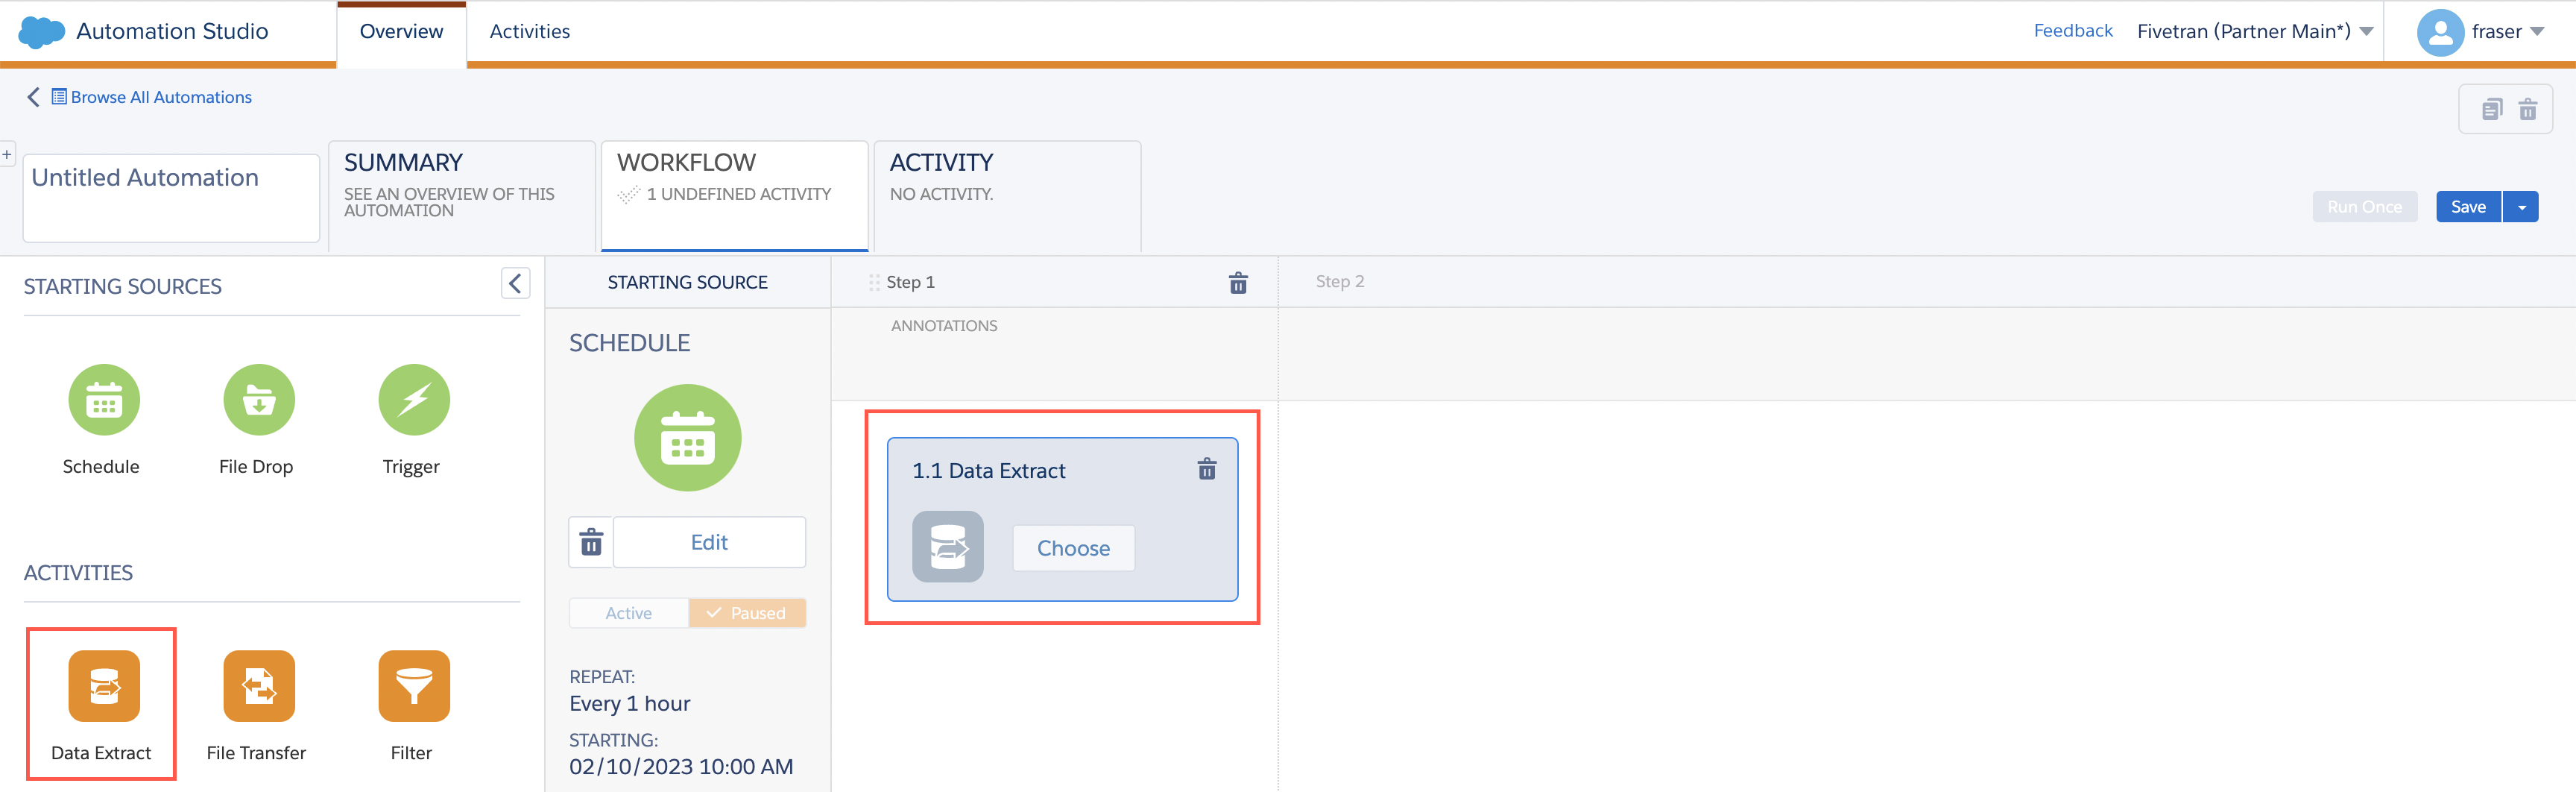
Click Choose, and then select the data extract activity you created in Step 4.
From the ACTIVITIES section, drag File Transfer onto your canvas.
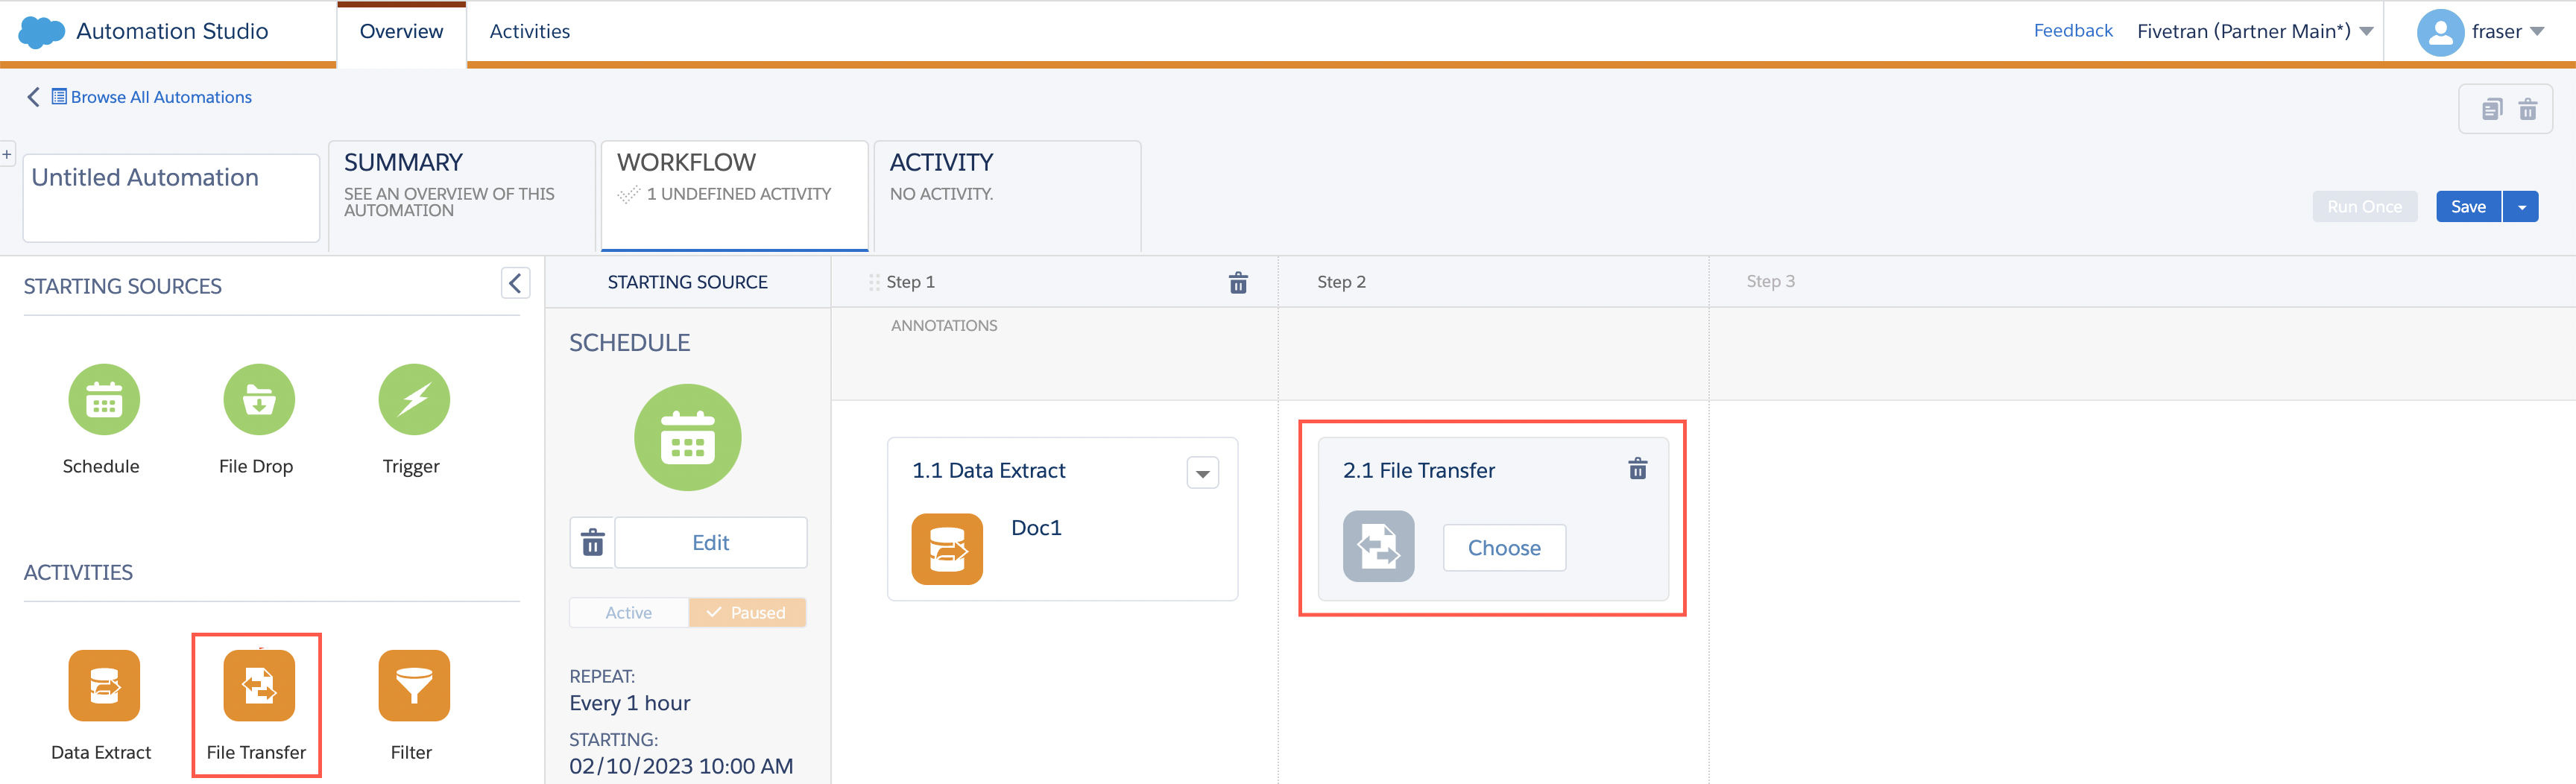
Click Choose, and then select the file transfer activity you created in Step 5.
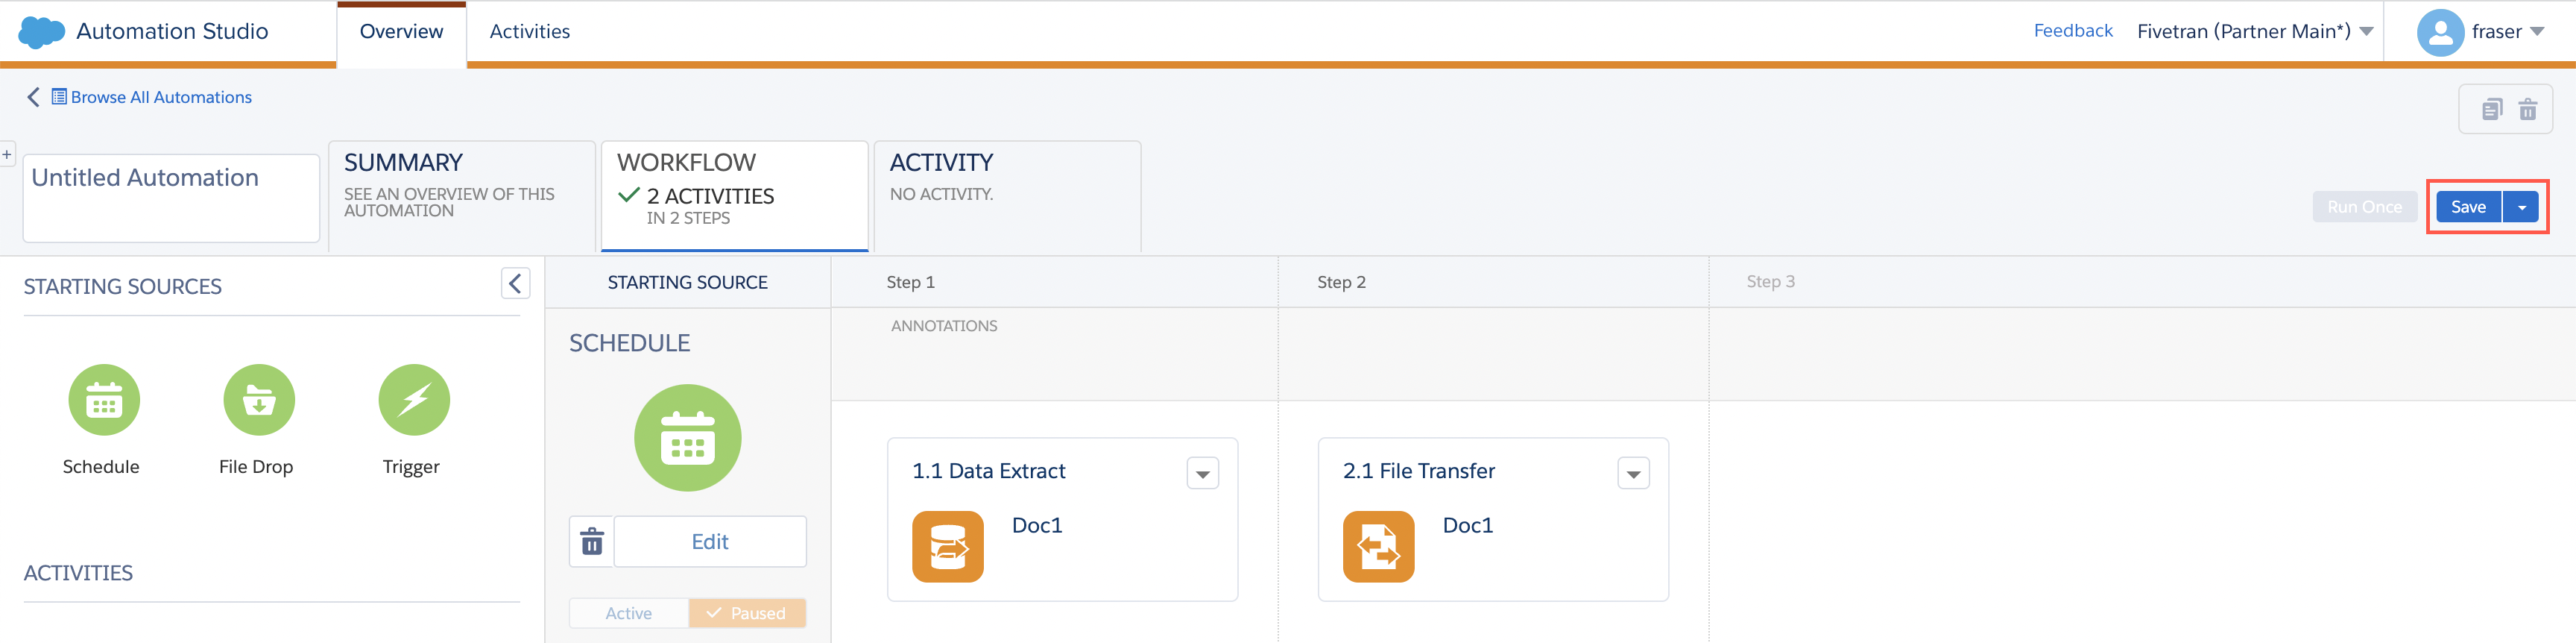
Click Save, and then enter a Name for the automation.
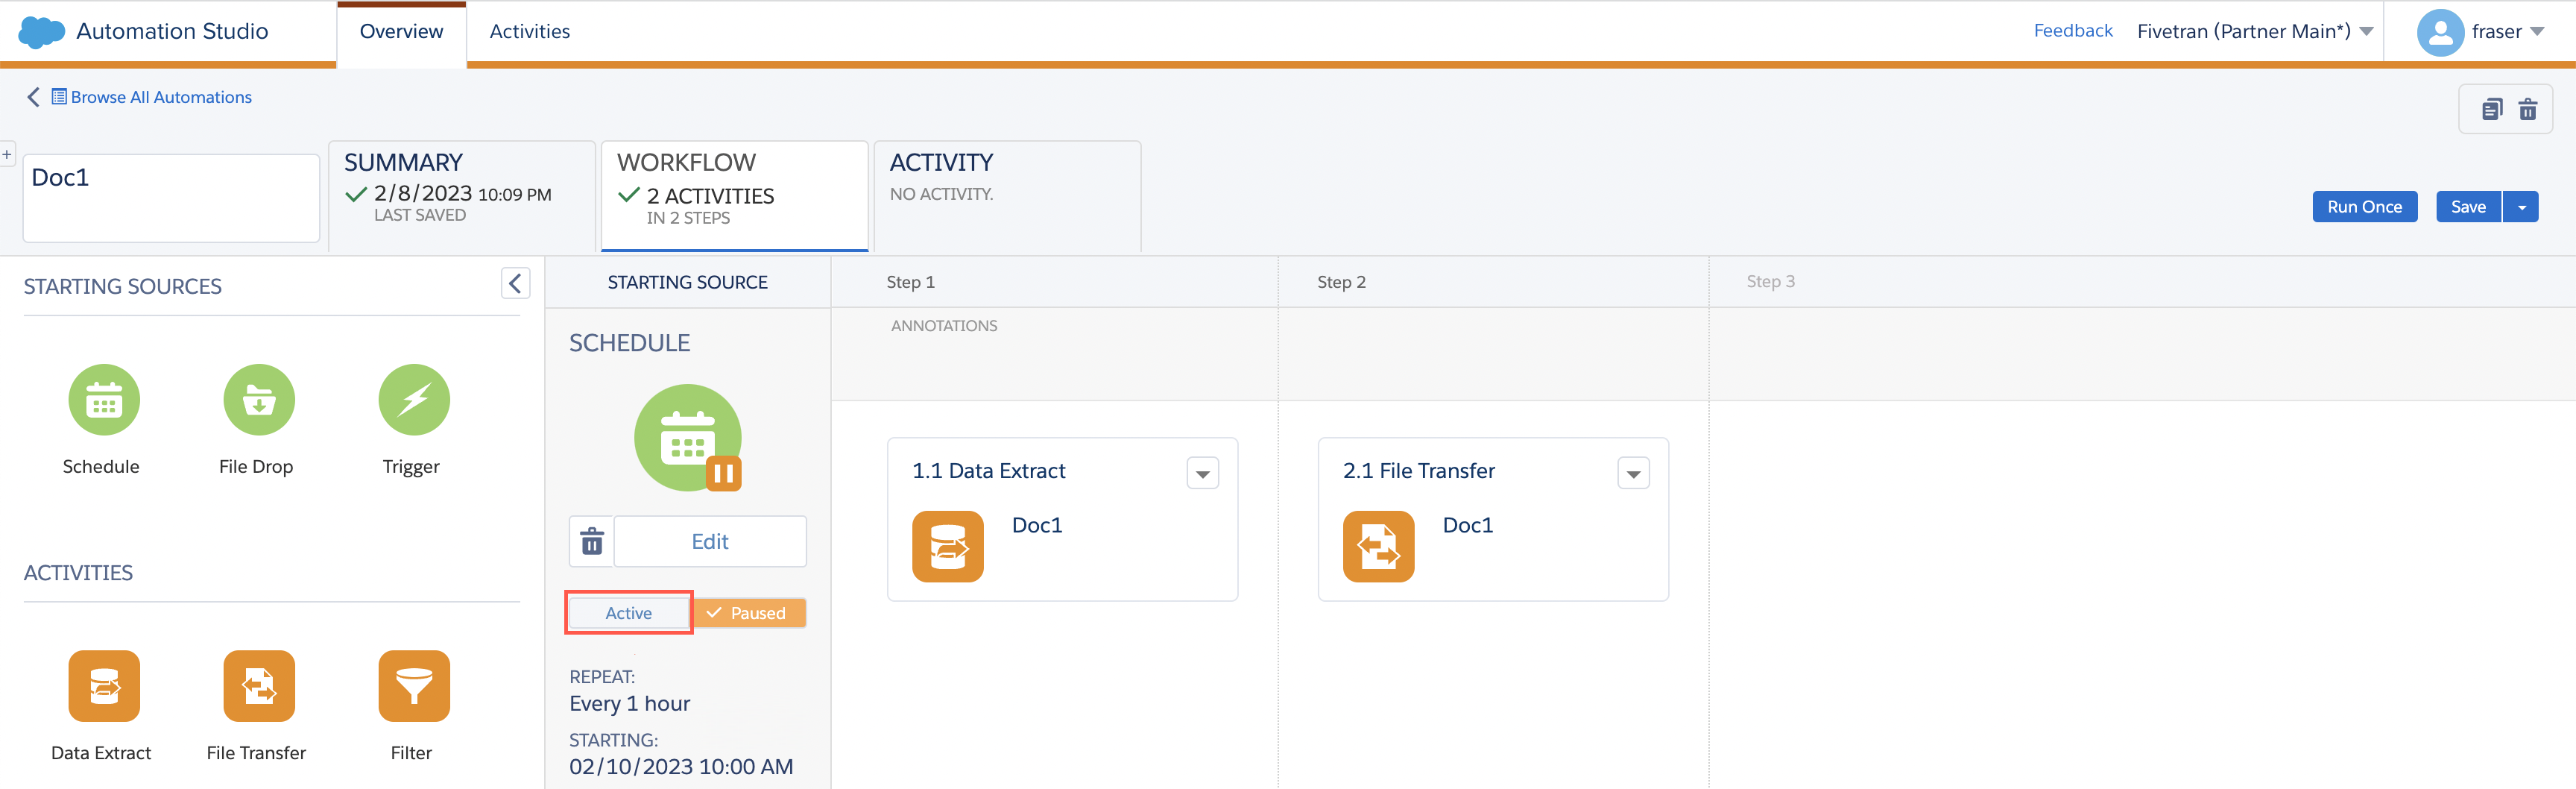
Click Active to activate the automation.
(Optional) In the Activities tab, enter the email address to be notified upon the failure or success of automation runs.

NOTE: To extract data of multiple data extensions using a single automation, you can create multiple data extract activities and add them to the first step of the automation. However, the file pattern of all the data transfer activities must match the file pattern of the file transfer activity.
Finish Fivetran configurationlink
Follow the instructions provided in our SFTP setup guide to create a SFTP connection.
IMPORTANT: In the SFTP connector setup form, make sure you do the following to configure the connection for Salesforce Marketing Cloud data extensions: