SendGrid
This page describes how to use Activations with Sendrid.
Getting Started
In this guide, we will show you how to connect SendGrid to Activations and create your first sync.
Prerequisites
- Have your Fivetran account ready. If you need one, create a Free Trial account now.
- Have your SendGrid account ready.
- Have the proper credentials to access to your data source. See our docs for each supported data source for further information:
1. Gather SendGrid API Credentials
To connect Activations to SendGrid, you'll need to collect one piece of information:
- API Token
From the home page of your SendGrid account click on Settings in the left hand navigation bar then select API Keys. From the API Keys page you can create a new key or use an existing one.
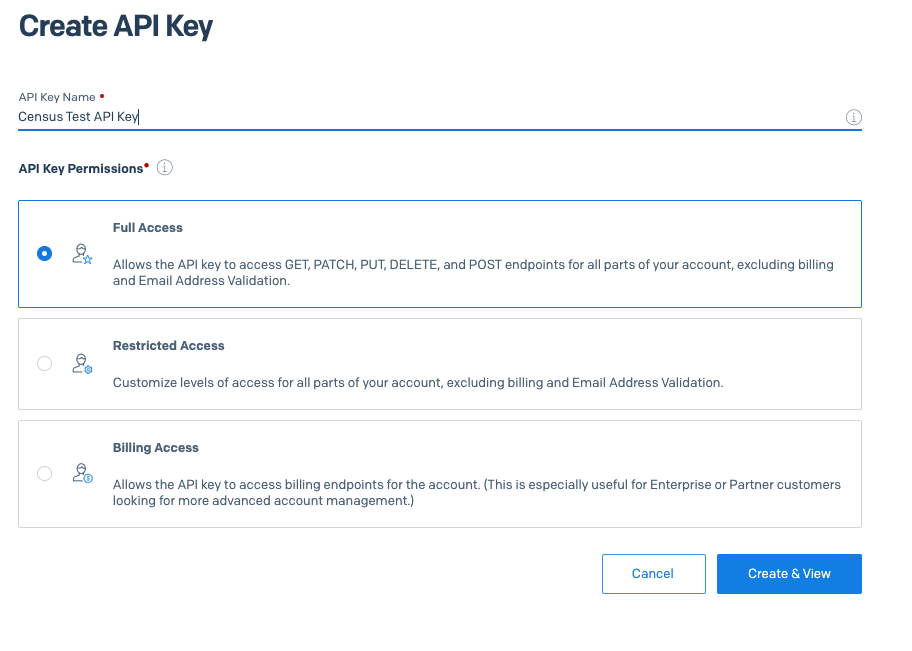
Create a New API Key in Sendgrid
Please note that SendGrid will only allow you to view your API key once when initially created.
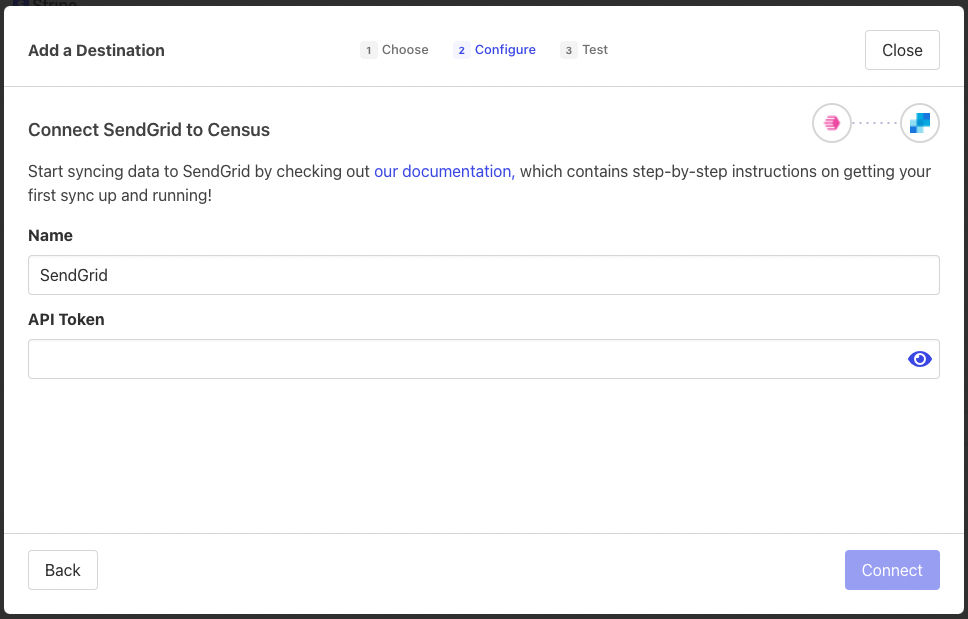
3. Adding Credentials to Activations
With the SendGrid API key, return to Activations and visit the Destinations tab. Click on the New Destination button and select SendGrid from the menu. Copy and paste the API Key into the dialog and hit save. You should be clear to create a new sync!
Supported Objects and Sync Behaviors
Activations currently supports syncing to the following SendGrid objects.
| Object Name | Supported? | Identifiers | Behaviors |
|---|---|---|---|
| Contact | ✅ | Update or Create, Update Only | |
| List | ✅ | Update or Create | |
| Email Templates | ✅ | Any unique identifier | Send |
Learn more about all of our sync behaviors in our Syncs documentation.
Contact Support if you want Activations to support more Sendgrid objects and/or behaviors.
Syncing to Subject Field
To sync to the email subject line, first update the email subject in the Sendgrid dynamic template to be {{{subject}}}. Then, when creating a sync in Activations, add a custom destination field called subject in the sync mapper and map it to the corresponding source field containing the subject line data.