How to Use Expression Scope to Track Changes
Question
I need to keep an audit trail of the operations happened on a particular row in target database. How can I use the ExpressionScope parameter in ColumnProperties to track changes?
Environment
HVR 5
Answer
Pre-requisite
You should be using the same version of HVR (5.3.1/25 or above) on all the machines.
Chn1 is already running in the hub hvrhub4.
In this example, source location is orcl and target location is olx.
Channel has table test1.
Channel should have Integrate running in burst mode. /ExpressionScope parameter is dependent on this integrate mode.
Steps
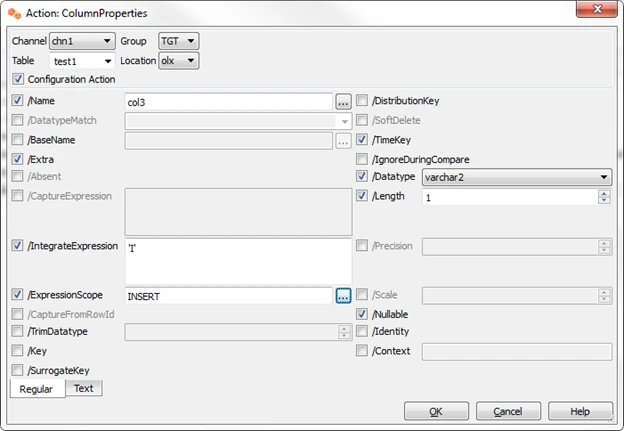
Create action to get an ‘I’ if an insert operation has occurred. This action is defined for the specific table and on TARGET group. In our case we are defining it on table test1.
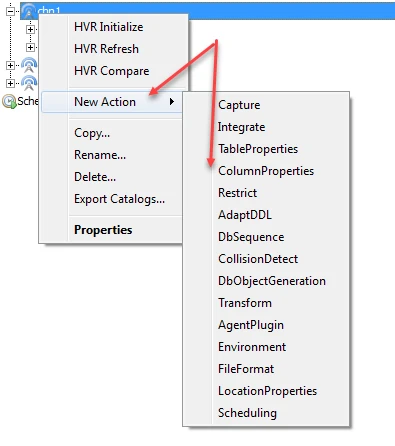
a. Right-click channel chn1 and select New Action and then ColumnProperties.
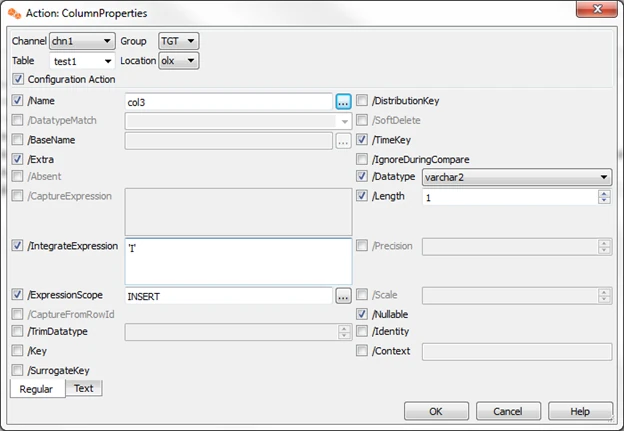
b. In the dialog, set the parameters as shown below. Here we define an extra column col3 to be populated with value ‘I’ whenever an insert occurs.
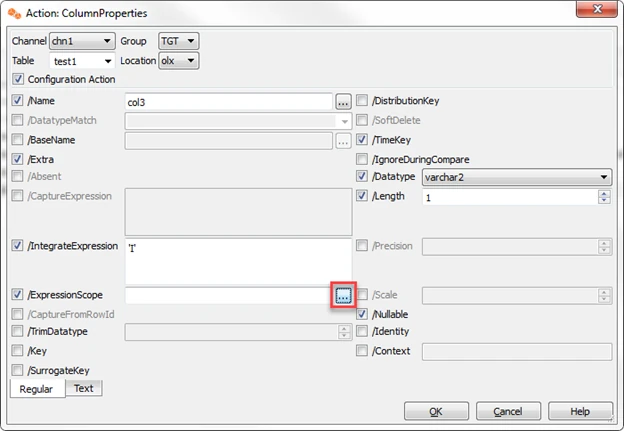
c. For the /ExpressionScope field, click the browse button next to it and select the operation INSERT.
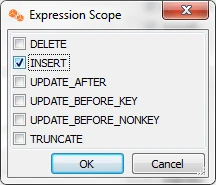
d. In the dialog, select the INSERT operation. Click OK to confirm.
e. The final Action dialog will look as below. Click OK to confirm, and this action will be added to the channel.
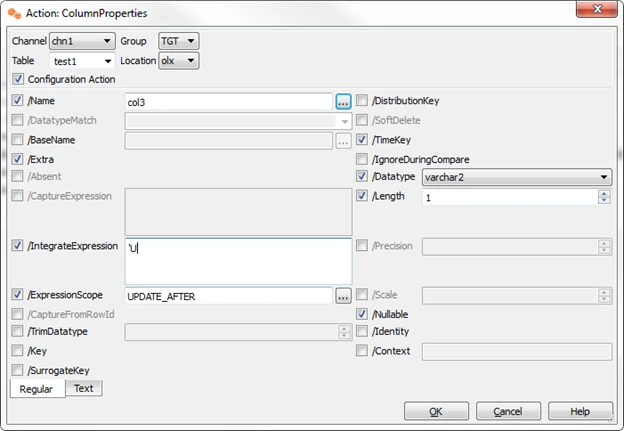
Create an action to get an ‘U’ in col3 whenever an update is done to the row on the target table. This action is defined for the specific table and on the TARGET group. In our case, we are defining it for table test1.
a. Follow item 1 of Step 1.
b. Follow item 2 of Step 1. Instead of INSERT, define an extra column col3 to be populated with value ‘U’ whenever an update occurs.
c. Follow item 3 of Step 1. Select UPDATE_AFTER.
The final Action dialog will look as below. Click OK to confirm.
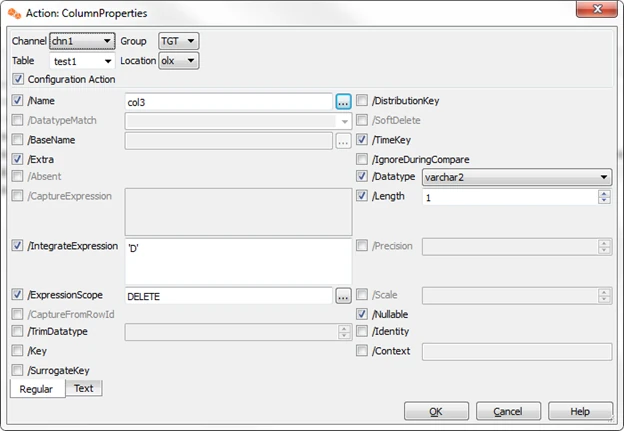
Create an action to get a ‘D’ in col3 whenever a delete is done to the row on the target table. This action is defined for the specific table and on the TARGET group. In our case, we are defining it for table test1.
a. Follow item 1 of Step 1.
b. Follow item 2 of Step 1. Instead of
INSERT, define an extra column col3 to be populated with value ‘D’ whenever a delete occurs.c. Follow item 3 of Step 1. Select DELETE.
d. The final Action dialog will look as below. Click OK to confirm.
Create an extra column hvr_delete to keep the rows that are deleted. Action in Step 3 is dependent of this action.
a. Right-click the channel and select Columnproperties.
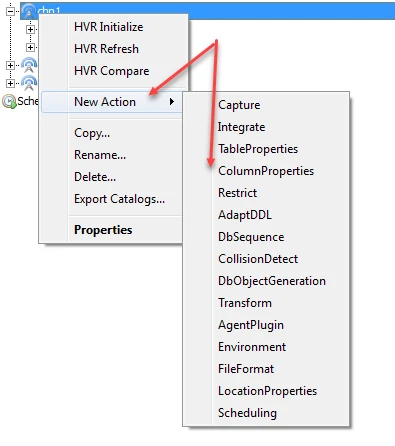
b. Create an extra column hvr_del to get populated when a row is deleted.
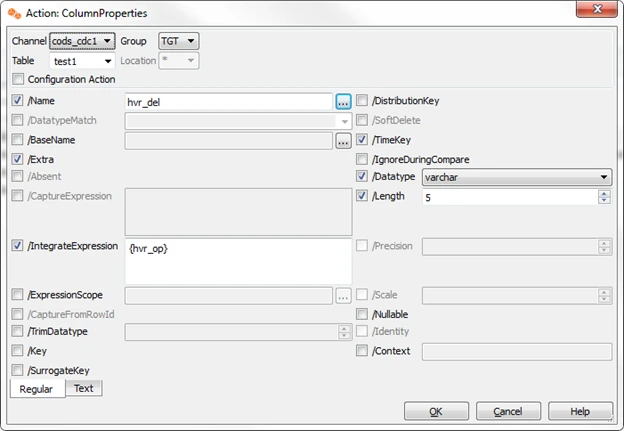
The actions will look as below.

Initialize the channel.
Perform Bulk Refresh for this channel.
Sample of how the target table will look like if an insert is done.
Table state after insert on Target.

Table state after update on row where C1=1 on Target.

Table state after a delete is done on row where C1=1 on Target.
