How To Add Parallelism by Defining Multiple Integration Jobs
Question
How can I add parallelism by defining multiple integration jobs?
Environment
HVR 5
Answer
There are times when a single replication channel requires multiple integrate jobs to keep the latency within expected service levels. In this scenario, we are demonstrating how to define a single capture job which routes data to four separate integrate jobs.
The following example replicates tables from Oracle to SQL Server using the TPCC schema which contains eight tables. The steps are the same regardless of your target database. Two tables will be replicated by each of four integrate jobs.
This solution uses an approach of defining four separate locations and location groups. Defining separate Integrate Actions for each table identifies which location group will be assigned for each table.
The following example assumes that a primary location has already been defined and tested for both Oracle and SQL Server. This creates new locations for the SQL Server to spread the workload across multiple integrate jobs.
Perform the following steps to add parallelism using integration jobs:
Make three new locations for your target database location.
As this solution is using four integrate jobs, we will start by making three new locations for the target database location. Do not make a copy of the location, but instead select New Location.
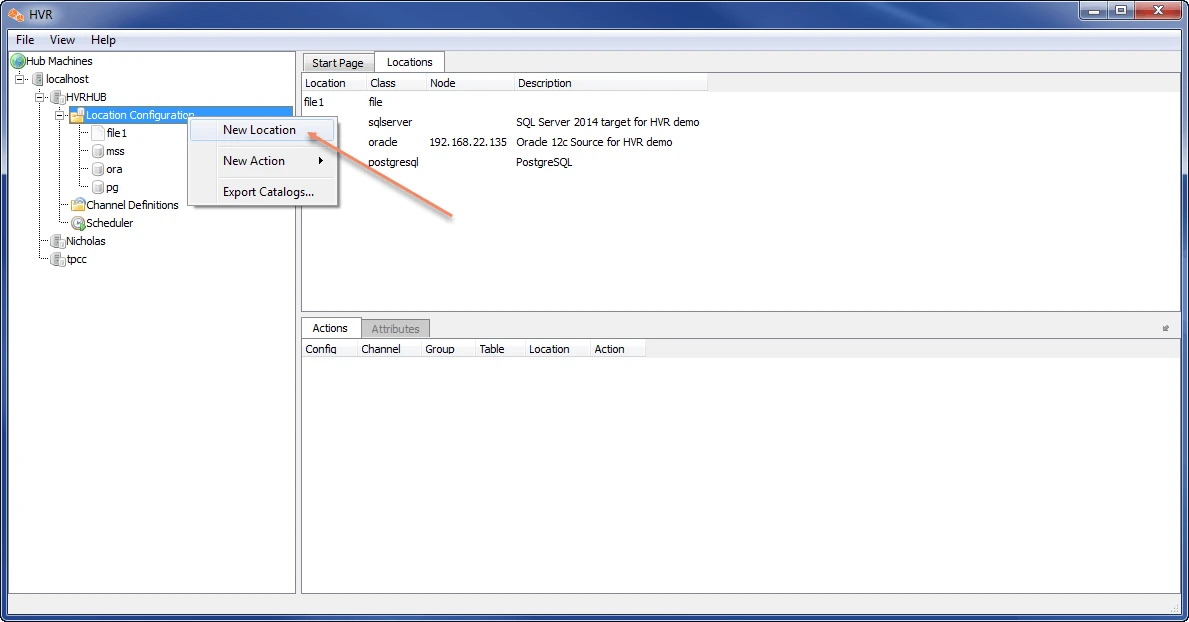
Add a new location named mss2s using the same details as used in the original mss location. Simply append the number 2 to the location name to make it mss2, then hit
O. Repeat this step until you have a total of four locations for SQL Server with the names of: mss, mss2, mss3, and mss4.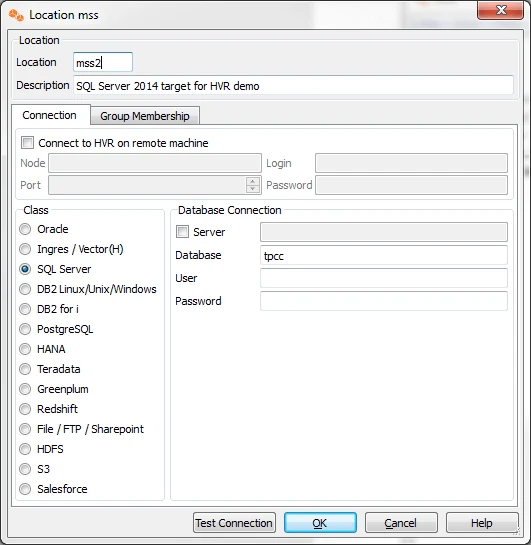
Create your channel.
The following example creates a new replication channel named one2many which includes one source capture job and four integrate jobs for eight tables.
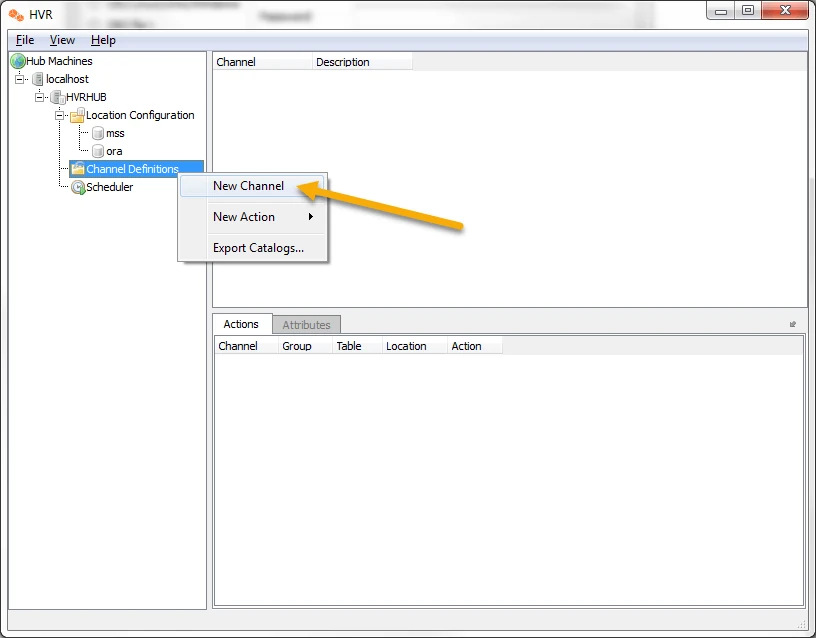
Right-click Channel Definitions and select New Channel.
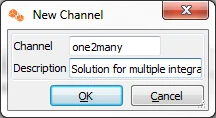
Enter any name and description for your new channel.
Create location groups.
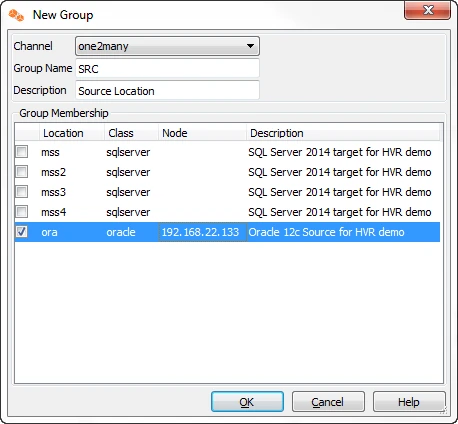
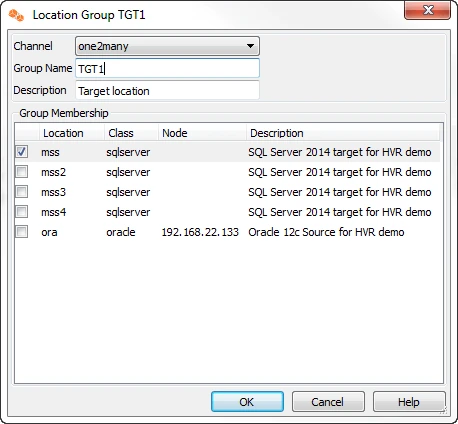
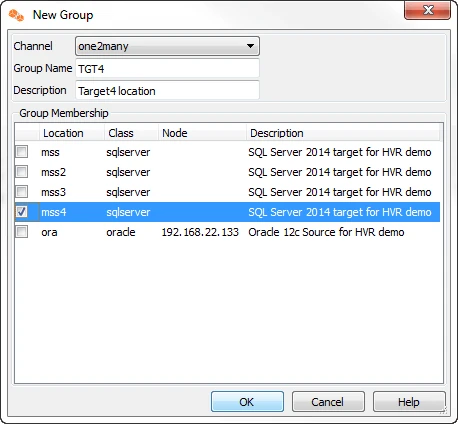
Create a total of five locations. One for the source capture locations and four for the Integrate locations. This example will name the source as SRC and the target groups as TGT1, TGT2, TGT3, and TGT4.
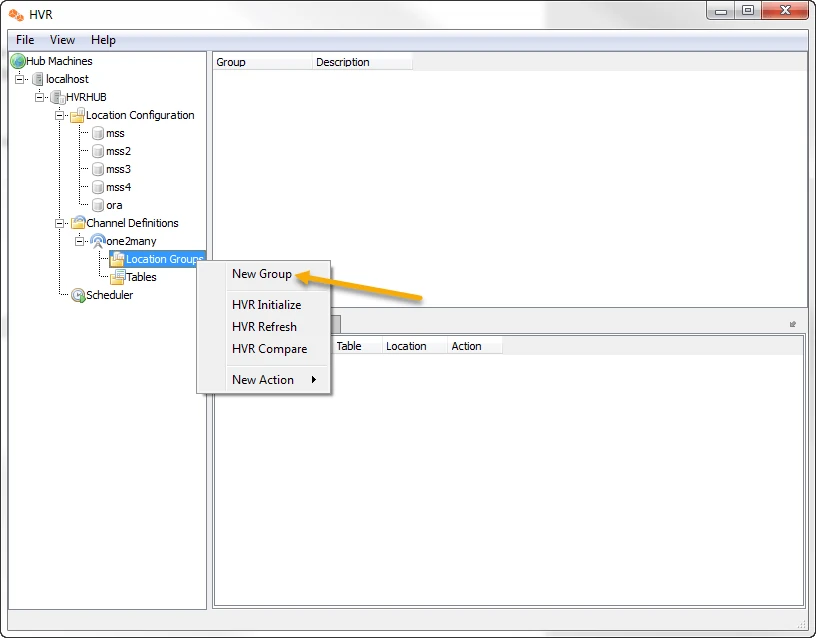
Right-click Location Groups and select New Group.
Enter a name and description for the Source location, such as SRC and click OK.
Repeat the process for all four of the Integrate locations.
Define which tables are to be replicated by this channel.
Using Table Explore, explore the tables located on the Oracle source location.
Right-click Tables and select Table Explore.
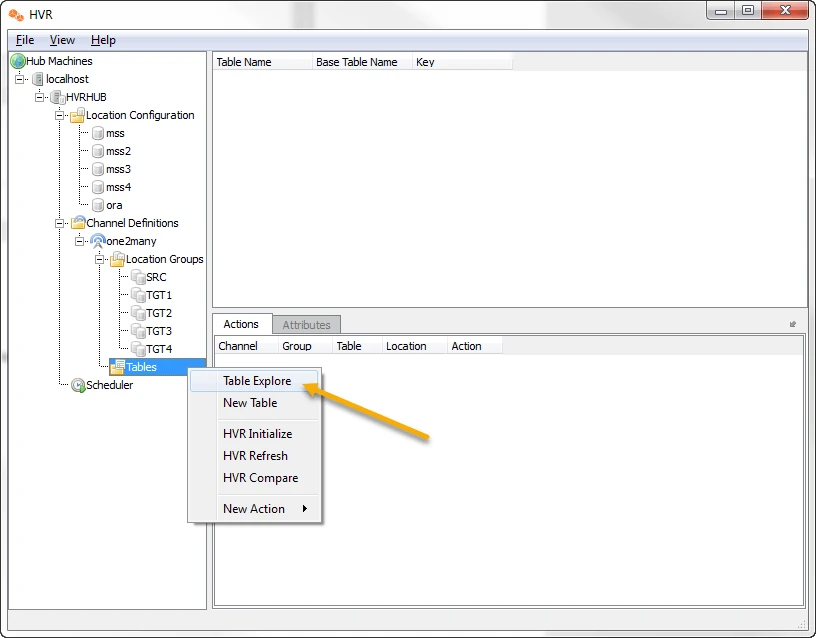
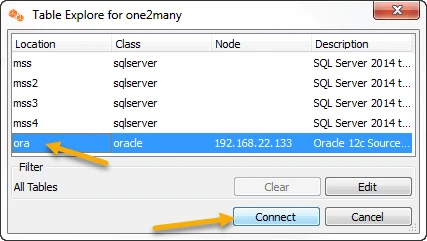
Select the location for Oracle and click Connect.
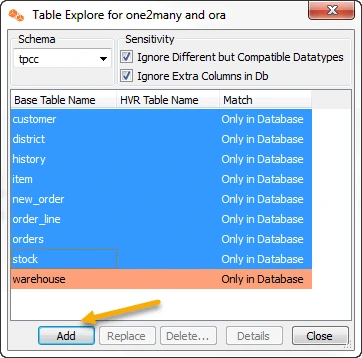
A window will be displayed showing all tables that are available in the database and/or tables that are already defined in another channel.
Select the first eight tables in the schema named tpcc and click Add.
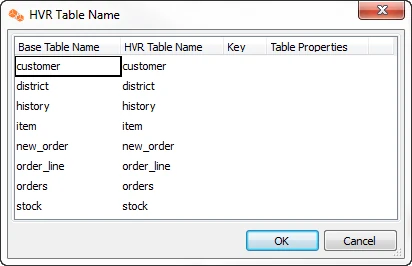
The following window is displaying showing the Base Table name and the HVR Table name.
Click OK.
The console returns you to the Table Explorer dialog.
Click Close.
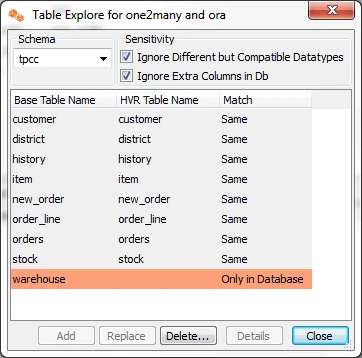
Define Capture action.
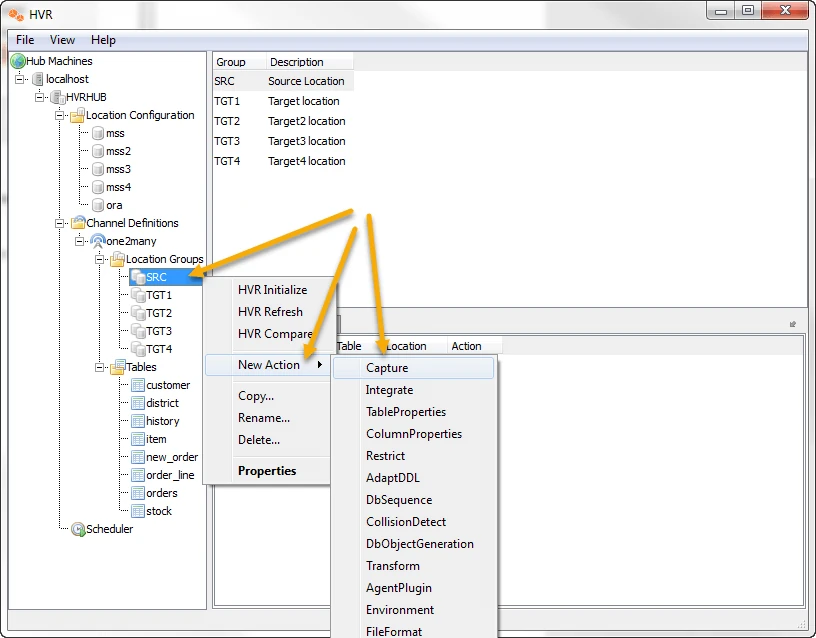
You need to define a single Capture action for all source tables that are part of the SRC location group.
Right-click the name of the location group, select New Action, and click Capture.
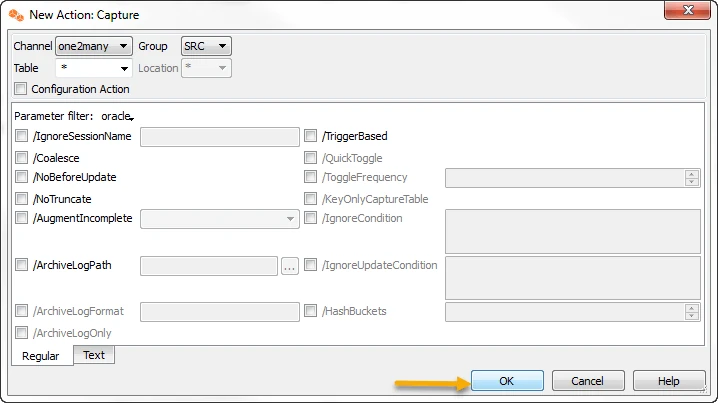
All the default Capture parameters are acceptable for this channel.
Click OK to add the action.
In each action for configuring the capture job, the action is configured at the group and not the location. The Configuration Action option should not be selected and the location stays grayed out.
Define **Integrate actions.
For all eight tables, you need to define a new Integrate action to identify which location connection is used for the integrate job. Assign the first two tables (customer, district) to location group TGT1. The second set of tables (history, item) are assigned to group TGT2. The third set of tables (new_order, order_lines) to group TGT3. And finally, the last two tables (orders, stock) are assigned to TGT4 group.
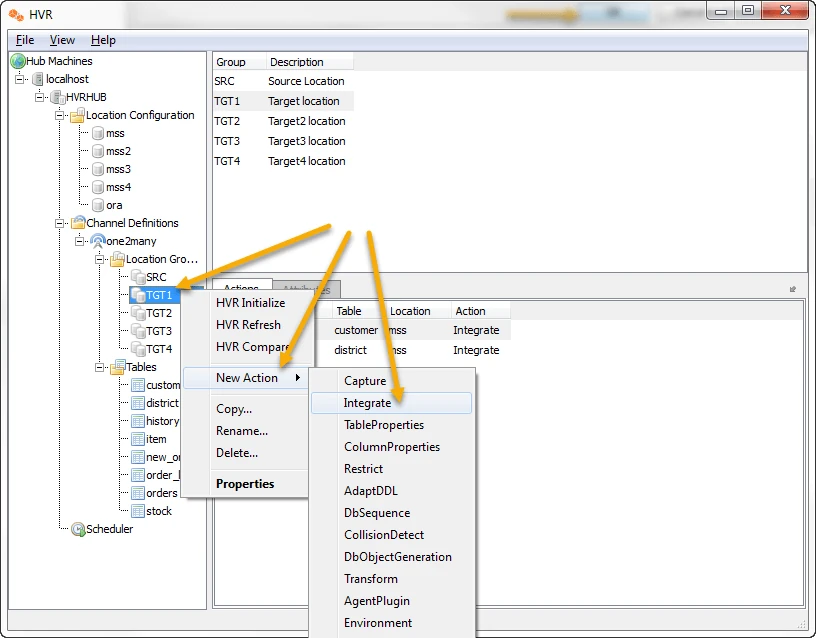
Click Tables and select the first table customer.
In each of the actions for configuring the integrate job, the action is configured at the group and not the location. The Configuration Action option should not be selected and the location stays grayed out.
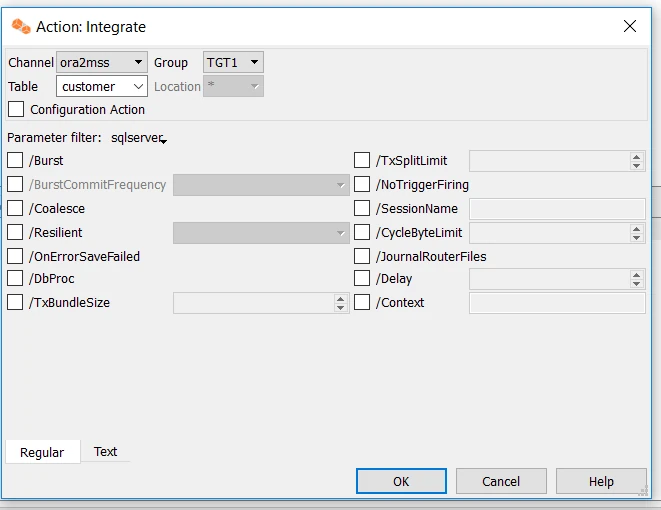
Repeat this process for the second table which should also be assigned the TGT1 group. Select Tables, select the first table and then select the table district. Repeat this process by assigning the next two tables to TGT2, TGT3, and TGT4.
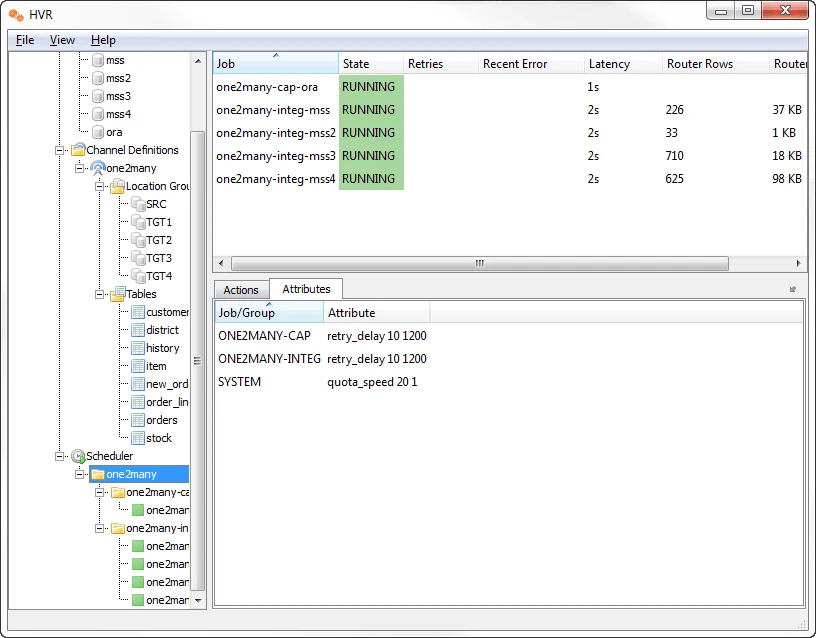
The resulting integrate actions should appear as shown below:
Run HVR Initialize.
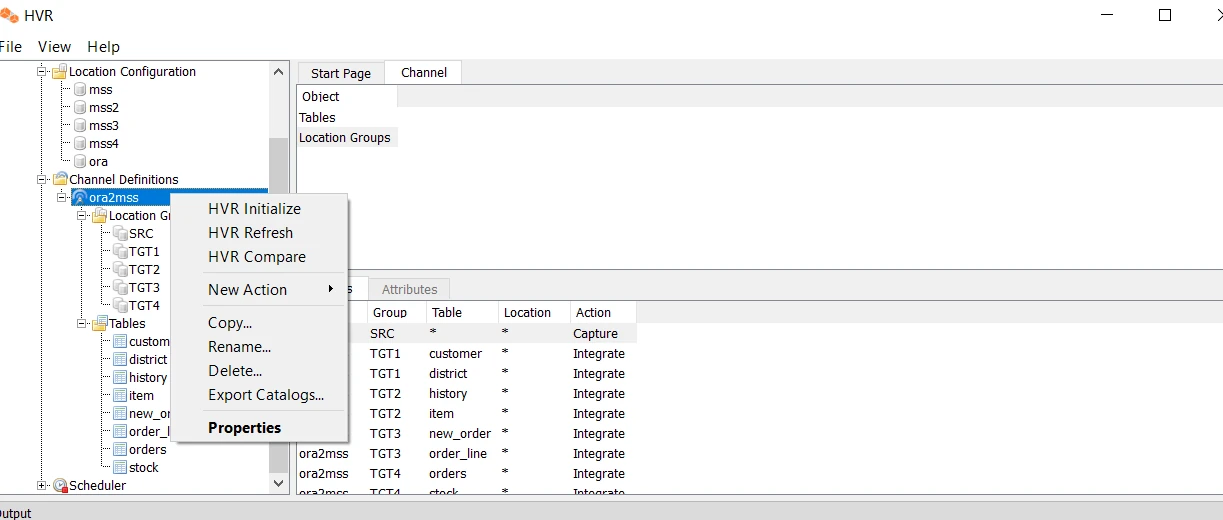
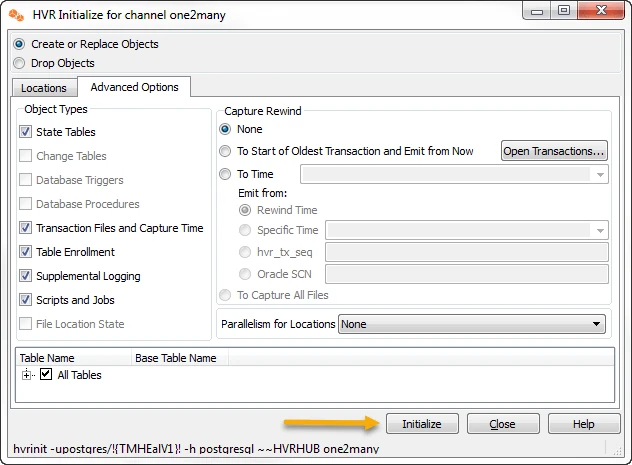
In order to save the runtime components for the channel, execute the HVR Initialize step.
Right-click the one2many channel and select HVR Initialize.
For this exercise, we leave all the default values for both the Locations tab and the Advanced Options tab. Make sure that the Create or Replace Objects is selected.
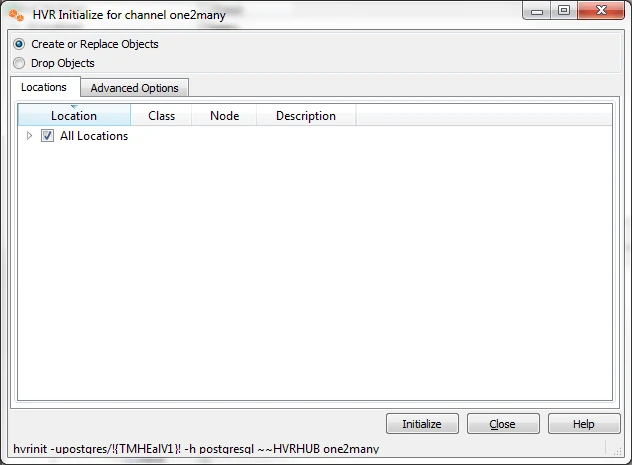
You can click the Advanced Options tab to see all the default settings when generating the runtime components.
Click Initialize.
The following message is displayed to show that HVR created five replication jobs, one for Capture and four for Integrate.
 a.Click OK to return to the Initialize window
Click Close to return back to the HVR Console.
This solution document does not cover the remain steps which is to initially load the data and start the incremental Capture/Integrate jobs with the HVR scheduler.
Appendix
Results of running Refresh:
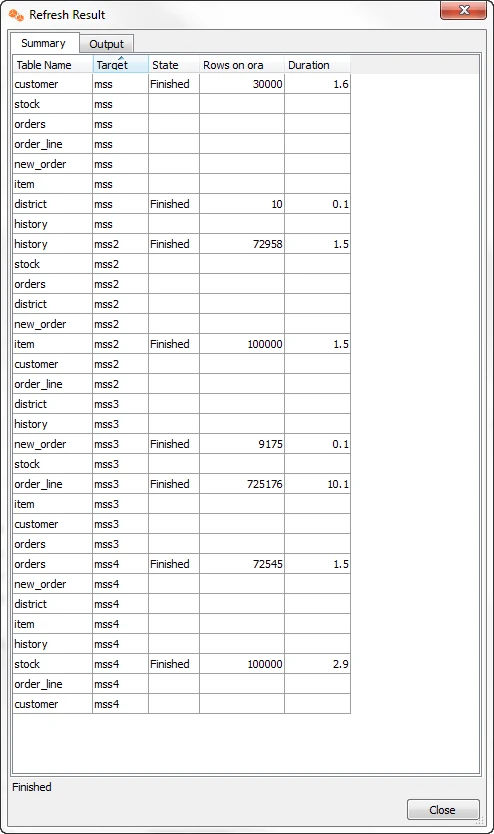
Output from Refresh:
one2many-refr-ora-mss: 2 tables recreated because Always Recreate was selected. [option -cf]
Refreshed districtfrom locationorato locationmss (10 rows 210 wide compression=49.5%). This bulk refresh took 0.15 seconds.
Refreshed customerfrom locationorato locationmss (30000 rows 861 wide compression=32.1%). This bulk refresh took 1.59 seconds.
Refreshed 2 tables from location oratomss.
one2many-refr-ora-mss2: 2 tables recreated because Always Recreate was selected. [option -cf]
Refreshed historyfrom locationorato locationmss2 (72958 rows 173 wide compression=89.2%). This bulk refresh took 1.48 seconds.
Refreshed itemfrom locationorato locationmss2 (100000 rows 149 wide compression=45.2%). This bulk refresh took 1.47 seconds.
Refreshed 2 tables from location oratomss2.
one2many-refr-ora-mss3: 2 tables recreated because Always Recreate was selected. [option -cf]
Refreshed new_orderfrom locationorato locationmss3 (9175 rows 69 wide compression=99.8%). This bulk refresh took 0.14 seconds.
Refreshed order_linefrom locationorato locationmss3 (725176 rows 217 wide compression=81.3%). This bulk refresh took 10.14 seconds.
Refreshed 2 tables from location oratomss3.
one2many-refr-ora-mss4: 2 tables recreated because Always Recreate was selected. [option -cf]
Refreshed ordersfrom locationorato locationmss4 (72545 rows 169 wide compression=94.3%). This bulk refresh took 1.45 seconds.
Refreshed stockfrom locationorato locationmss4 (100000 rows 441 wide compression=26.0%). This bulk refresh took 2.91 seconds.
Refreshed 2 tables from location oratomss4.
Refresh of 8 tables from location ora to 4 other locations finished.
Results of running Integrate jobs:
