How to Promote Pre-production Environment to Production
Question
How do I promote my environment from pre-production to production?
Environment
HVR 5
Answer
This article provides the procedural steps for an HVR Administrator to export their lower pre-production environment and import it into their upper production environment.
Applies to
The steps in this document apply to promoting to a production environment from or to Windows or Linux/UNIX platforms. Instructions for upgrading an HVR instance can be found in the online documentation pages.
This article applies to version v5.7.
This article does not address generating or using new SSL certificate information.
This article does not address any AgentPlugin actions that references a custom file path or any other environment variable that may reference a custom file path.
This article does not apply to moving maintenance tasks, instead they should be recreated.
This article assumes that the upper production environment is already installed. If not, please refer to our installation guide: Installing and Upgrading HVR.
Prerequisites
Before performing any steps, ensure to fulfill the following requirements:
Read the compatibility section of the HVR Release Notes to ensure that HVR is compatible with the server you selected to be the HVR Hub for your upper environment.
Download the HVR installation compatible with your operating system. To download the installation, use the official HVR product download site.
Install the database that will serve as the upper HVR repository. Also, create a schema/database/user that has the same name as your lower HVR repository.
Overview
Verify your upper environment is installed and ready.
Export location properties from the lower and import to the upper environment.
Change the physical properties of the location to match the upper environment.
Export the channel definition (except for locations) and import to the upper environment.
Initialize the channel to create runtime objects and stateful information.
Start the jobs.
Instructions
Start the HVR Listener on the upper server. See Hvrremotelistener
Register the hub:
a. Launch the HVR User Interface.
b. Click File > Register Hub.
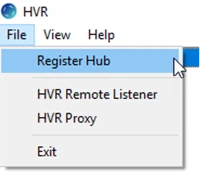
c. Enter connection details for your HVR Hub server, which include:
- HVR Remote Listener server node, port, and login information
- Repository Class
- Database Connection
Export catalogs from the lower HVR Hub to upper HVR Hub:
a. Export your location definitions. For this, right-click your old Hub and select Export Catalogs….
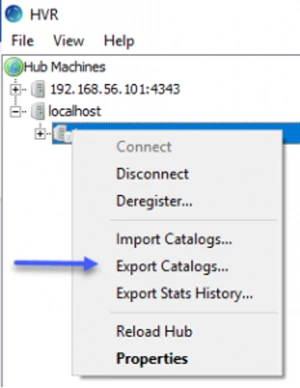
b. In the Catalog group box, only check Locations.
c. Use the Browse button to choose a folder and name the file to store the output.
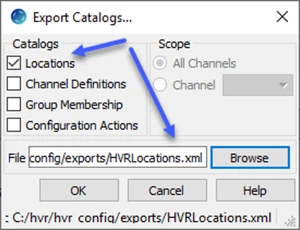
d. Click OK.
Ensure that the exported files are transferred to the server in the upper environment.
Import and edit the new locations. Change the location properties to point to the new upper environment. Ensure the HVR Agent and the database server information is included.
Test connection for all locations on the upper HVR Hub.
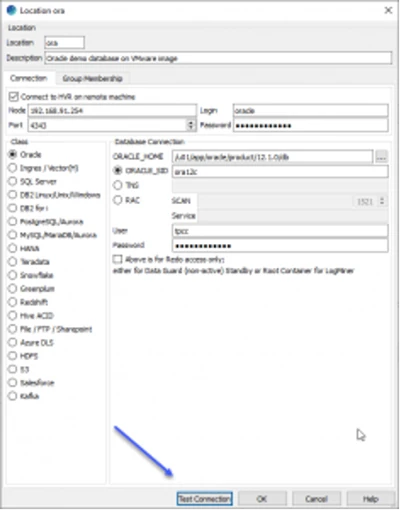
Repeat this step for all connections until all connection tests are successful.
Promote the remaining Catalog definitions from the lower HVR Hub to upper HVR Hub.
a. Export your channel definitions. For this, right-click your lower Hub and select Export Catalogs….
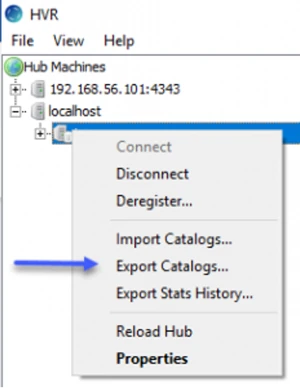
b. In the Catalog group box, uncheck Locations and check Channel Definitions, Group Membership, and Configuration Actions for All Channels.
c. Use the Browse button to choose a folder and name the file to store the output.
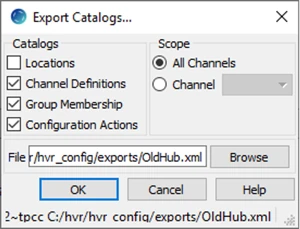
d. Click OK.
Ensure that the exported files are transferred to the server in the upper environment.
Import your HVR catalog definitions. For this, right-click your upper Hub and select Import Catalogs….
a. Select the XML file, to which you saved the exported catalog definitions.
b. Click Open to complete the import.
c. Verify that your entire HVR Catalog has been imported to the upper HVR server.
d. Deploy and start the upper HVR Hub.
Launch the HVR GUI and connect to the upper HVR Hub repository.
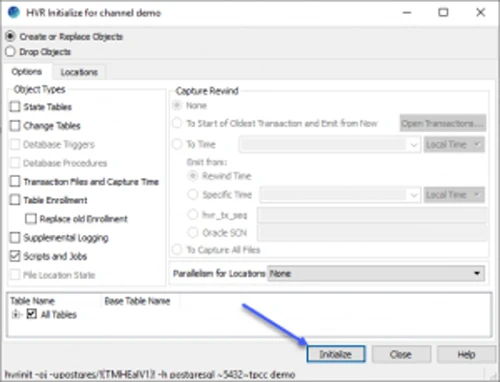
For all channels, you must run HVR Initialize to deploy local runtime objects including Scripts and Jobs.
a. Right-click the channel definition and select HVR Initialize.
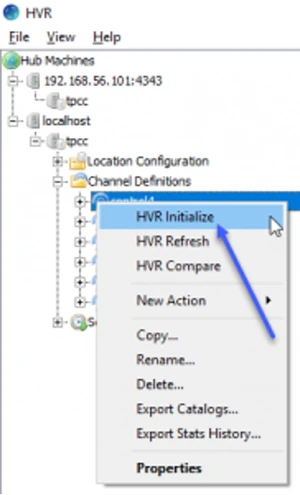
b. Select Create or Replace Objects.
The first time the channel is deployed in this environment, you will need to select all objects and run HVR Initialize for with all objects selected.
If you are promoting to a channel that already exists and has already been running, you only need to select Scripts and Jobs while leaving all other object unselected.
c. Click Initialize.
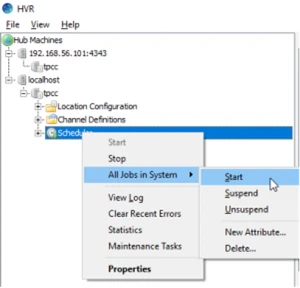
Start all jobs in the system. For this, right-click the Scheduler and select All Jobs in System > Start.
