Upgrading HVR
Upgrading installations can be challenging, especially if downtime or a large number of machines are involved. For this reason, different HVR versions are typically fully compatible with each other; there is no need to upgrade all machines in a channel at once. For more information, see section Compatibility Between HVR Versions.
All machines (remote source, remote target, hub, GUI) may be upgraded at the same time. It is also possible to only upgrade certain machines (e.g. only a hub machine, GUI, remote source, or target). If this is done, it should be understood that each HVR release fixes certain bugs and/or contains new features. Each fix or feature is only effective if the correct machine is upgraded. For example, if a new HVR release fixes an integrate bug, then that release must be installed on the machine(s) which perform integrate. If only the GUI and/or hub machine is upgraded, there will be no benefit. Read the HVR Release Notes (in $HVR_HOME/hvr.rel) to find out which features and fixes have been added, and which machines must be upgraded for each feature and fix to be effective. New features should not be used until all machines that are specified for that feature are upgraded, otherwise, errors may occur.
Before upgrading HVR, it is recommended to take a full backup of the following:
- the HVR_HOME and HVR_CONFIG directories.
- the HVR hub database using a DBMS's native backup option.
Alternatively, use command hvrcatalogexport to create a backup of the hub database. However, this command does not support creating a backup of HVR Events and Statistics related information. To back up the hub database using this method, in HVRGUI, right-click the hub and select Export Catalogs. Ensure that all catalogs (Locations, Channel Definitions, Group Membership, and Configuration Actions) are selected in the Export Catalogs... dialog. Click Browse and specify the name of the backup file to be created. Click OK.
Perform the following steps to upgrade HVR:
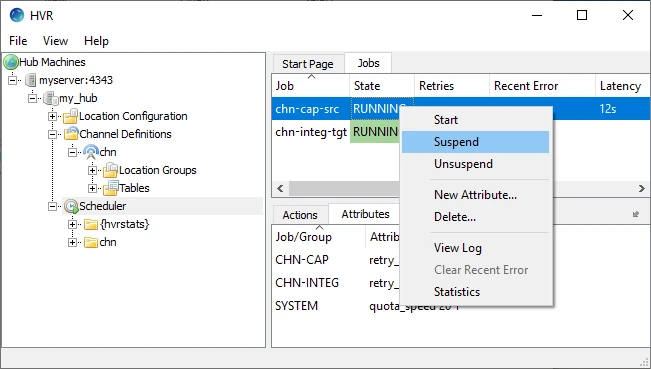
On the hub machine, suspend all the replication jobs: in the Jobs pane, right-click the capture job (e.g. chn-cap-src) and click Suspend. Wait until the integrate job has finished integrating all the changes (so no transaction files are left in the router directory) and then suspend it too.
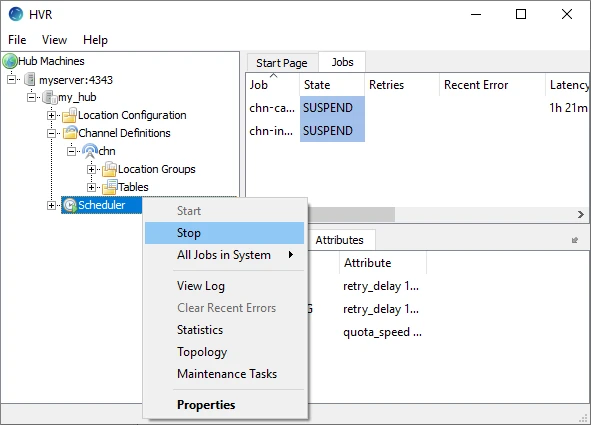
On the hub machine, stop the HVR Scheduler: right-click the Scheduler node and click Stop.
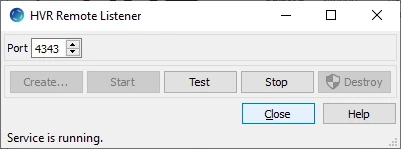
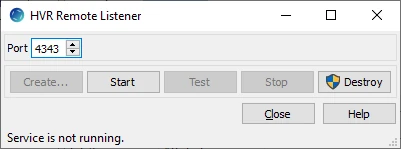
If the HVR Remote Listener service is running, it must be stopped on all agent/hub instances. Click File ▶ HVR Remote Listener ▶ Stop.
Install the new version of HVR downloaded from the Fivetran.com website. For more information, see Downloading HVR.
For Unix or Linux, execute the following commands to uncompress the HVR distribution file (e.g, hvr-5.7.0-linux_glibc2.5-x64-64bit_ga.tar.gz) into the HVR_HOME directory:
$ cd $HVR_HOME
$ umask 0
$ gzip -dc /tmp/hvr-5.7.0-linux_glibc2.5-x64-64bit.tar.gz | tar xf -
For Windows, run the HVR installation file (.exe) or extract the compressed file (.zip) into the HVR_HOME directory.
If HVR must perform log-based capture from Ingres, it needs a trusted executable to read from the DBMS logging system.
Click here to see the steps...
Execute the following commands while logged in as the DBMS owner (ingres):
$ cd /usr/hvr/hvr_home
$ cp bin/hvr sbin/hvr_ingres
$ chmod 4755 sbin/hvr_ingres
It is not required to create a trusted executable when either of the following are true:
capture is trigger-based
capture will be from another machine
HVR is running as the DBMS owner (ingres)
Additionally, on Linux, the trusted executable should be patched using the following command:
$ /usr/hvr/hvr_home/lib/patchelf --set-rpath /usr/hvr/hvr_home/lib --force-rpath /usr/hvr/hvr_home/sbin/hvr_ingresIf HVR and ingres share the same Unix group, then the permissions can be tightened from 4755 to 4750. Permissions on directories $HVR_HOME and $HVR_CONFIG may need to be loosened so that user Ingres can access them;
$ chmod g+rX $HVR_HOME
$ chmod -R g+rwX $HVR_CONFIG
Launch HVR GUI.
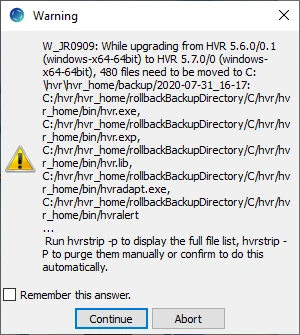
When you launch HVR GUI for the first time after the upgrade, a warning dialog (Warning: W_JR0909) may be displayed. This dialog lists all files that will be moved to a backup directory (/hvr_home/backup/currentdate) since they are not required or could be potentially dangerous in the upgraded version of HVR. These files can include the old HVR installation files like shared libs or scripts and also the scripts/files added by the user.
HVR regards HVR_HOME as its private directory which should not contain user files.
In the warning dialog, click Continue to move the files to a backup directory (/hvr_home/backup/currentdate).
If Abort is selected, these files will not be moved to the backup directory. However, these files can be purged later using the command hvrstrip -P. Note that executing hvrstrip -P does not create a backup of the files being purged.Connect to the hub. Right-click the hub and click Connect. When you first connect to the hub after the upgrade, an information dialog may be displayed prompting you to upgrade the HVR catalogs to a new version.
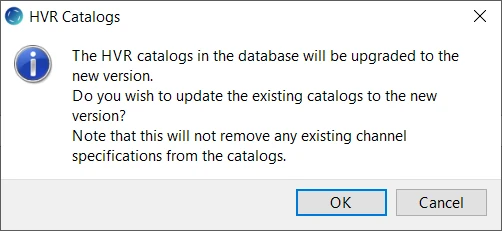
- When upgrading to the HVR version below 5.6.5/13, the following dialog will appear.
Click OK to upgrade the HVR catalogs to a new version.
Click Continue for connecting to the hub. Also, follow the instructions in the warning dialog to upgrade the hvr_stats table later using the command Hvrcatalogupgrade.
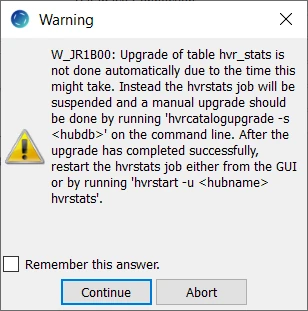
Clicking Abort will abort the connection to the hub.
- When upgrading to HVR version 5.6.5/13 and higher, the following dialog may be displayed. Select the upgrade option that suits you best.
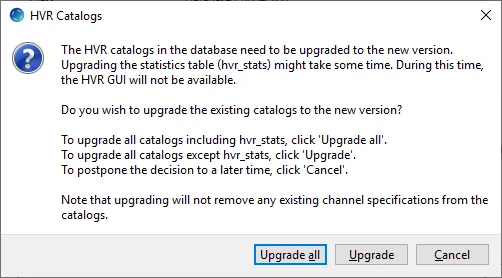
- When upgrading to the HVR version below 5.6.5/13, the following dialog will appear.
If the HVR Remote Listener service was stopped before upgrading HVR, it must be restarted on all agent/hub instances. Click File ▶ HVR Remote Listener ▶ Start.
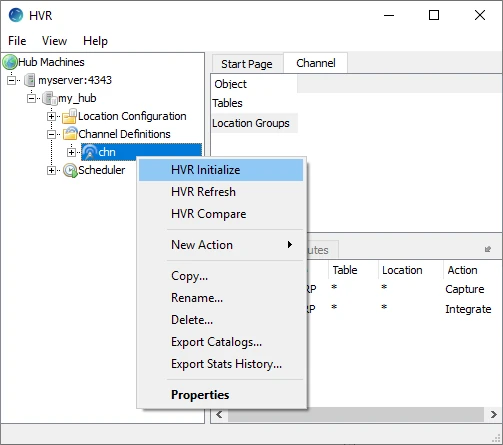
For certain bug fixes, it may be necessary to regenerate the Scripts and Jobs for each channel. Note that this upgrade step is seldom needed; only if it is explicitly mentioned in the HVR Release Notes.
Right-click the channel and select HVR Initialize.
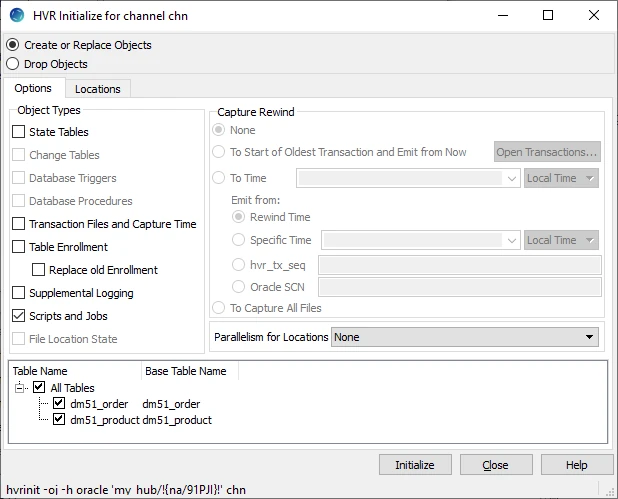
In the HVR Initialize dialog, select Scripts and Jobs and click Initialize.
On the hub machine, start the HVR Scheduler.
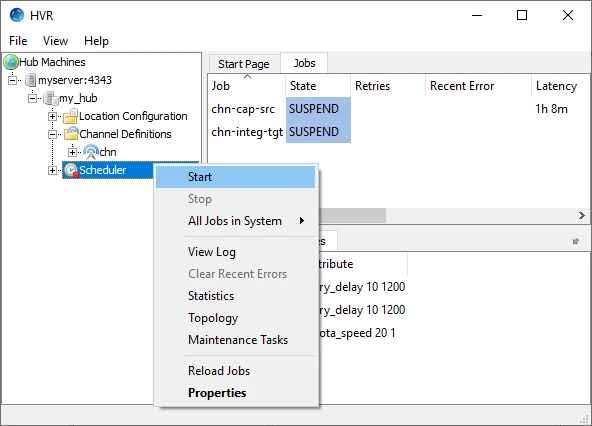
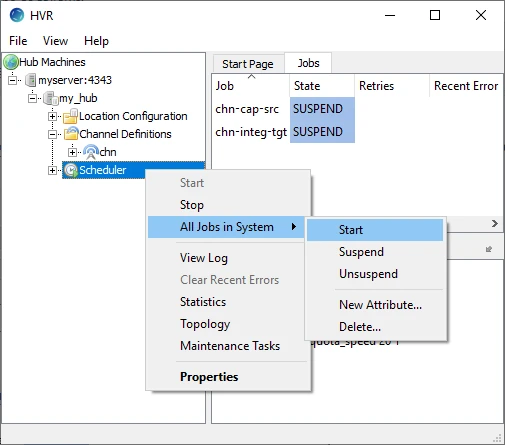
On the hub machine, start the capture and integrate jobs. Right-click the Scheduler node, navigate to All Jobs in System, and click Start.
