Creating and Adding Tables to Channel Manually
Option Add Table Manually allows you to create a table and add it to an existing channel. Table creation includes defining table name, base name, table group, adding columns of specified data types, adding column attributes, defining whether a column is nullable, a key or a distribution key column, etc.
Adding a table manually can be done, for example, in cases when there is a channel with a file system as a source and a database as a target, and you need to define a table on the source to be replicated to the target.
After the table is added to the channel that has activated replication running, you must activate the table in the channel. For more information, see section Activating Replication.
To manually add a table to a channel:
Navigate to the left side bar and click Tables.
On the Tables page, select the channel to which the table will be added using the All Channels filter.
At the top right, click the More Options icon
 and select Add Table Manually.
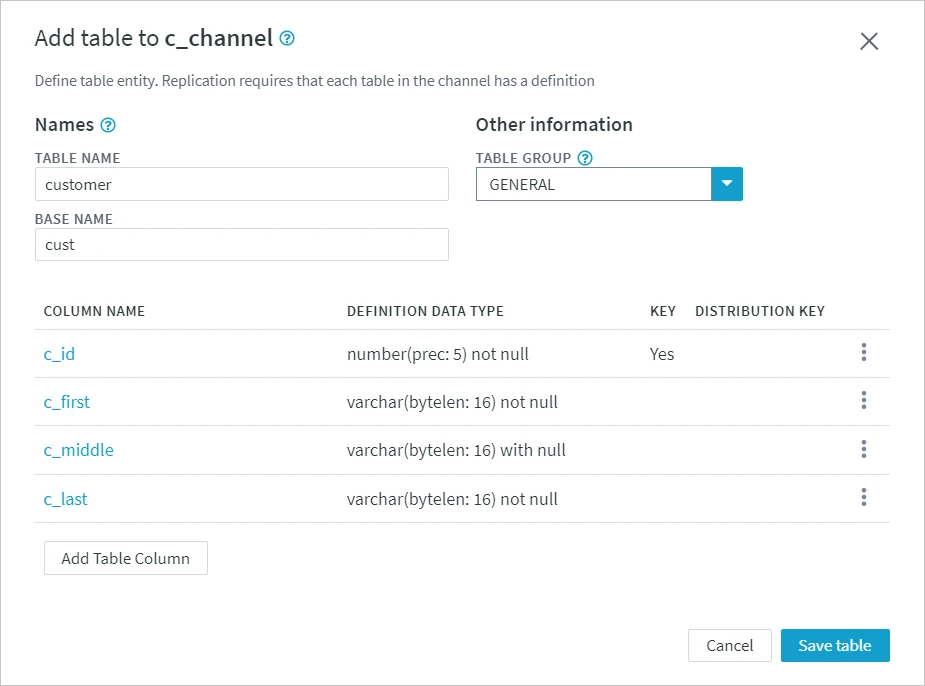
In the Add table to <channel> dialog, specify table details, such as table name, table group, and base name.
To add a column to the table, click Add Table Column.

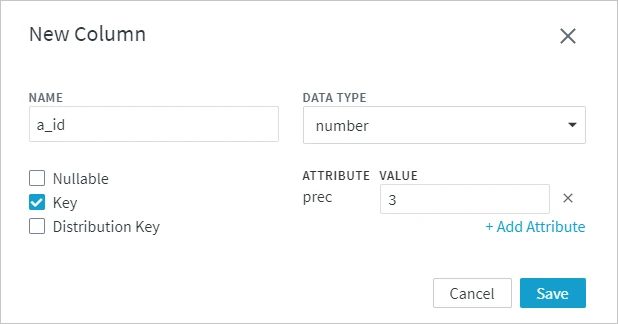
In the New Column dialog, specify the name of the column.
Select the data type for the column from the drop-down list.
(Optional) Select whether the column will be nullable, a key column or a distribution key column.
(Optional) Add an attribute to a column:
- Click +Add Attribute.
- Select an attribute from the drop-down list.
- Specify or select a value next to the added attribute.
Click Save to add the column to the table.
