Replicating XML file to Database Table
This example describes how to move an XML file from a source location to a database table on a target location using HVR.
Prerequisites
Create a table in a target database, for example, as follows:
SQL > create table test_xml (c1 int, c2 varchar2(20));Create an XML file with the HVR's XML format, for example, as shown below:
<?xml version="1.0" encoding="UTF-8"?>
<!DOCTYPE hvr SYSTEM "lib/hvr.dtd">
<hvr version="1.0">
    <table name="test_xml">
        <row>
            <column name="c1">1</column>
            <column name="c2">Hello</column>
        </row>
        <row>
            <column name="c1">2</column>
            <column name="c2">Hello World</column>
        </row>
    </table>
</hvr>
Here, c1 and c2 match the base names of the columns and test_xml matches the table base name in the target database.
Configuration Steps
For the purpose of this example, it is assumed that the hub database already exists and a target database location tgt has been configured. For more information on how to register the HVR Hub and create locations, see, for example, section Quick Start for HVR - Oracle.
Next, add a file directory to the source location: in HVR GUI, right-click Location Configuration and select New Location.
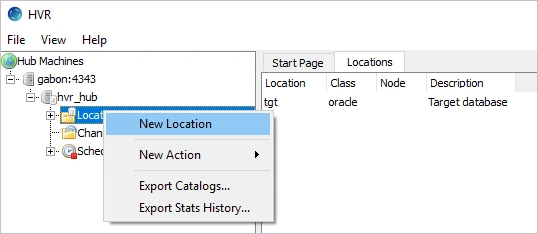
In the New Location window, specify the location name src.
In the Class pane, select File/FTP/Sharepoint.
In this case, the XML file resides on a local machine, thus, select Local in the Protocol field. Alternatively, connect to a remote file location using one of the available file protocols (e.g. FTP, SFTP or WebDAV).
In the Directory field, select the directory, in which the XML file will be uploaded.
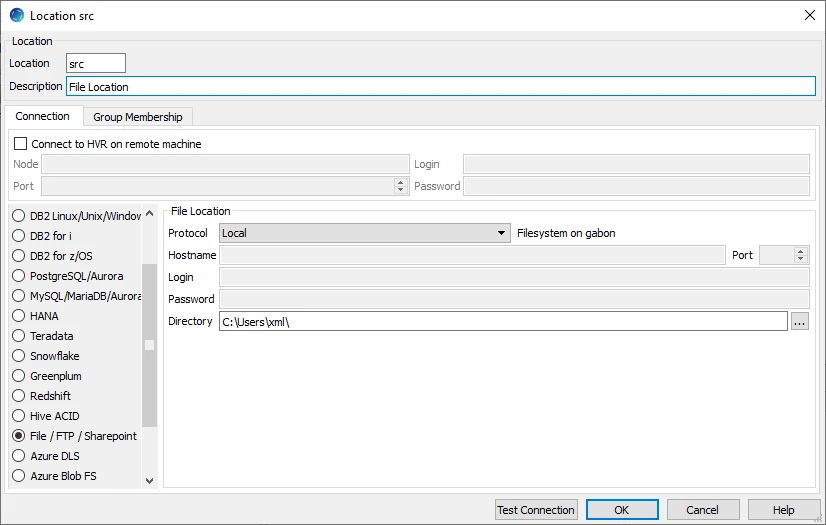
Click Test Connection to verify the connection and then click OK.
Now, you need to create a channel: right-click Channel Definitions and select New Channel. Specify the channel name, e.g. xml_to_tbl, and click OK.
Expand the channel node, right-click Location Groups and select New Group. Specify the name of the source group, e.g. SRCGRP, select src under the Group Membership.
Right-click Location Groups and select New Group. Specify the name of the target group, e.g. TGTGRP, select tgt under the Group Membership.
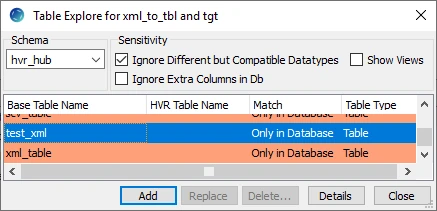
Right-click the Tables node, select Table Explorer. In the Table Explorer window, click Connect. Select the required table, in this case, test_xml, and click Add. Click OK in the HVR Table Name window and close the Table Explorer window.
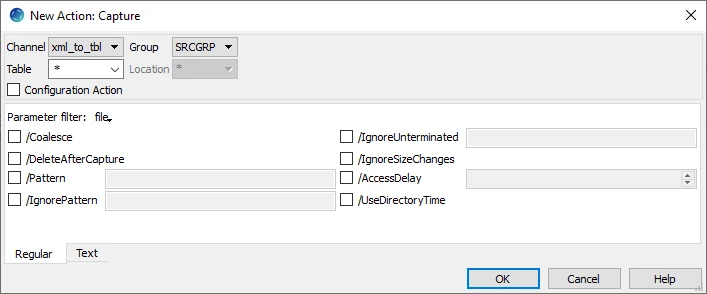
Add the Capture action to the source group: right-click source group SRCGRP, select New Action ▶ Capture. In the New Action: Capture, click OK.
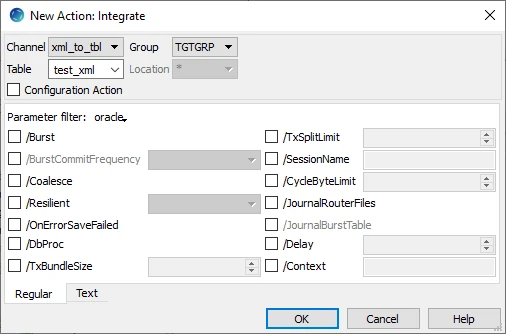
Add the Integrate action to the target group: right-click target group TGTGRP, select New Action ▶Integrate.
In the New Action: Integrate window, select table test_xml and click OK.
Now that the channel is configured, right-click the channel and select HVR Initialize. In the HVR Initialize window, click Initialize. HVR will create two replications jobs under the Scheduler node.
Right-click the Scheduler node and select Start.
Right-click the Scheduler node, navigate to All Jobs in System and click Start.
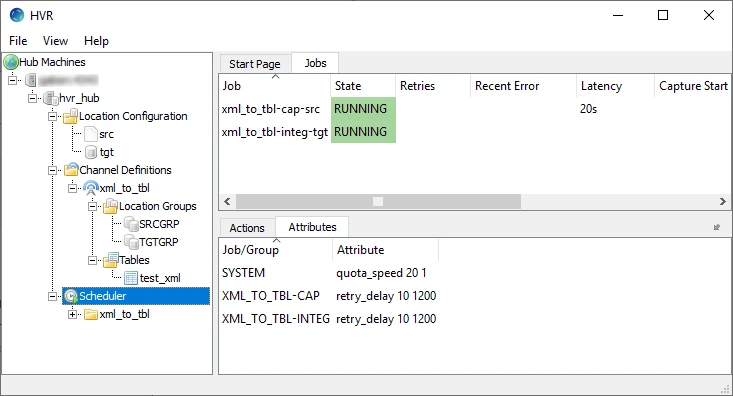
As shown in the screenshot below, the Capture and Integrate jobs are in the RUNNING state.
Test Replication
Add the XML file to the directory defined on the source location. Right-click the Scheduler node and select View Log that will display the output of the Capture and Integrate jobs running.
If you look at the table, you will see that it got populated with the corresponding values from the XML file.