Configuring Multi-Directional Replication
A bi-directional topology assumes that data is replicated between two locations in both directions, and end users (applications) modify data on both sides. A multi-directional active/active replication involves more than two locations that stay synced up. For more information on different types of HVR replications, refer to section Replication Topologies.
For the list of locations, on which bi-directional replication is supported, refer to the relevant section of Capabilities.
Channel Setup for Multi-Directional Replication
The steps described in this section are applicable for both bi-directional and multi-directional replication.
The following steps are to configure a multi-directional replication with three locations on Oracle machines.
In HVR GUI, after registering the hub, create three physical locations app1, app2, app3:
a. In the navigation tree pane, right-click Location Configuration and select New Location.
b. Fill in the appropriate fields to connect to location app1 (e.g. as shown on the image below) and click Test Connection to verify the connection to the database and then click OK.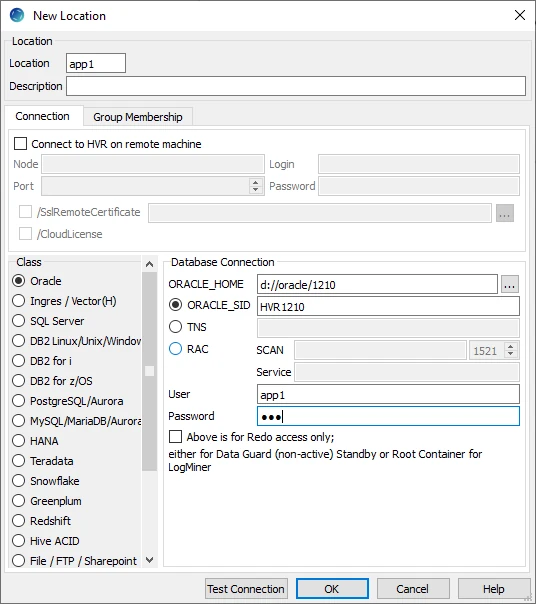
Repeat the above steps a and b to create locations app2 and app3.
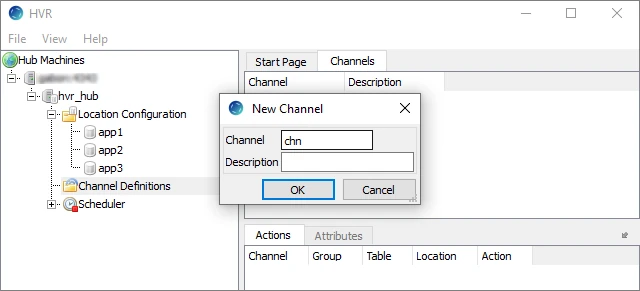
Define a channel for replication: right-click Channel Definitions and select New Channel and enter the name of the channel chn. Click OK.
Define logical locations (location groups) for replication. Since this is a multi-directional configuration, a single location group will be defined including all physical locations.
a. Click the plus sign (+) next to the channel chn, right-click Location Groups and select New Group.
b. Enter the name of the group Active and select all of the locations app1, app2, app3. Click OK.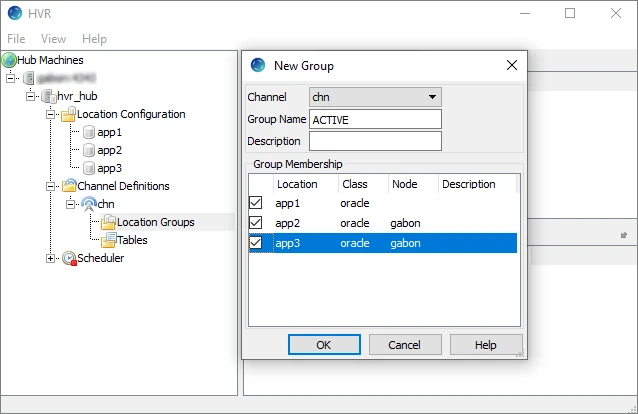
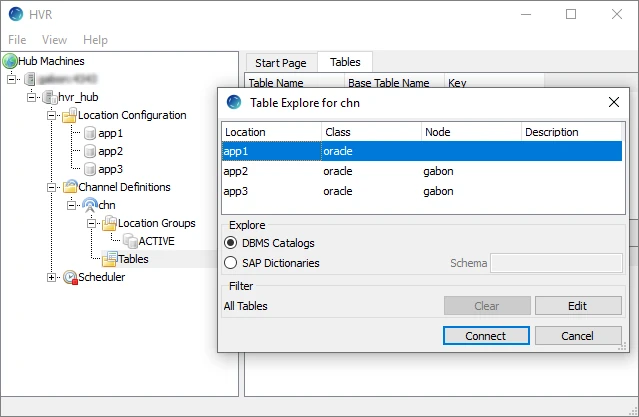
Location app1 includes table Product. Right-click Tables and select Table Explorer. In the Table Explorer dialog, select app1 and click Connect. Select the table and click Add.
At least two actions must be defined on the channel:
a. Right-click group ACTIVE, click New Action and select Capture. While adding action Capture, ensure that field Table has value '*' and field Group has value 'ACTIVE'.
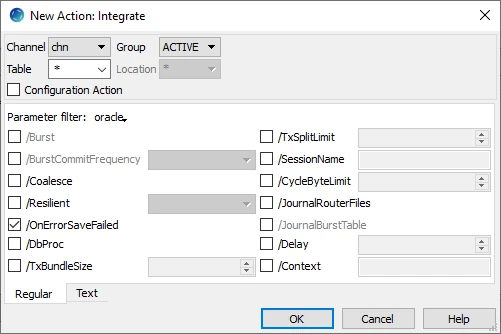
b. Right-click group ACTIVE, click New Action and select Integrate. In the Integrate dialog, select the /OnErrorSaveFailed parameter and click OK. Ensure that field Table has value '*' and field Group has value 'ACTIVE'.Parameter /OnErrorSaveFailed allows HVR to continue replication when errors occur. The error message including the row causing the failure is stored in the fail table tbl_f and can be investigated afterwards (see command Hvrretryfailed).The errors will also be written to the log file.
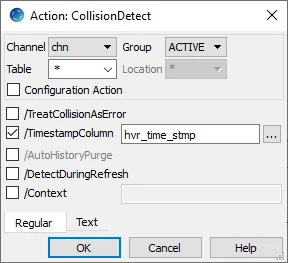
In a multi-directional replication environment, there can always be collisions. For example, users in different databases may update the same row at the same time, or a row may be updated in one database and deleted in another database. If collisions happen, then the end result may be that your databases get out of sync. HVR provides a sophisticated collision detect capability (CollisionDetect) that will ensure that the most recent change to a row always wins and systems remain in sync. Right-click group ACTIVE, click New Action and select CollisionDetect.
In the CollisionDetect dialog select option /TimestampColumn and select the timestamp column in the replicated tables for collision detection. A timestamp column should be manually added beforehand to each replicated table in the multi-directional channel. Consider using action CollisionDetect only on tables with a reliable timestamp column that accurately indicates when the data was last updated.
In some multi-directional replication environments, the collisions may be prevented at the application level (using customers' own application partitioning), thus avoiding the need to use action CollisionDetect.
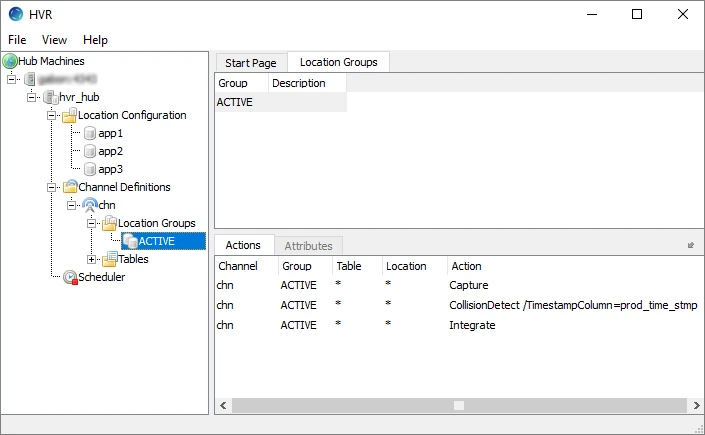
The resulting channel definition is shown on the image below:
At the initial stage of setting up the multi-directional replication, some of the locations may not have the tables existing in another location. In this case, you need to create the tables in all locations in the channel and ensure they are all in sync. You can use the HVR Refresh capability for this. For example, only location app1 has table Product at this point. To create the table in other two locations app2 and app3:
a. In the HVR GUI, right-click channel chn and select HVR Refresh. In the HVR Refresh dialog, select app1 as a source and app2 and app3 as targets.
b. Below, ensure that the required table is selected.
c. Under the Options tab, select Create Absent Tables. Click Refresh.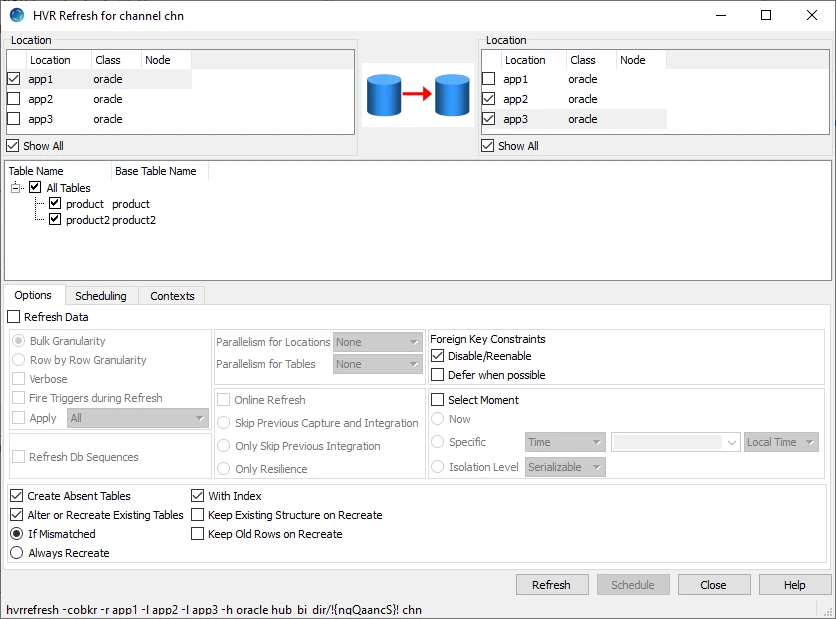
Once the absent tables are created in the other two locations, right-click channel chn and select HVR Initialize. HVR will create the corresponding jobs under the Scheduler.
After that, run HVR Refresh once again to sync the data in all the locations to ensure that no data changes made during the refresh are lost.
You can run the Refresh operation in parallel across all locations (tables) to speed up the execution. For this select the number of parallel refresh processes in the Parallelism for Locations and Parallelism for Tables fields.
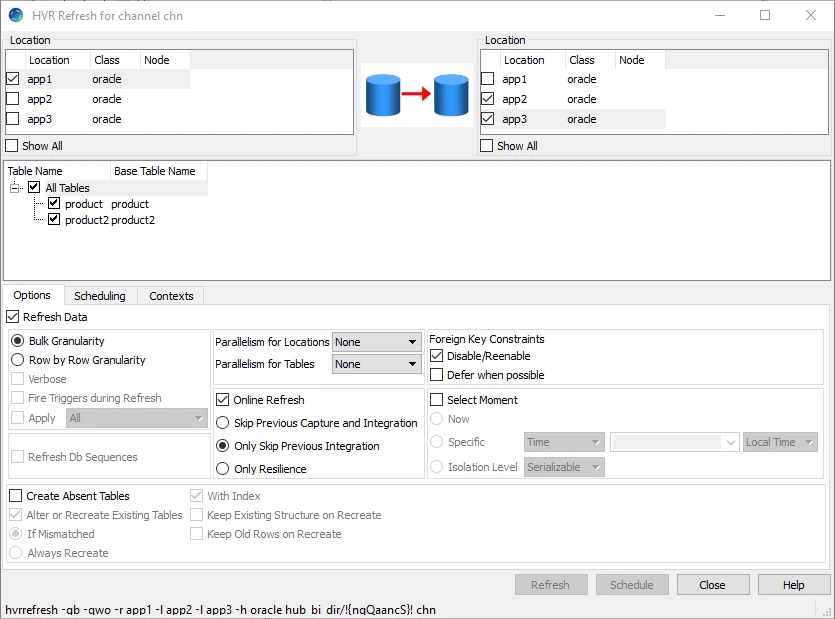
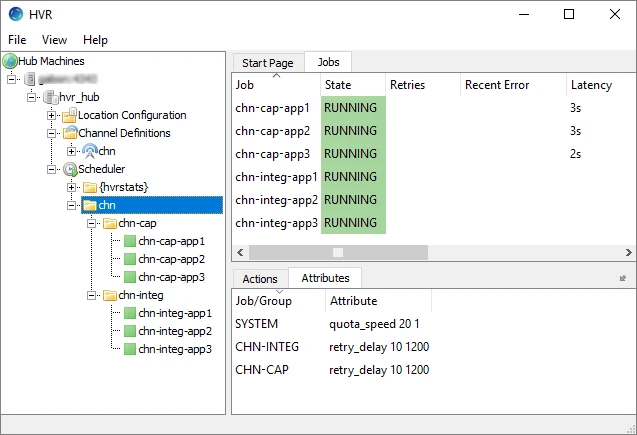
Right-click the Scheduler and click Start. On Windows, the HVR Scheduler runs as a system service. Create a new HVR Scheduler service using the HVR GUI dialog.
Right-click the Scheduler, select All Jobs in Systems, and click Start. Once the jobs are started, they will go from the SUSPEND state to the RUNNING state. The setup is now complete.
