Single Sign-On Using PingOne
Follow our guide to set up single sign-on (SSO) into Fivetran using the Fivetran PingOne catalog application. While PingFederate is not officially supported by Fivetran, it is SAML 2.0 compliant. For more information, see our statement on SAML 2.0 providers.
Prerequisites
To set up PingOne SSO with Fivetran, you need:
- A PingOne Administrator account
- A Fivetran Account Administrator account
In PingOne
Add and configure the Fivetran application
Log in to your PingOne account and select the environment you want to connect to Fivetran.
Go to Connections > Applications.
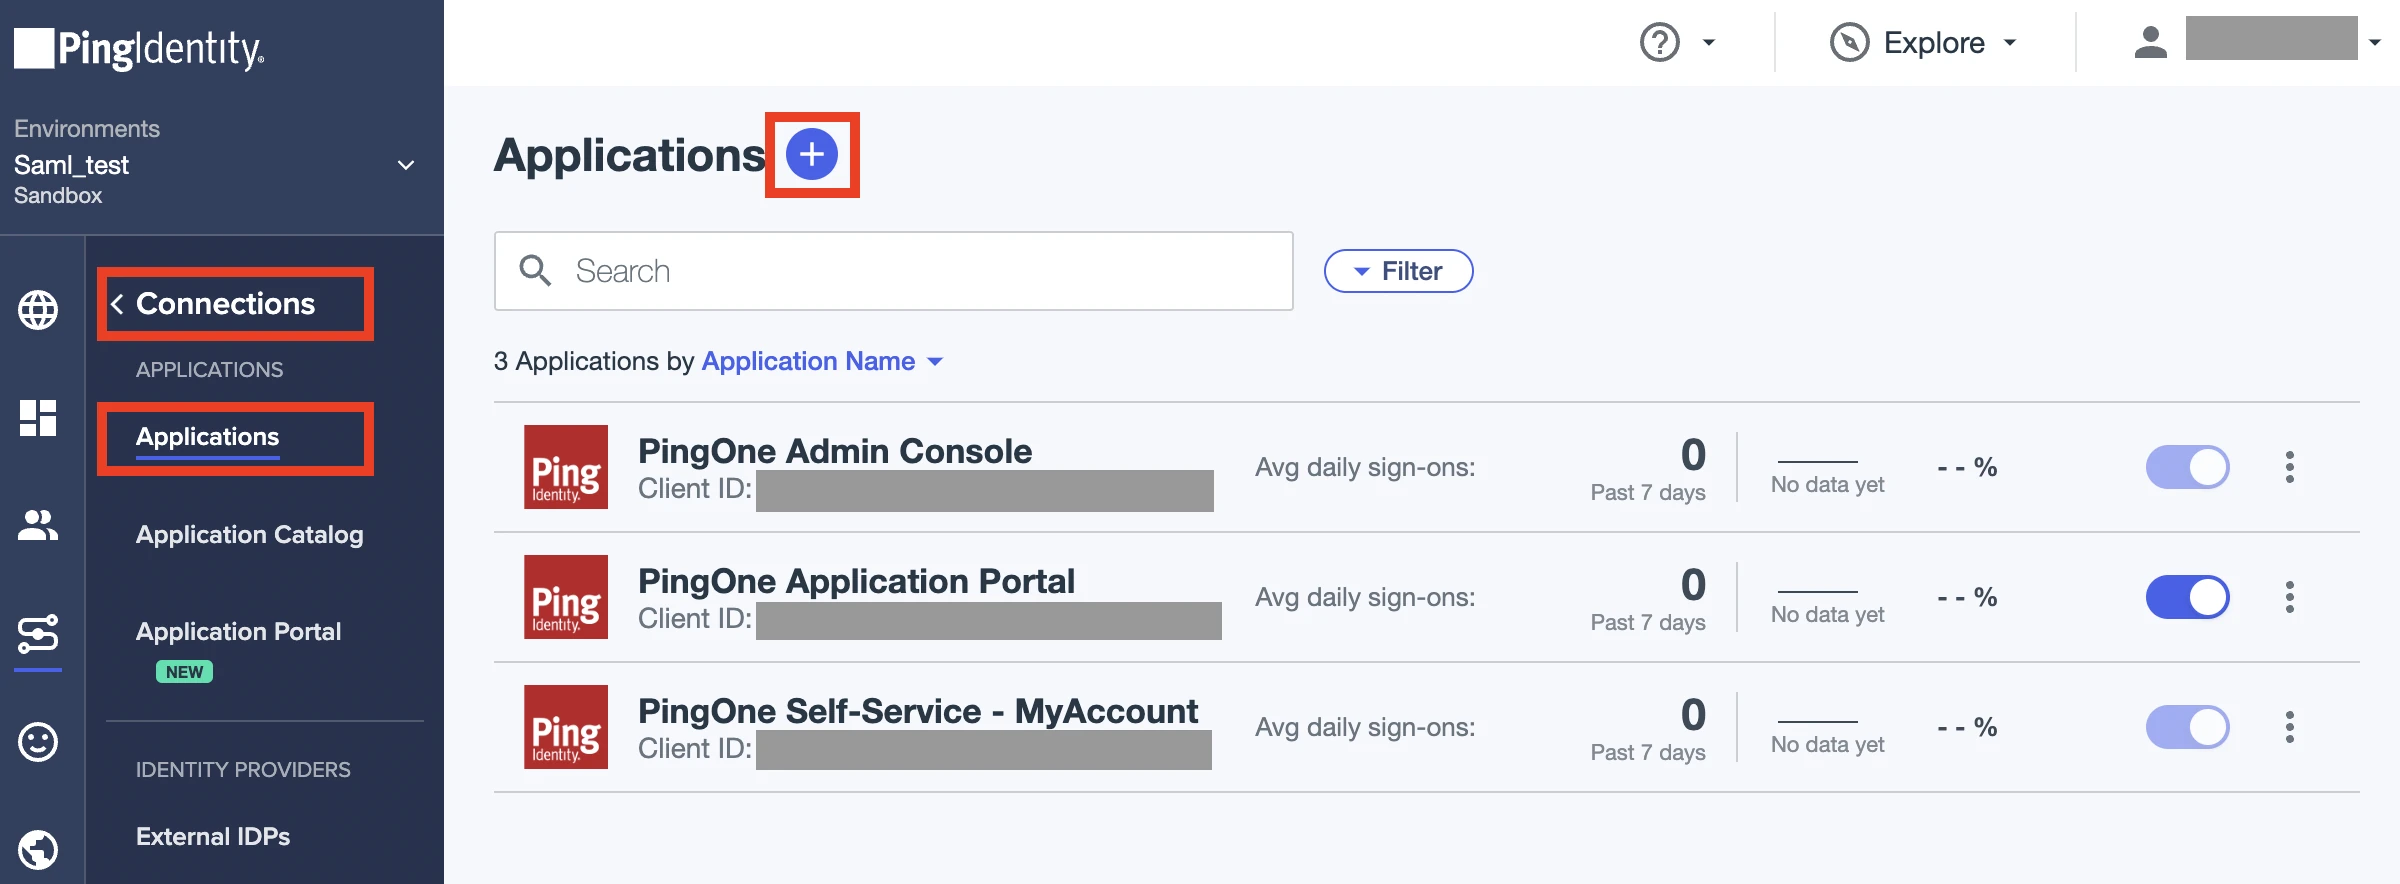
On the Applications page, click +.
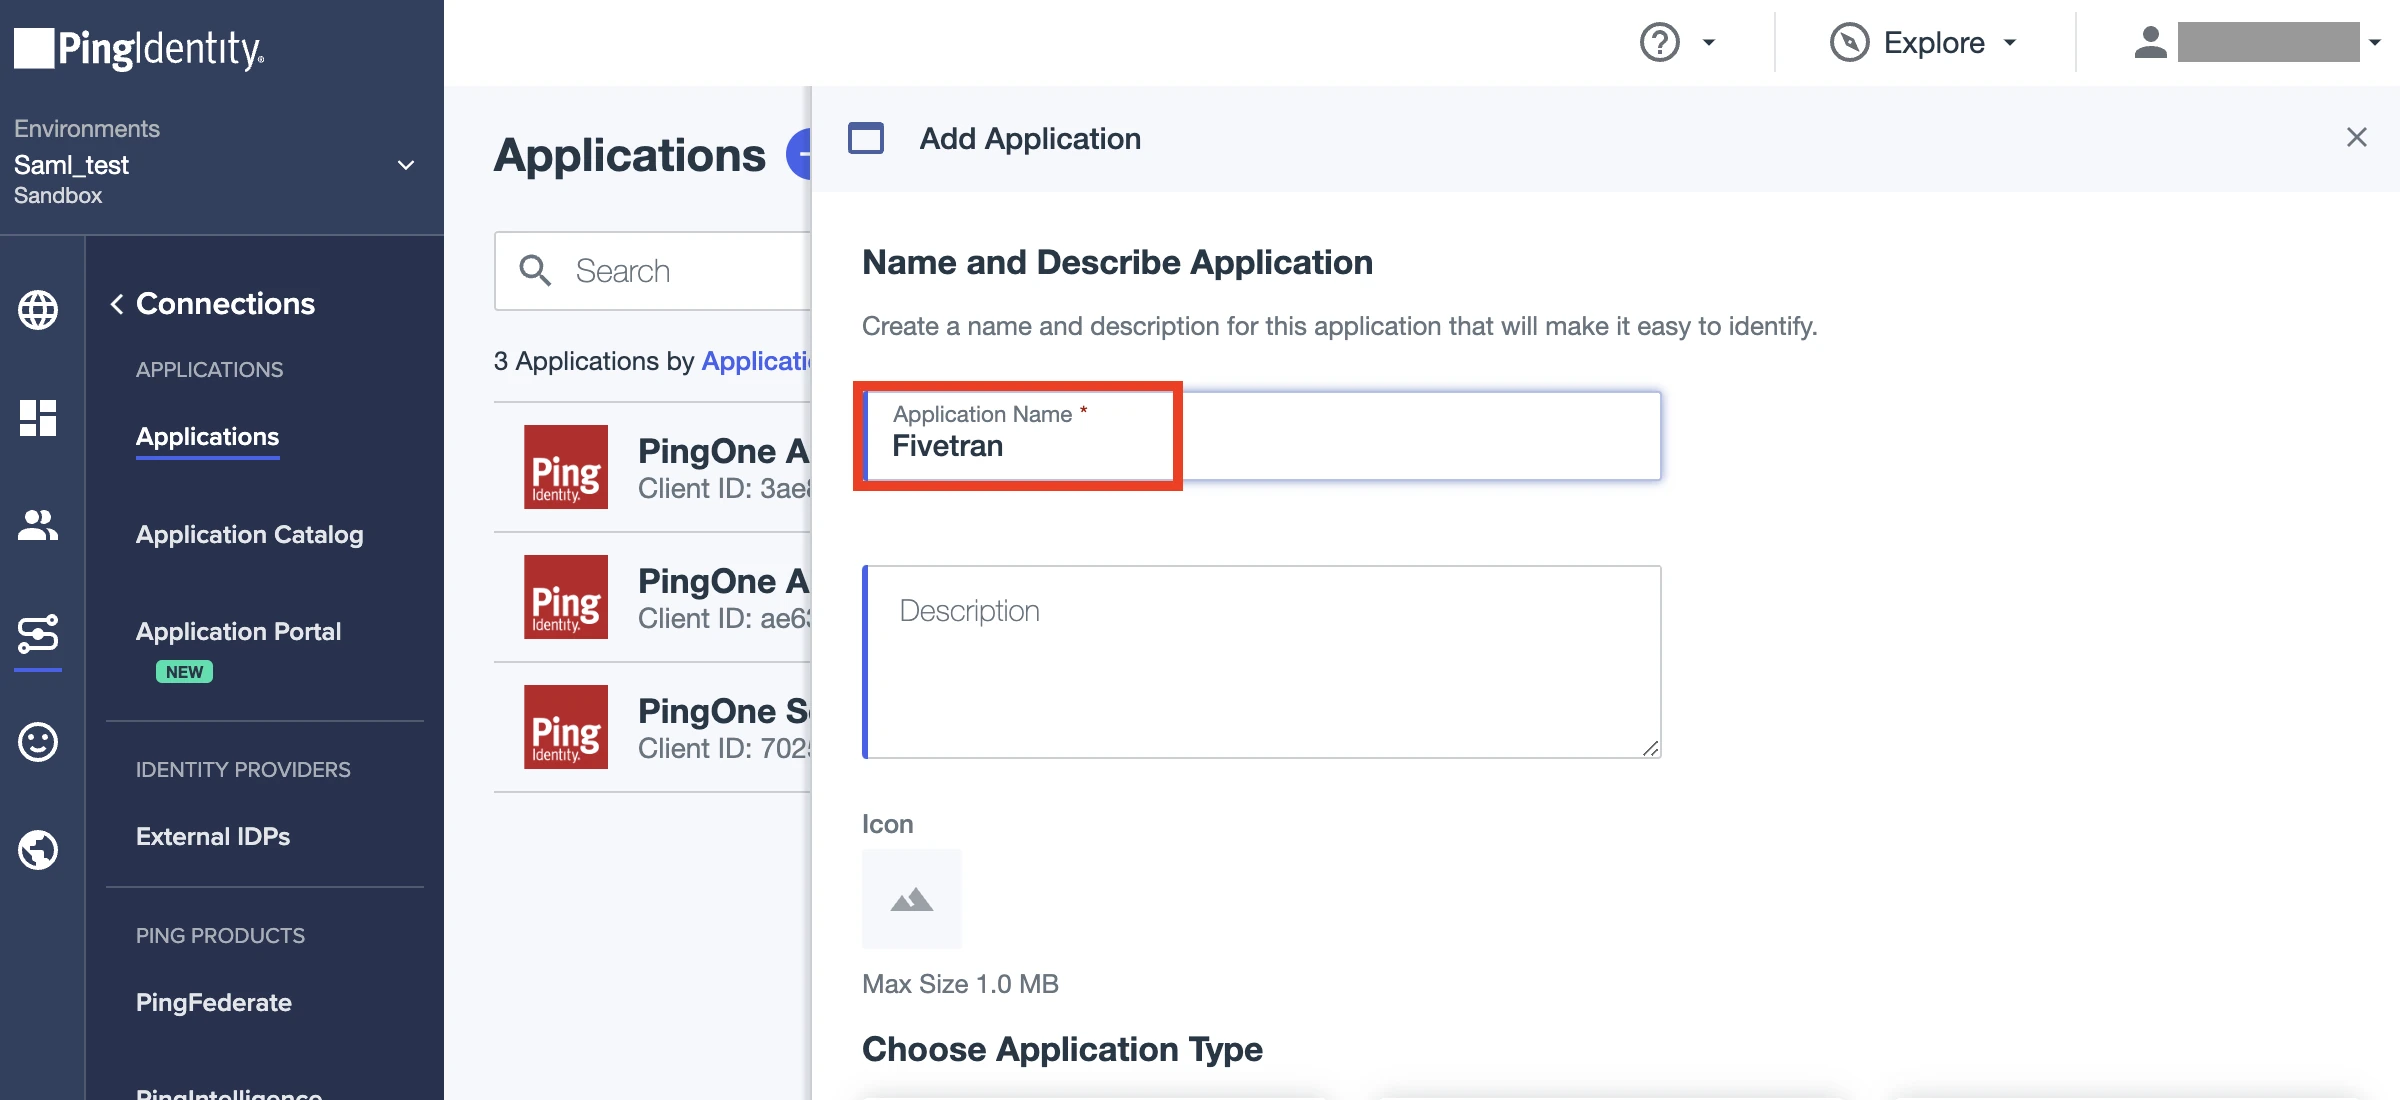
In the App Application pop-up, enter the Application name (we recommend "Fivetran").
(Optional) Enter the description and upload an icon file for the Fivetran app.
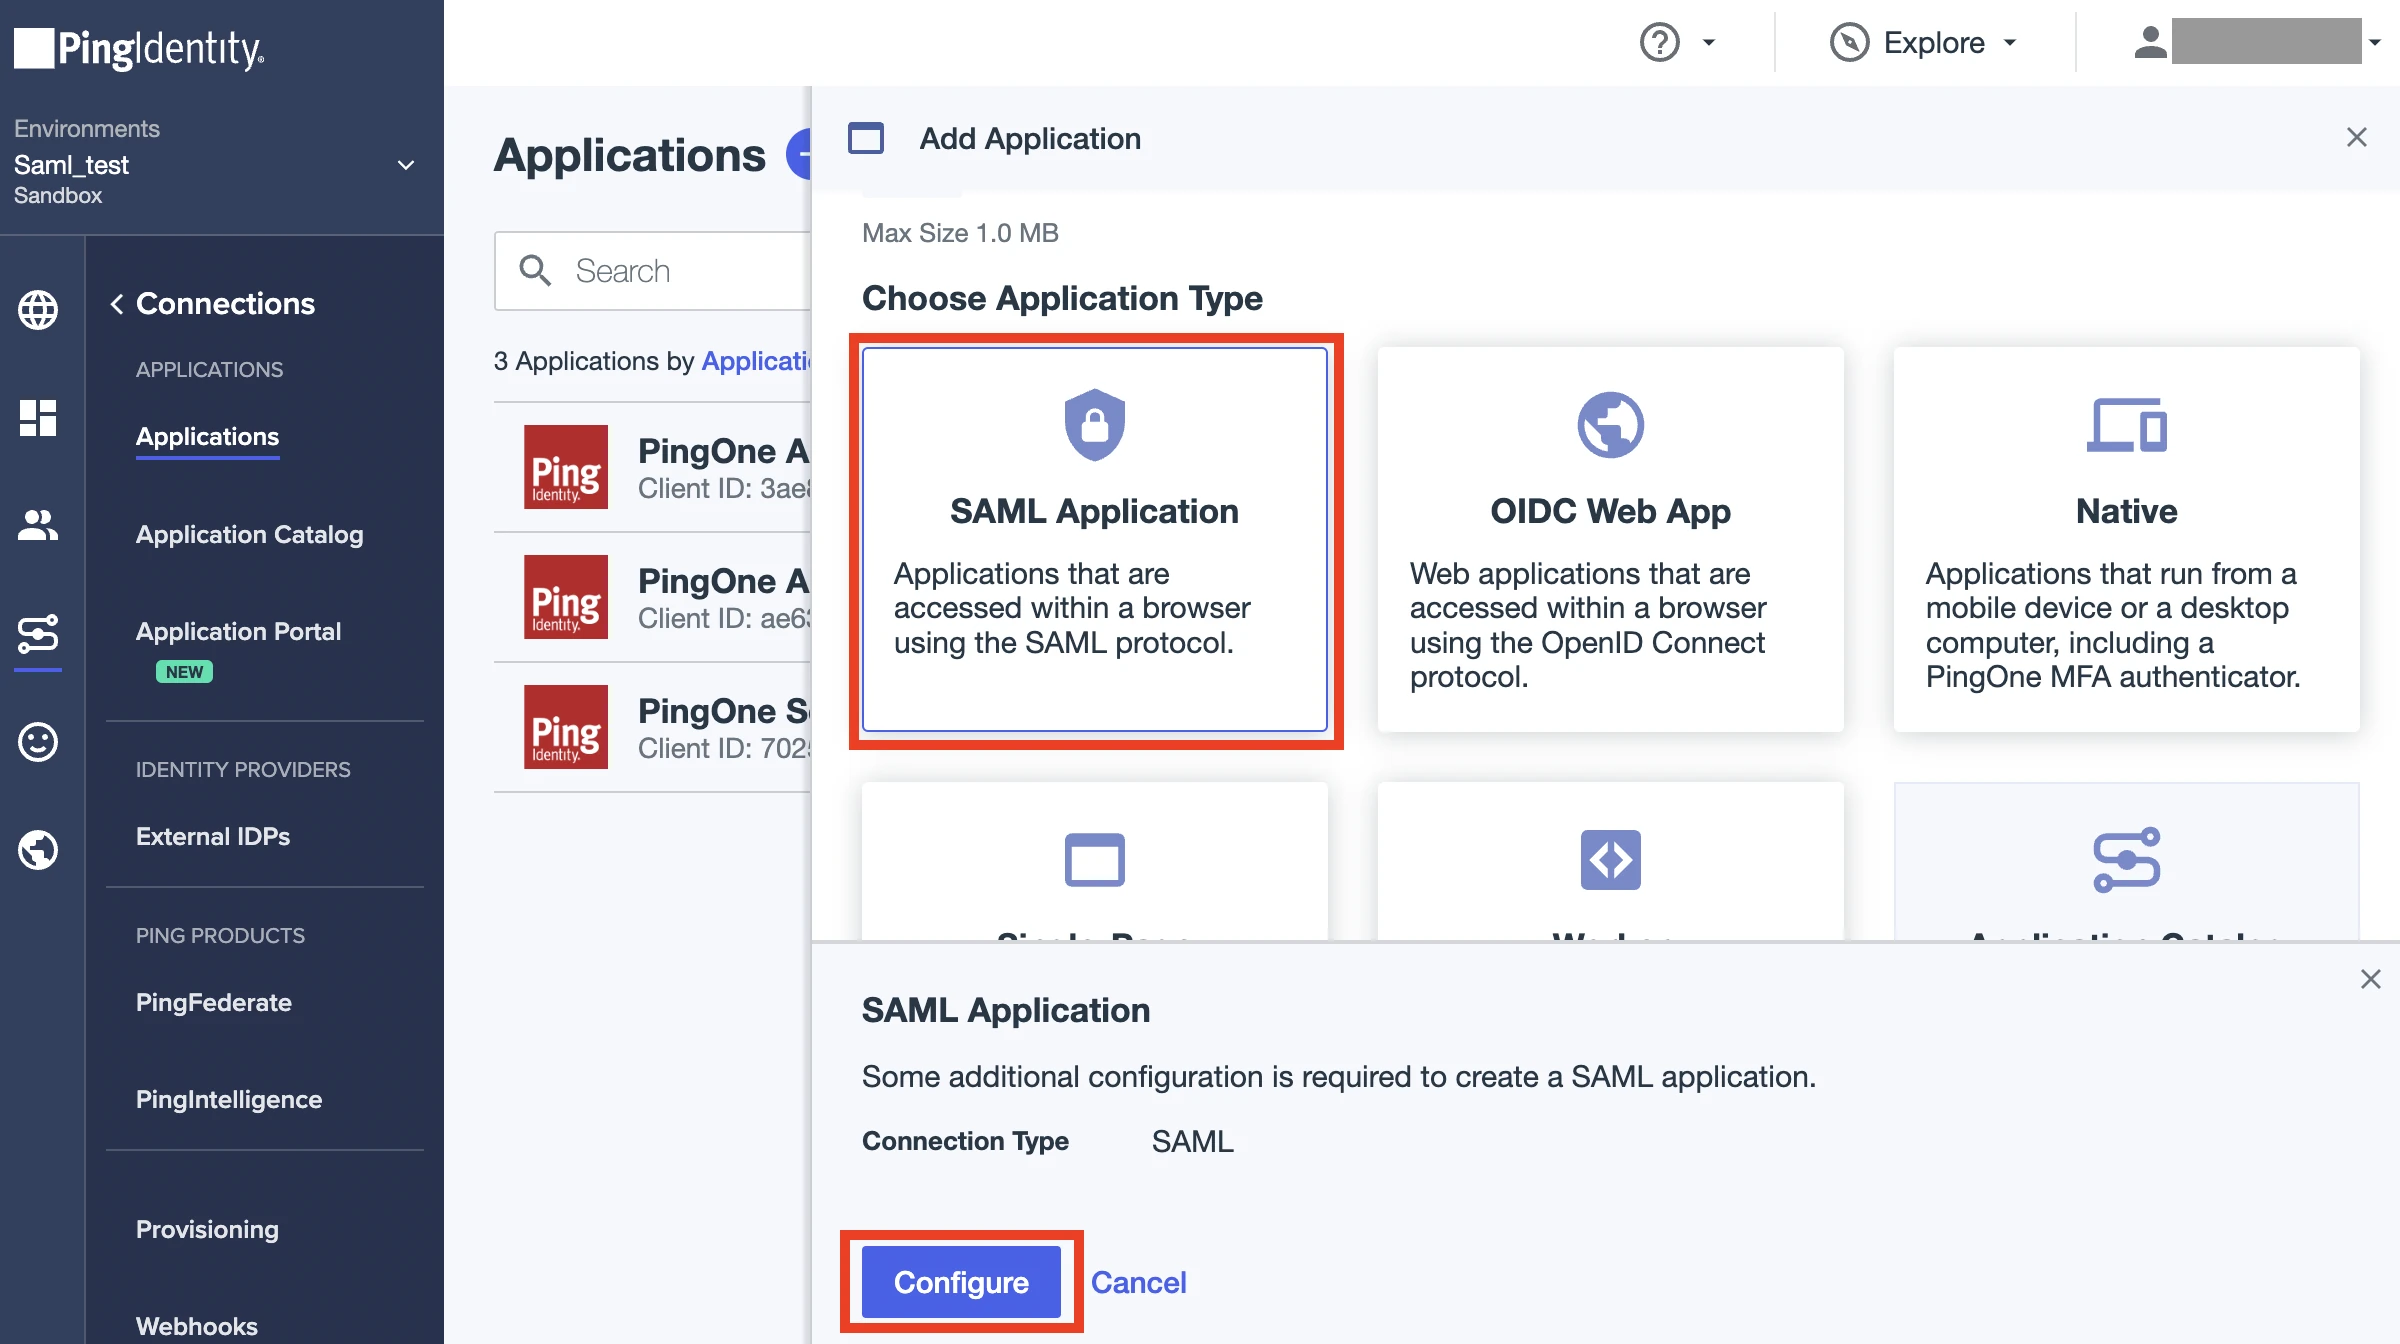
Under the Choose Application Type section, choose SAML Application, then click Configure.
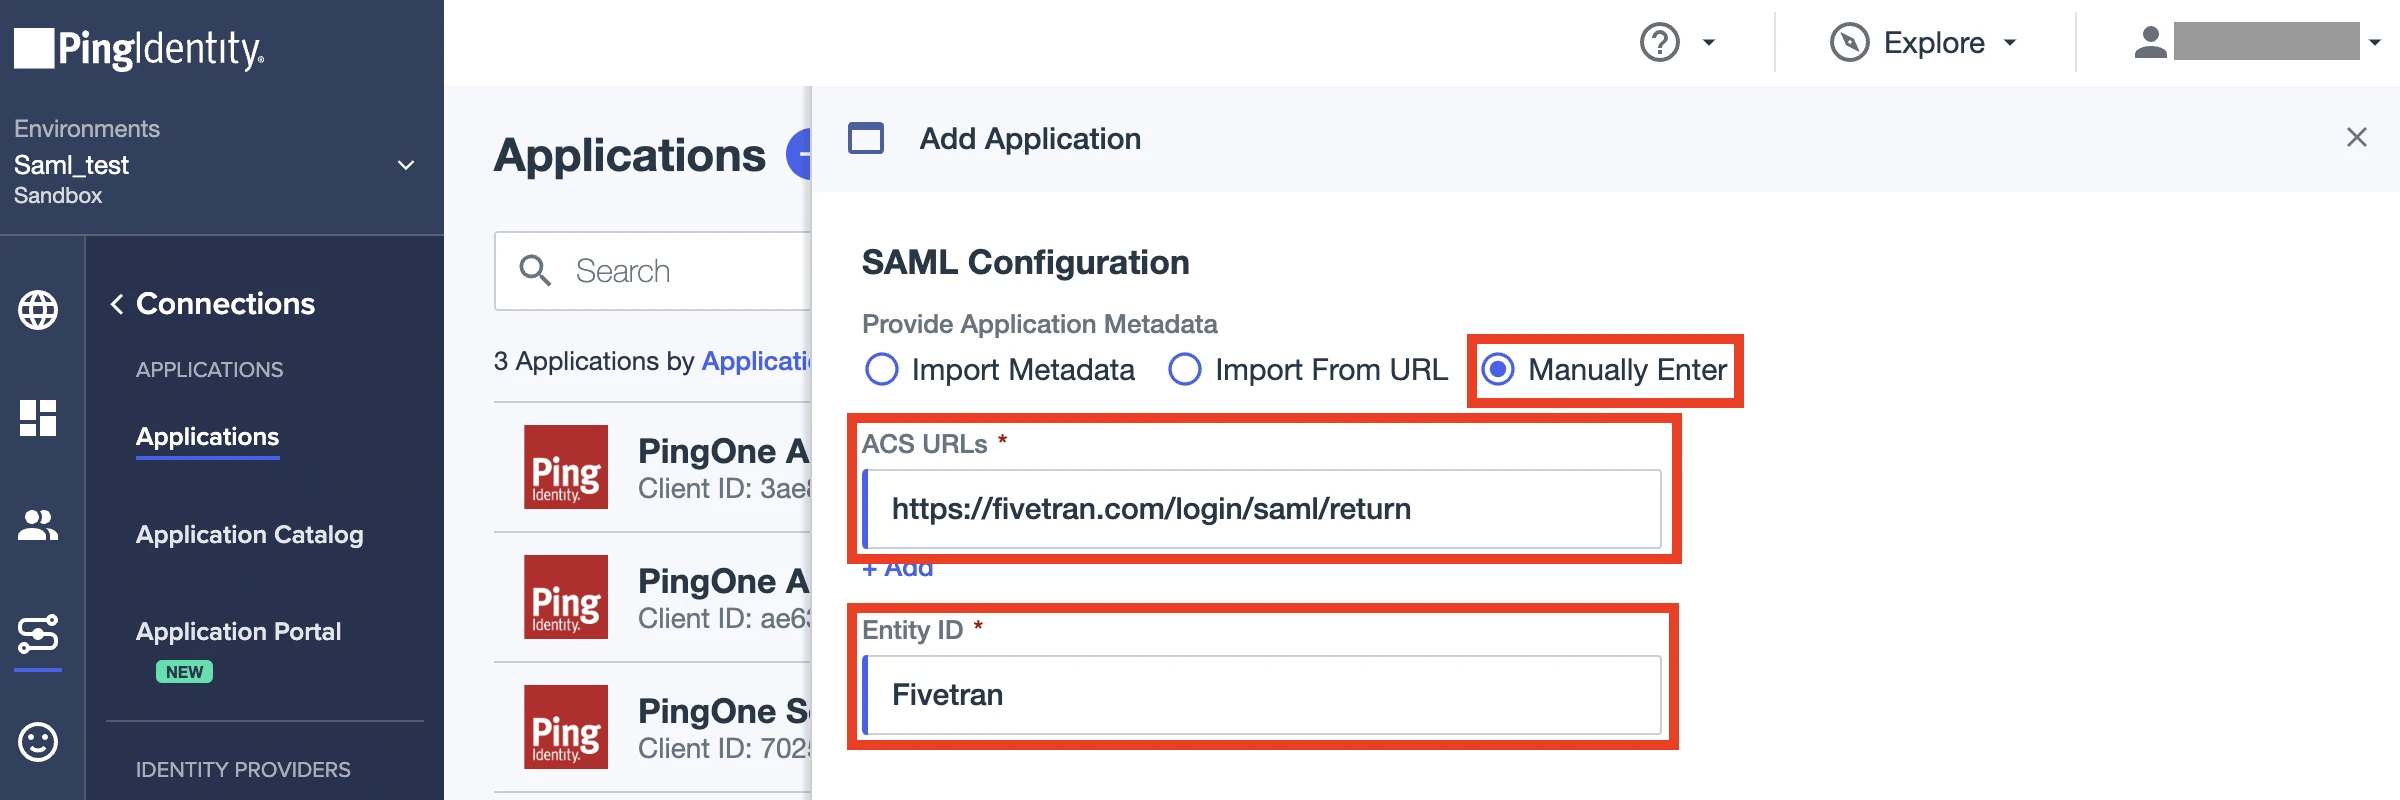
In the SAML Configuration step, select Manually Enter.
In the ACS URLs field, enter
https://fivetran.com/login/saml/return.In the Entity ID field, enter "Fivetran". Make a note of it.
Click Save.
On the App details page, go to the Configuration tab, then click the Edit icon.

Make sure the Sign Assertion option is selected.

From the SUBJECT NAMEID FORMAT drop-down menu, select urn:oasis:names:tc:SAML:1.1:nameid-format:unspecified.
In the ASSERTION VALIDITY DURATION (IN SECONDS) field, enter "60".
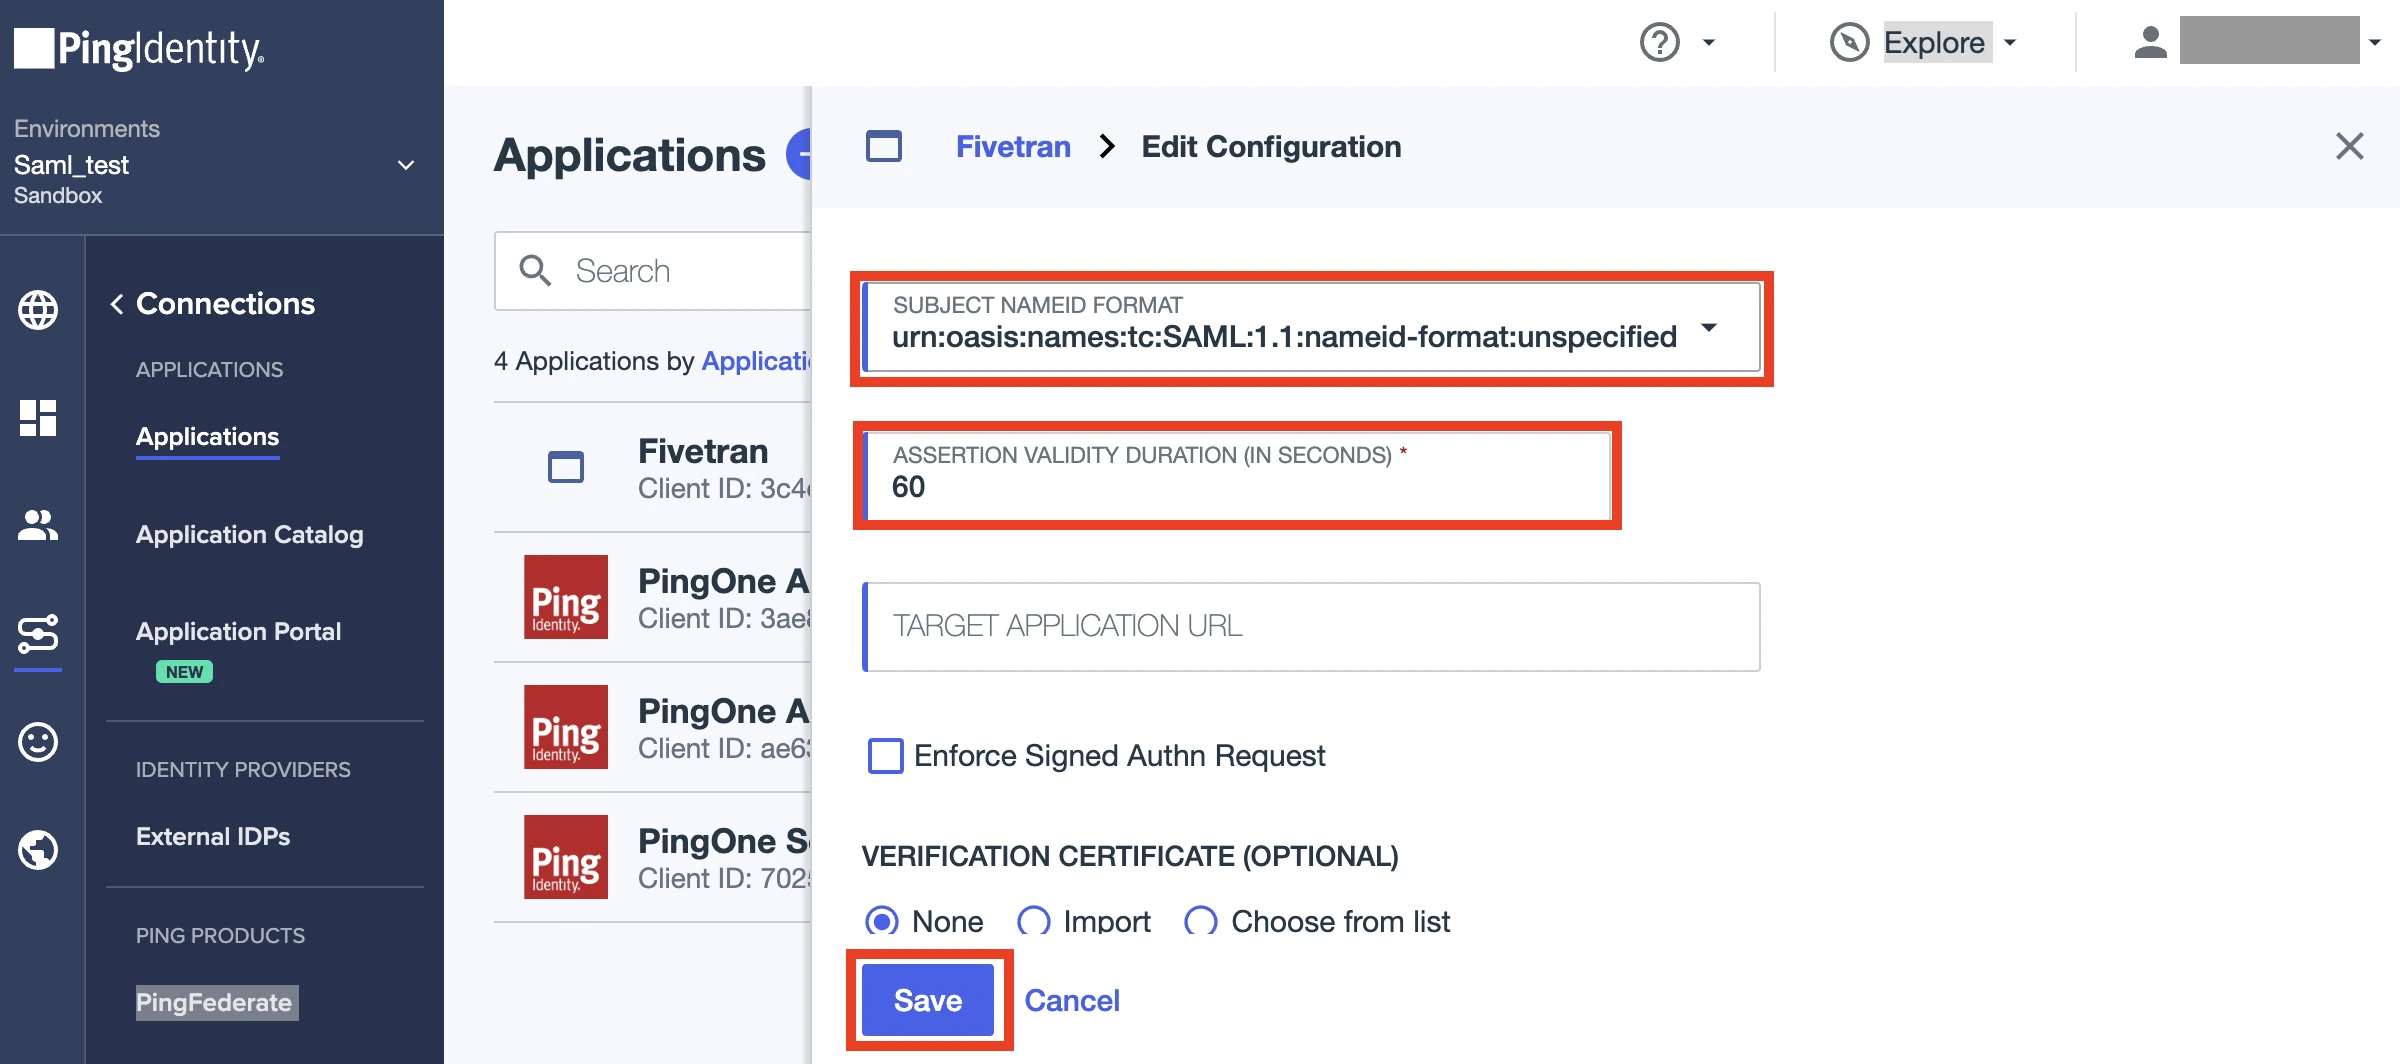
Click Save.
Map attributes
On the App details, go the Attribute Mappings, then click Edit.
Beside the saml_subject field, choose Email Address from the drop-down menu.
Click +Add.
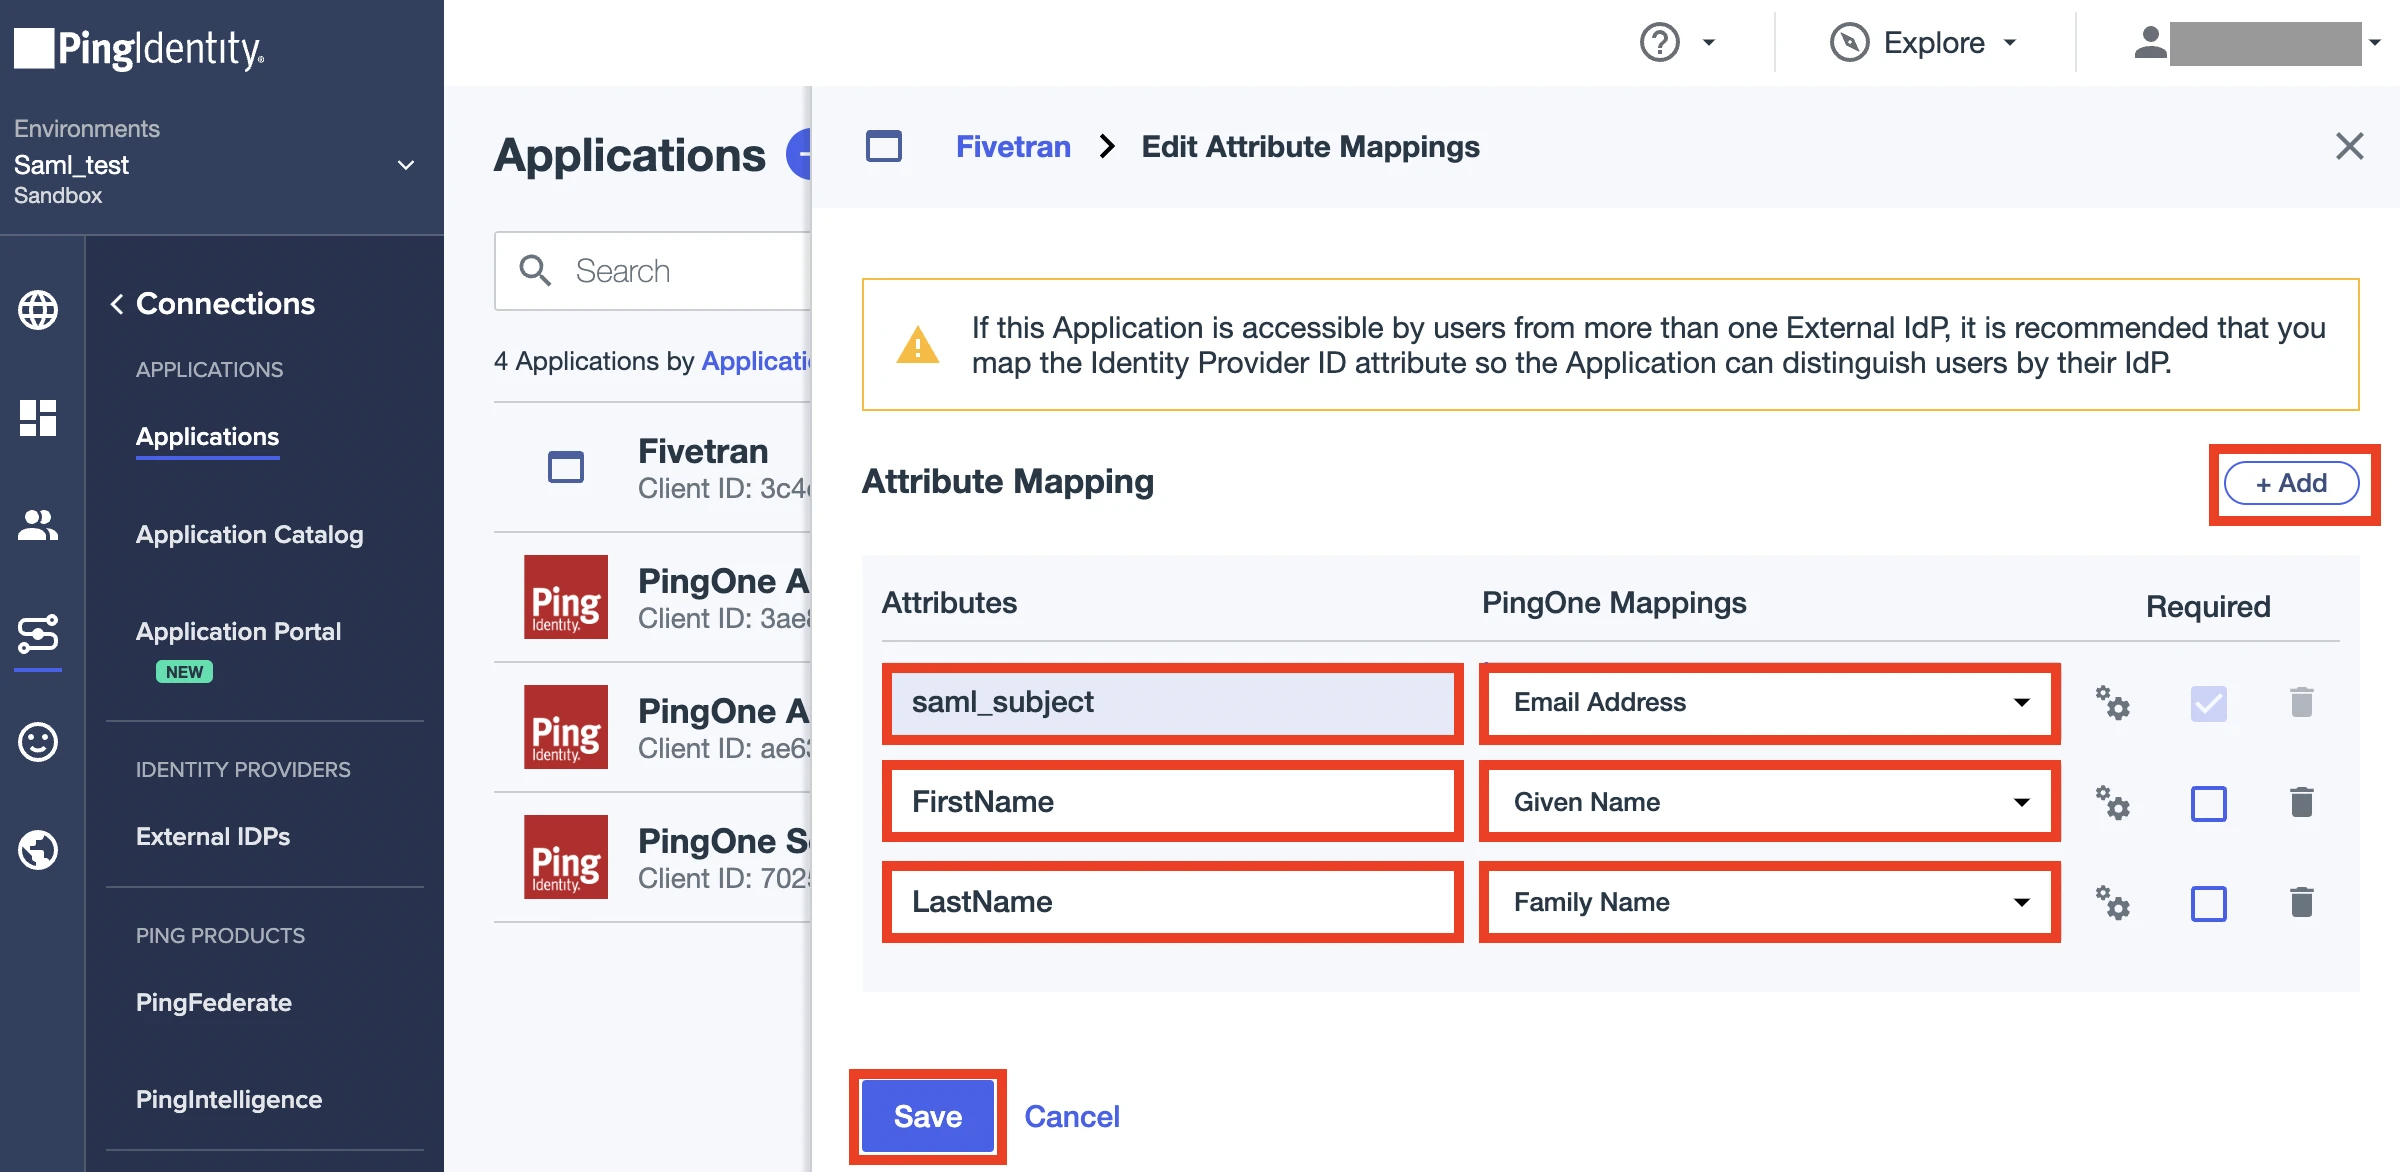
Enter "FirstName" in the left field and select Given Name in the right menu.
Click +Add.
Enter "LastName" in the left field and select Family Name in the right menu.
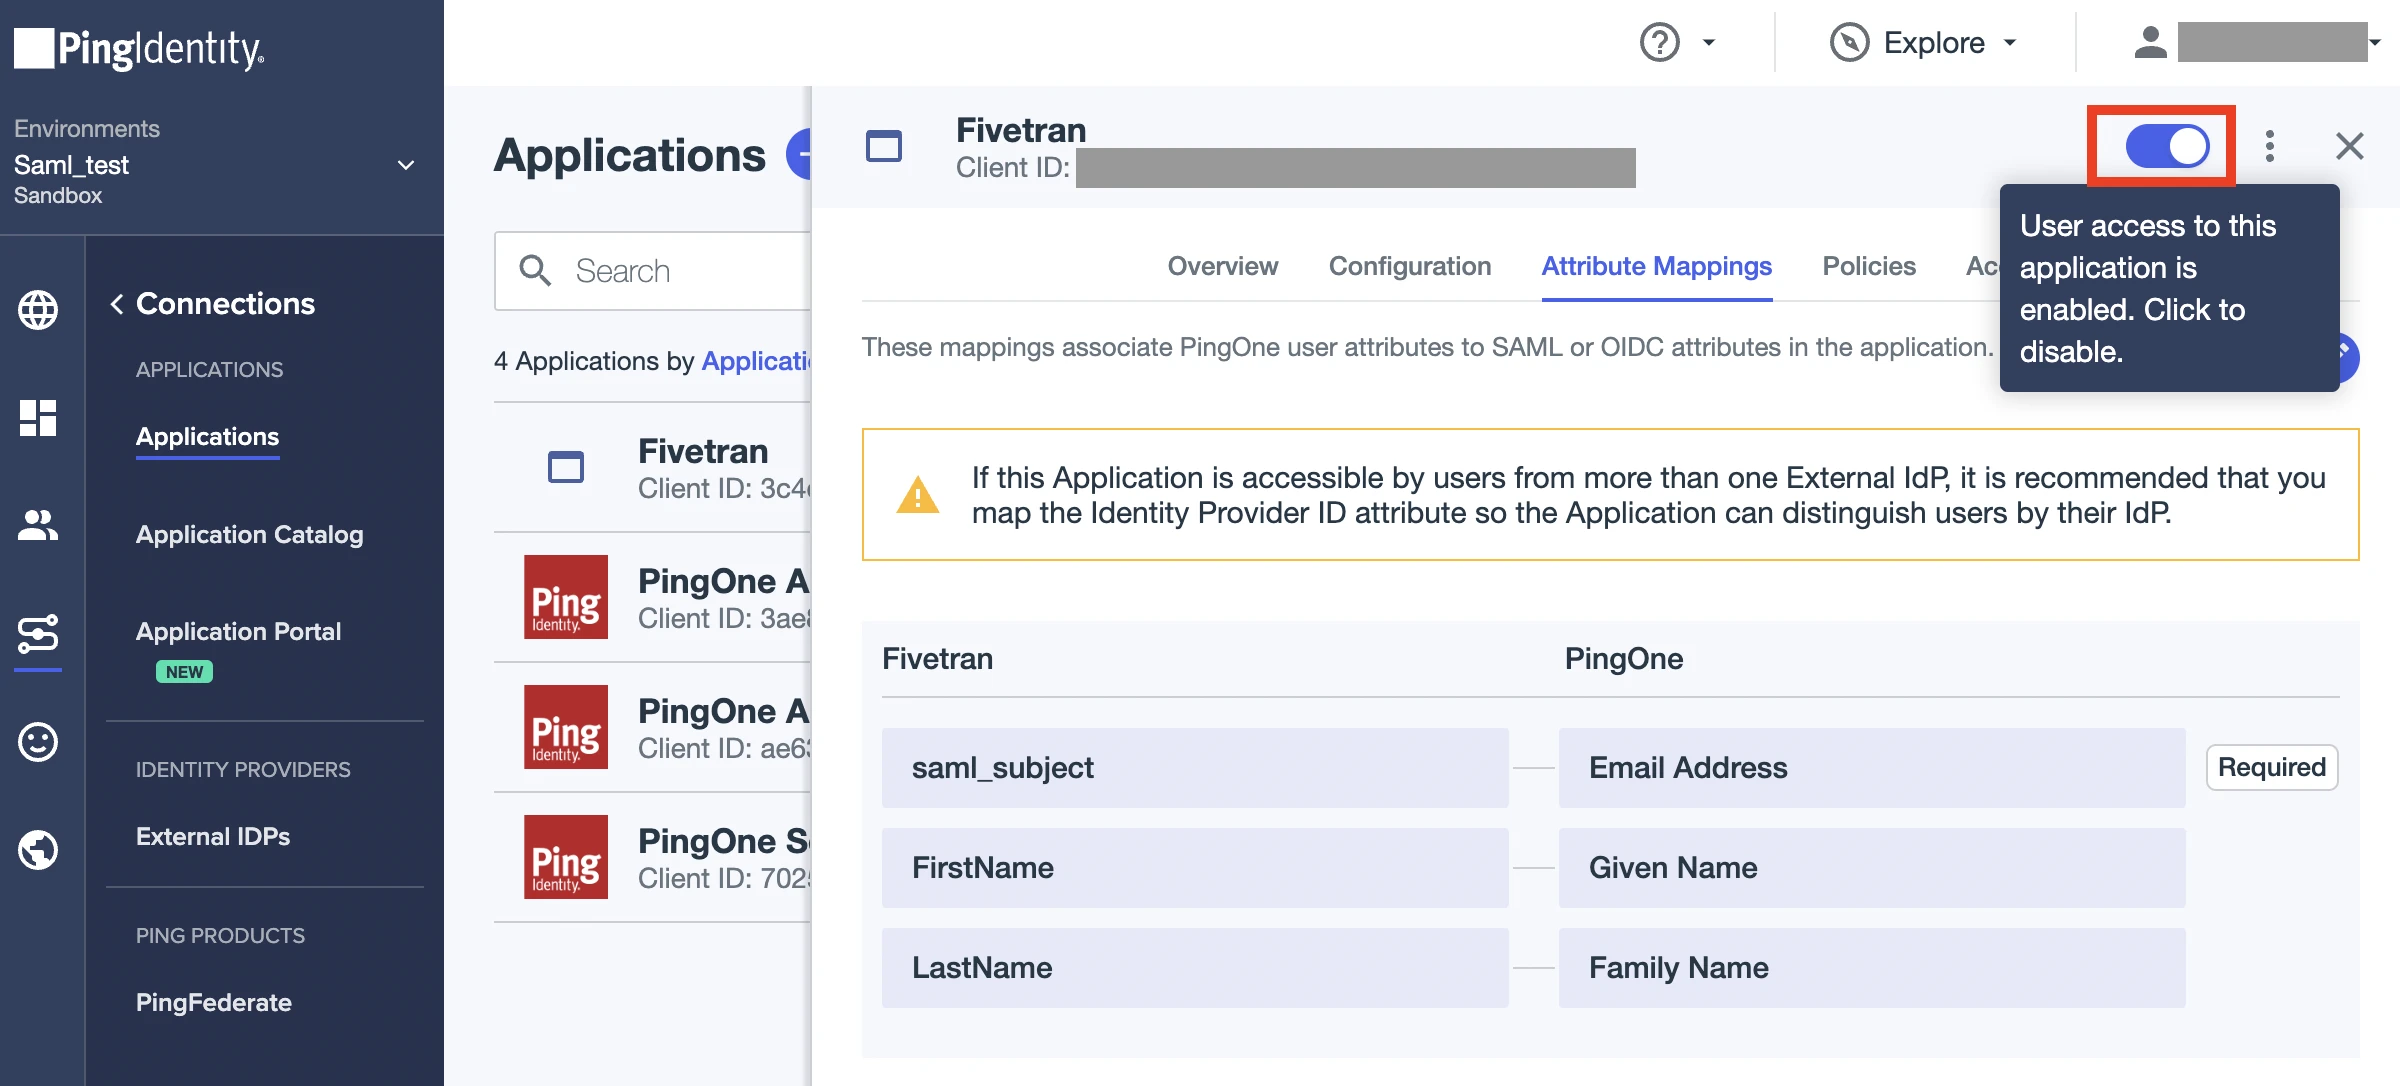
Click Save. The Fivetran app is created.
Use the toggle in the top-right corner of the page to enable user access to the Fivetran app.
Add user details
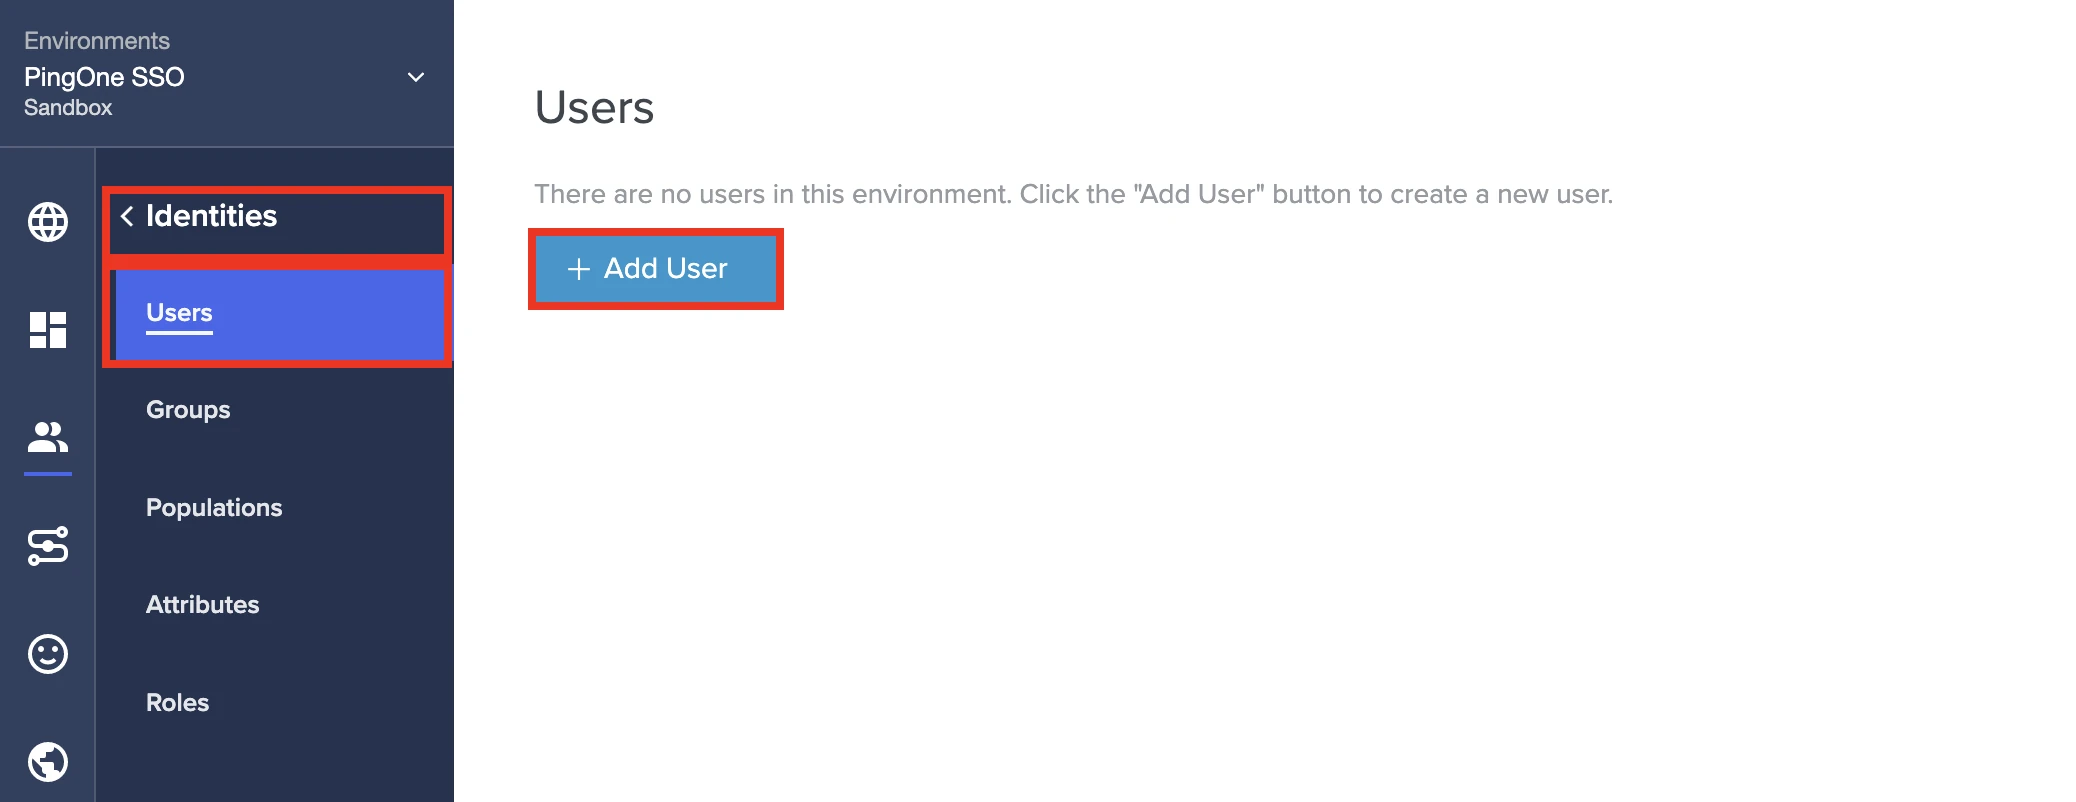
Go to Identities > Users.
Click + Add User.
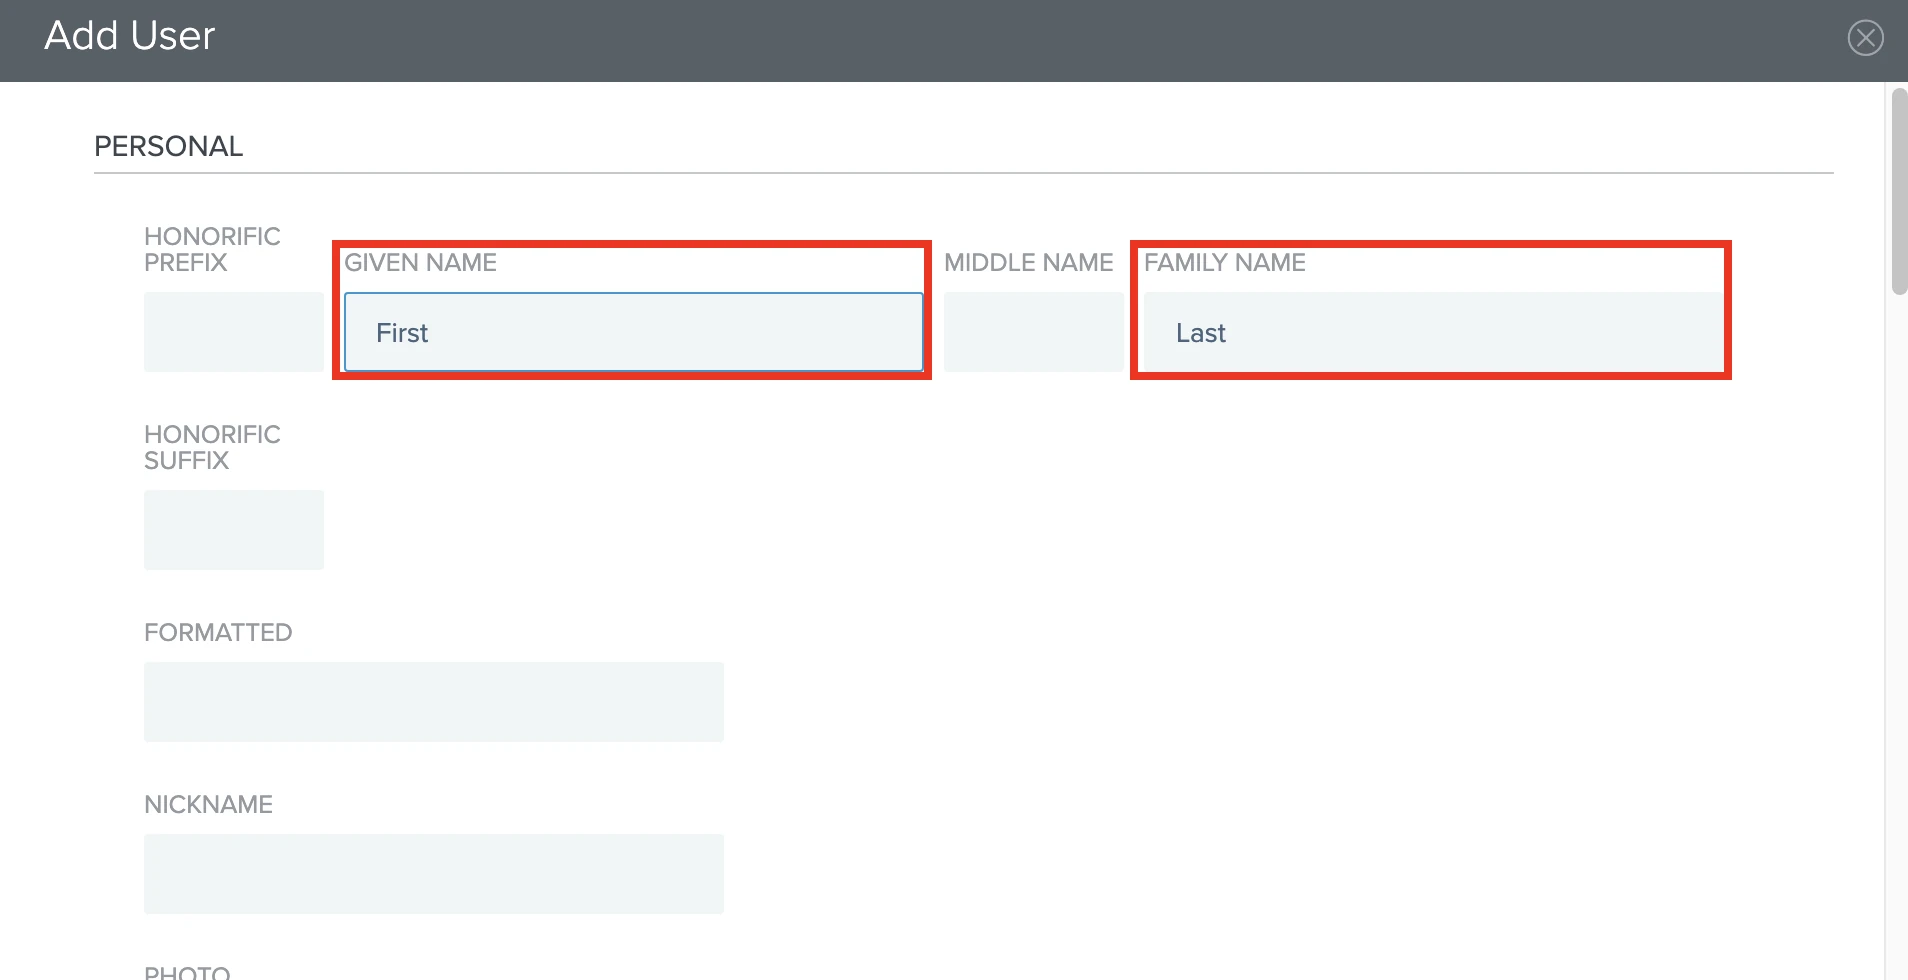
In the Add User popup, enter the GIVEN NAME and FAMILY NAME of the user you want to add to the Fivetran app.
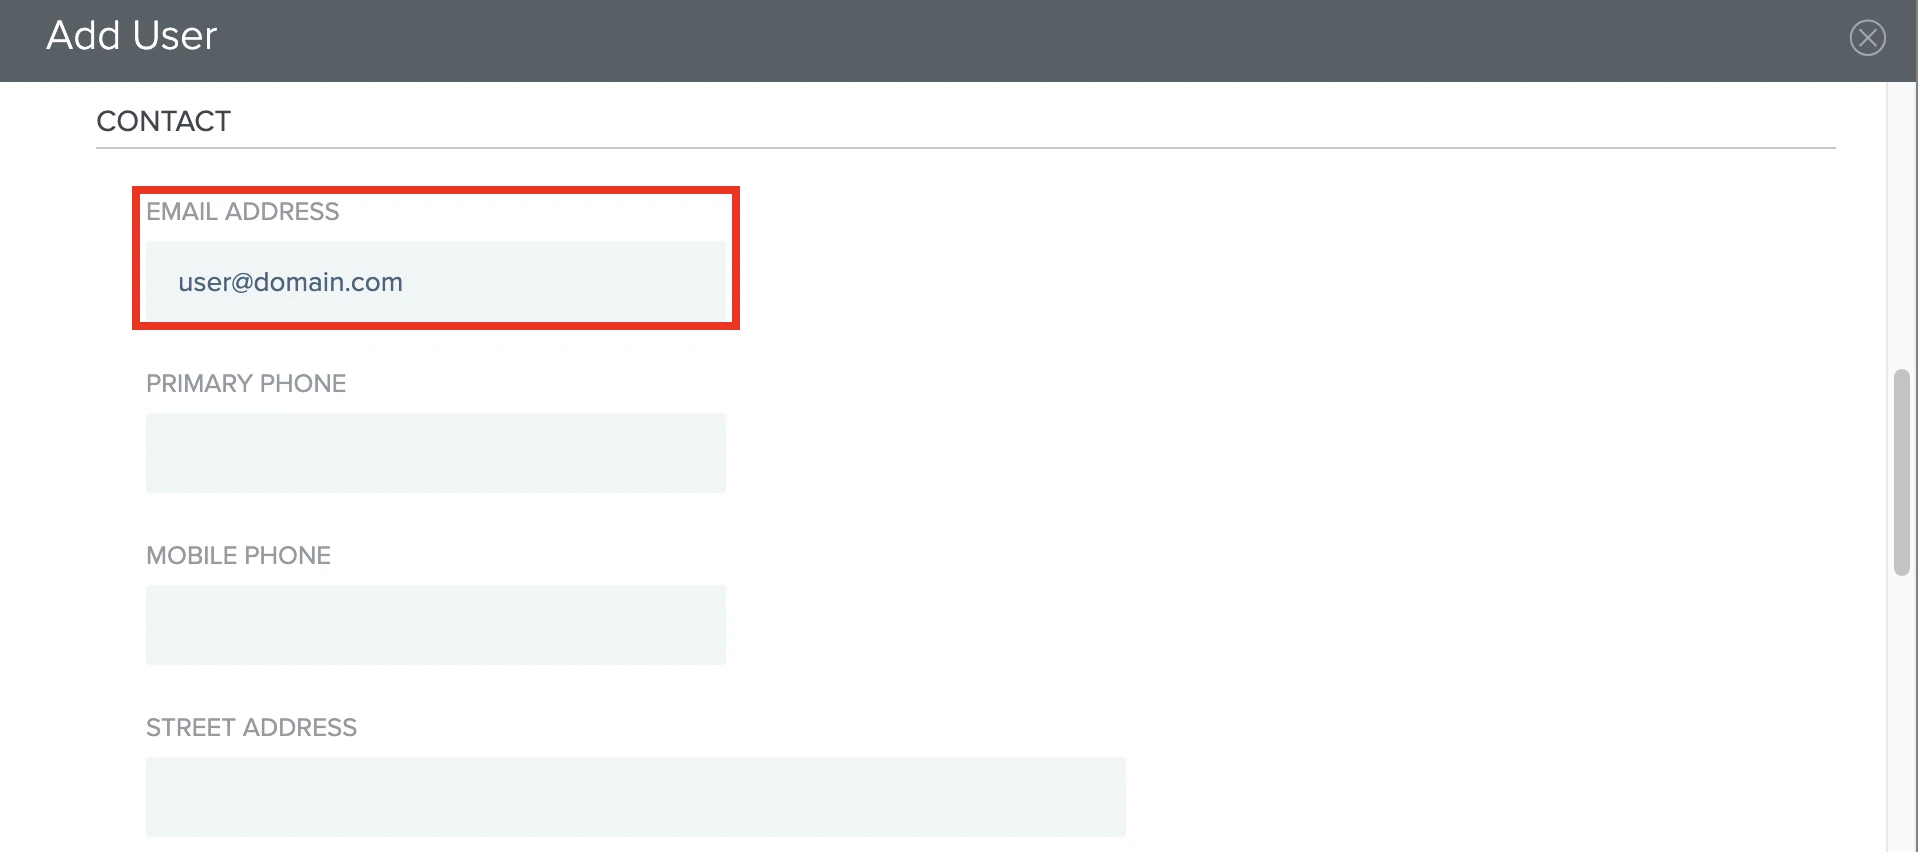
In the CONTACT section, enter the EMAIL ADDRESS of the user you want to add to the Fivetran app.
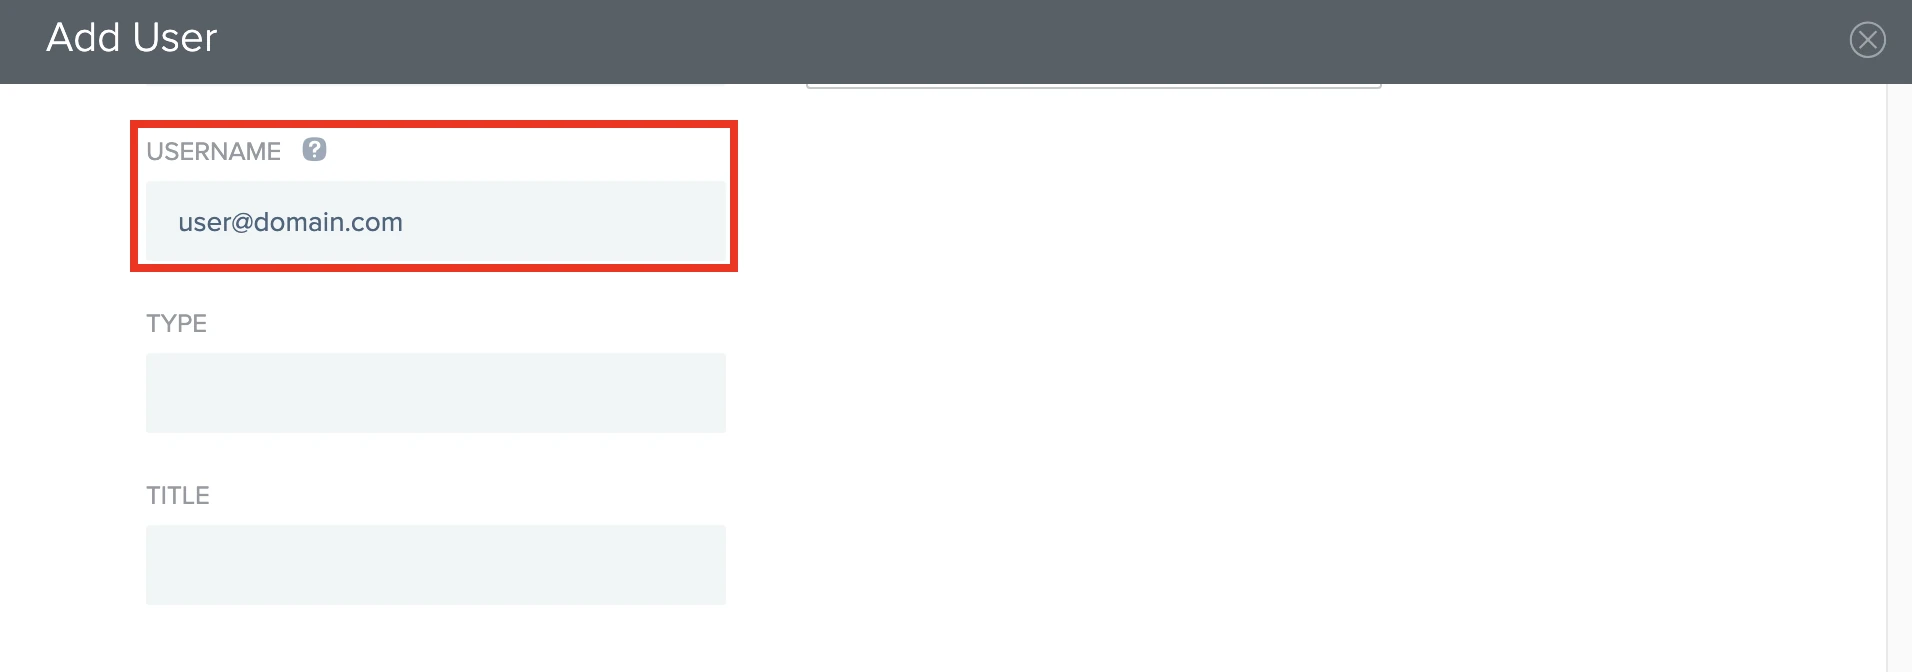
Scroll down to the COMPANY INFORMATION section. In the USERNAME field, enter the email address of the user you want to add to the Fivetran app.
Click Save.
On the Users page, click the down-arrow icon to expand the added user's details, then click Reset Password.
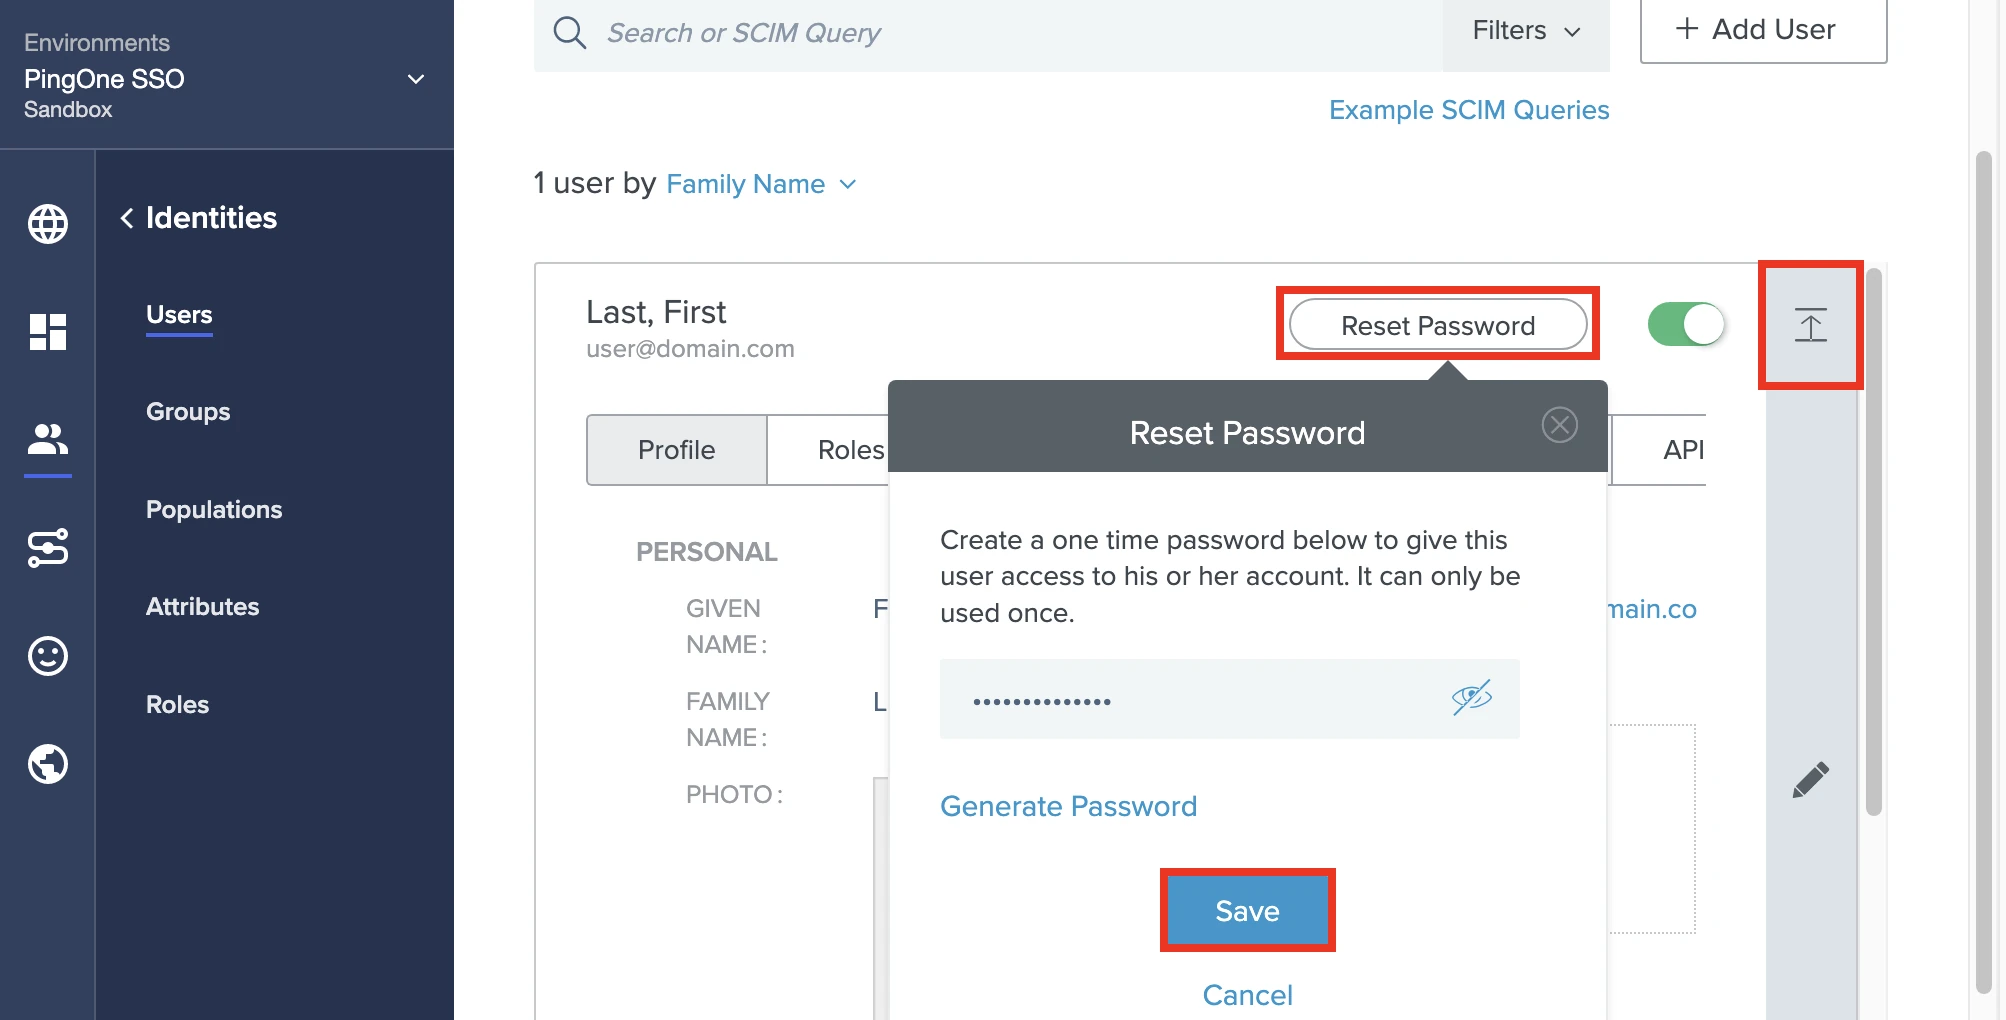
Enter a one-time password in the input field. You will need to replace it with a permanent password when you log in for the first time.
Click Save.
Add group details
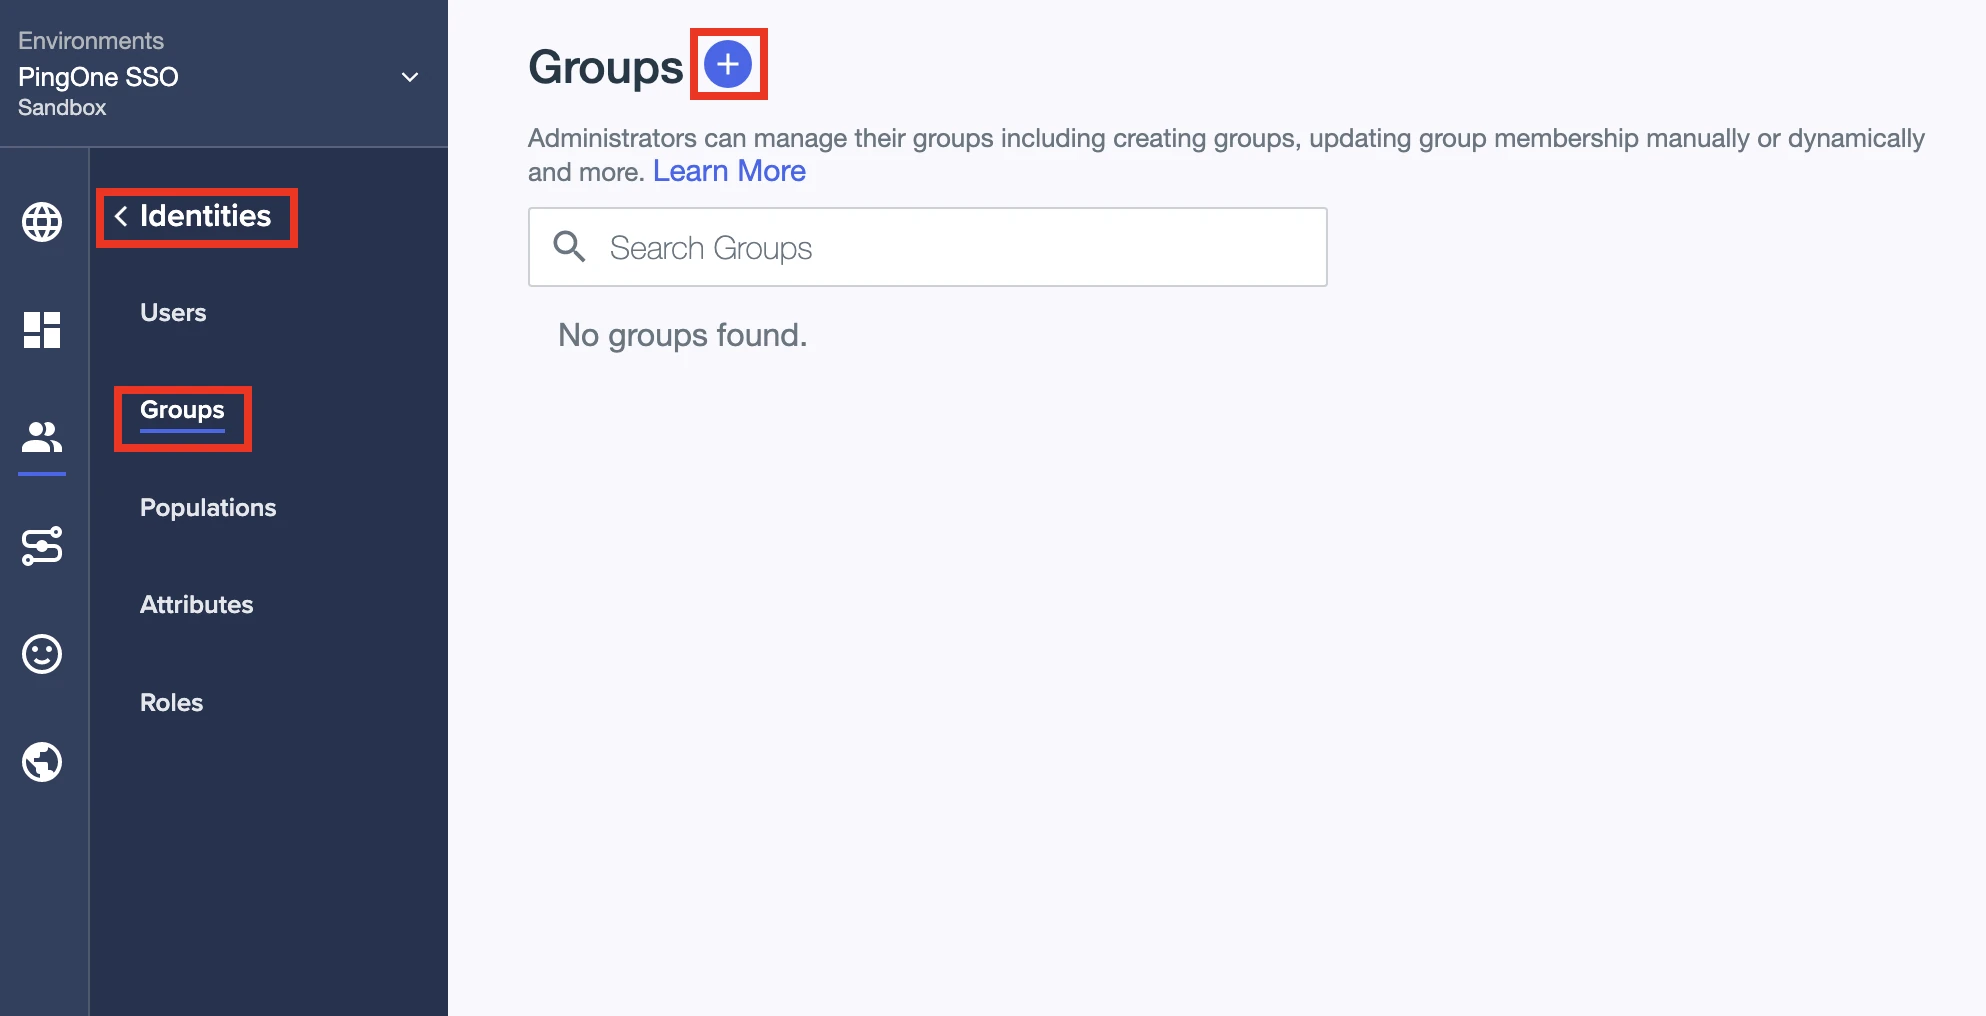
Go to Identities > Groups.
Click +.
Specify the Group Name. We recommend "Fivetran".
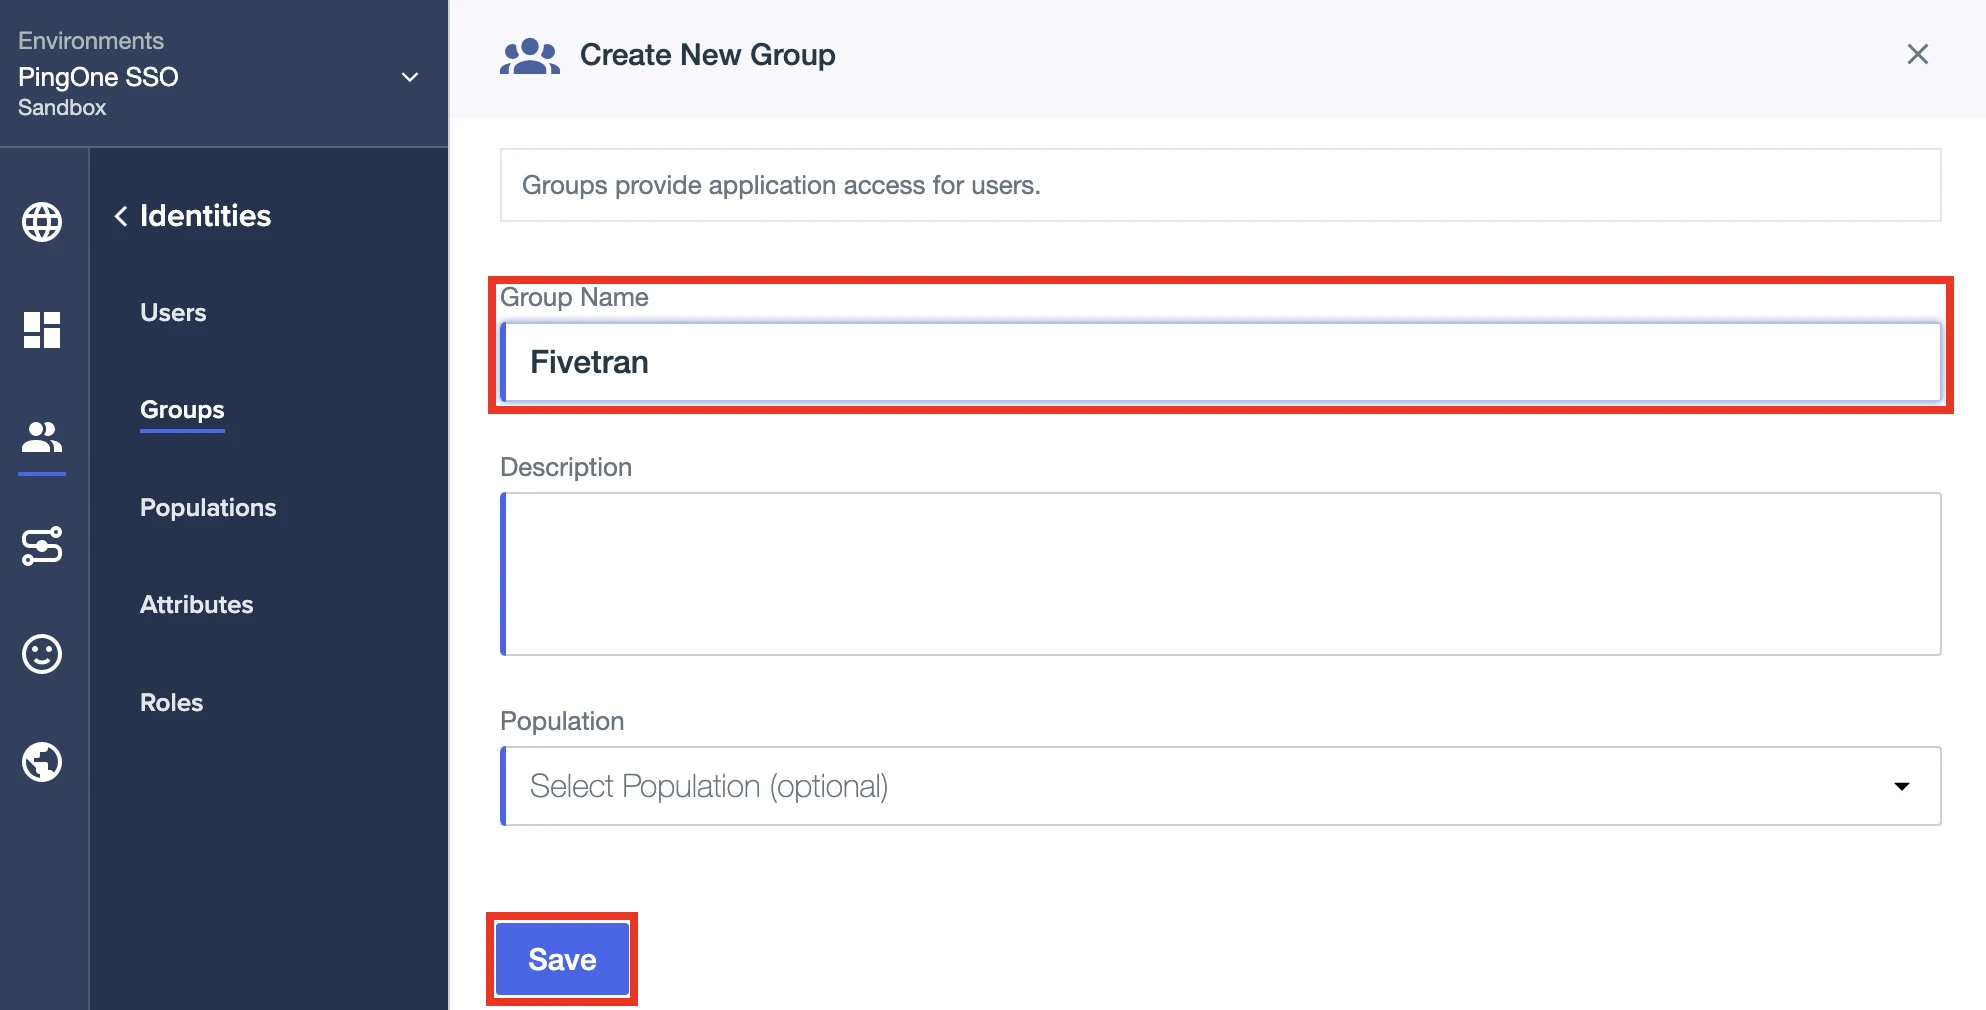
Click Save.
On the Fivetran group page, go to the Users tab.
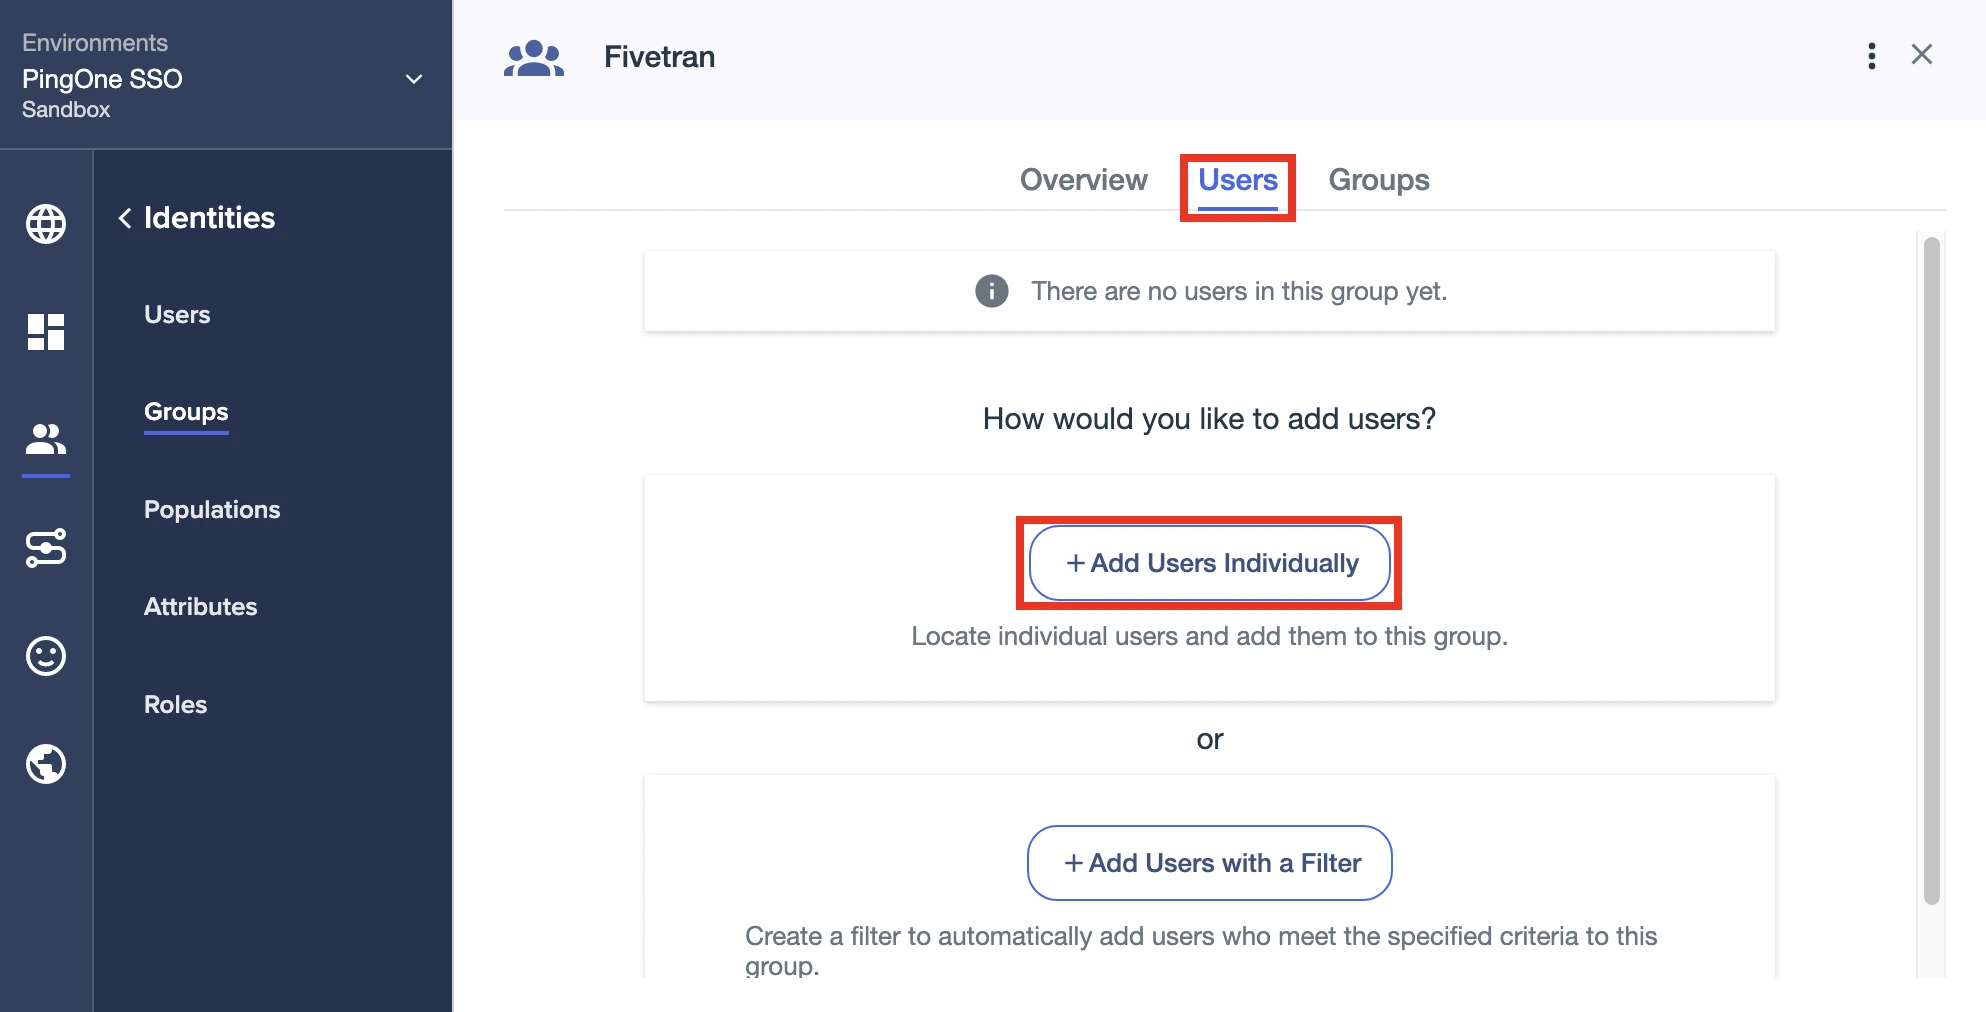
Click + Add Users Individually.
Click + to add the Fivetran user to the group.

Click Save.
Provide access
Go to Connections > Applications.
Click the Fivetran app.
Go to the Access tab.
Click the pencil icon.
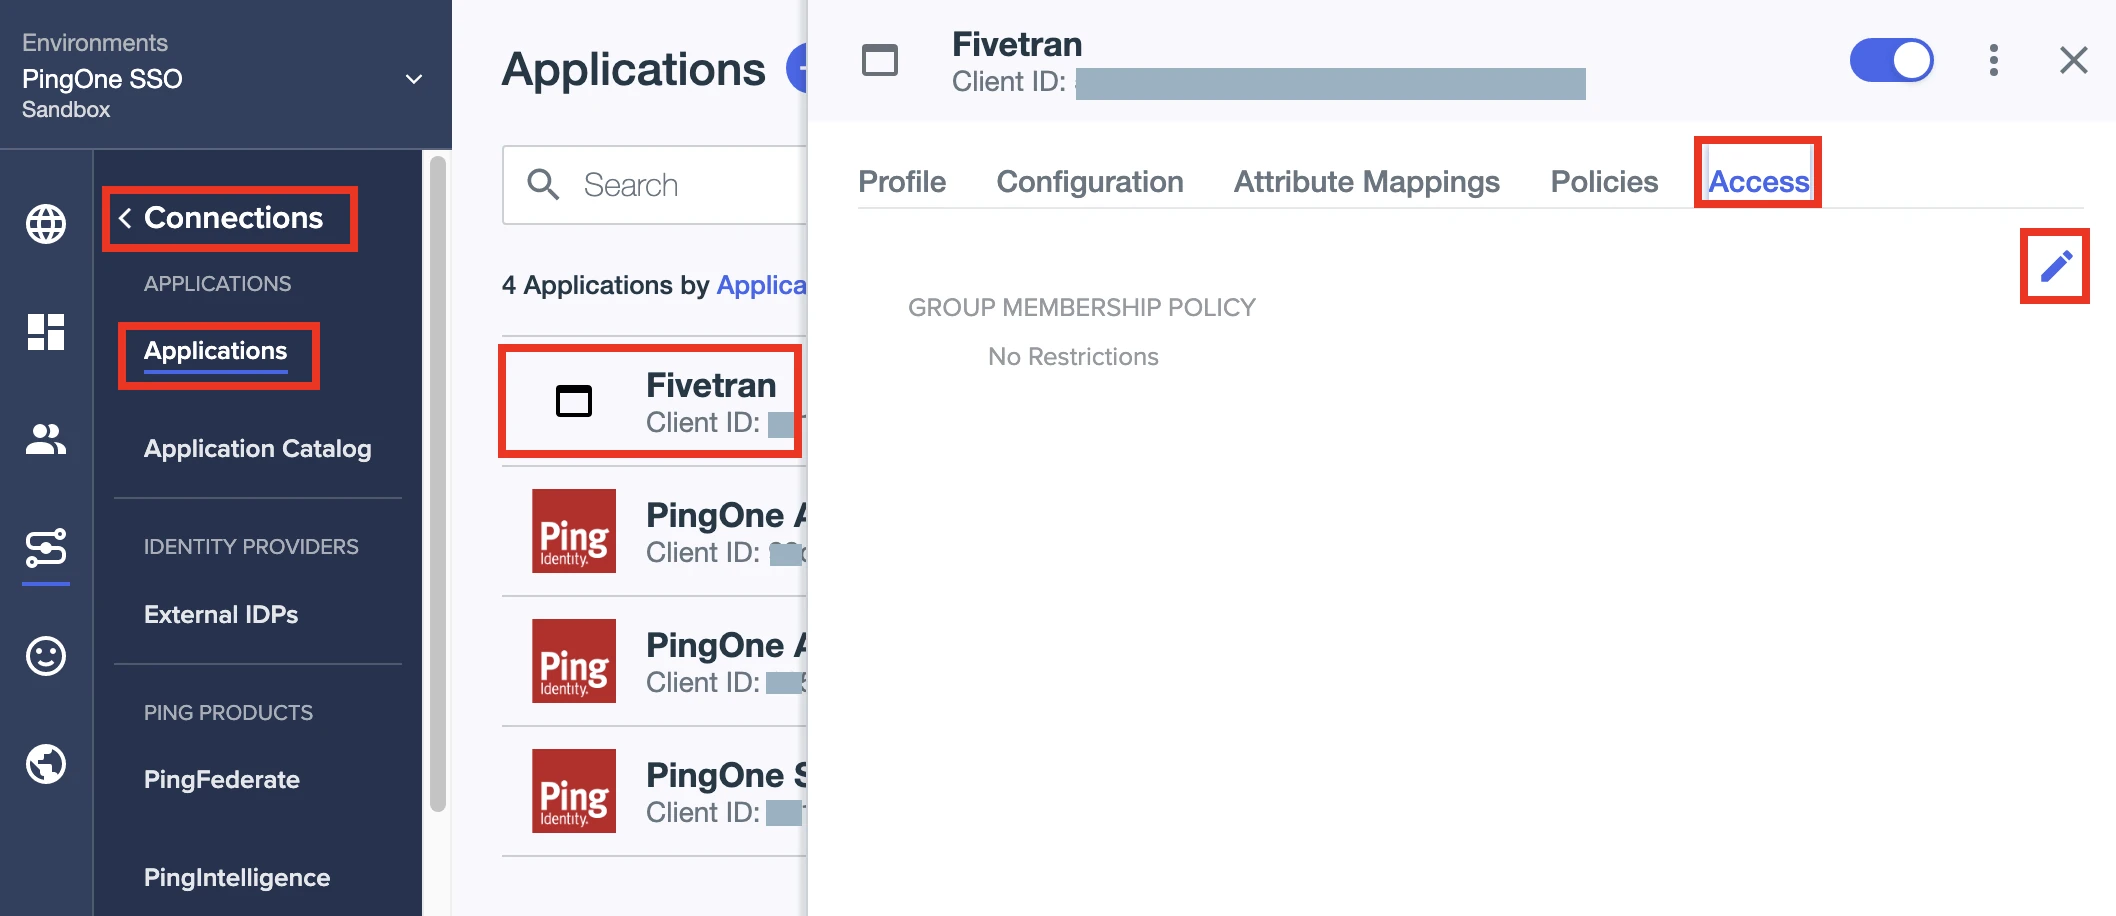
Click + to give the Fivetran group access to the Fivetran app.
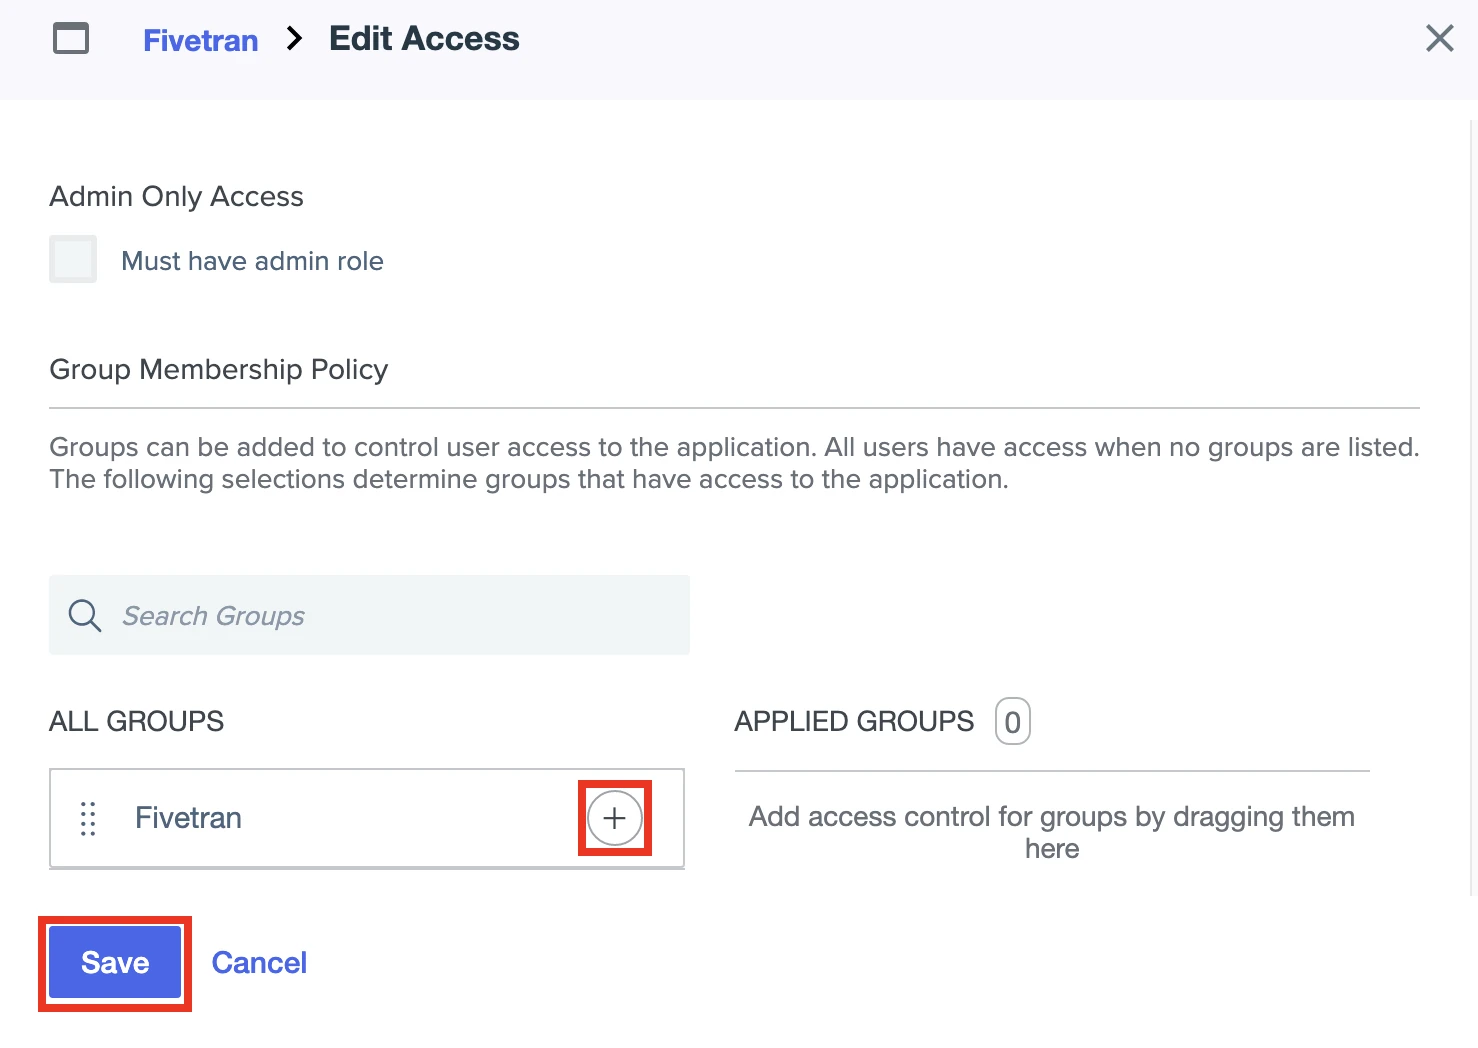
Click Save.
Fivetran supports Just-In-Time (JIT) user provisioning. If you assign the app to users who don't have a Fivetran account, Fivetran will create new accounts for them with the read-only access. You will need to grant the newly created users the relevant role with the corresponding permissions.
Get Sign on URL, Issuer, Public certificate, and Application Identifier
To complete the setup in Fivetran, you need the following credentials:
- Sign on URL
- Issuer
- Public certificate
- Application Identifier
To find these credentials, do the following:
In the PingOne Admin console, open the Fivetran app page and go to the Configuration tab.
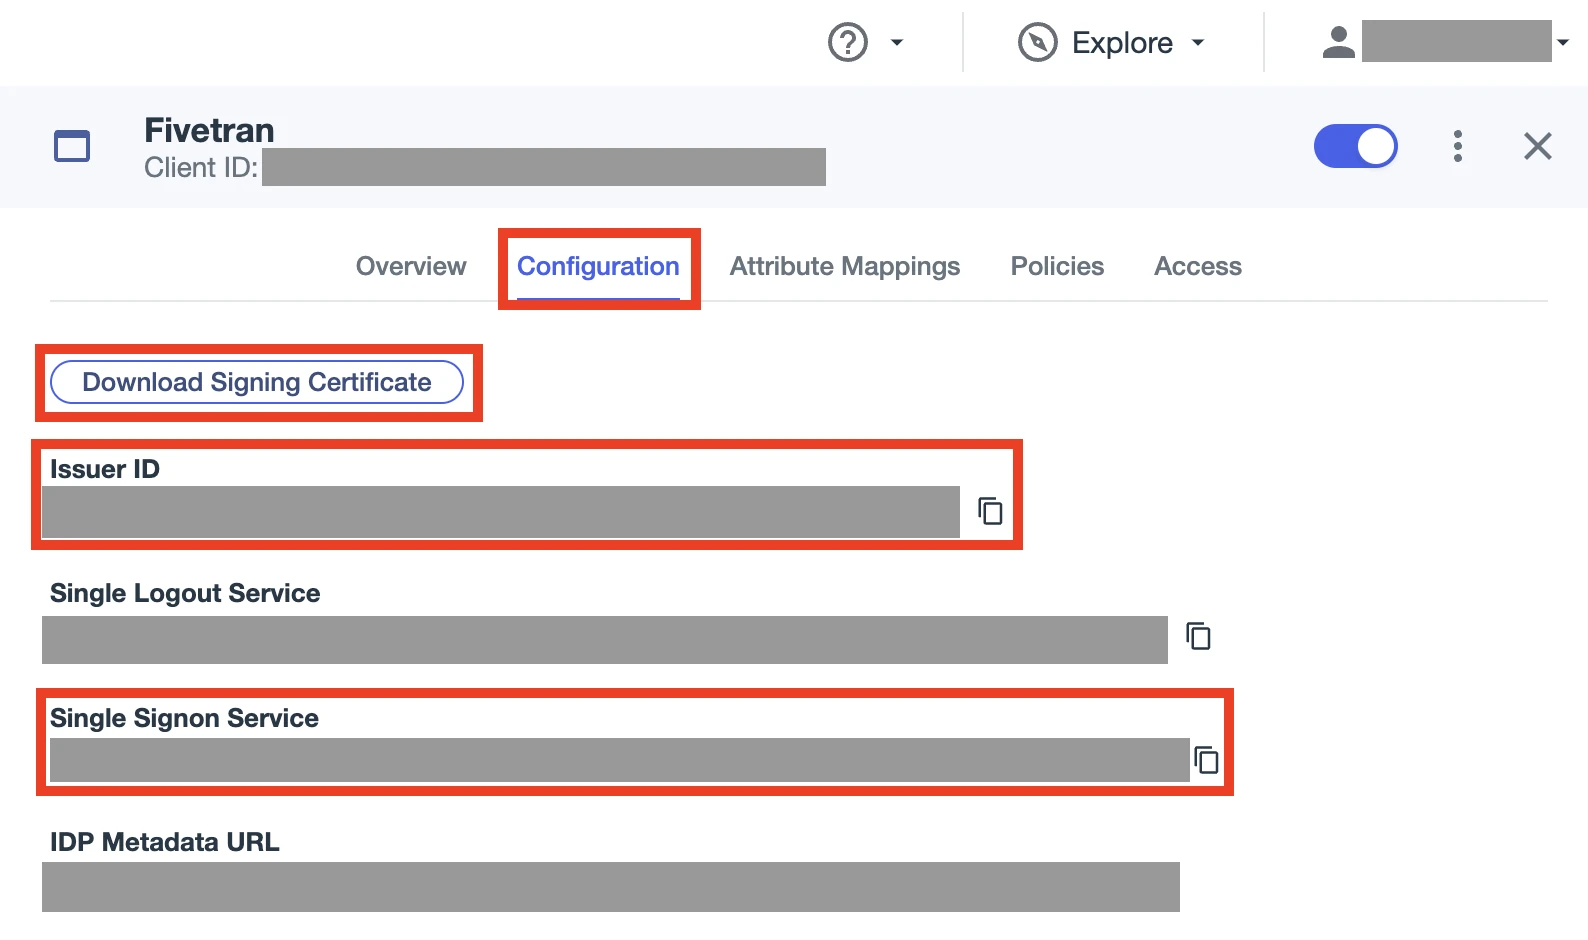
Click Download Signing Certificate and select the X509 PEM (.crt) format.
Open the downloaded certificate in a text editor and copy the certificate, which is the string between the
-----BEGIN CERTIFICATE-----and-----END CERTIFICATE-----statements. You must enter it in the Public certificate field in Fivetran.Copy the Issuer ID and make a note of it. You must enter it in the Issuer field in Fivetran.
Copy the Single Signon Service and make a note of it. You must enter it in the Sign on URL field in Fivetran.
Copy the Entity ID and make a note of it. You must enter it in the Application identifier (Entity ID) field in Fivetran.
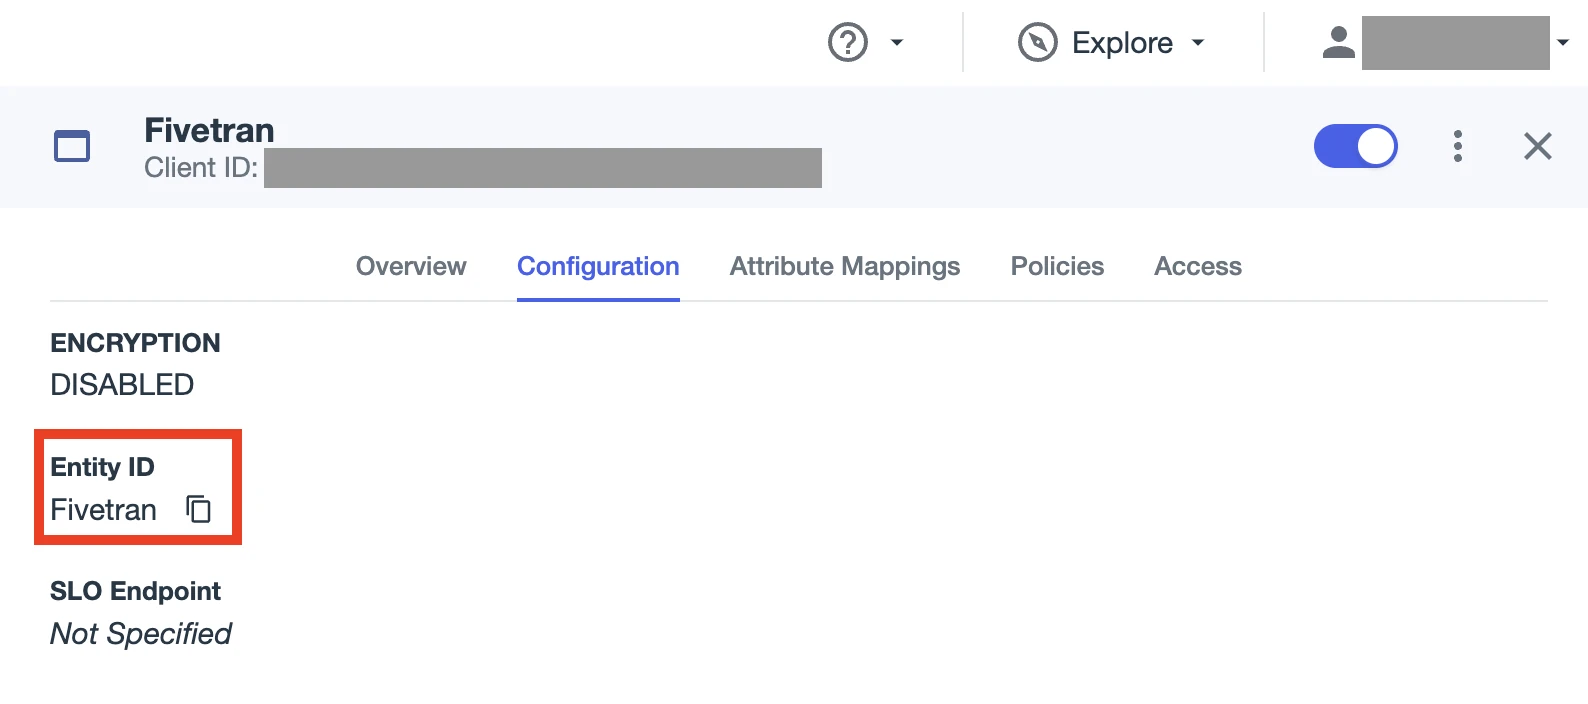
When configuring Single Sign-On with PingOne in Fivetran, log in to your PingOne account and go the Fivetran app page to be able to copy-paste the values.
In Fivetran
By default, Fivetran allows Just-In-Time (JIT) user provisioning. If you don't have a Fivetran user for the specified OneLogin user, the Fivetran user will be created automatically with the read-only access. To grant the newly created user the relevant role with the corresponding permissions, log in as a Fivetran user with the Users: Manage permission and manage the user's roles and permissions on the Users tab of the Users & Permissions page.
In Fivetran, click Account Settings > General.
On the Account Settings tab, under Authentication Settings, switch the Enable SAML authentication toggle to ON.
Under SAML Config, in the Sign on URL, Issuer, Public certificate, and Application Identifier (Entity ID) fields, enter Single Signon Service, Issuer ID, Download Signing Certificate and Entity ID values you found in Step 6, respectively.
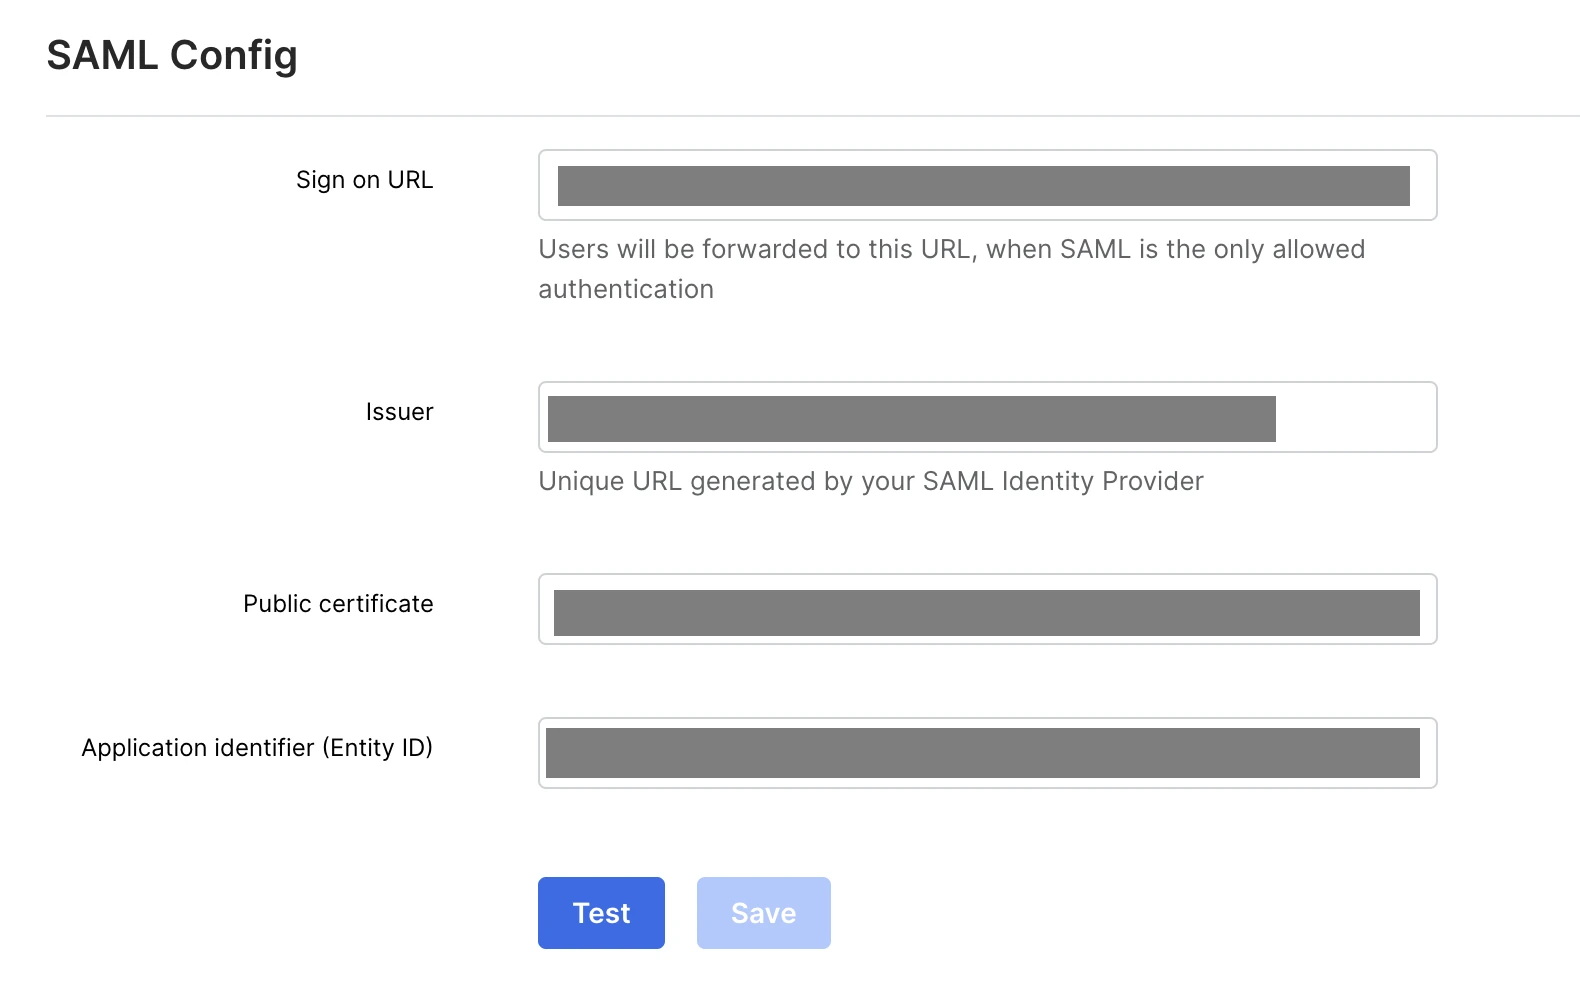
Click Save Config. You'll see the message Account settings successfully saved.
Testing SSO (Optional)
If you assigned the Fivetran app to a user who doesn't have a corresponding Fivetran user, you need to grant them write access after they have been automatically provisioned in your Fivetran account.
To test SSO, follow these steps:
In the PingOne Admin console, open the Fivetran app page. Go to the Configuration tab and copy the Initiate Single Sign-On URL. You will need it to log in to Fivetran using SAML SSO.
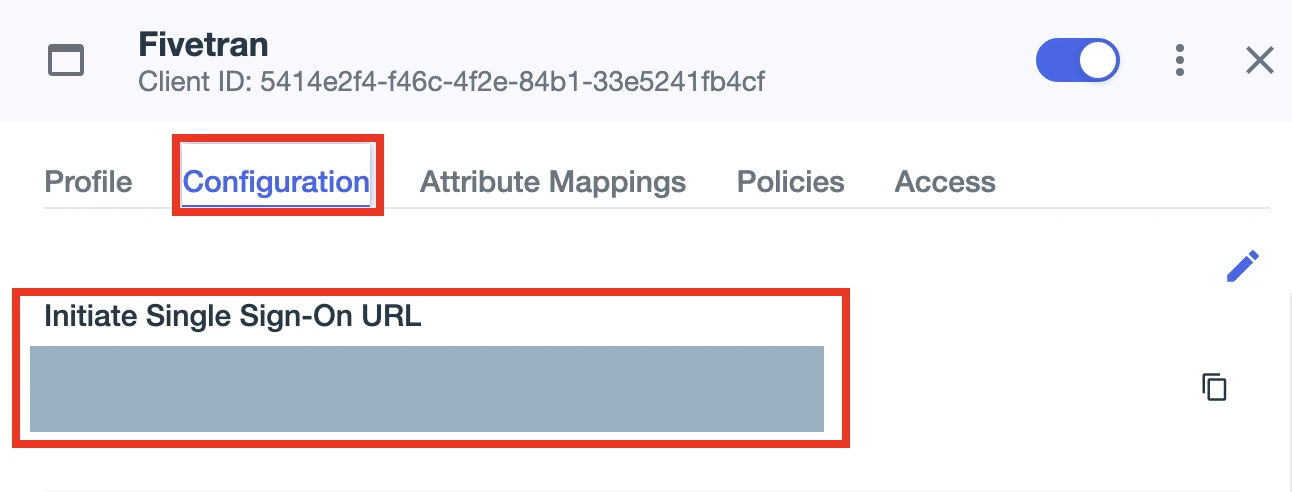
In a browser, paste the Initiate Single Sign-On URL to the address bar.
Enter the USERNAME you created in Step 3.
Enter your PASSWORD. Specify either of the following:
- the one-time password you created in Step 3 if you test SSO for the first time
- the permanent password you created when logging in using SSO for the first time
Click Sign On.
If you are testing SSO login for the first time, in the Current Password field, specify the one-time password you created in Step 3.
If you are testing SSO login for the first time, in the New Password and Verify New Password, specify a new permanent password.
If you are testing SSO login for the first time, click Save.
You will be redirected to your Fivetran dashboard.
Restrict login to SSO
Follow the steps below to restrict logins to SSO only:
- Log in to the Fivetran dashboard.
- In the bottom left menu, click Account Settings > General.
- Go to the Account Settings tab.
- In the Authentication Settings section, set the Required authentication type to SAML or Google OAuth.
When the Required authentication type is set to None, users can log in either with SSO or with their email and password.