Single Sign-On Using Google Workspace
Follow our guide to set up single sign-on (SSO) into Fivetran using the Google Workspace custom SAML application.
Prerequisites
To use Google Workspace SSO with Fivetran, you need Google Workspace and Fivetran accounts.
In Google Workplace
Add the custom SAML application for Fivetran
Log in to your Google Admin account and go to Apps/Web and mobile apps.

In the panel, select Add App.

Click Add custom SAML app.
![Add custom SAML app]](docsMedia1527520387)
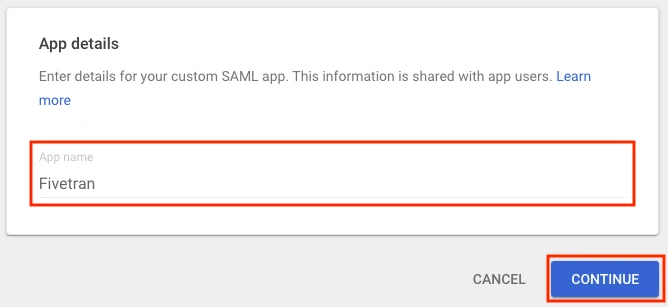
Enter Fivetran as the application name.
Click Continue to switch to the Google Identity Provider details page.
Get Sign on URL, Issuer and Public certificate
Make a note of the SSO URL. This is the Sign on URL in Fivetran.
Make a note of the Entity ID. This is the Issuer in Fivetran.
Download the Certificate. Open the downloaded certificate file in any text editor. The certificate is a string inside the
-----BEGIN CERTIFICATE-----and-----END CERTIFICATE-----statements. Make a note of it. You will enter it in the Public certificate field in Fivetran.Your public certificate should not include leading and trailing labels such as
-----BEGIN CERTIFICATE-----and-----END CERTIFICATE-----. Copy only the value between these labels.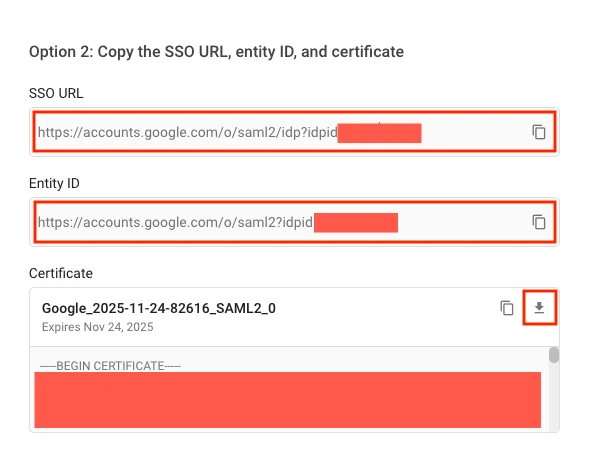
Click Continue to switch to the Service provider details page.
Configure the custom SAML application for Fivetran
Enter https://fivetran.com/login/saml/return as the ACS URL.
Fill the Entity ID field with a memorable value (for example, "Fivetran"). You'll enter this same value in the Application identifier (Entity ID) field in Fivetran.
Leave the Start URL empty and the Signed response checkbox clear.
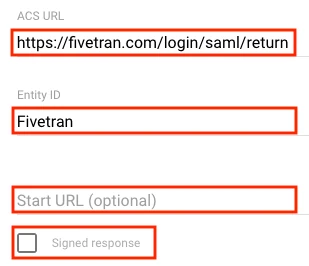
Set the Name ID format to UNSPECIFIED.
Set the Name ID to Basic Information > Primary email.
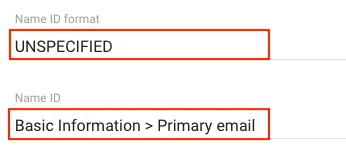
Click Continue to switch to the Attribute mapping page.
Click ADD MAPPING twice.
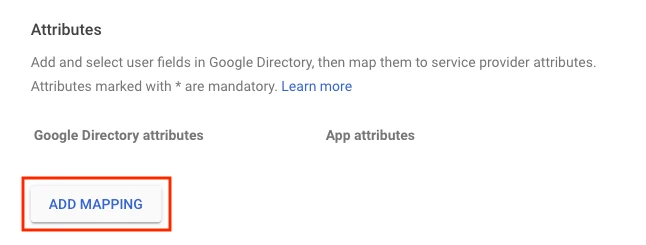
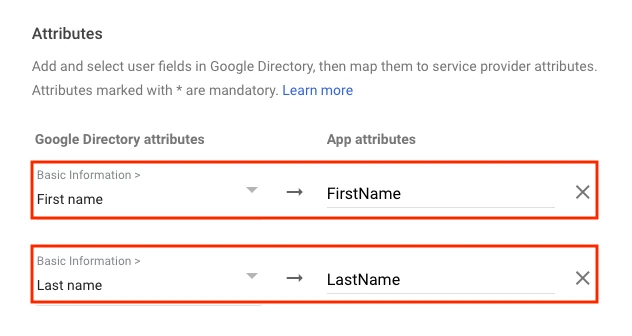
Select the Basic Information/First name in the Google Directory attributes for the first row.
Enter FirstName in the App attributes for the first row.
Select the Basic Information/Last name in the Google Directory attributes for the second row.
Enter LastName in the App attributes for the second row.
Click FINISH.
Enabling user access to the custom SAML application for Fivetran
By default, the custom SAML application created for Fivetran isn't accessible to users. Click OFF for everyone.

This example assumes you are enabling the application for everyone. Read Google's article "Apply policies to different users" to learn about applying policies to different users.
Click ON for everyone.
Click SAVE. Changes may take up to 24 hours to propagate to all users.

In Fivetran
By default, Fivetran allows Just-In-Time (JIT) user provisioning. If you don't have a Fivetran user for the specified OneLogin user, the Fivetran user will be created automatically with the read-only access. To grant the newly created user the relevant role with the corresponding permissions, log in as a Fivetran user with the Users: Manage permission and manage the user's roles and permissions on the Users tab of the Users & Permissions page.
In Fivetran, click Account Settings > General.
On the Account Settings tab, under Authentication Settings, switch the Enable SAML authentication toggle to ON.
Under SAML Config, in the Sign on URL, Issuer, Public certificate (without the
-----BEGIN/END CERTIFICATE-----statements), and Application identifier (Entity ID) fields, enter the values you found in Step 2 and Step 3.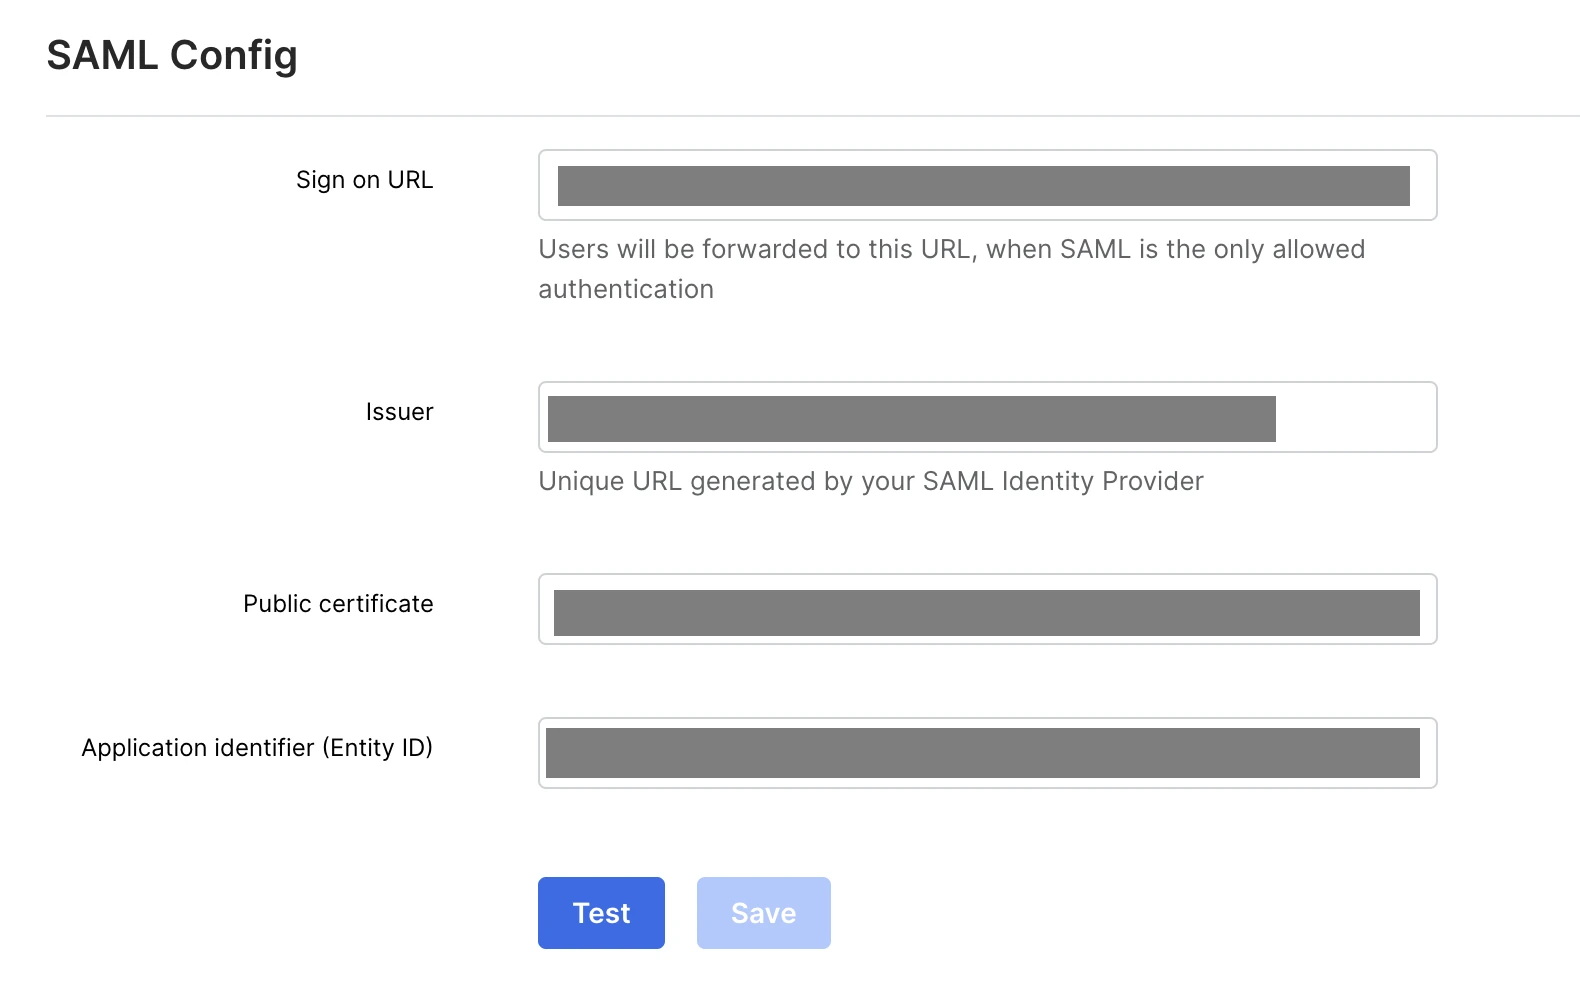
Click Save Config. You'll see the message Account settings successfully saved.
Testing SSO (Optional)
To test SSO, follow these steps:
Log in to the Google account you have granted access to.
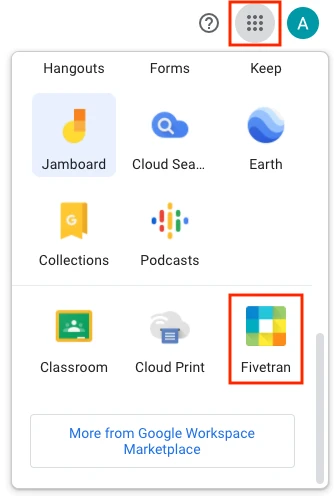
Select the Fivetran button from the App selector. You will be redirected to your Fivetran dashboard.
Restrict login to SSO
Follow the steps below to restrict logins to SSO only:
- Log in to the Fivetran dashboard.
- In the bottom left menu, click Account Settings > General.
- Go to the Account Settings tab.
- In the Authentication Settings section, set the Required authentication type to SAML or Google OAuth.
When the Required authentication type is set to None, users can log in either with SSO or with their email and password.