Fivetran SCIM Configuration Guide for Okta
You must have an Enterprise or Business Critical plan to use Fivetran SCIM for OKTA.
We recommend that you migrate to the newest version of our Fivetran app in Okta to be able to manage user identities for teams.
Overview
If your organization uses Okta to manage employee access to tools and services, you can leverage Okta's provisioning feature to automatically grant access to your users. This document explains how to configure Okta to work with Fivetran to provide user provisioning through the System for Cross-domain Identity Management (SCIM) API specification. SCIM is designed to make managing user identities in cloud-based applications and services easier.
Supported features
Once you set up the SCIM integration between Okta and Fivetran, Administrators can perform the following Fivetran user management actions within Okta:
- Import users - Okta imports users from Fivetran
- Create users - Okta creates users in Fivetran
- Update user attributes - Okta updates the First Name, Last Name, and Role attributes in Fivetran
- Deactivate users - Okta soft deletes users in Fivetran
- Group Push - Okta creates, updates, or deletes teams in Fivetran
Administrators can no longer manage users directly in Fivetran once SCIM is enabled.
We don’t support configuring team roles via SCIM. This means you can’t map groups to team roles.
Prerequisites
To connect Fivetran SCIM service with an Okta integration, you need:
- A Fivetran account with an Account Administrator role and an Enterprise or Business Critical plan
- Administrator privileges in Okta
- A SCIM provisioning subscription for Okta
Setup instructions
Configure Fivetran and obtain your API token
In your Fivetran dashboard, go to Account Settings > General.
Scroll down to the SCIM Config section to access your SCIM provisioning settings.
The section is only visible if you are on an Enterprise or Business Critical plan.
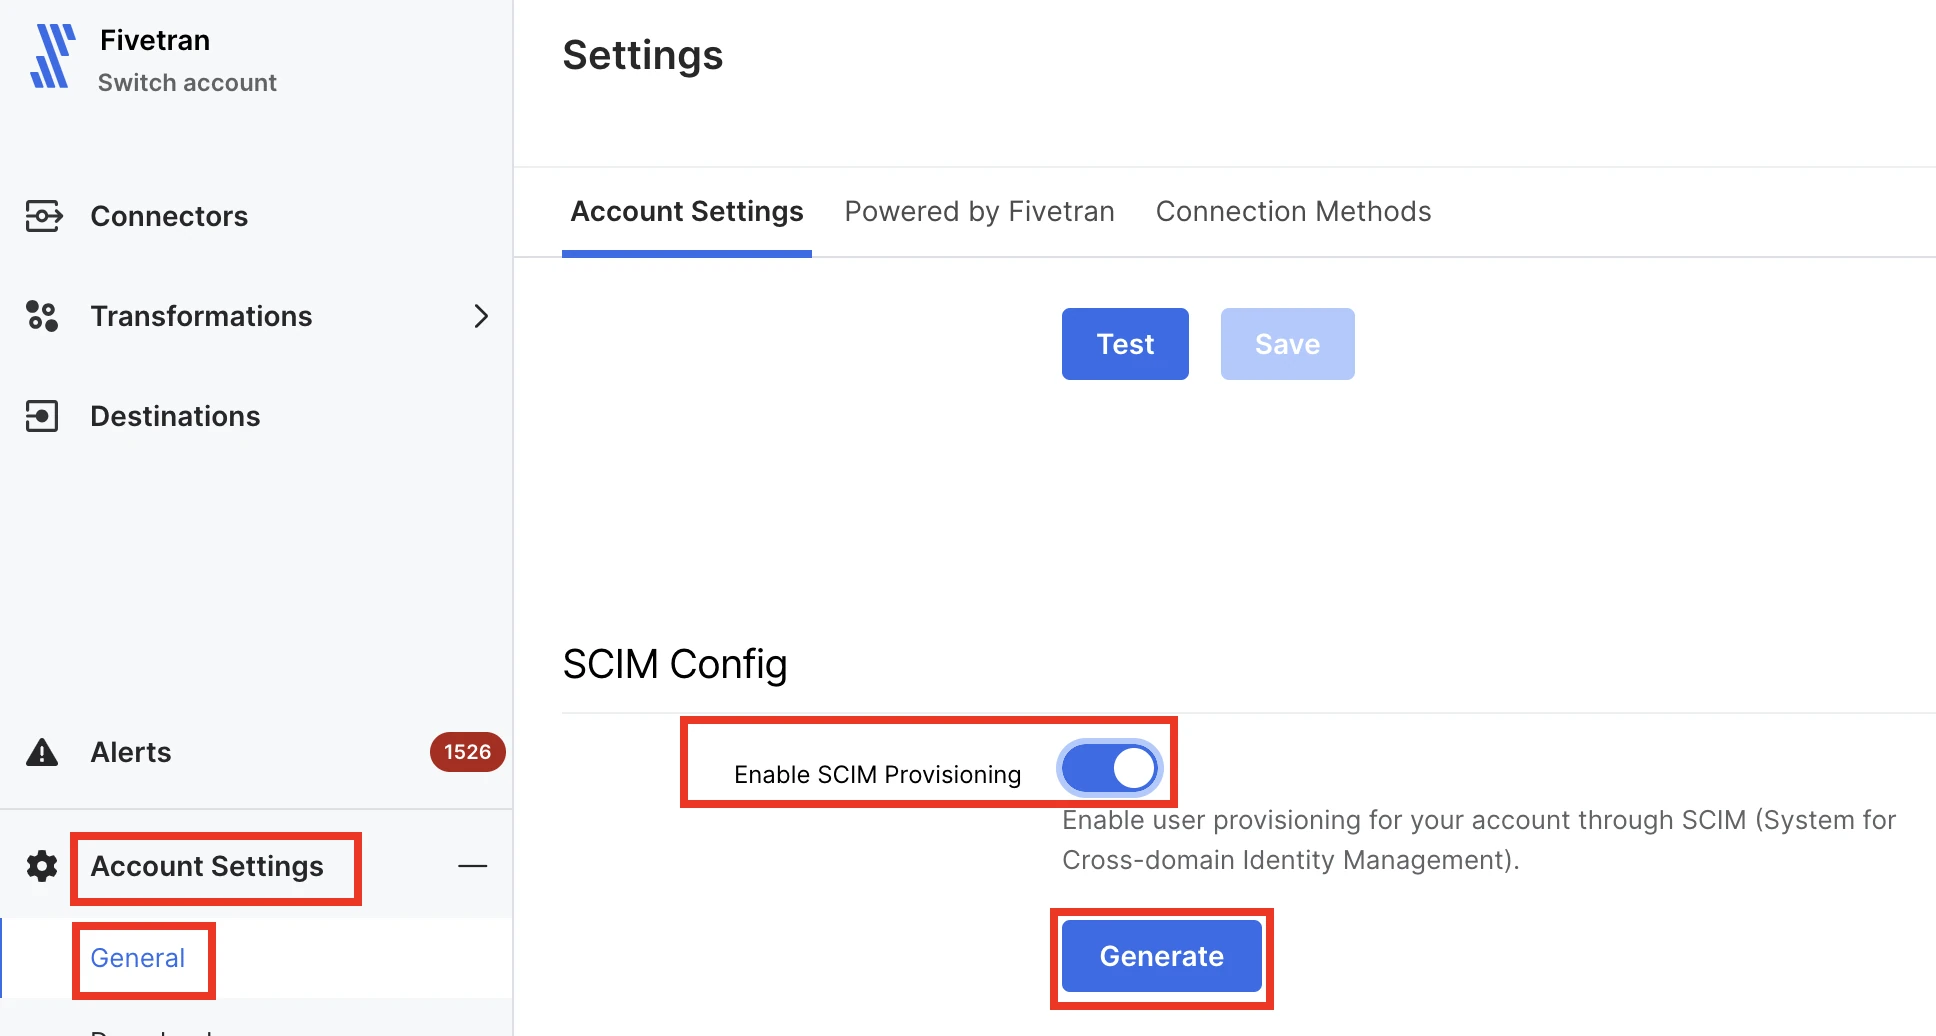
Switch the Enable SCIM Provisioning toggle to ON.
Click Generate to generate a new API token.
Copy your API token. You will need to provide it in your Okta Application.
Click Save Config.
Connect Fivetran SCIM service to an Okta integration
If you want to enable SCIM support for your existing Fivetran Okta integration, skip to Step 6. Otherwise, start from Step 1.
In the Okta Admin Console, go to Applications > Applications and click Browse App Catalog.

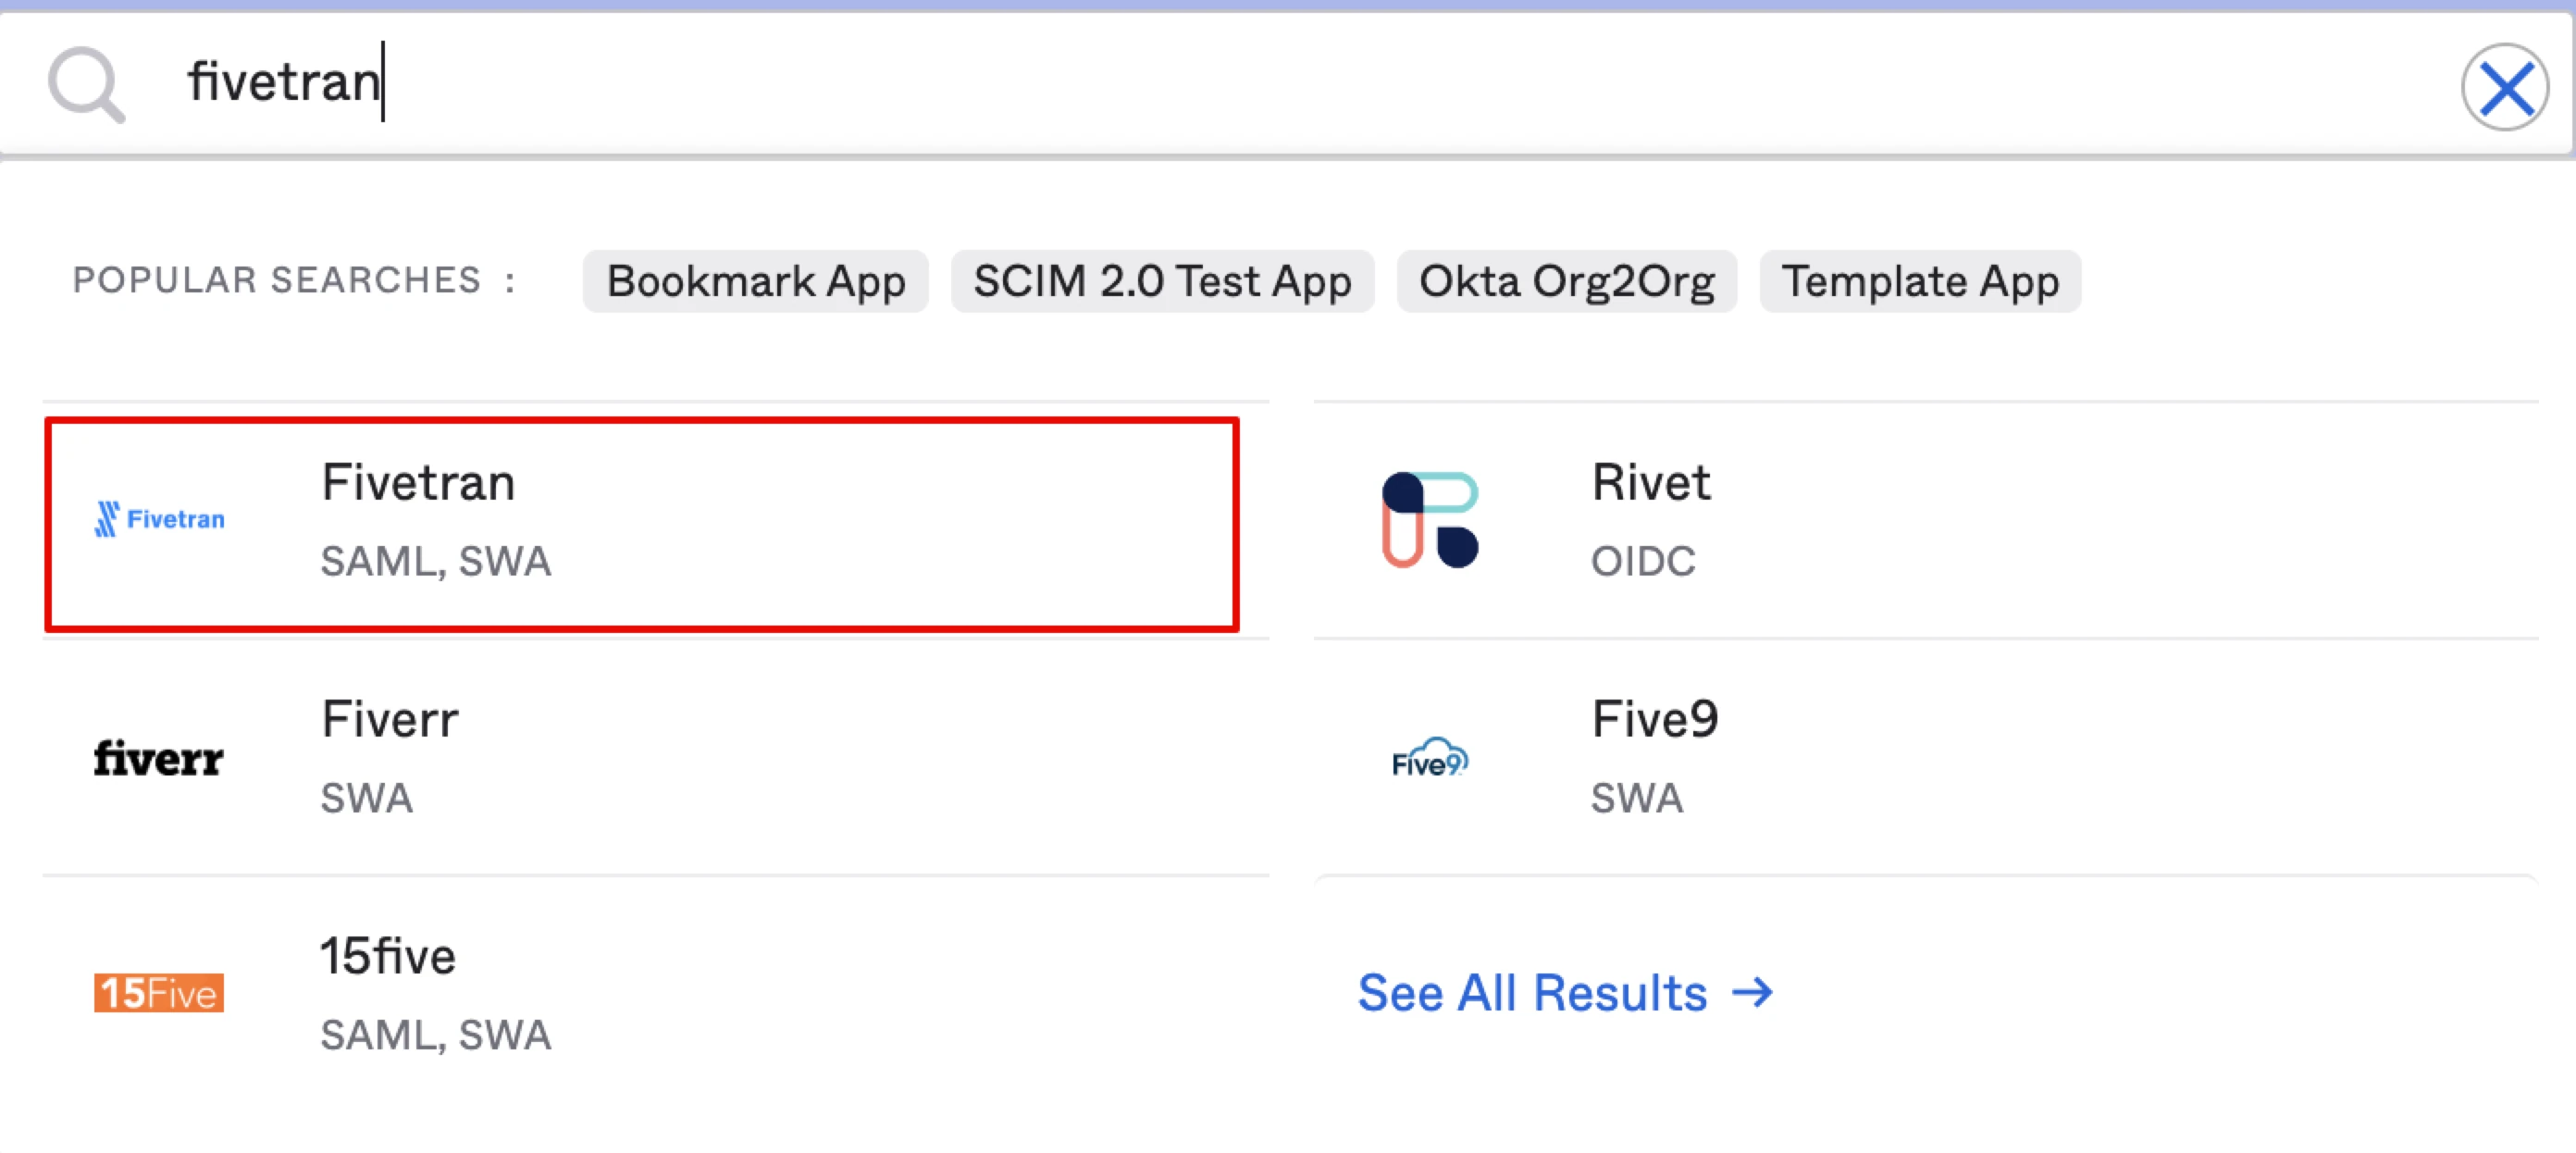
Find "Fivetran" in the integration list and click it.
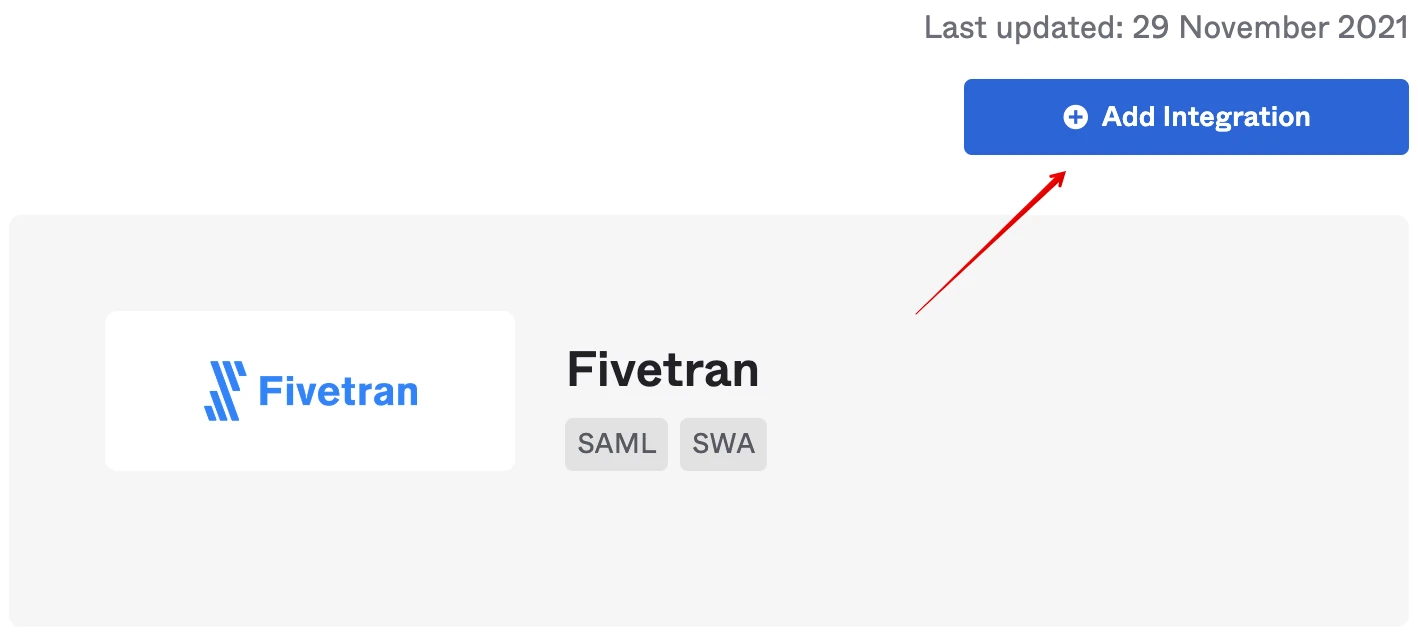
Click Add Integration.
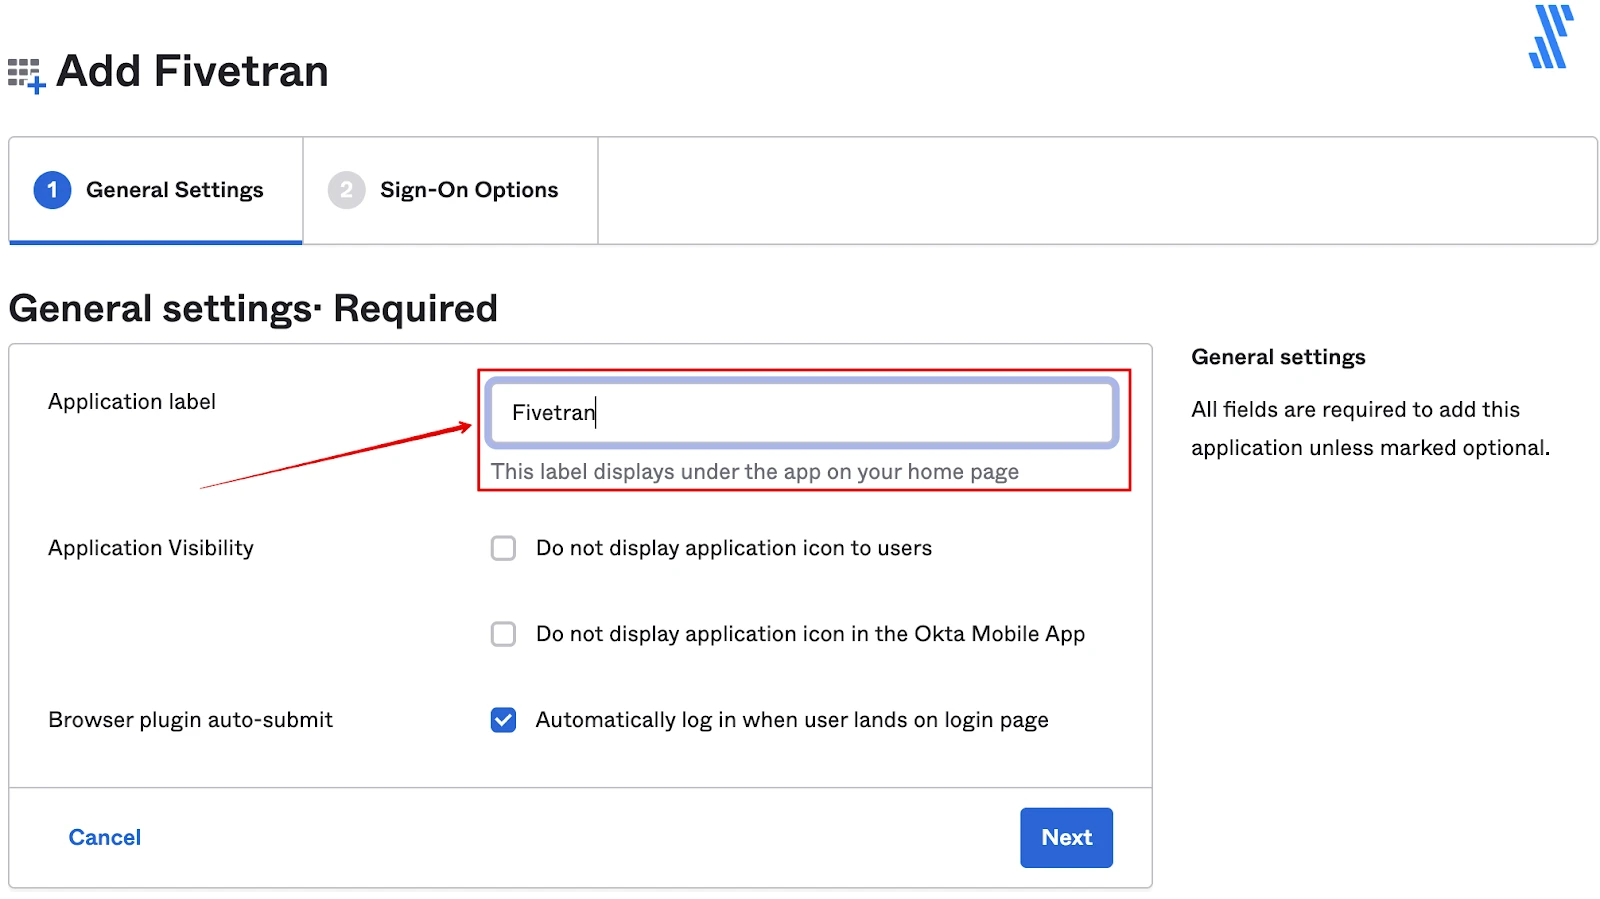
Fill in the Application label field and click Next.
On the Sign On Options page, select the Email username format and click Done.
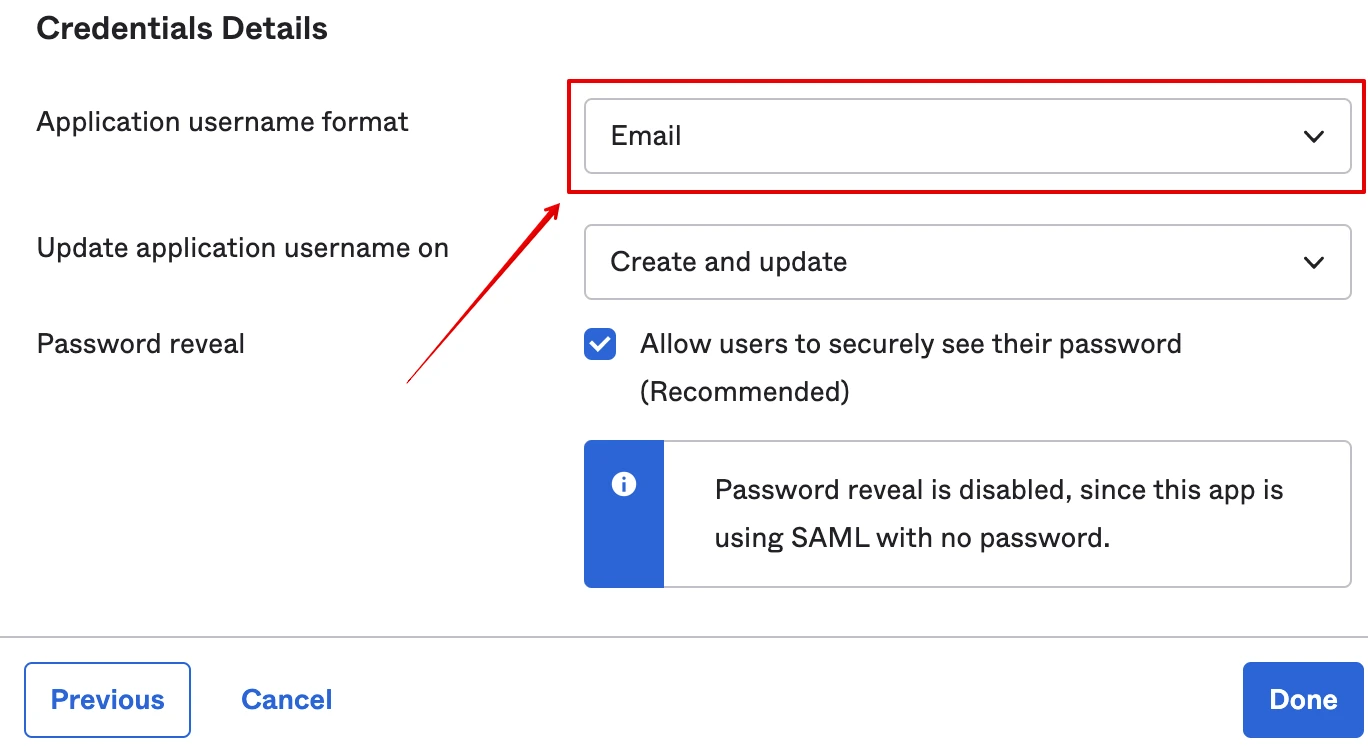
See the Field Mapping troubleshooting article to learn about field mapping to make sure that email and username attribute values match.
Go to Provisioning > Integration and click Configure API Integration.
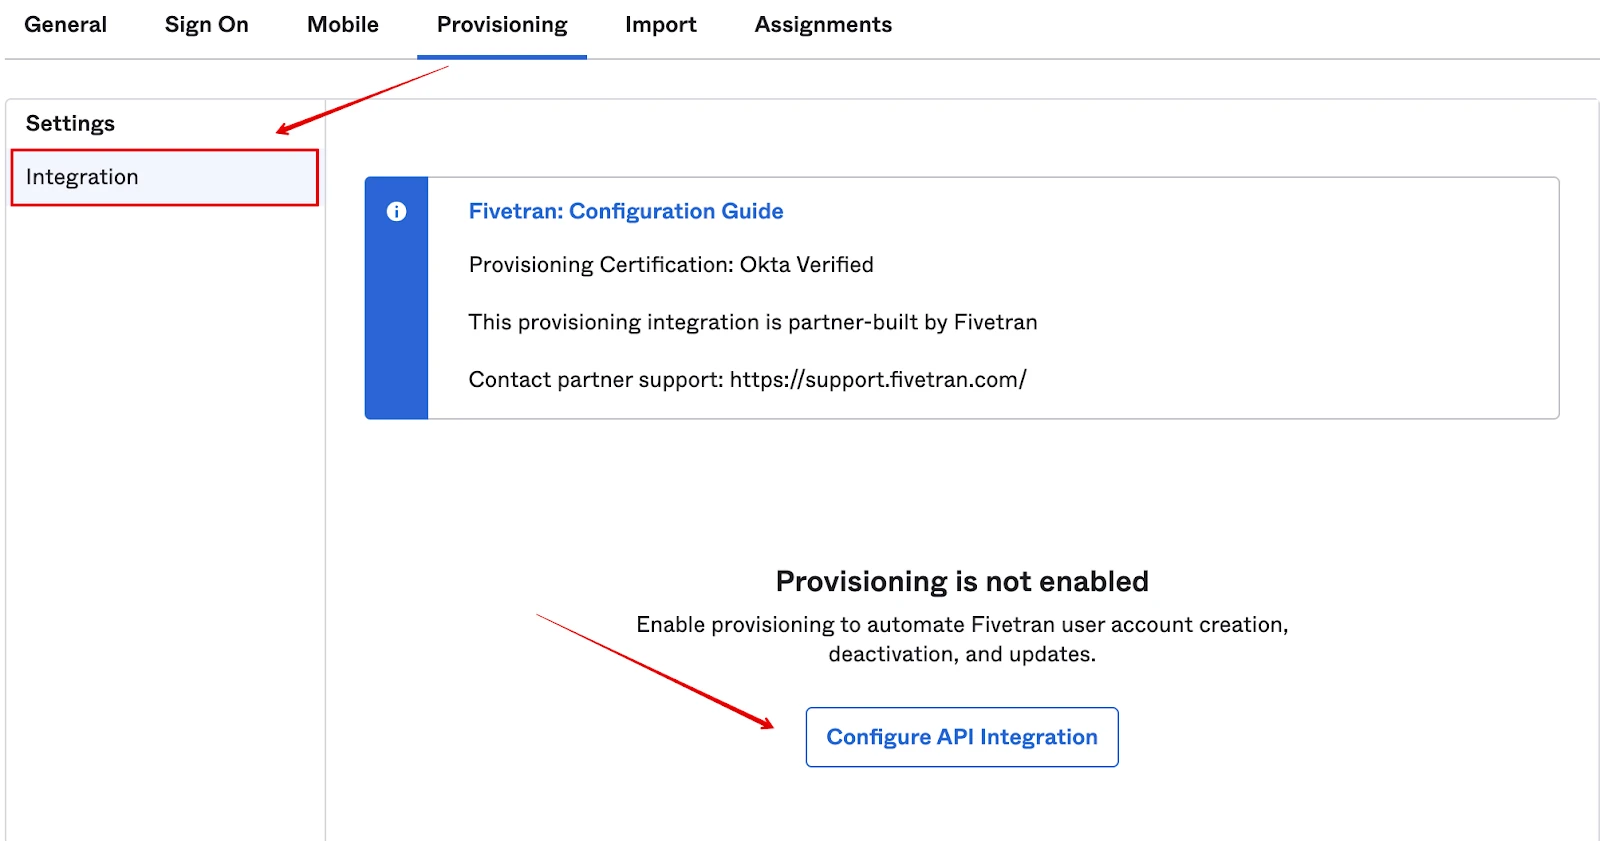
Select the Enable API integration checkbox, and enter the SCIM API token you generated in Step 2.
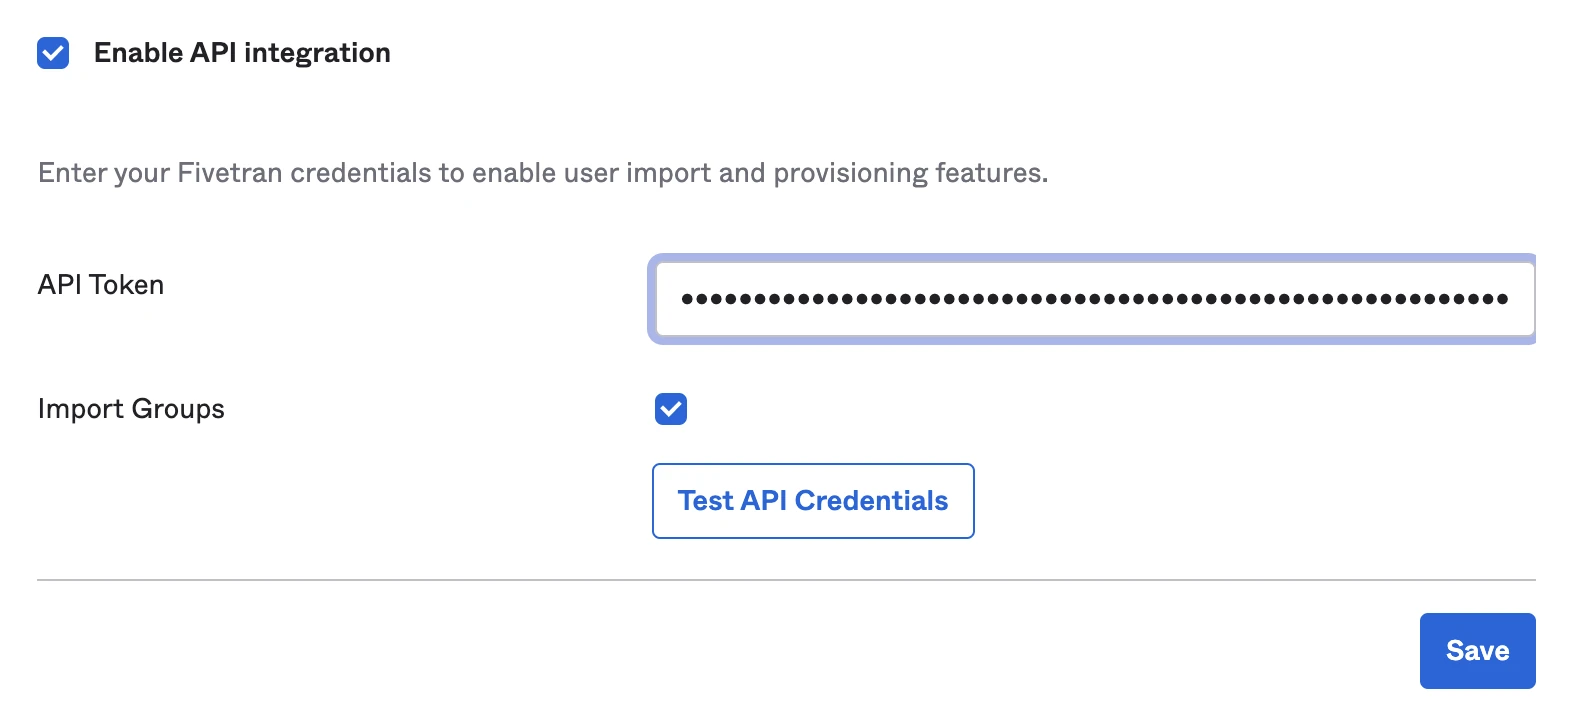
Click Test API Credentials to verify that the Okta application can connect to the Fivetran SCIM API.
Click Save.
Configure your Okta integration
In the Settings menu, click To App.
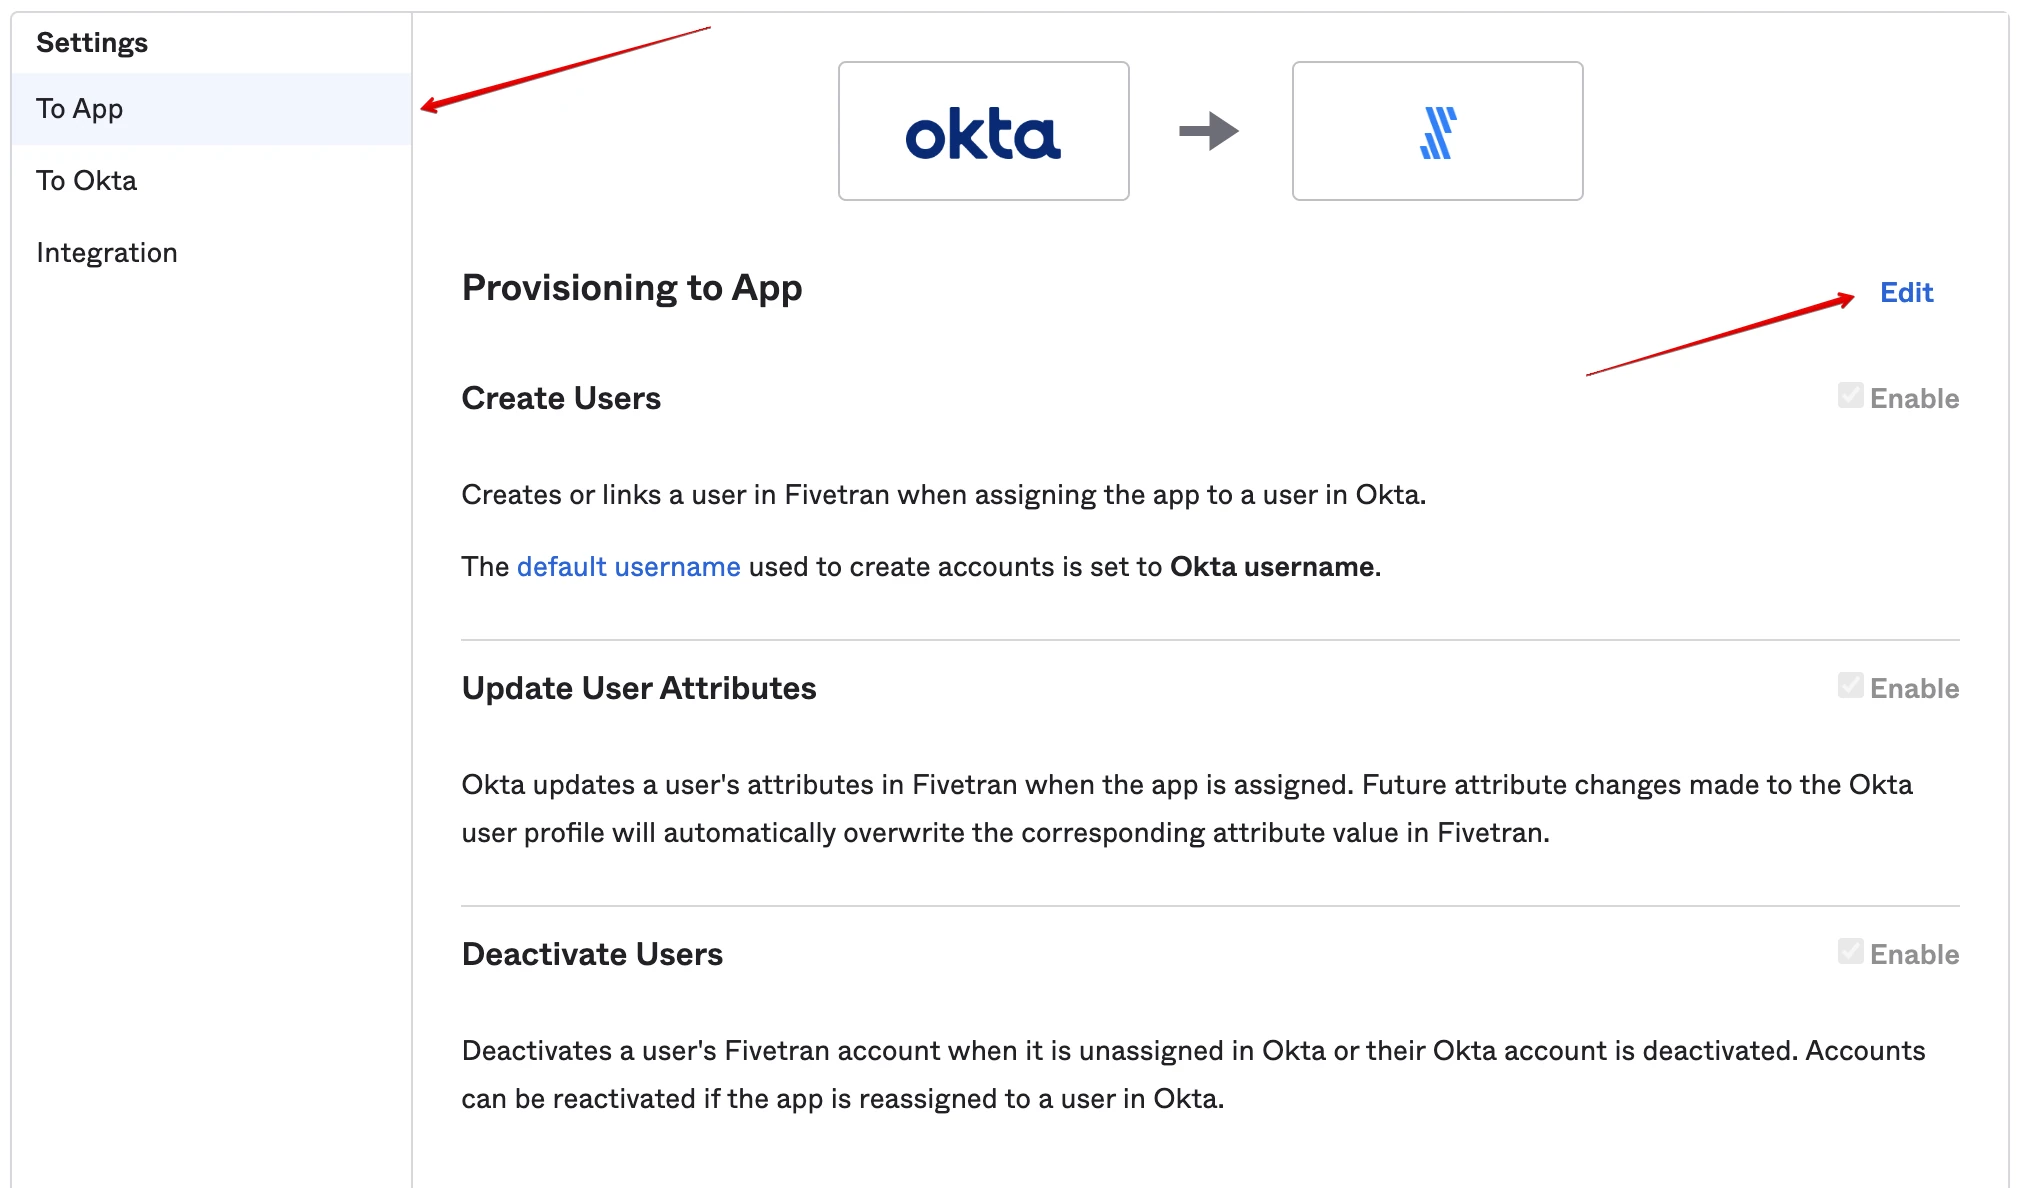
Click Edit to make changes to the following sections:
Create Users — when selected, Okta assigns a new account in your downstream application for each user that Okta manages. Okta doesn't create a new account if it detects that the username specified in Okta already exists in your application.
Update User Attributes — when selected, Okta syncs any updates made to the profiles of users assigned to the integration, and sends those changes to your downstream application. Profile changes made in your application are overwritten with their respective Okta profile values. Fivetran only allows you to update the "Family name", "Given name", and "Role" fields.
Deactivate Users — if selected, when the user is unassigned in Okta, then Okta deactivates the relevant user in the Fivetran account.
Assign Fivetran application to users
Make sure that only the users in your company who need to have access to Fivetran are assigned to the Okta app integration. We automatically create a new user in your Fivetran account when you add your company users on the Assignments tab in Okta.
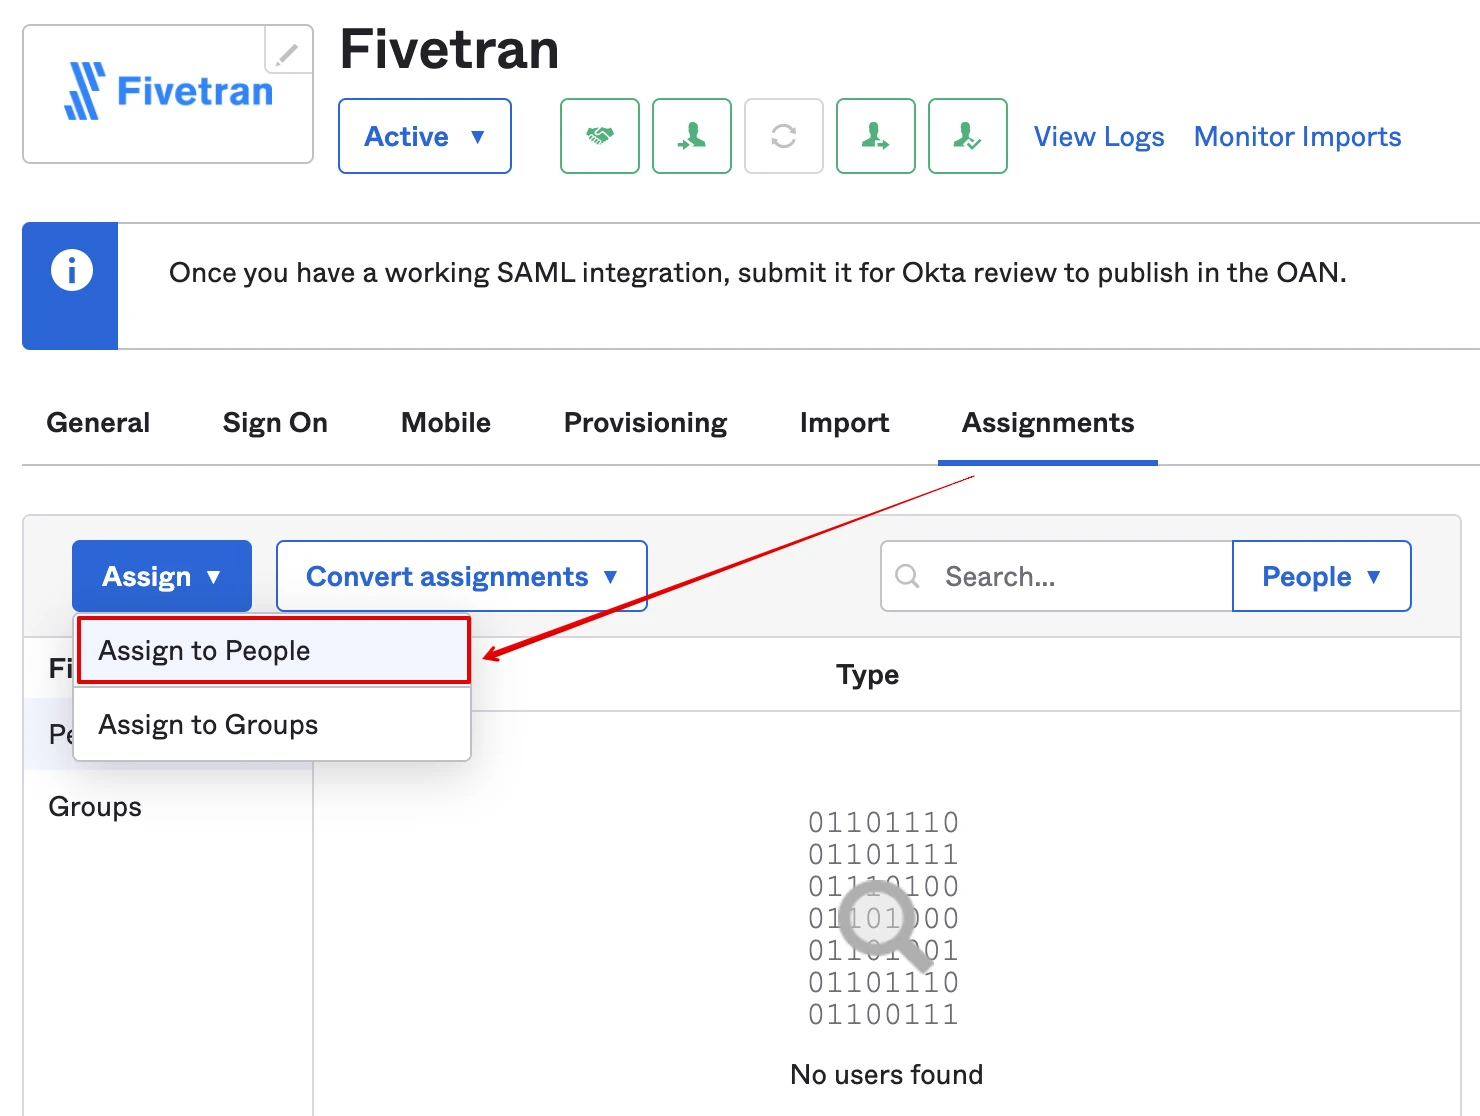
In your Okta dashboard, go to your Okta app integration. Click Assign > Assign to People and choose the user you want to assign the app to.
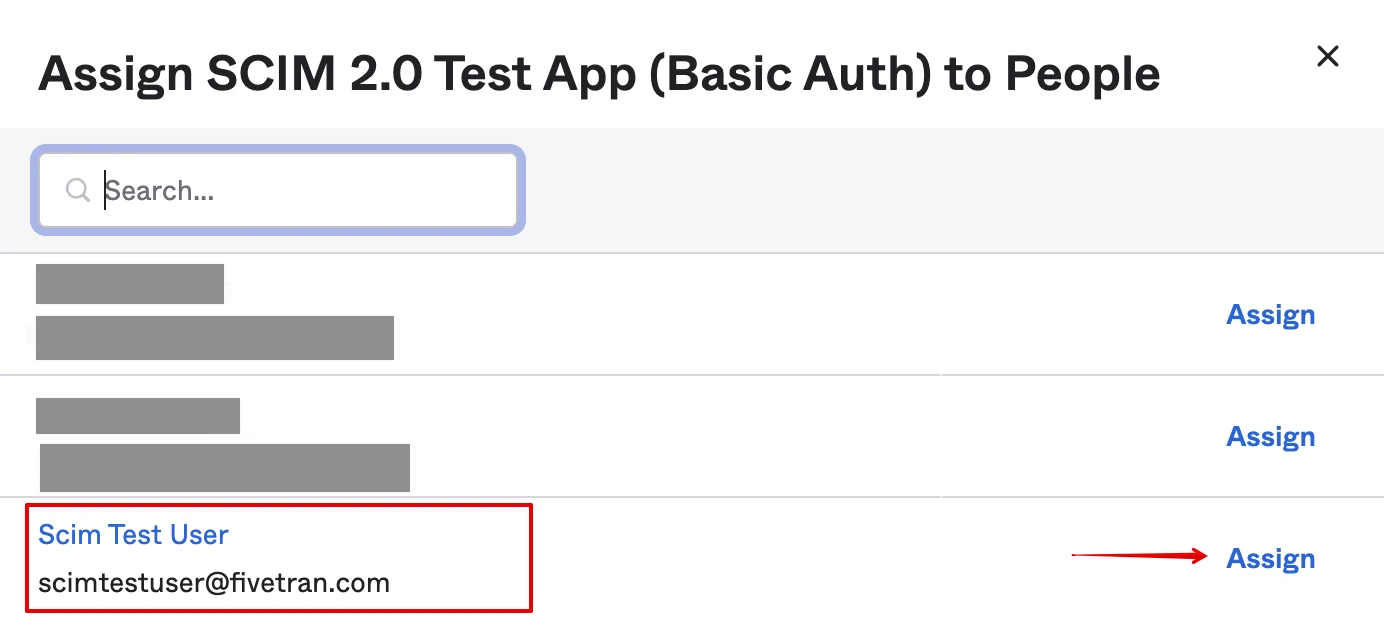
Click Assign for the selected user.
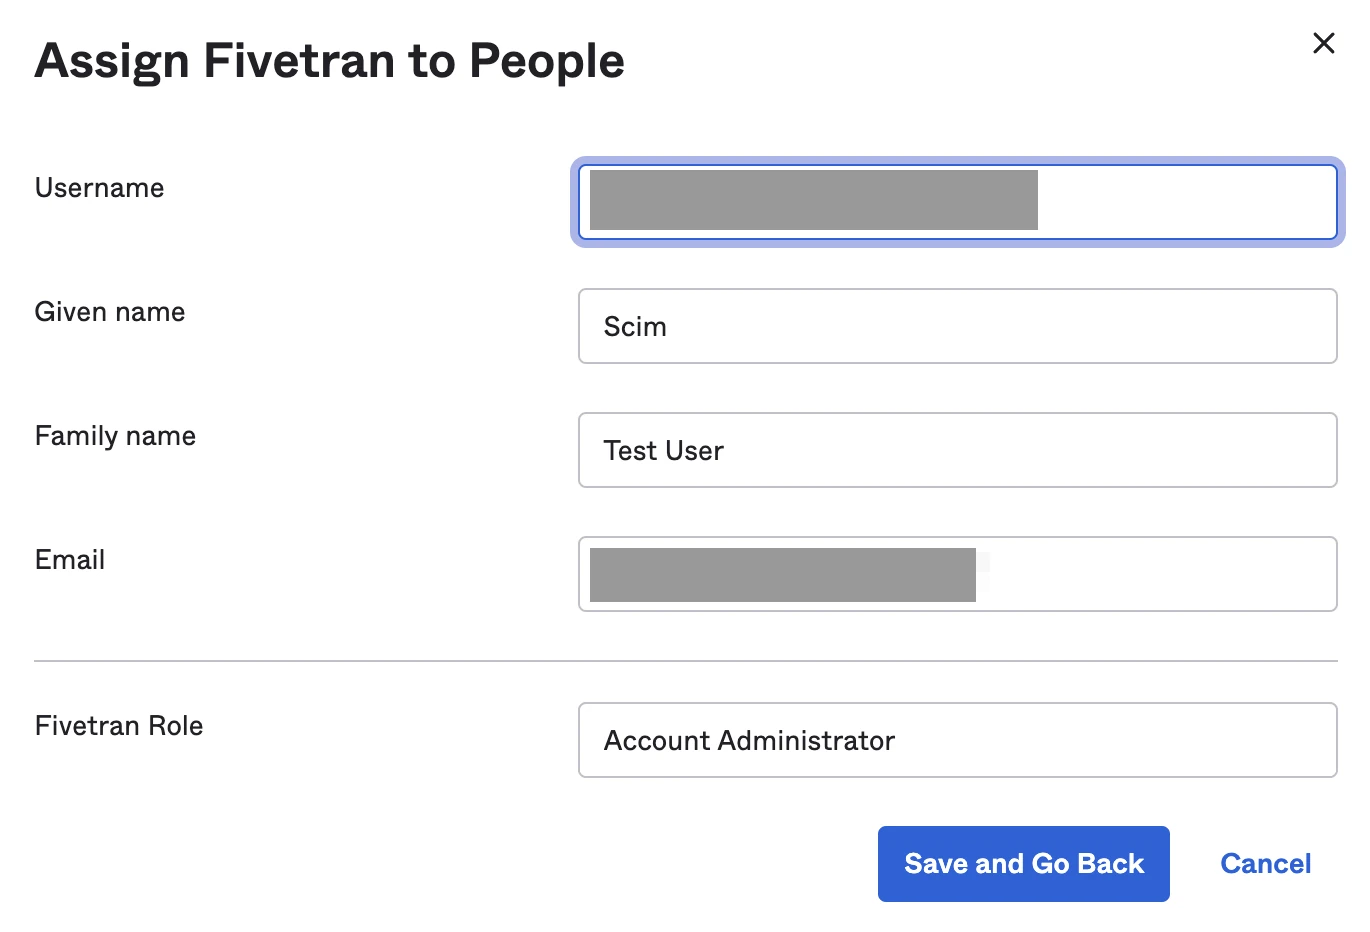
Verify the user attributes, then click Save and Go Back.
If your application already has user assignments when you enable provisioning, the assigned users will not be provisioned in Fivetran automatically. You need to manually provision these users by clicking Provision User on the Assignments tab of your Okta application. Learn more about the manual user provisioning in Okta's Provision unprovisioned users documentation.
(Optional) Add the Role attribute to your Okta user profile
- Open the Application User profile that you have used to / will use to assign Fivetran to users in Okta.
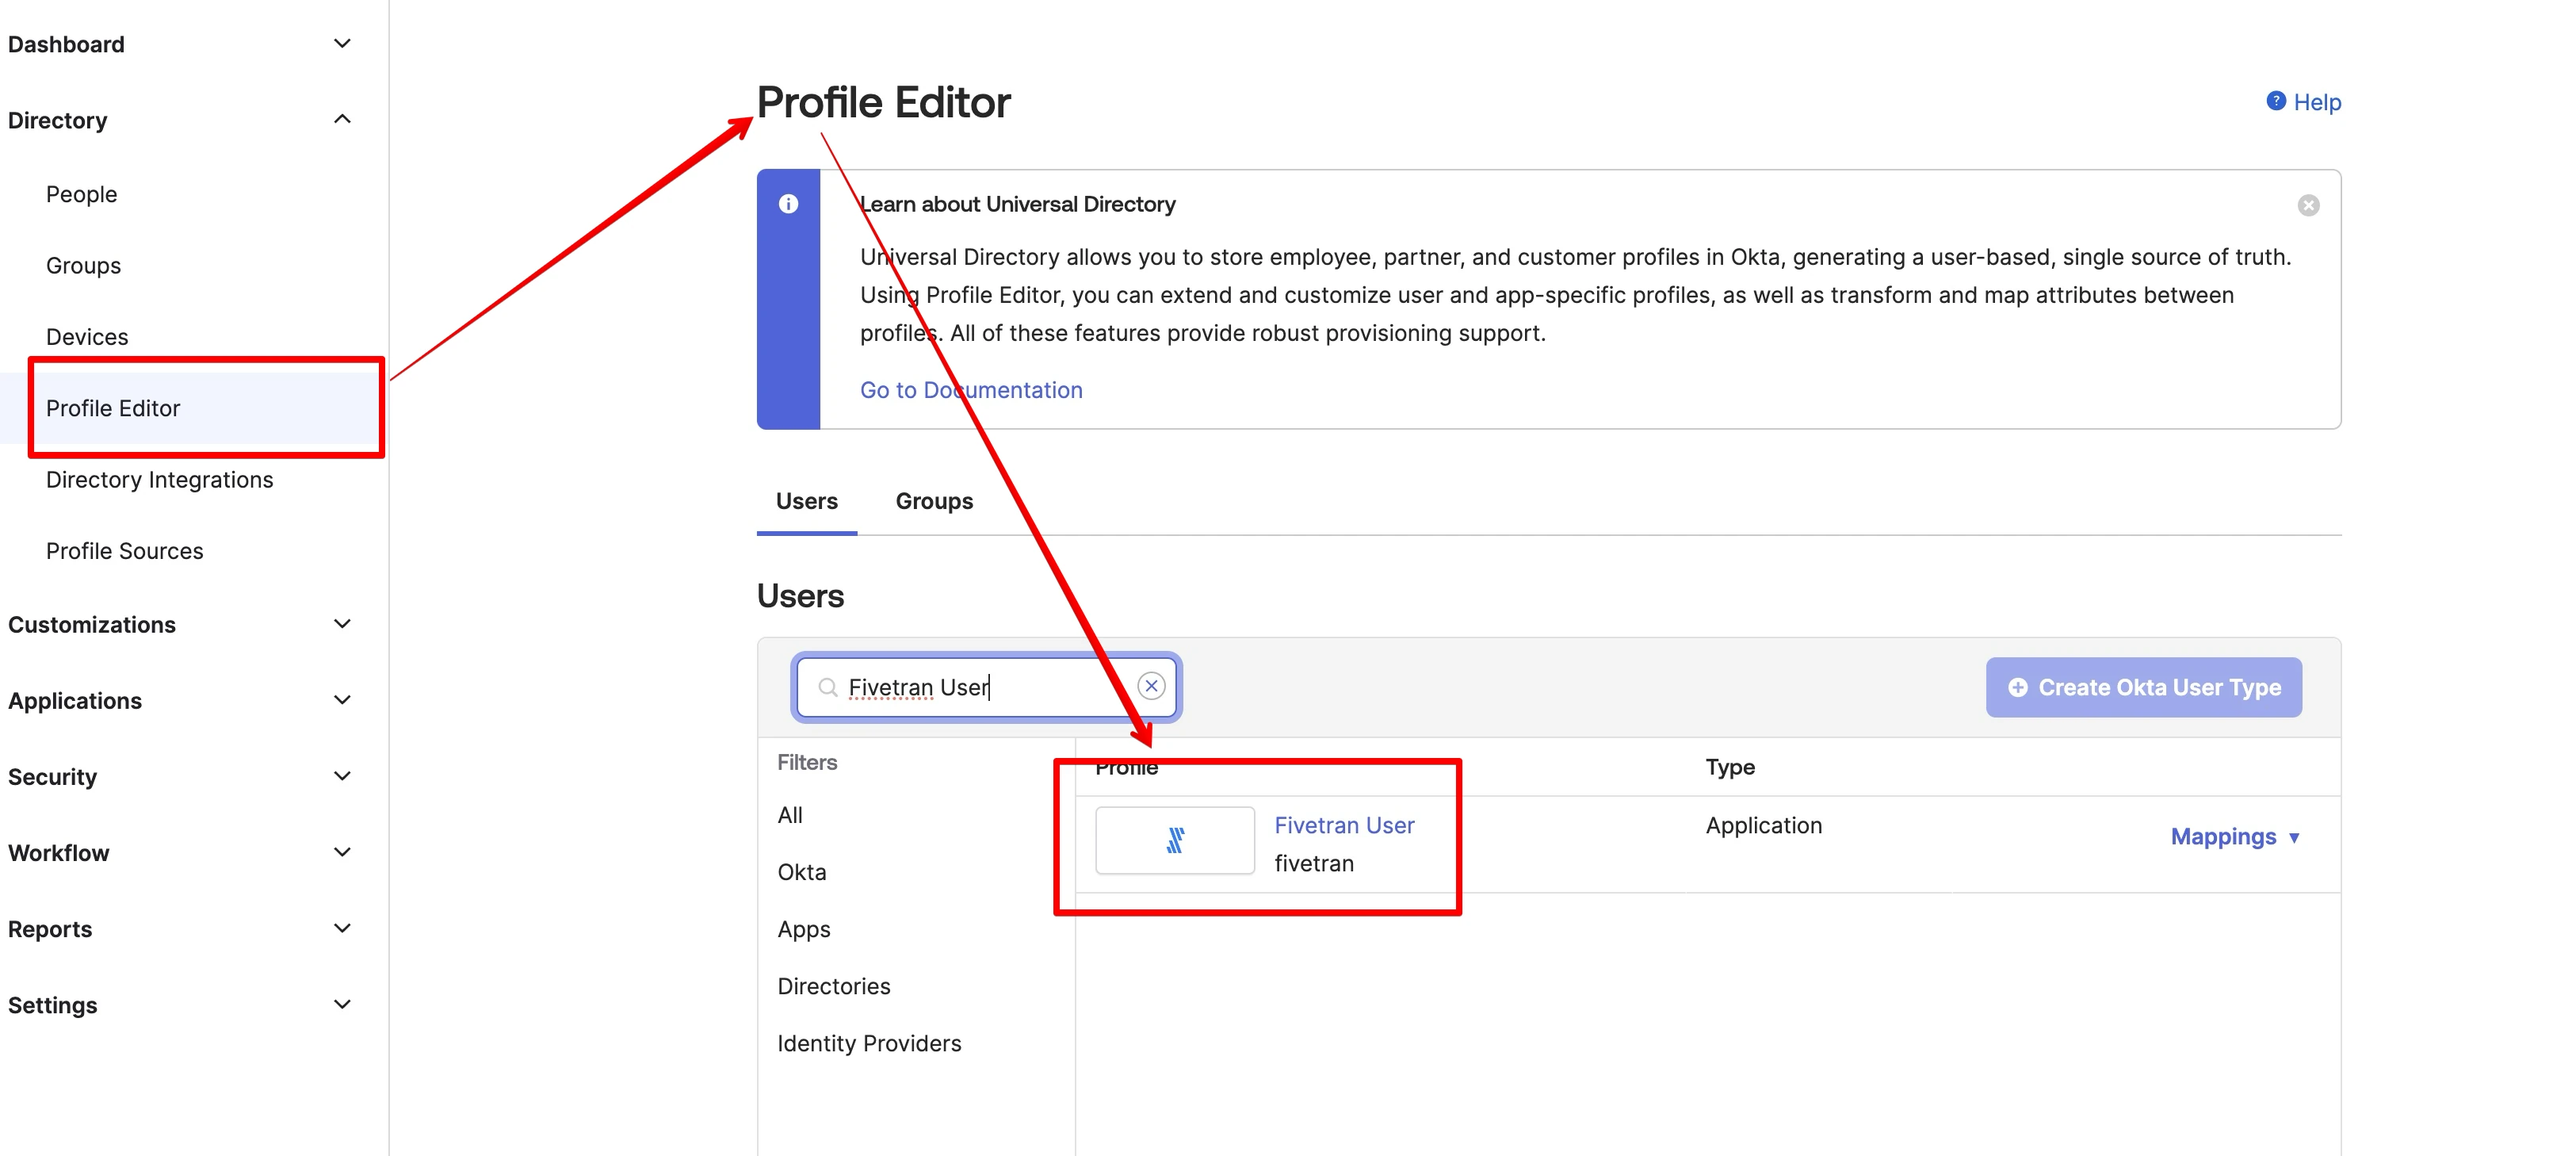
Click Add Attribute and add a new custom attribute Role. The name must exactly match the name of the relevant standard user role in Fivetran RBAC model or an existing custom user role in your account.
Destination-level or connector-level roles are not supported in the Fivetran SCIM API.
If you want to use standard account-level roles, fill in the attribute fields as listed below:
Display Name Value Account Administrator Account Administrator Account Analyst Account Analyst Account Billing Account Billing Account Reviewer Account Reviewer Destination Creator Destination Creator 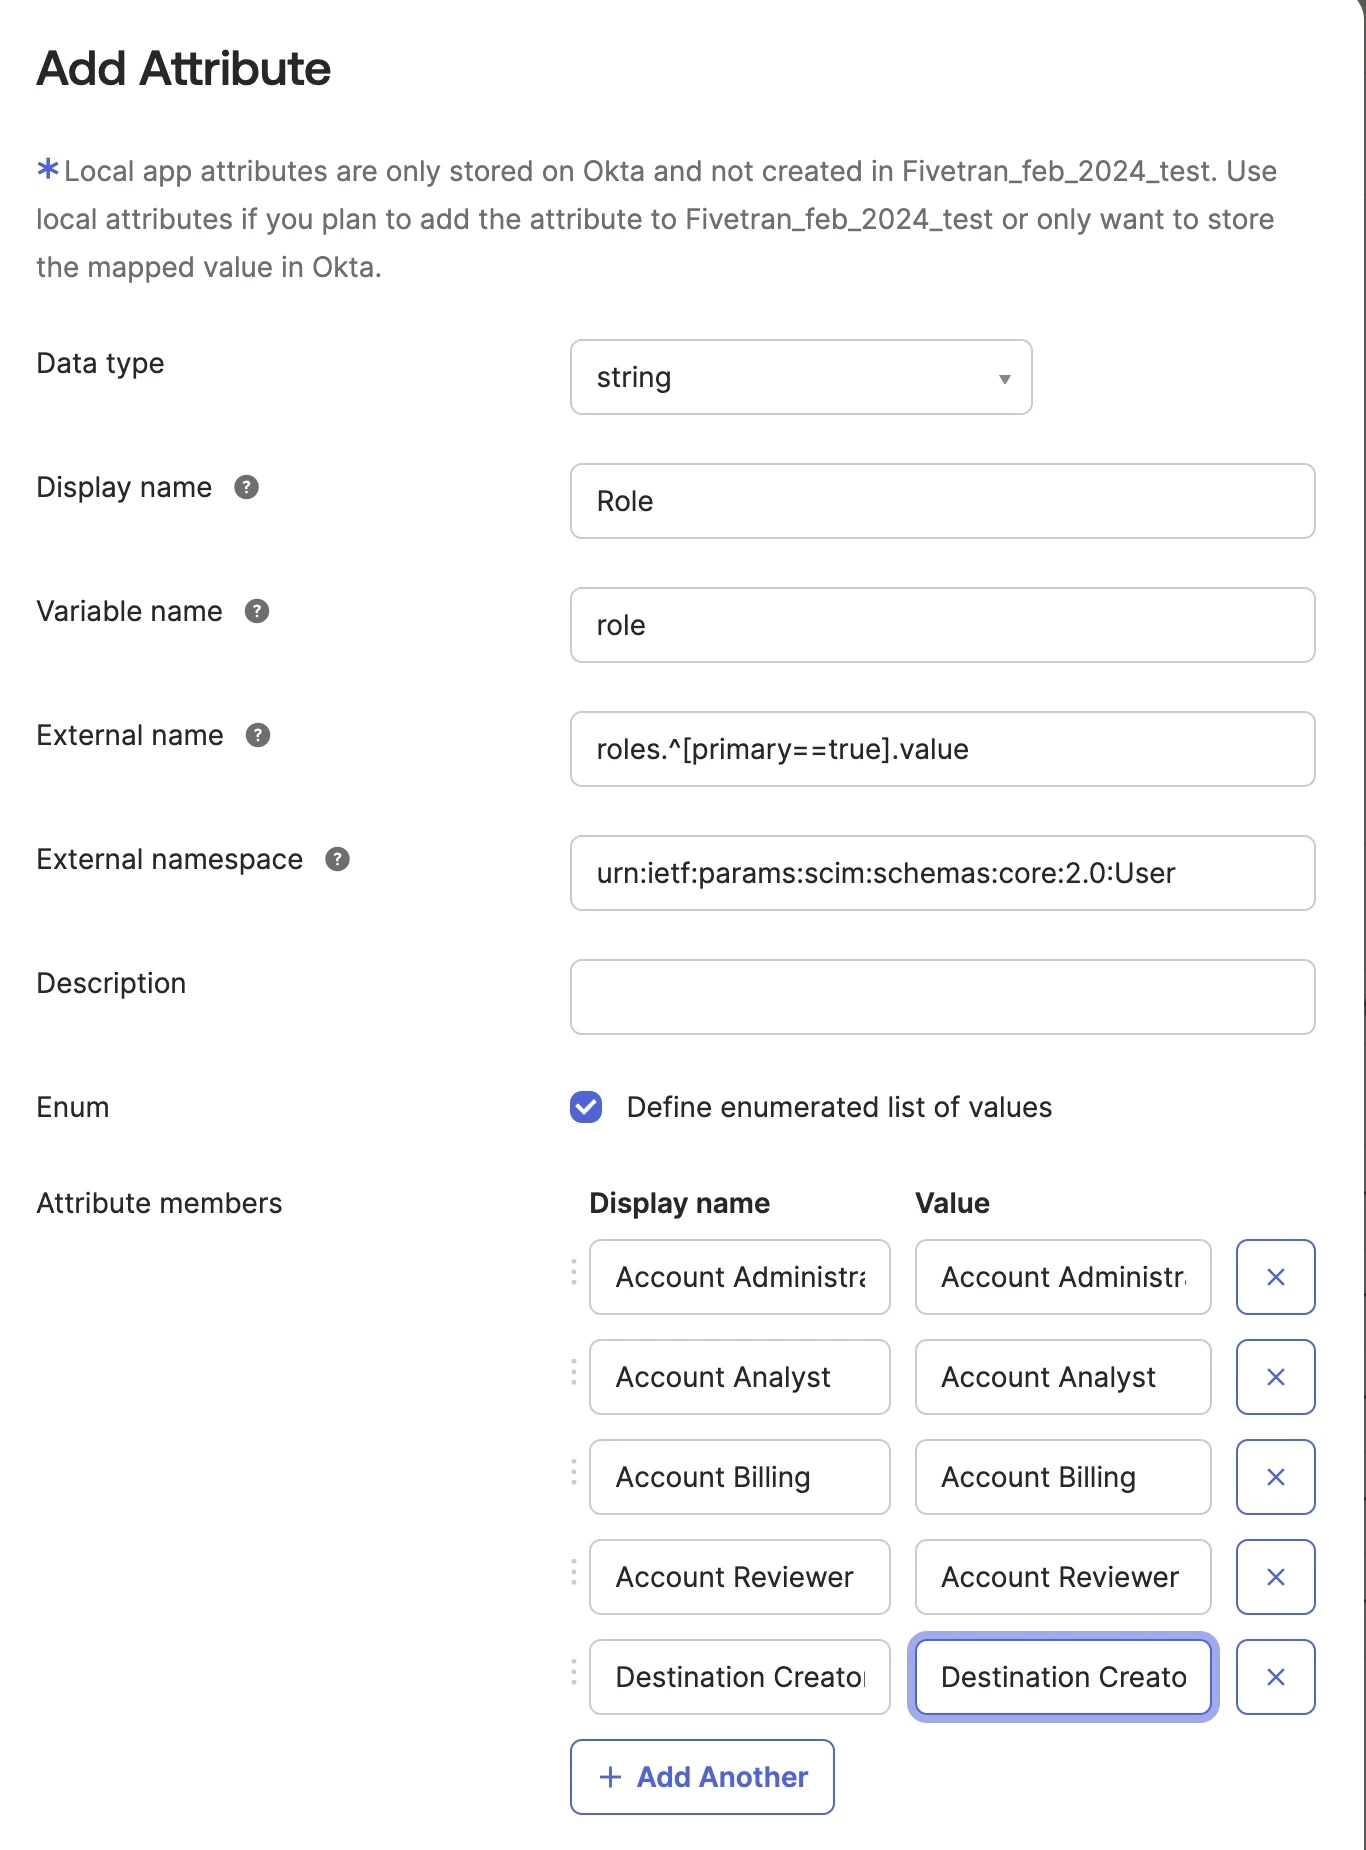
Fill in the External name and External namespace fields as listed below:
Field Value External name roles.^[primary==true].valueExternal namespace urn:ietf:params:scim:schemas:core:2.0:UserClick Save Attribute.
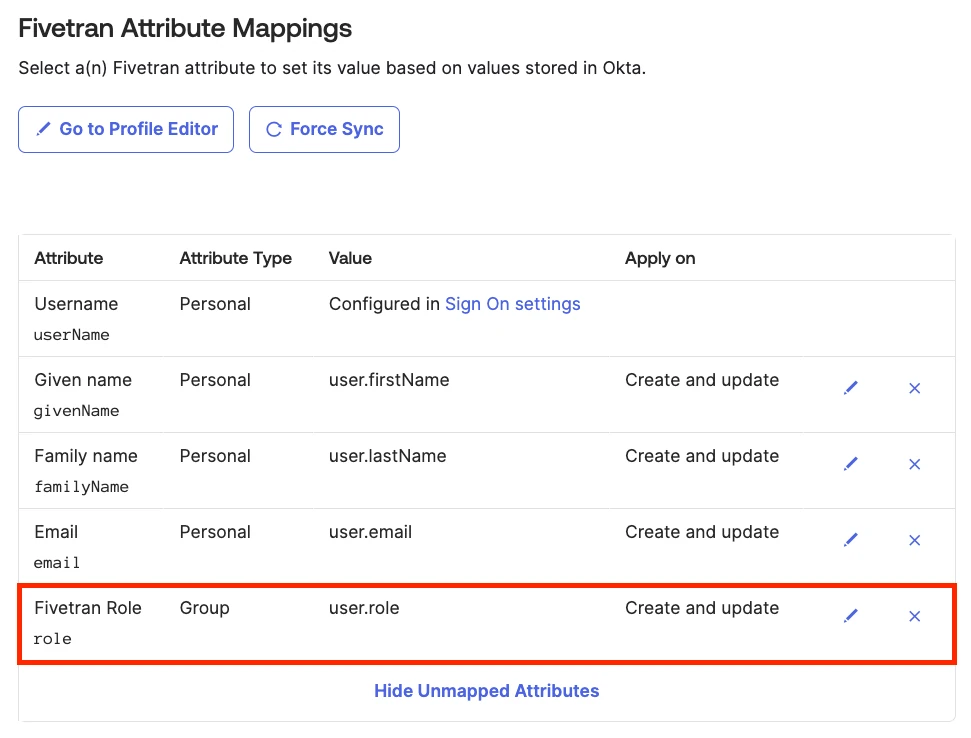
Make sure that the Fivetran Role attribute is correctly mapped:
(Optional) Import users from your Fivetran account into Okta
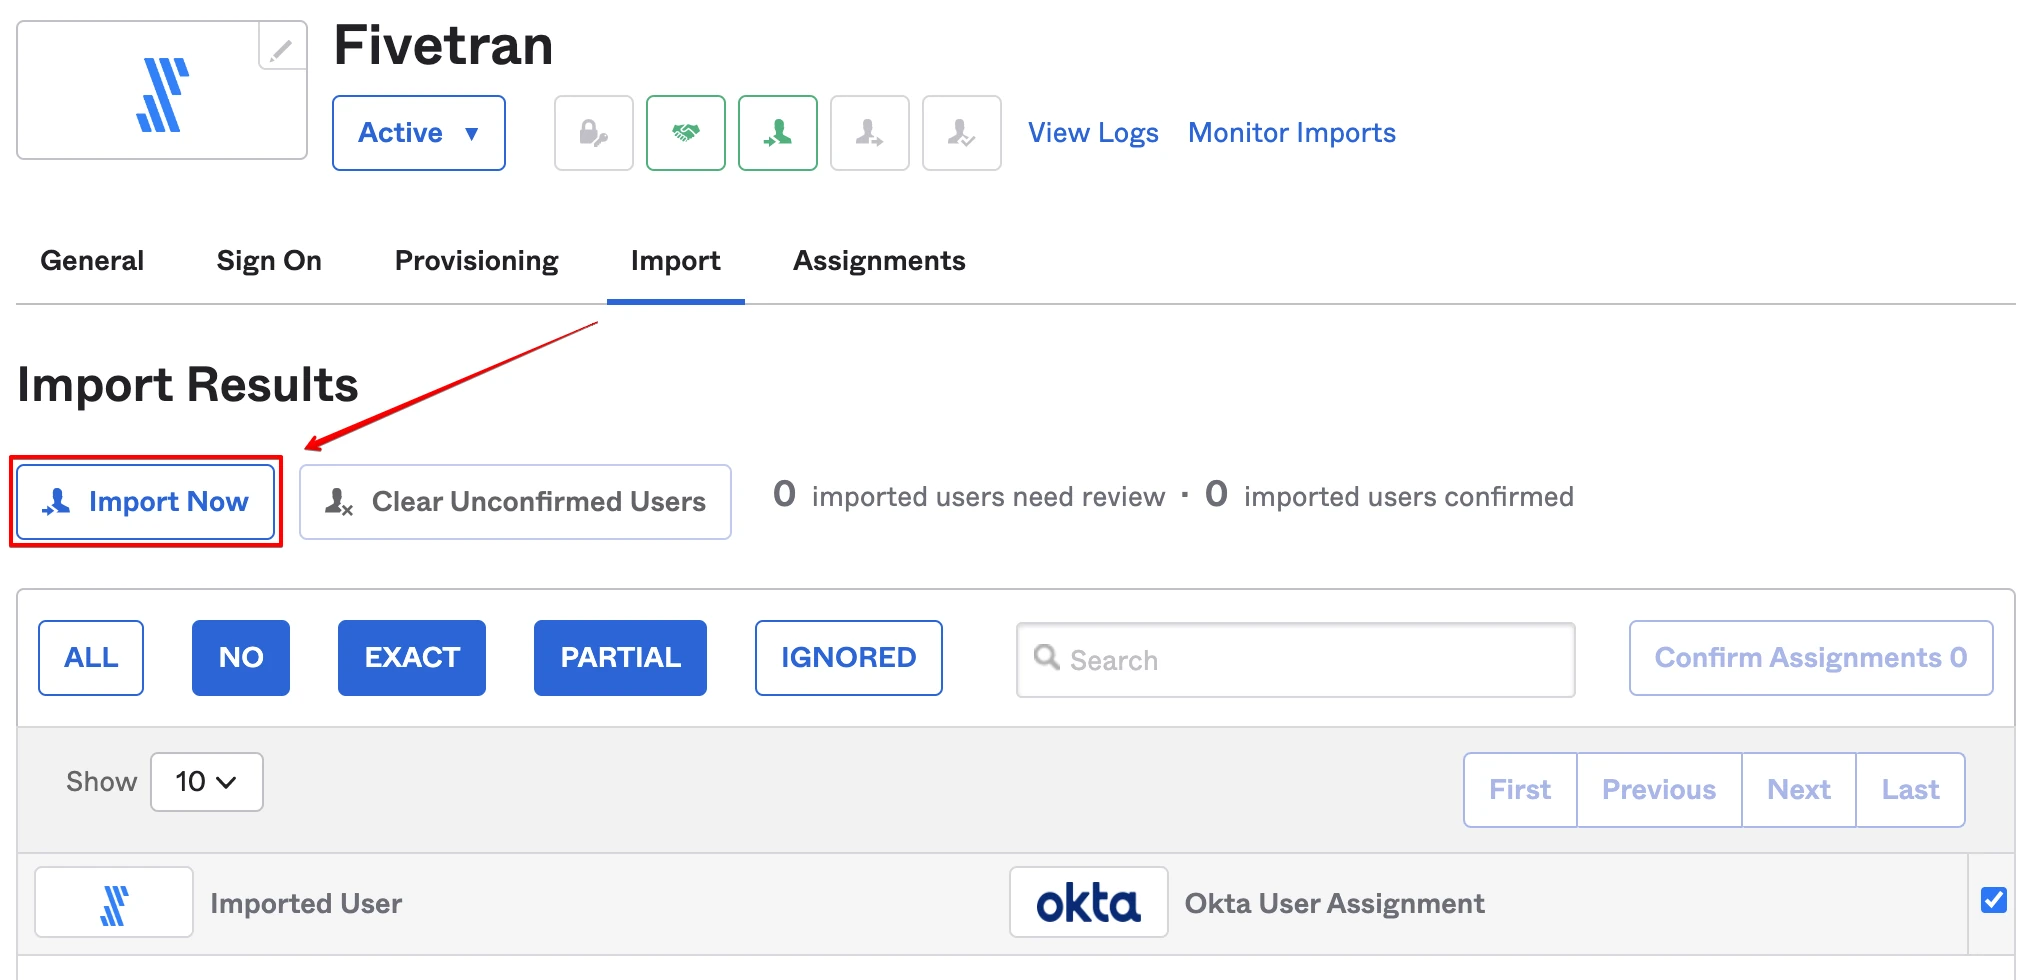
In your Okta dashboard, go to your Okta app integration. Open the Import tab and click Import Now.
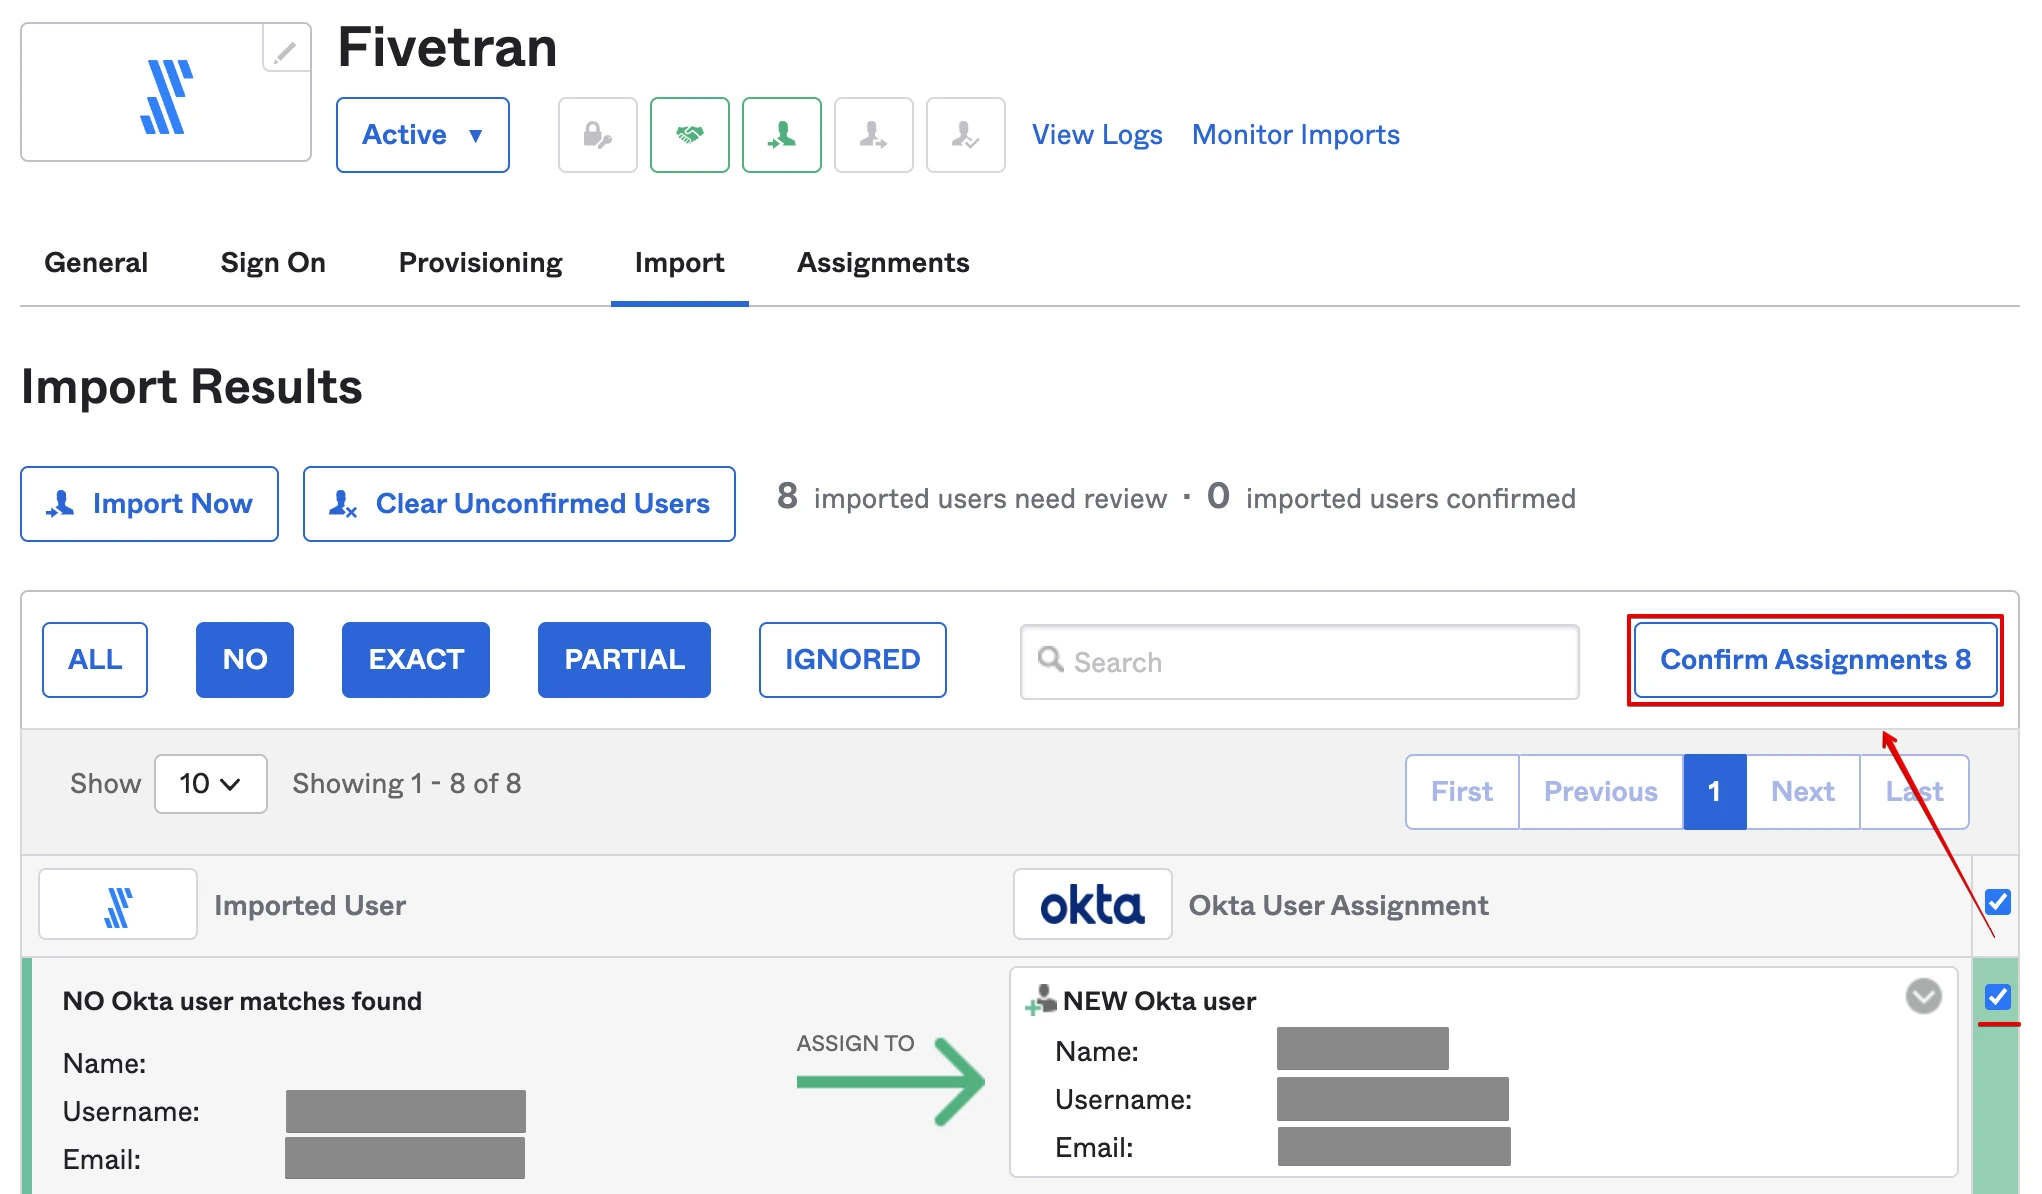
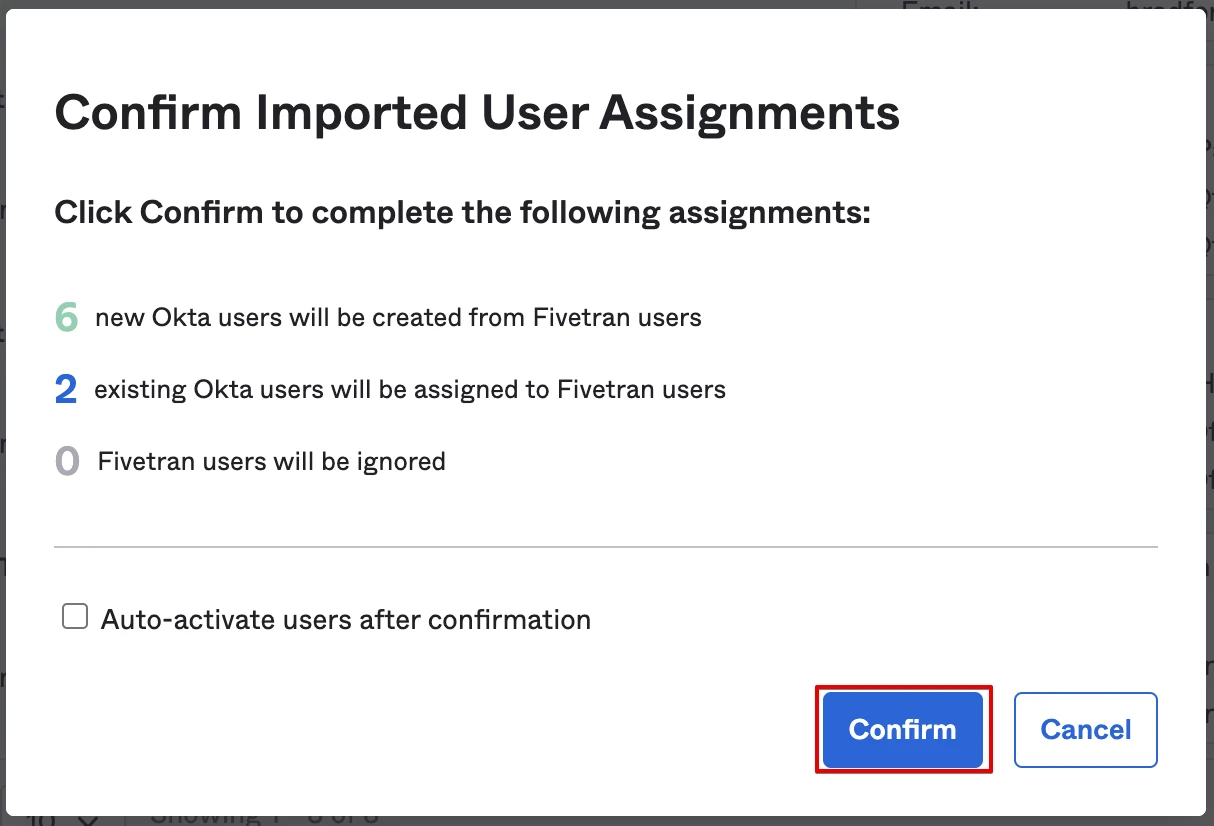
When the import process completes, select the users you want to assign to the integration and click Confirm Assignments.
In the pop-up window, click Confirm.
Assign Fivetran application for groups
This feature is only available in the latest version of our Fivetran app for Okta SCIM.
We don’t support configuring team roles via SCIM. This means you can’t map groups to team roles.
Make sure that only the groups in your company that are relevant to Fivetran are assigned to the Okta app integration. We automatically create a new team in your Fivetran account when you add your company groups on the Assignments tab in Okta.
In your Okta dashboard, go to your Okta app integration.
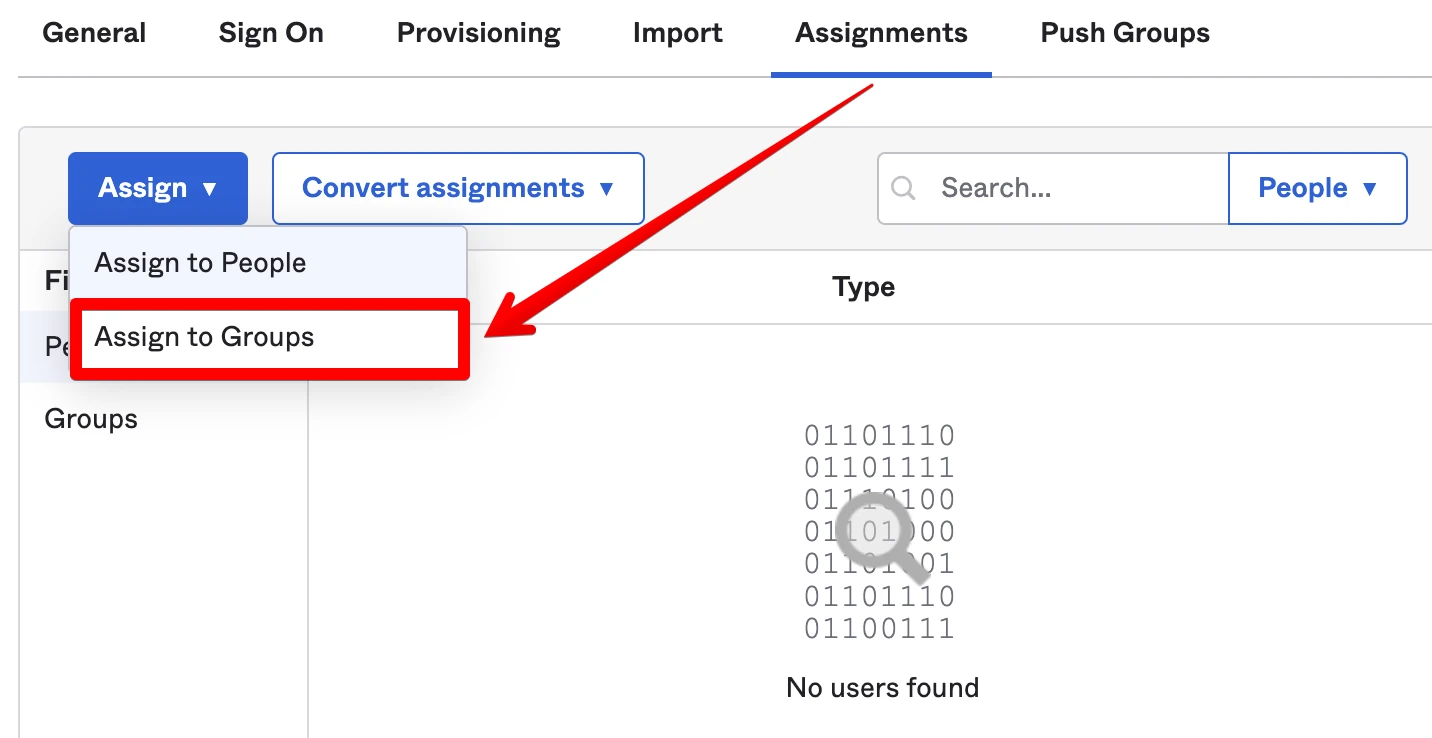
Click Assign > Assign to Groups and choose the group you want to assign the app to.
Click Assign for the selected group.

Limitations
Administrators can no longer manage users directly in Fivetran once SCIM is enabled.