
SFTP Setup Guide
Follow our setup guide to sync files from your SSH server to your destination using SFTP.
Prerequisites
To set up a Fivetran SFTP connection, you need:
- an account on an SSH server containing files with supported file types and encodings
- the ability to log in to this account using either a password or a key pair
(Optional, Private Preview only) To manage credentials outside of Fivetran, you need an External Secret Manager configured for your account before starting setup.
- (Optional) a Fivetran Proxy Agent installed in your network. Required only for connections using a Proxy Agent.
- (Optional) a Private key for authentication using customer-supplied key and a passphrase if the private key is encrypted.
Setup instructions
Select sync strategy
- In the connection setup form, select the sync strategy: Magic Folder or Merge Mode.
- Enter the Destination schema name of your choice.
- If you selected Merge Mode as your sync strategy, enter the Table group name. We combine this with the destination schema to form the Fivetran connection name
<destination_schema>.<table_group_name>. This enables you to create multiple Merge Mode connections per destination schema. The Table group name value is used only in Fivetran and does not appear in your destination. In the Destination names field, choose the naming convention you want Fivetran to use for the schemas, tables, and columns in your destination:
- Fivetran naming: Standardizes the schema, table, and column names in your destination according to the Fivetran naming conventions.
- Source naming: Preserves the original column names from the source system in your destination. The source naming rules apply only to the column names, while the schema and table names follow the Fivetran naming rules.
If you want to modify your selection, make sure you do it before you start the initial sync.
Connect
(Not applicable to Hybrid Deployment) In the Connection Method drop-down menu, you can choose one of the following methods to connect Fivetran to your SFTP server:
Connect directly: Fivetran connects directly to your SFTP Server. This is the simplest method. To connect directly, Fivetran's IP addresses should be safelisted in your firewall.
Connect via SSH Tunnel: Fivetran connects to a separate server in your network, which provides an SSH tunnel to your SFTP Server. You must choose this option if your SFTP Server is in an inaccessible subnet.
Connect via Proxy Agent: Fivetran uses this option to connect to SFTP servers in private networks without exposing them directly to the internet or through an SSH tunnel.
Connect via Proxy Agent
Fivetran connects to your database through the Proxy Agent, providing secure communication between Fivetran processes and your database host. The Proxy Agent is installed in your network and creates an outbound network connection to the Fivetran-managed SaaS.
To learn more about the Proxy Agent, how to install it, and how to configure it, see our Proxy Agent documentation.
- Select an existing agent from the Proxy agents drop-down list, or click + Configure a new proxy agent to set up a new agent.
- In the SFTP Server Host Address field, enter your SFTP server's IP address or domain that is reachable from the network where the Proxy Agent is installed.
For connections configured with Hybrid Deployment, Connect directly is pre-selected in the Connection Method drop-down menu.
If you select Connect via SSH Tunnel, make a note of the automatically generated SSH Tunnel Public Key.
Select the Authentication method for your SFTP server:
Password: Enter the password for your SFTP server username in the SFTP Server Password field.
Fivetran-managed key: Fivetran generates and manages an SSH key pair for you. Make a note of the SFTP Server Public Key and proceed to the Configure your keypair in a text editor section.
Customer-supplied key: You must provide your own SSH private key. You can upload the private key in OpenSSH and PEM formats. We also support the RSA (2048-bit minimum), ED25519, and ECDSA key types.
Be sure to configure the SFTP Server Public Key and SSH Tunnel Public Key on their respective servers if you authenticate using the Fivetran-managed key and connect to your SFTP server via SSH Tunnel.
If you use a password for logging into your SFTP server and choose Connect directly as the connection method, proceed to the Add login details section.
Configure your keypair in a text editor
Perform these steps only if you selected Connect via SSH Tunnel to connect to your SFTP server. For other connection methods, skip to Add login details.
You need to create a group and an SSH user, add the SSH user to the group, create the .ssh directory and authorized_keys file, and grant them permissions, unless they already exist and have the permissions granted. To do it, log in to your server and run the following commands:
Create group
fivetran:sudo groupadd fivetranCreate an SSH user
fivetran:sudo useradd -m -g fivetran fivetranSwitch to your
fivetranuser:sudo su - fivetranCreate the
.sshdirectory:mkdir ~/.sshGrant the
.sshdirectory permissions:chmod 700 ~/.sshSwitch to the
.sshdirectory:cd ~/.sshCreate the
authorized_keysfile:touch authorized_keysGrant the
authorized_filepermissions:chmod 600 authorized_keys
Use a text editor and add the SSH Tunnel public key from the Fivetran setup form to the authorized_keys file. The key must be in a single line without any line break while copying.
Add the Fivetran public key to the /.ssh/Authorized_keys file on any SSH account you want to use.
Add login details
In the connection setup form, enter the following details:
- SFTP Server Host Address
- SFTP Server Port
- SFTP Server Username
Depending on the authentication method you choose, enter the following details:
- If you select Password, enter your SFTP Server Password.
- If you select Customer-supplied key:
- In the Private Key field, upload your SSH private key file in a supported format.
- (Optional) If your private key is encrypted with a passphrase, enter the Passphrase.
If you selected Connect via an SSH tunnel as your connection method, enter the following details:
- SSH Tunnel Host Address
- SSH Tunnel Port
- SSH Tunnel Username
If you entered DNS instead of an IP Address in the Host Address of the SFTP Server, you must have an IP address to DNS mapping for the SFTP Server in
/etc/hostsfile of the tunnel host, or the name should resolve to an IP using the internal DNS server.
Unlike Connect directly, private and internal (non-internet-routable) host addresses are allowed for the Connect via Proxy Agent method, since the Proxy Agent already runs inside your network.
(Optional) In the setup form, enter your Folder Path from your SFTP server to specify the section of the file system in which you want Fivetran to look for files. If you don't provide a prefix, we'll search the root folder for files we can sync.
(Optional) Click Run connection test to validate the login credentials and connection to the SFTP server.
You can skip this intermediate test and proceed to the next step. However, if you choose to skip, we will perform this test once you have finished your configuration.
Add SFTP configuration
Magic Folder Mode
- If you want to sync files from nested folders within the specified folder, set the Include subfolders toggle to ON.
Merge Mode
In the setup form, choose your configuration options. Using these configuration options, you can select subsets of your folders, specific types of files, and more to sync only the files you need in your destination. In addition, setting up multiple connections targeted at the same file system but with different options allows you to slice and dice a file system any way you'd like.
Format
File Handling - We process and sync all files based on the file handling option you select:
- Extract structured data into destination tables - Parse supported file types and sync structured data into destination tables. We recommend this option for most use cases.
- Replicate unstructured files Beta - Copy unstructured files in their original format without extracting data. This option is ideal for PDF documents, images, and other non-tabular file formats. Learn more about unstructured file replication in our documentation.
File Type - We process all files as the selected file type. Use the File Pattern field to select the file extensions you want to sync.
If you select XML, we load your XML data into the
_datacolumn without flattening it.If you select XLS/XLSX/XLSM, proceed to the Configure Files section to determine how you want to analyze your spreadsheet.
We do not support dynamic table mapping for XLS/XLSX/XLSM files.
If you select CSV or TSV, then enter the following details:
- (Optional) Delimiter - Specify the delimiter used in your CSV file. If your CSV file uses a custom delimiter, replace the default comma
,with your specific delimiter. For example, if your file is tab-delimited, enter\t, or if it's pipe-delimited, enter|. If you leave this field blank, we'll attempt to detect the delimiter for each file automatically. However, note that automatic detection may not work in all cases. If your files sync with an incorrect number of columns or use a unique delimiter, consider specifying the delimiter. You can store files with different delimiters in the same folder. For more details on how delimiter inference works, see our documentation. - Quote character - Typically, CSVs use double quotes
"to enclose a value. Set the toggle to off if you don't want to use an enclosing character. - Non-Standard escape character - Set the toggle to ON if your CSV generator uses non-standard ways of escaping characters like newline, delimiter, etc. Not standard in CSVs.
- Null Sequence - Set the toggle to ON if your CSVs use a special value indicating null. Specify the value indicating null only if you are sure your CSVs have a null sequence. Typically, CSVs have no native notion of a null character. However, some CSV generators have created one, using characters such as
\Nto represent null. - Skip Header Lines - Use this option to skip over a fixed number of header lines at the beginning of your CSV files. Set the toggle to ON, and then in the Number of skipped header lines field, specify the number of header lines you want to skip.
- Skip Footer Lines - Use this option to skip over a fixed number of footer lines at the end of your CSV files. Set the toggle to ON, and then in the Number of skipped footer lines field, specify the number of footer lines you want to skip.
- Headerless files - Set the toggle to ON if your CSV-generating software doesn't provide a header line. Fivetran can generate generic column names and sync data rows with them.
- Allow inconsistent row lengths - Set the toggle to ON, if you want to sync rows in CSV files with inconsistent length. If you do not enable the toggle, we handle the inconsistent row lengths based on the option you selected in the error handling settings.
- Line Separator - Line separators are used in CSV files to separate one row from the next. By default, we use the new line character
\nas the line separator. If you use a different line separator for your CSV files, replace\nwith your custom line separator.
- (Optional) Delimiter - Specify the delimiter used in your CSV file. If your CSV file uses a custom delimiter, replace the default comma
If your file type is JSON or JSONL, then choose one of the following:
JSON Delivery Mode - Use this option to choose how Fivetran should handle your JSON data.
- If you select Packed, we load all your JSON data into the
_datacolumn without flattening it. - If you select Unpacked, we flatten one level of columns and infer their data types.
- If you select Packed, we load all your JSON data into the
Configure files
(Optional) Base folder path - Choose the lowest common folder in a folder hierarchy that includes all the files you want to sync and enter it in the Base folder path field. This defines a specific location where Fivetran scans for files and helps ensure optimal performance.
For example, if the files are in
files/exports/customers/data_20251016.csvandfiles/exports/products/data_20251016.csv, setfiles/exportsas the base folder path.File Mapping - You can map the files to a destination using the following options:
Define per table
Select Define per table.
Click + Add files to specify destination tables and their corresponding file name pattern.
Table name - Use names that are unique across all SFTP connections within the same destination schema.
(Optional) File pattern - Use a regular expression as the file pattern to determine whether to sync specific files. The pattern you specify applies to everything under the prefix (base folder path). If you want to sync everything under the prefix, leave this field blank.
For example, if under the prefix you have a folder
data, which has sub-folders,subFolder1,subFolder2, etc. These sub-folders have JSON files with the formatreport_03/12/2050.json. Use the following regex patterns to decide whether or not to sync specific files:data/.*matches all files in the data folder, including those in subfolders.data/.*jsonmatches all JSON files in the data folder, including those in subfolders.data/subFolder2/report_.*\.jsonmatches all the JSON files in thesubFolder2folder that have a name that starts with the prefixreport_.. For example,report_file.json.report_\d{2}/\d{2}/\d{4}\.jsonmatches all the JSON files that begin with the prefixreport_and are followed by a date format ofDD/MM/YYYYorMM/DD/YYYY. For example,report_03/12/2050.json.We recommend that you test your regex.
(Optional) Archive File Pattern - Use a regular expression to filter and sync files from archived folders. We sync the files in compressed archives with filenames matching the specified pattern. For example, if you specify the archive folder pattern as
.*json, we will sync only the files that end in a .json file extension from the archive folder.You need to configure archive patterns per table. This is useful when an archive folder contains files following different naming patterns, allowing you to route each type to a specific destination table based on its pattern.
For example, if the archive folder contains
test12.jsonandcheck12.json, you can configuretest.*\.jsonas archive pattern for Table1 to sync onlytest12.jsonto Table1, andcheck.*\.jsonfor Table2 to sync onlycheck123.jsonto Table2.(Optional) Click Preview Files to validate the file pattern.
You can skip this intermediate test and proceed to the next step. However, if you choose to skip, we will perform this test once you have finished your configuration.
If you have selected XLS/XLSX/XLSM as your file type, we automatically analyze your spreadsheet to identify the cell reference. If you opt to enter a cell reference of your choice, enable the Manually provide cell reference toggle. We use the cell reference to sync all contiguous data starting from the top-left cell in all the spreadsheets matching the name.
- Analyze sheet - Identify the sample file you would want to sync. We analyze and identify the eligible data sets. To determine the cell reference correctly, perform one of the following steps:
- Set the Manually provide cell reference toggle to ON to enter the cell reference.
- In the Cell reference for syncs field, enter the cell reference in the
'<sheetName>'!<startColumnName><startRowName>format. For example, if you want to sync data starting from cell 'C3' of the 'Data2' worksheet, enter'Data2'!C3.
- In the Cell reference for syncs field, enter the cell reference in the
- In the Spreadsheet to find data to be synced field, enter the path from the root folder of one of your Excel files.
- Click Analyze sheet.
- In the Cell reference for syncs drop-down menu, select the cell reference.
- Set the Manually provide cell reference toggle to ON to enter the cell reference.
Learn more about syncing Excel files in our documentation.
- Click Save.
- Analyze sheet - Identify the sample file you would want to sync. We analyze and identify the eligible data sets. To determine the cell reference correctly, perform one of the following steps:
Dynamically extract tables
Select Dynamically extract tables.
Use this option to dynamically extract table names from file paths using a regular expression with a named capture group.
Table extraction pattern - Specify a regular expression with a named capture group
(?<table>...)to extract the table name from matching file paths.For example, if your files follow a naming pattern like
20250101/report/customers.csv,20250101/report/orders.csv, etc., you can use the pattern\d{8}/report/(?<table>\w+)\.csv. Fivetran will automatically create separate destination tables for each unique table name extracted from the pattern (e.g.,customers,orders). To learn more about Dynamic File Mapping, see How to use Dynamic File Mapping?We recommend that you test your regex to ensure it correctly captures the table name.
(Optional) Click Preview to validate the regex pattern and see which table names will be extracted from your files. The preview displays one matched file per table with the corresponding table name extracted from the file path.
The preview displays the table names extracted from your files. These names will be converted according to Fivetran's naming conventions when synced to your destination. For more information, see our naming conventions documentation.
Any new tables observed post-setup (i.e. previously unseen table values that match your pattern) will be added automatically. You can control this behavior using Schema change settings.
Primary Key used for file process and load - Use this option to let Fivetran know how you'd like to update the files in your destination. When you modify a previously synced file, the option you select determines if we should replace the rows in the destination table or append new rows to the table:
- If you select Upsert file using file name and line number, we will upsert your data using the surrogate primary keys
_fileand_line. If a file has a unique name, we will sync the data for that file as new data. - If you select Append file using file modified time, we will upsert your files using surrogate primary keys
_file,_line, and_modified. You can track the full history of a file or set of files, and your files will have a combination of old and new data or data that is updated periodically. - If you select Upsert file using custom primary key, you can keep the most recent version of every record, and your files will have a combination of the old and new data or data that is updated periodically. You can choose the primary keys you want to use after you save and test.
You can't modify your primary key option once the initial sync is successful. However, if you selected Upsert file using custom primary key, you can change the columns selected as primary keys after the initial sync.
- If you select Upsert file using file name and line number, we will upsert your data using the surrogate primary keys
Additional options
Compression - If your files are compressed but do not have extensions indicating the compression method, you can decompress them according to the selected compression algorithm. If all of your compressed files are correctly marked with a matching compression extension (.bz2, .gz, .gzip, .tar, or .zip), you can select infer. If you select uncompressed, we do not decompress the files and sync the uncompressed files. If you choose a compression format, we decompress every file using the format you select. For example, if you have an automated CSV output system that GZIPs files to save space but saves them without a .gzip extension, you can set this field to GZIP. We will decompress every file that we examine using GZIP.
Error Handling - Use the error handling option to choose how to handle errors in your files. If you know that your files contain some errors, you can choose to skip poorly formatted lines.
If you select skip, we ignore improperly formatted data within a file, allowing you to sync only valid data.
If you select fail, we fail the sync with an error when finding any improperly formatted data.
We recommend that you select fail unless you are sure that you have undesirable, malformed data.
You will receive a notification on your Fivetran dashboard if we encounter errors.
(Optional) PGP Encryption Options - Use this option to sync PGP encrypted files. Set the toggle to ON and specify the following:
PGP Private Key - Upload the PGP secret key as an attachment.
(Optional) Passphrase - Enter the passphrase you used to generate the key.
(Optional) Signer's Public Key - Upload the signer's public key as an attachment. This key is used for verifying the files.
- For PGP decryption processes, we strictly comply with the RFC4880 standard. We support syncing only base64 encoded files.
- To support PGP encryption on compressed files, the file name must contain both a valid compression extension and the .pgp encryption extension. For example: sample.csv.zip.pgp — where .zip is the compression extension and .pgp is the encryption extension.
(Hybrid Deployment only) If your destination is configured for Hybrid Deployment, the Hybrid Deployment Agent associated with your destination is pre-selected for the connection. To assign a different agent, click Replace agent, select the agent you want to use, and click Use Agent.
Finish Fivetran configuration
Click Save & Test. Fivetran will take it from here and sync data from your SFTP server.
Click Confirm to ensure that the server SSH key is trusted when the initial tests run.
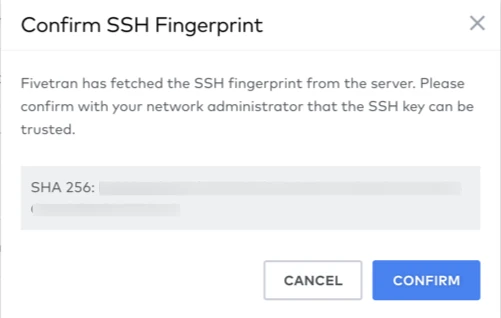
Fivetran tests and validates the SFTP connection. On successful completion of the setup tests, you can sync your SFTP data to your destination.
Setup tests
Depending on your sync strategy and file mapping method, Fivetran performs the following SFTP connection tests:
(Both Magic Folder Mode and Merge Mode) The Validating Connection Parameters test validates the username, password, host address, and port number you specified in the setup form.
(Both Magic Folder Mode and Merge Mode - Connect via Proxy Agent only) The Determining if Proxy Agent is connected test validates that the Proxy Agent you selected is reachable and connected to Fivetran.
(Both Magic Folder Mode and Merge Mode) When using a customer-supplied key pair, the Validating SSH private key test validates that the private key you provided can be parsed and is in a supported format.
(Both Magic Folder Mode and Merge Mode) The Connecting to SFTP Server test validates the server credentials you specified in the setup form and checks the accessibility of your SFTP server.
(Merge Mode - Define per table) The Finding tables test validates if you have specified at least one table in the files field to set up the connection.
(Merge Mode - Define per table) The Validating Regex File Pattern test validates all the file pattern regex you specified in the setup form.
(Merge Mode - Dynamically extract tables) The Validating Table extraction pattern test validates the table extraction pattern regex and ensures it includes a valid
(?<table>...)named capture group.(Merge Mode - Define per table) The Validating Archive Pattern test validates the archive pattern regex you specified in the setup form. We perform this test only if you specify a regex in the Archive File Pattern field.
(Merge Mode) The Validating EscapeChar test validates the escape character you specified for your CSV files and checks the length of the character, which must not be more than one. We perform this test only if you specify an escape character in the Escape Character field.
The Validating Infer FileType test validates whether
inferis added as a value in thefile_typeparameter for connections created using the API. We perform this test only if you have set up your connection using the API.(Merge Mode) The PGP Support test validates whether the connection can successfully retrieve a minimum of one sample file and a maximum of ten sample files from FTP and decrypt them using the PGP keys you uploaded. We perform this test only if you set the PGP Encryption Options toggle to ON.
(Merge Mode) The Multi-Character Delimiter Support test validates the length of the delimiter, which must be within 15 characters. We perform this test only if you specify the delimiter for your CSV files in the Delimiter field.
(Merge Mode) The Validating Excel Cell Reference Per Table test validates the cell references provided when the toggle is 'ON' per table for Excel file type.
(Merge Mode - Define per table) The Finding Matching Files test checks if the connection can successfully retrieve a minimum of one sample file and a maximum of five sample files for each of the tables you specified in the setup form.
(Merge Mode - Dynamically extract tables) The Finding Matching Files test checks if the connection can successfully discover tables and retrieve a minimum of one sample file and a maximum of three sample files for each discovered table (up to 5 tables).
The tests may take a couple of minutes to complete.