AI Connector Agent Setup Guide Beta
Follow this guide to quickly generate your connector with the AI Connector Agent and connect your data source to Fivetran.
Prerequisites
To use the AI Connector Agent, you need a Fivetran account and a user role with permissions to create a connection.
Setup instructions
Specify source details
Log in to your Fivetran account.
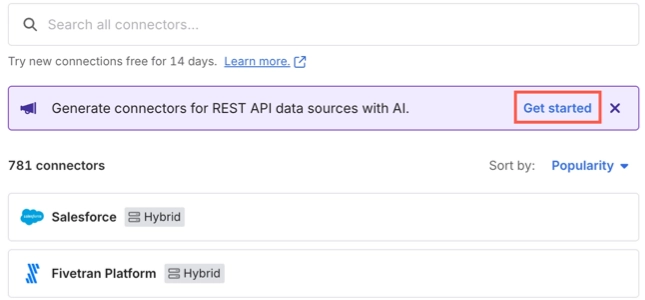
Go to the Connections page and click + Add connection.
In the AI-generated connectors banner, click Get started.
Click Set up for AI Connector Agent.
Click Select for the destination you want to use for your connection.
Enter the name of your data source.
Provide one or both of the following:
API documentation URL: Enter the homepage URL for the data source API documentation (for example,
https://dev.frontapp.com/docs/welcomeorhttps://app.delighted.com/docs/api). Do not enter the URL of a specific endpoint or subpage.API reference file: Upload one of the following files to help the agent identify and extract API endpoints more accurately:
- OpenAPI specification (YAML or JSON)
- Postman collection (JSON)
- API documentation (PDF)
You can provide either the API documentation URL, an API reference file, or both. However, an API reference file improves endpoint discovery and extraction accuracy.
Read our terms and conditions and select the I consent to Fivetran's AI Connector Agent terms checkbox.
Click Generate. The agent starts scanning the API documentation and generating the connector. Depending on the complexity of the source and the number of endpoints, this process can take anywhere from a few minutes to over an hour.
After you click Generate, you can leave the page or close it at any time. The agent continues generating the connector in the background. To check the status later, go to the Connections page in the Fivetran dashboard, select the connection, and click Resume setup in the connection details page.
After the agent identifies the available endpoints from the API documentation, a Review endpoints link appears in the Last synced column in the Connections page. You can click this link to go directly to the Review endpoints page.
Review API endpoints
In the Review endpoints page, review the list of entities and the associated API endpoints that the agent extracted from the API documentation. By default, all entities are selected.
The Table column lists the tables that will store data from each of these API endpoints.
Clear the checkboxes for any entities you do not want to sync.
Click Continue.
Set up connection
In the connection setup form, review the schema name in the Destination schema field. The agent automatically generates a unique schema name, which you can keep or replace with a name of your choice before you click Save & Test.
Make sure the schema name is correct before you click Save & Test. You cannot change it later.
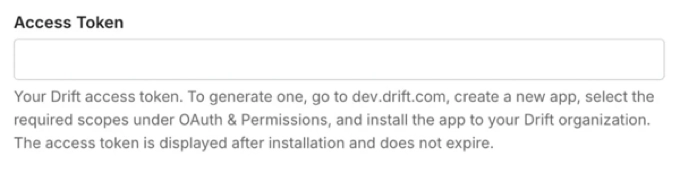
Complete the remaining fields in the connection setup form. For information about the required values and how to obtain them, see the description below each field.
The following example shows a field description in the connection setup form:
If your data source uses OAuth 2.0 authentication, add the following URL as a redirect URL in your OAuth 2.0 application and click Authorize:
https://fivetran.com/integrations/ai-generated/oauth2/returnMake sure you add the redirect URL to your OAuth 2.0 application before you click Authorize.
Click Save & Test. Fivetran tests and validates the connection.
Once the connection tests pass, click Continue.
Choose one of the following options:
Start syncing all my data now: Starts the initial sync immediately and syncs all data from the API endpoints you selected. This option runs a historical sync and captures all the data without customization. To start the sync immediately, click Start Initial Sync.
I need to customize data before syncing: Lets you review and customize the connection schema before starting the initial sync. You can block specific tables or columns, hash sensitive data, and define how to handle future changes to the source schema. To customize the schema before syncing your data, do the following:
Review the connection schema and clear the checkboxes for any tables or columns you want to exclude. By default, all tables and columns are selected.
Click Save & Continue.
Choose how to handle future changes to the source schema.
Click Continue.
Click Start Initial Sync.
I'll sync later: Defers the initial sync. Choose this option if you are not ready to start syncing data immediately. To start the sync later:
In the Fivetran dashboard, go to the Connections page.
Select the connection that the agent created.
Click Start Initial Sync.
To review and customize the connection schema before syncing your data, click Customize data before syncing before you start the initial sync.