Configure Data Blocking and Column Hashing
You can manually block and hash single columns in your connection's schema either when setting up a new connection or when changing the schema of an existing connection.
When you block a table or column or hash a column that is specified as a filtering criterion in your row filter, you are prompted to confirm your decision because we delete row filters that use that table or column.
Additionally, when you set up a new connection, we ask you to define how Fivetran should handle new tables and columns that are created in the source in the future. These Schema Change Handling settings are applied to all tables and columns in the connection schema. For existing connections, you can change the Schema Change Handling settings at any time.
You can choose from the following Schema Change Handling options:
- Allow all – New schemas, tables, and new columns for existing tables are synced into the destination.
- Allow columns – Only new columns for existing tables are synced into the destination. New schemas and configurable tables* are blocked from being synced to the destination.
- Block all – New schemas, configurable tables*, and new columns for existing tables are not synced into the destination.
You can select Send notifications under New Data Notifications Settings if you want us to still send you a notification email whenever we detect new data objects in the source. In that case, if you have disabled notifications for the connection, you must click Activate in the popup that appears to enable them.
In some connectors with a defined schema, including many of our application connectors, some tables are not configurable. Non-configurable tables cannot be completely blocked. If you select the Block All option, we only sync the primary keys of the non-configurable tables.
Configure existing connections
You can change the Data Blocking, Column Hashing, and Schema Change Handling settings for any existing connection, except the Magic Folder connectors. Magic Folder connectors don't support these features.
Configure individual columns
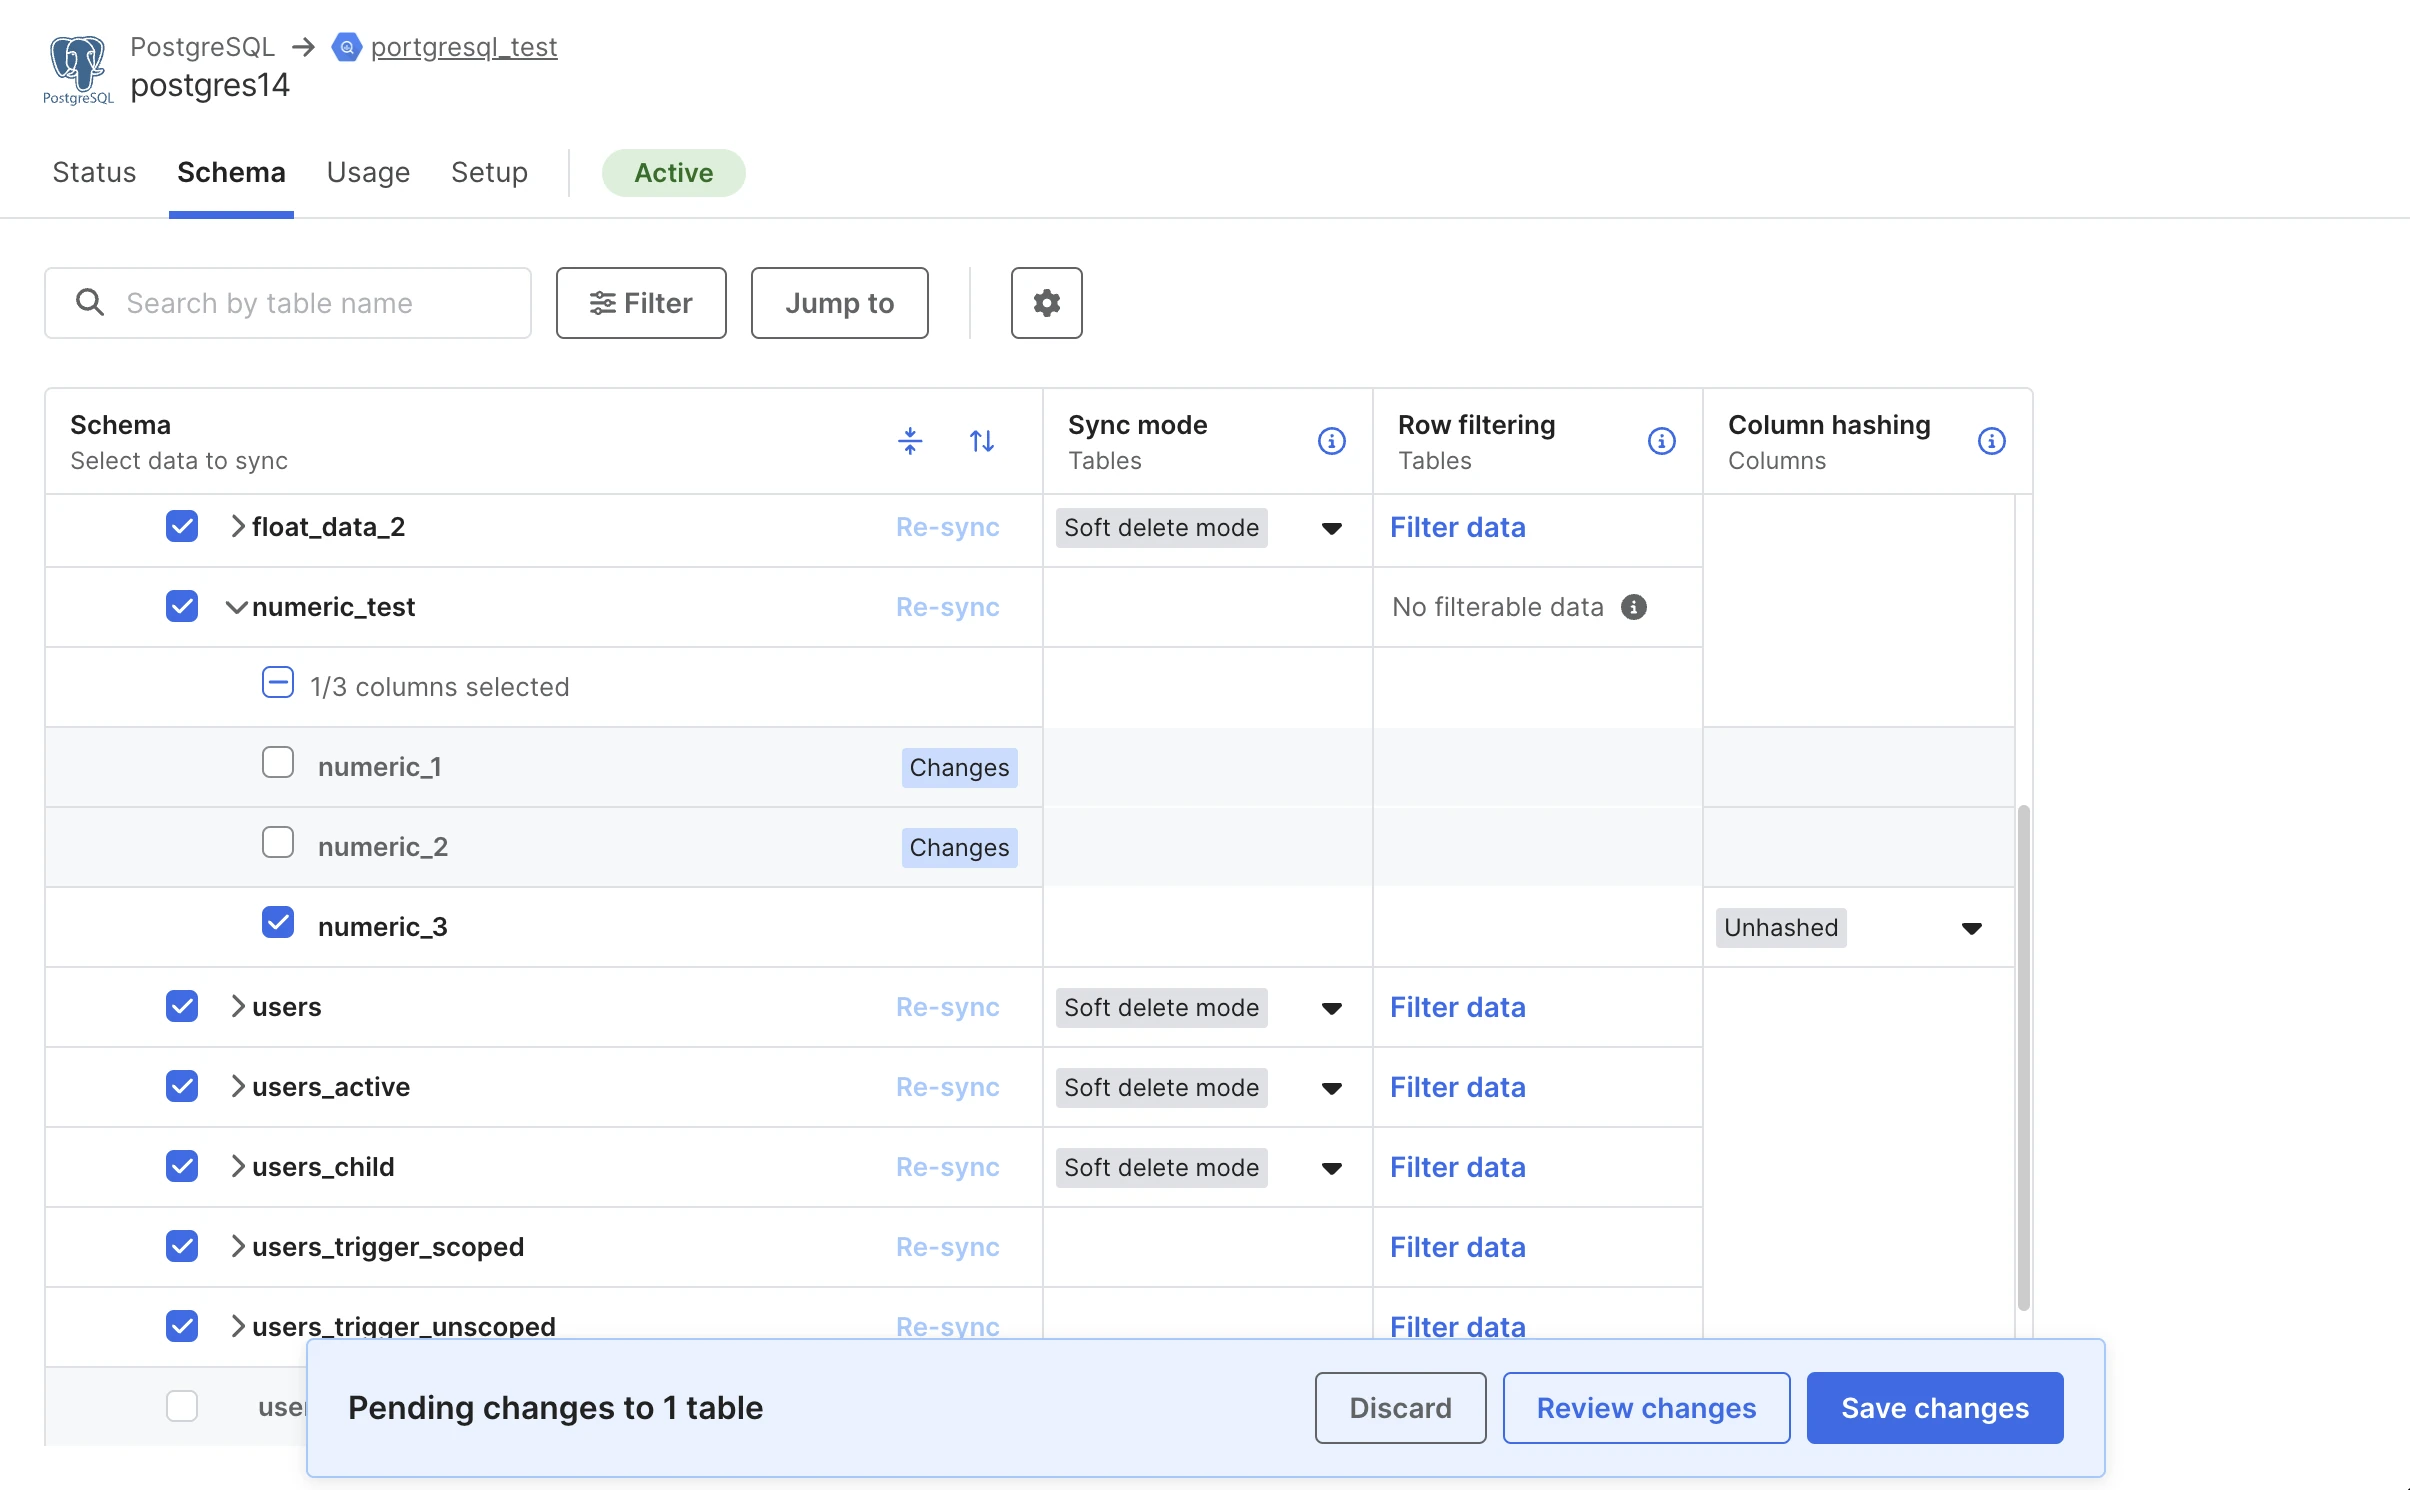
Block columns
To block columns, do the following:
Go to the Schema tab on your connection details page and uncheck the columns you would like to omit from syncing.

Select an option to review, save, or discard your changes in the popup on the bottom of the page.
After you click Save changes, a pop-up window opens asking whether you want to Drop blocked columns from the destination. If you don't choose this option, we replace the existing values of the blocked columns in your destination with NULL.
Click Save & Apply.
Unblock columns
To unblock blocked columns, do the following:
- Go to the Schema tab on your connection details page and check the columns you would like to sync.
- Select an option to review, save, or discard your changes in the popup on the bottom of the page.
- After you click Save changes, a pop-up window opens asking whether you want to Re-sync to populate columns for existing records,or to keep the NULL values for existing records by choosing Do not re-sync.
- Click OK. If you chose Re-sync to populate columns for existing records, a re-sync starts.
An unblocked column usually appears in the destination only once the connection successfully completes its next sync.
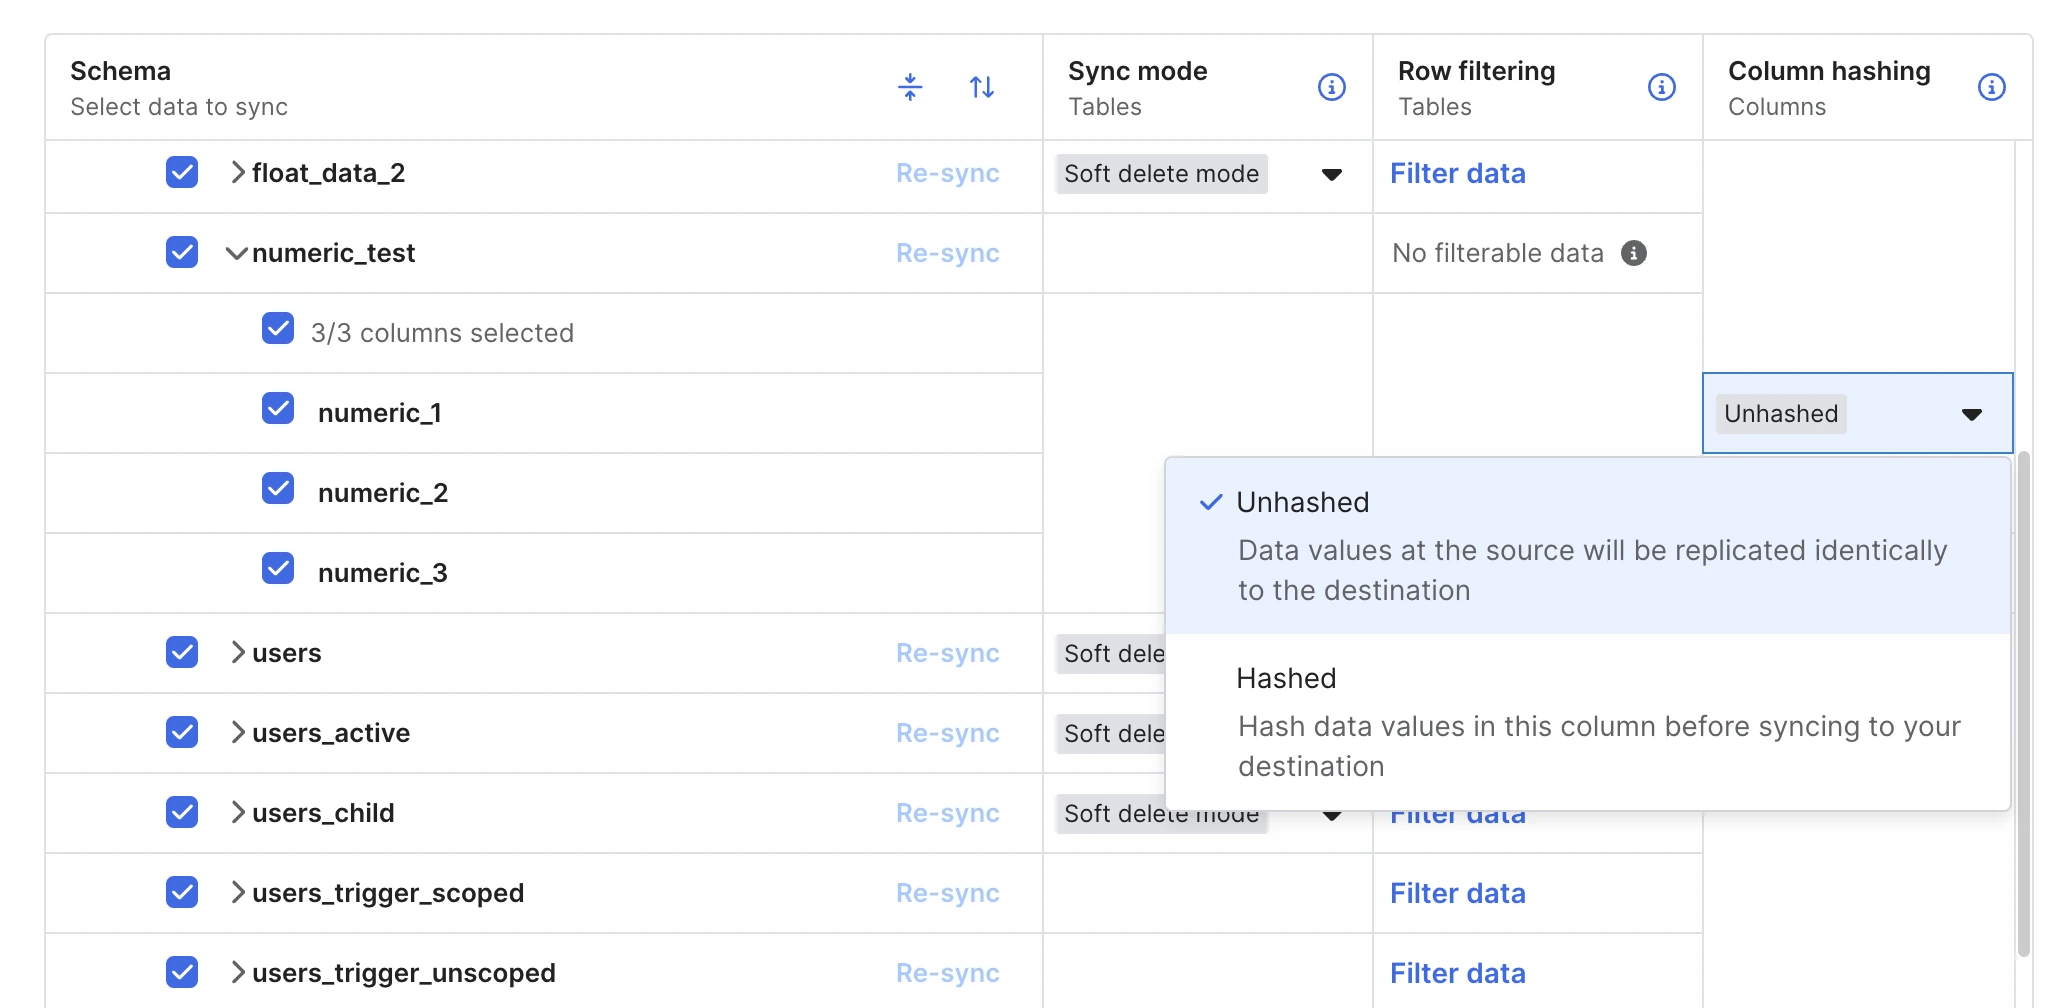
Hash columns
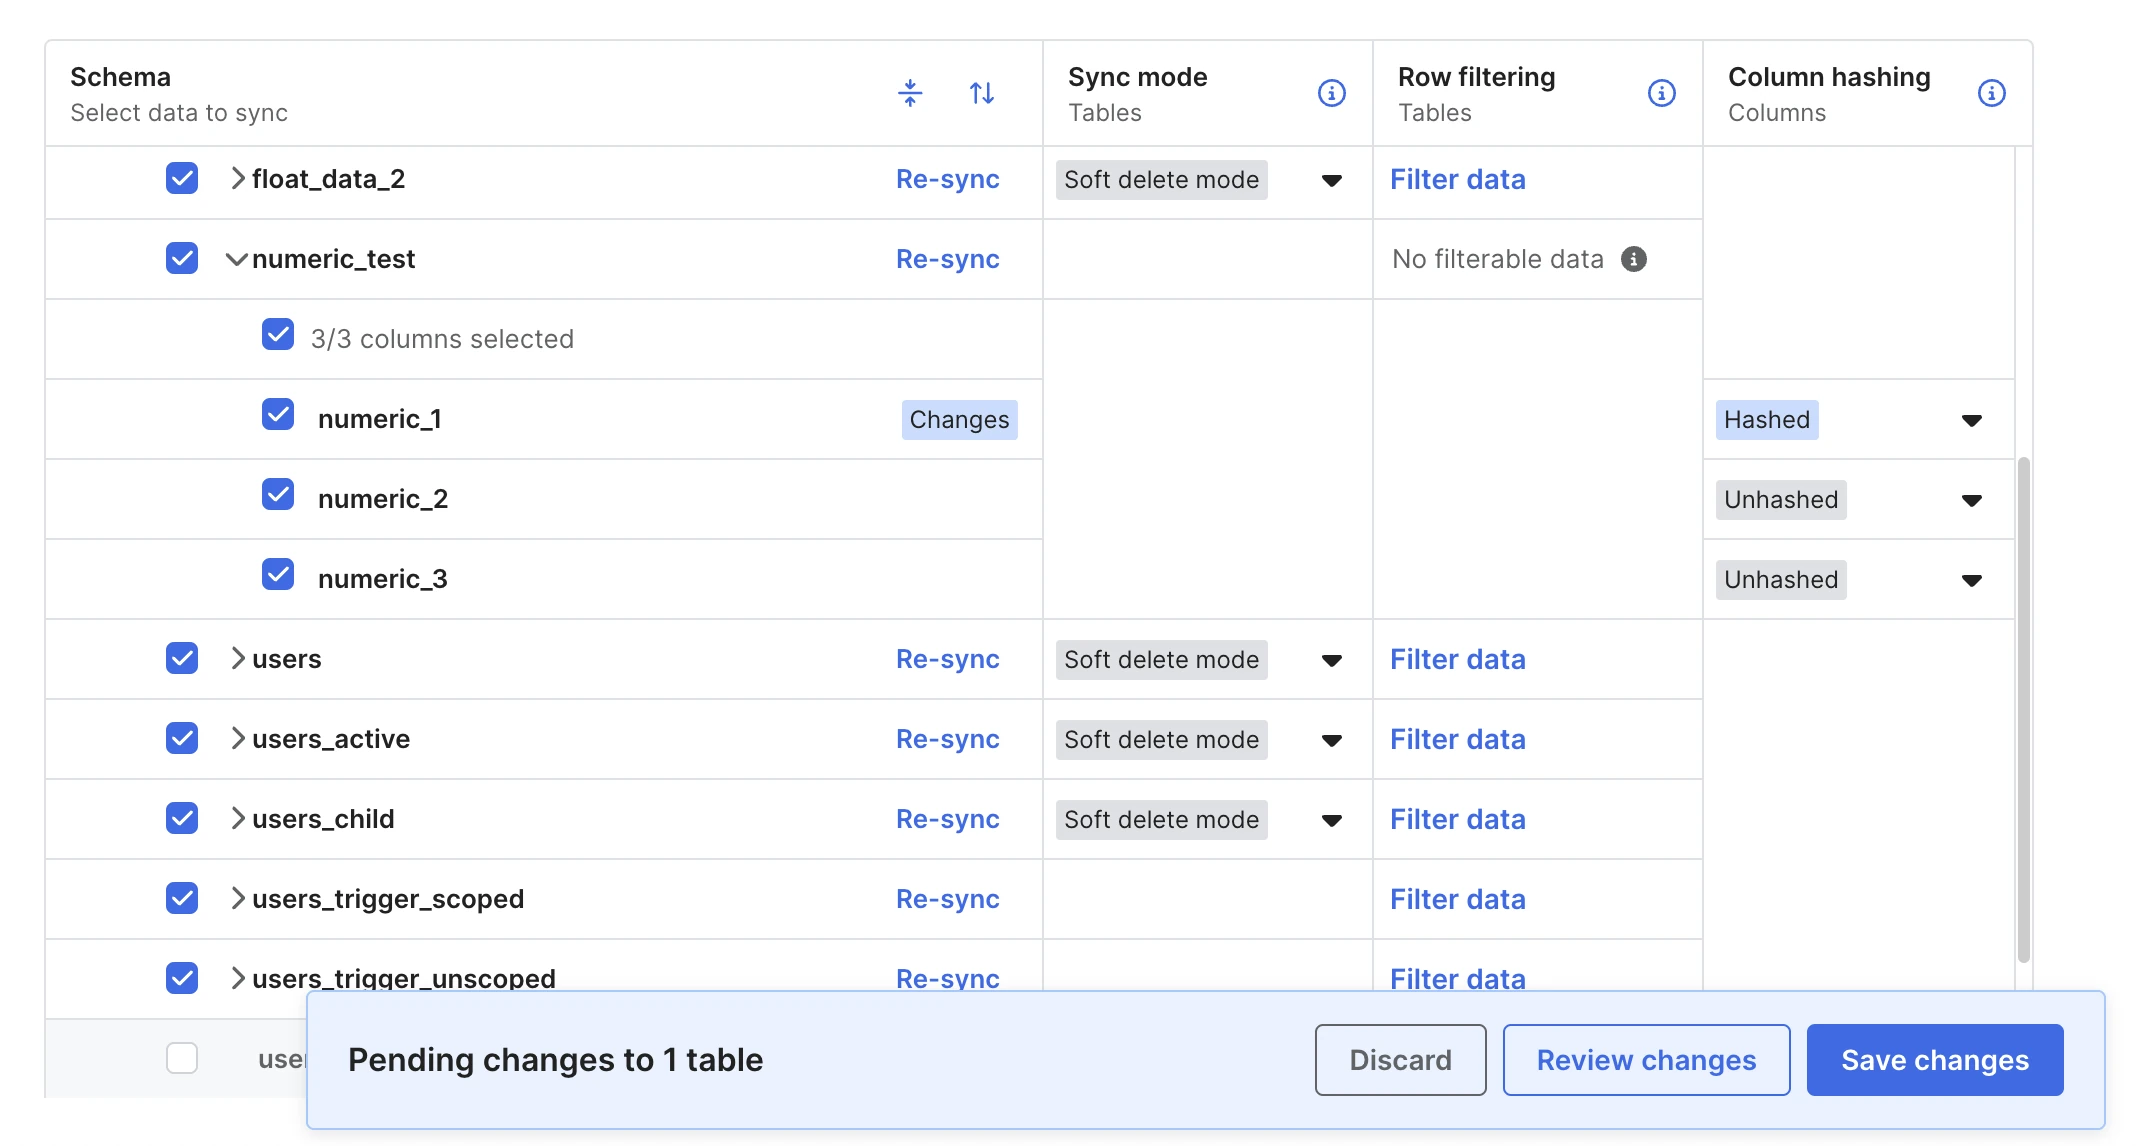
To hash columns, do the following:
Go to the Schema tab on your connection details page and open the Hashed/Unhashed drop-down menu on the columns you'd like to hash.

Select Hashed.
Select an option to review, save, or discard your changes in the popup on the bottom of the page.
After you click Save changes, a pop-up window opens asking whether you want to replace the existing values of the hashed columns in your destination with NULL by choosing Do not re-sync or to Re-sync to populate columns for existing records with hashed values.
Click OK. If you chose Re-sync to populate columns for existing records, a re-sync starts.
Unhash columns
Hashing is a one-way operation. You can only unhash the hashed columns if you have access to the original values.
To unhash hashed columns, do the following:
- Go to the Schema tab on your connection details page and open the Hashed/Unhashed drop-down menu on the columns you'd like to unhash.
- Select Unhashed.
- Select an option to review, save, or discard your changes in the popup on the bottom of the page.
- After you click Save changes, a pop-up window opens asking whether you want to keep the NULL values for existing records by choosing Do not re-sync or to Re-sync to overwrite existing hashed data with unhashed values.
- Click OK. If you chose Re-sync to overwrite existing hashed data, a re-sync starts.
Configure schema change settings for existing connections
To define the Schema Change Handling settings for your existing connection, do the following:
- On the Schema tab of your connection details page, click the gear icon.
- Select one of the provided options from the displayed menu.
- (Optional) Select Send notifications under New Data Notifications Settings if you want us to still send you a notification email whenever we detect new data objects in the source.
If you have disabled notifications for the connection, you must click Activate in the popup that appears to enable them.
- Click Save Changes in the top right corner of the dashboard.
Configure new connections during setup
When you are setting up a new connection, you configure both the Data Blocking and Column Hashing and the Schema Change Handling settings. You can do it either in your Fivetran dashboard as described below or use our REST API, as described in our Connection Management Troubleshooting documentation.
Magic Folder connectors don't support these features.
Use data blocking and column hashing with databases and similar connectors
Overview
For the connector types listed below, we fetch the connection schema upon successful completion of setup tests. This allows you to review the schema before the initial sync and block or hash the data columns you do not want to send to the destination.
We fetch the schema after setup tests for the following database connectors:
- BigQuery
- CockroachDB
- Databricks
- Db2 for i
- Db2 for LUW
- MySQL
- Oracle
- High-Volume Agent Oracle
- PostgreSQL
- SAP HANA
- Snowflake
- SQL Server
- High-Volume Agent SQL Server
We fetch the schema after setup tests for the following connectors, which behave similarly to databases:
- Airtable
- Aveva PI
- BambooHR
- Gainsight Customer Success
- Microsoft Dynamics 365 Business Central
- Microsoft Dynamics 365 CRM
- Microsoft Dynamics 365 Finance and Operations
- NetSuite SuiteAnalytics
- Oracle Business Intelligence Publisher
- Oracle Fusion Cloud Apps
- Salesforce
- ServiceNow
- Smartsheet
- Veeva Vault
- Zuora
We fetch Marketo's schema after we start the initial sync.
If you choose to use custom primary key when setting up any file connection, we fetch the schema after setup test for that connection.
We fetch the schema after setup tests for the following event connectors that support Data Blocking and Column Hashing:
Instructions
After your newly-created connection's setup tests have succeeded, a Connection test successful! message appears in your dashboard. Follow these steps to review your schema:
Click Select your data. Fivetran starts fetching the schema.
Review your schema. By default, all tables and columns are checked to be synced into your destination. You can do any of the following:
- Uncheck the tables and table columns that you don't want to be synced to your destination ( in other words, blocked).
- Select and hash table columns.
- Keep the schema unchanged.

Select an option to review, save, or discard your changes in the popup on the bottom of the page.
After you click Save changes, a pop-up asking How would you like to handle changes? appears. To choose how Fivetran should handle new data in the source in the future, select one of the options:
- Allow all – New schemas, tables, and new columns for existing tables are synced into the destination.
- Allow columns – Only new columns for existing tables are synced into the destination. New schemas and configurable tables* are blocked from being synced to the destination.
- Block all – New schemas, configurable tables*, and columns for existing tables are not synced into the destination.
*In some connectors with a defined schema, including many of our application connectors, some tables are not configurable. Non-configurable tables cannot be completely blocked. If you select the Block All option, we only sync the primary keys of the non-configurable tables.
(Optional) Select Send notifications under New Data Notifications Settings if you want us to still send you a notification email whenever we detect new data objects in the source. In that case, you must Activate notifications for the connection in the popup that appears.
Click Start Initial Sync.
After the initial sync, you can change the blocking and hashing settings in the Schema tab of the connection details page at any time.
Use data blocking and column hashing with application, event, file, and function connectors
Overview
For these connector types as well as the Amazon DynamoDB and MongoDB database connectors, Fivetran must start extracting data from your source to uncover the full schema (tables and columns) that is to be delivered to the destination. If you choose to use data blocking or column hashing for these connector types, we start the extract and present the schema to you once we’ve fetched it. This can take some time for certain connectors.
Some ad reporting connectors such as Facebook Ads and LinkedIn Ads do not offer blocking or hashing before the first sync because you already choose which fields to sync during connection setup.
Instructions
After your newly created application, event, file, or function connector's setup tests have succeeded, the Almost ready to sync pop-up appears.
Select one of the displayed options:
- Block or hash columns first and click Review your data. Fivetran starts an extract to fetch the schema from your source, which enables you to review it and block or hash selected columns before sending data to your destination.
- Sync all source data and click Start initial sync. All data is synced to your destination right away.
If you chose Sync all source data, Fivetran syncs all your data to your destination. Proceed to Step 7.
If you chose Block or hash columns first, Fivetran starts fetching the schema.
If the schema can be fetched within 60 seconds, the Review your schema pop-up appears. Proceed to Step 7.
If fetching the schema takes longer than 60 seconds, a pop-up stating We'll email you when your schema is ready appears.
In some cases, fetching the schema may take up to several days.
While the schema is being fetched, the connection's status is Incomplete on the Status tab of the connection details page. The Schema tab of the connection details page displays We are still fetching your data schema.

Once fetching the schema is complete, we send you an email. Click Review your data in the email to navigate to the Schema tab of the connection details page and review your schema.
Review your schema. By default, all tables and columns are checked to be synced into your destination. You can do any of the following:
- Uncheck the tables and table columns that you don't want to be synced to your destination (in other words, blocked)
- Select and hash table columns
- Keep the schema unchanged

Click Save & Continue.
The How would you like to handle the changes? pop-up appears requesting you to choose how Fivetran should handle new tables and columns during the syncs that may appear in the source in the future. Select one of the provided options:
- Allow all – New schemas, tables, and new columns for existing tables are synced into the destination.
- Allow columns – Only new columns for existing tables are synced into the destination. New schemas and configurable tables* are blocked from being synced to the destination.
- Block all – New schemas, configurable tables*, and new columns for existing tables are not synced into the destination.
*In some connectors with a defined schema, including many of our application connectors, some tables are not configurable. Non-configurable tables cannot be completely blocked. If you select the Block All option, we only sync the primary keys of the non-configurable tables.
(Optional) Select Send notifications under New Data Notifications Settings if you want us to still send you a notification email whenever we detect new data objects in the source.
You must click Activate in the popup that appears to enable notifications for the connection.
We do not send New Data Detected notification emails for connectors that don't support data blocking or column hashing due to limitations in how we track schema changes.
Click Start Initial Sync.
After the initial sync, you can change the blocking and hashing settings on the Schema tab of the connection details page at any time.