Connection Schemas
Learn how to manage your connection schemas in your Fivetran dashboard.
Overview
Each connection profile includes a Schema tab, which displays information about your connection's schemas. Learn more about schemas in our core concepts documentation.
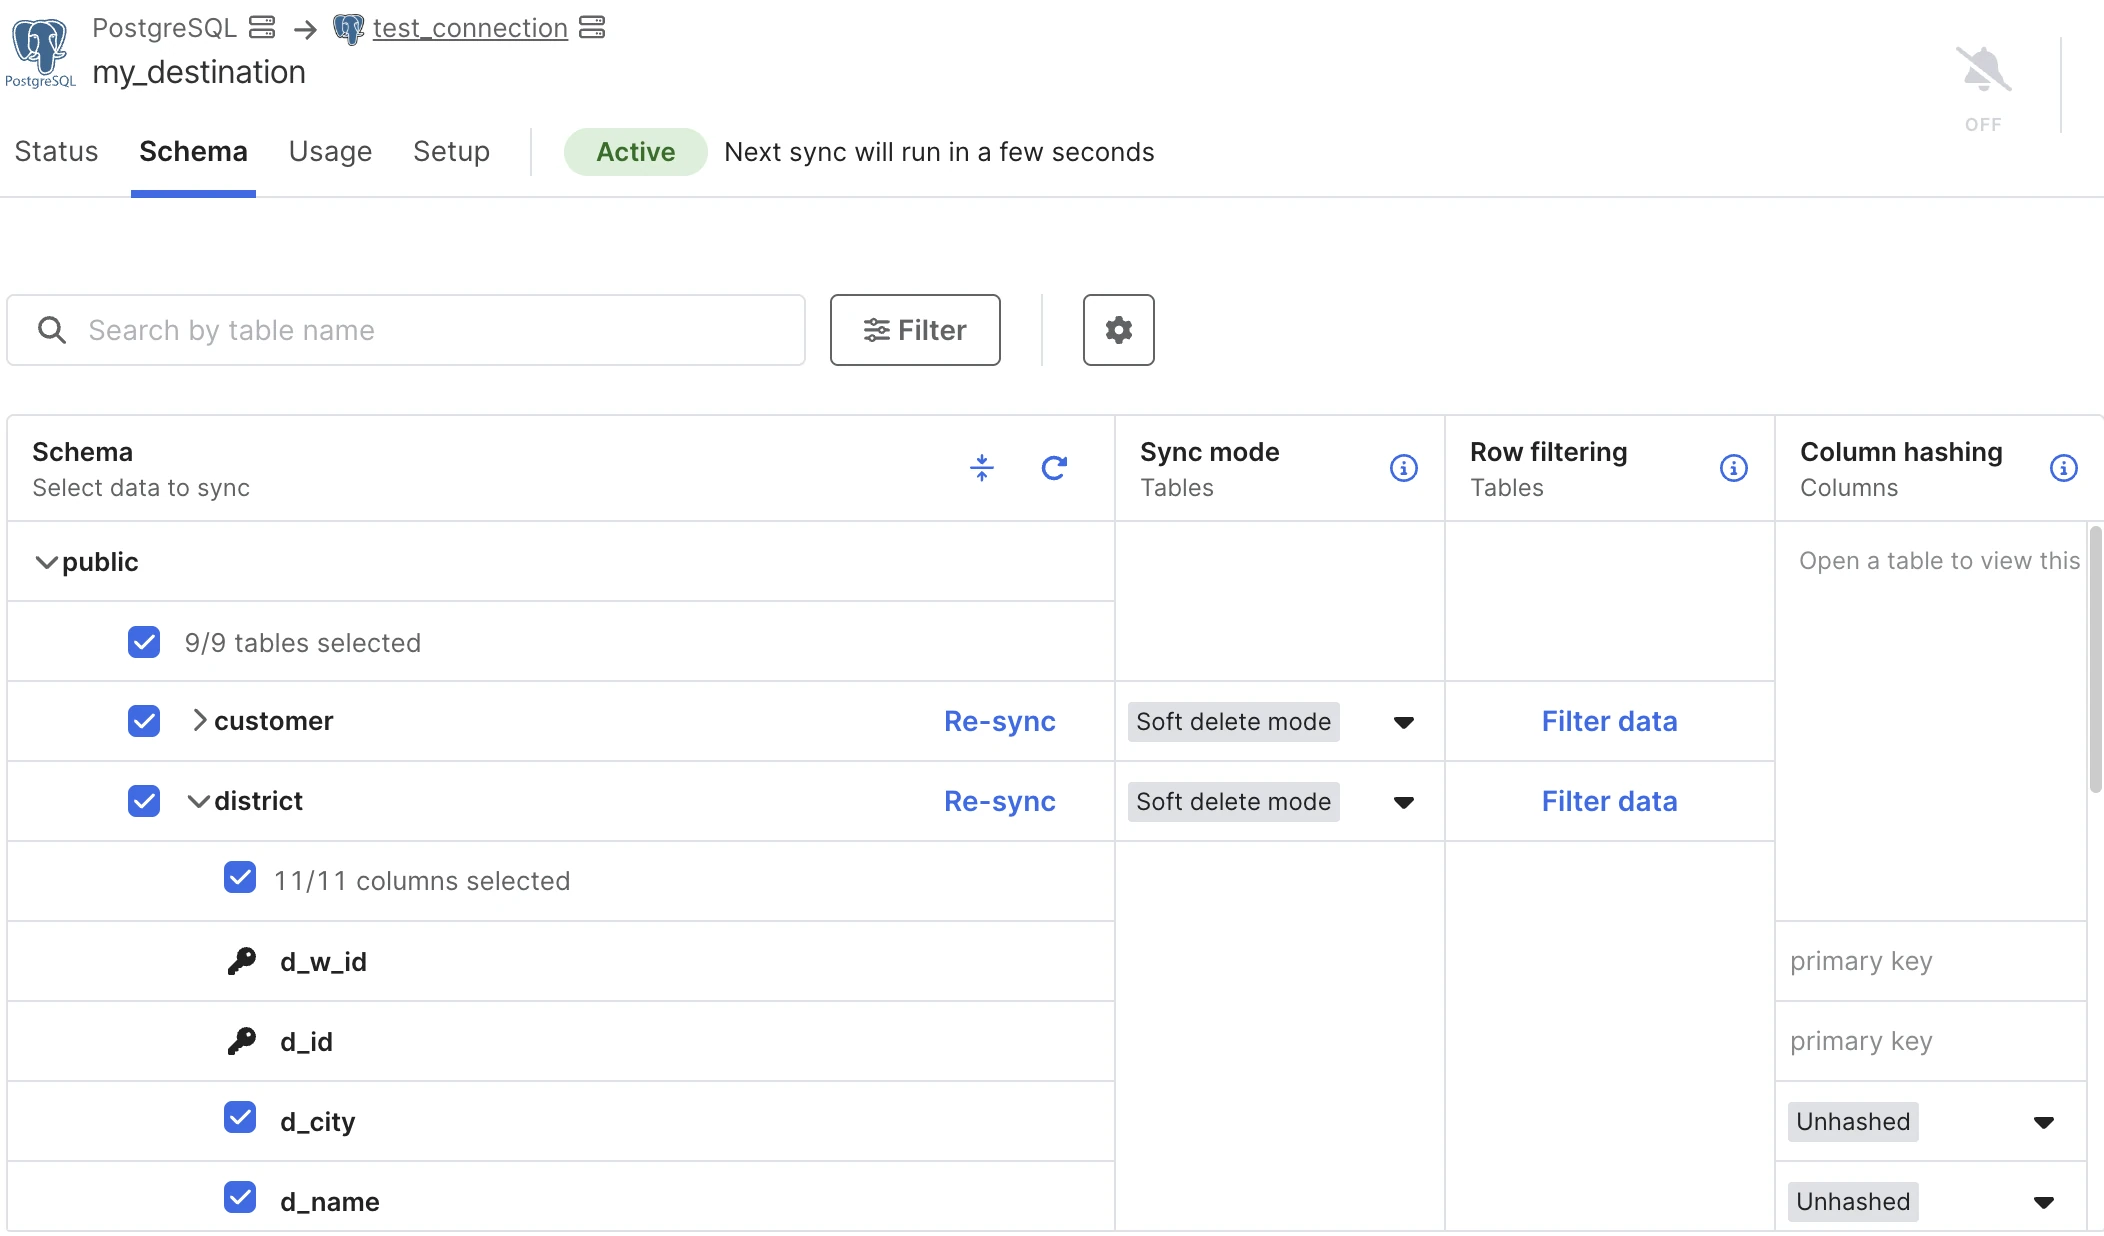
The Schema tab looks different depending on which connection you view. Depending on the connector, you'll see one of the following:
- A fully customizable schema
- A semi-customizable schema
- A non-customizable schema
- (Magic folder connectors only) A list of source files and their corresponding destination tables. The list indicates if any source files are in an unsupported format.
The Schema tab contains information about the following:
Types of schemas
There are several different types of schemas:
- Source schema: A source schema shows how your data is structured in your data source. For Application sources, this is generated by Fivetran.
- Connector schema configuration (also called "connector schema"): A connector schema configuration defines the data that Fivetran can sync to your destination. Depending on the connector, you can customize your connection schema configuration by excluding tables, blocking columns, or hashing columns. View your connection schema configuration on the Schema tab.
- Destination schema: A destination schema defines how your data is structured in your destination. Fivetran typically creates one destination schema per connection, though we can create multiple destination schemas for database sources. Learn more in our destination schema and table management documentation.
Schema changes
We automatically perpetuate changes in the source schema to the connector schema configuration and destination schema to ensure that we accurately sync your data. Read our schema migrations documentation to learn more.
We also update your destination schema when you update your connection configuration schema. For example, if you hash column field, we will sync hashed data to the field column in your destination, then ask you to choose whether we re-sync that table to overwrite the existing unhashed data or if we just sync hashed data moving forward. Depending on the connector, we may automatically trigger a re-sync if you include a table in your connection schema configuration that had been previously excluded from syncs. Learn more in our database automatic re-sync documentation.
When you change a column's data type in your source, we update the data type in the corresponding destination column. Learn how in our changing data type documentation.
Schemas
View schemas
The Schema tab displays a list of your connection's schemas with their constituent tables and columns listed below them. Both active and inactive schemas are listed. Click the black arrow to the left of the schema name to collapse or expand it.

You can do the following with your schemas:
- Collapse or Expand all the schemas.
- If your connection has multiple schemas, you can click Jump to and select your schema from the list.
- If an ERD is available for the connector, you can click ERD to see the connector's ERD.
- Update the latest schema from the source by clicking the refresh icon .
The Schema tab of a Magic Folder connection has a different view. Learn more in our Files Schema documentation.
Block schemas
Blocking a schema prevents Fivetran from syncing any table or column within that schema.
To block a schema, set the toggle next to the schema name to OFF, then click Save changes.
If you want to un-block this schema in the future, set the toggle back to ON. Depending on how long you wait and connector, you may need to do a historical re-sync to update that schema's data in your destination, which increases your MAR.
Define Schema Change Handling settings
To view or change your Schema Change Handling settings, click Schema change settings above the schema list.
In the settings pane that appears on the right, choose from the following options:
Allow all new data: New schemas, tables, and new columns for existing tables are synced into the destination.
Allow new columns: Only new columns for existing tables are synced into the destination. New schemas and configurable tables* are blocked from being synced to the destination.
Block all new data: New schemas, configurable tables*, and new columns for existing tables are not synced into the destination.
*In some connectors with a defined schema, including many of our application connectors, some tables are not configurable. Non-configurable tables cannot be completely blocked. If you select the Block All option, we only sync the primary keys of the non-configurable tables.
If you want to receive a notification email whenever we detect new schemas, tables, or columns in the source, click the Send email when a new schema is detected toggle to the on position. We don't send notification emails for deletions in the source.
We don't send New Data Detected notification emails for the following connector types:
- Database connectors
- Magic Folder connectors
- Certain SaaS connectors (see your connection's notification options on its Schema tab)
- Lite connectors that don't support table-level data blocking
- Connectors created through our Connector SDK
To save changes to your settings, click Save.
Apply and review changes
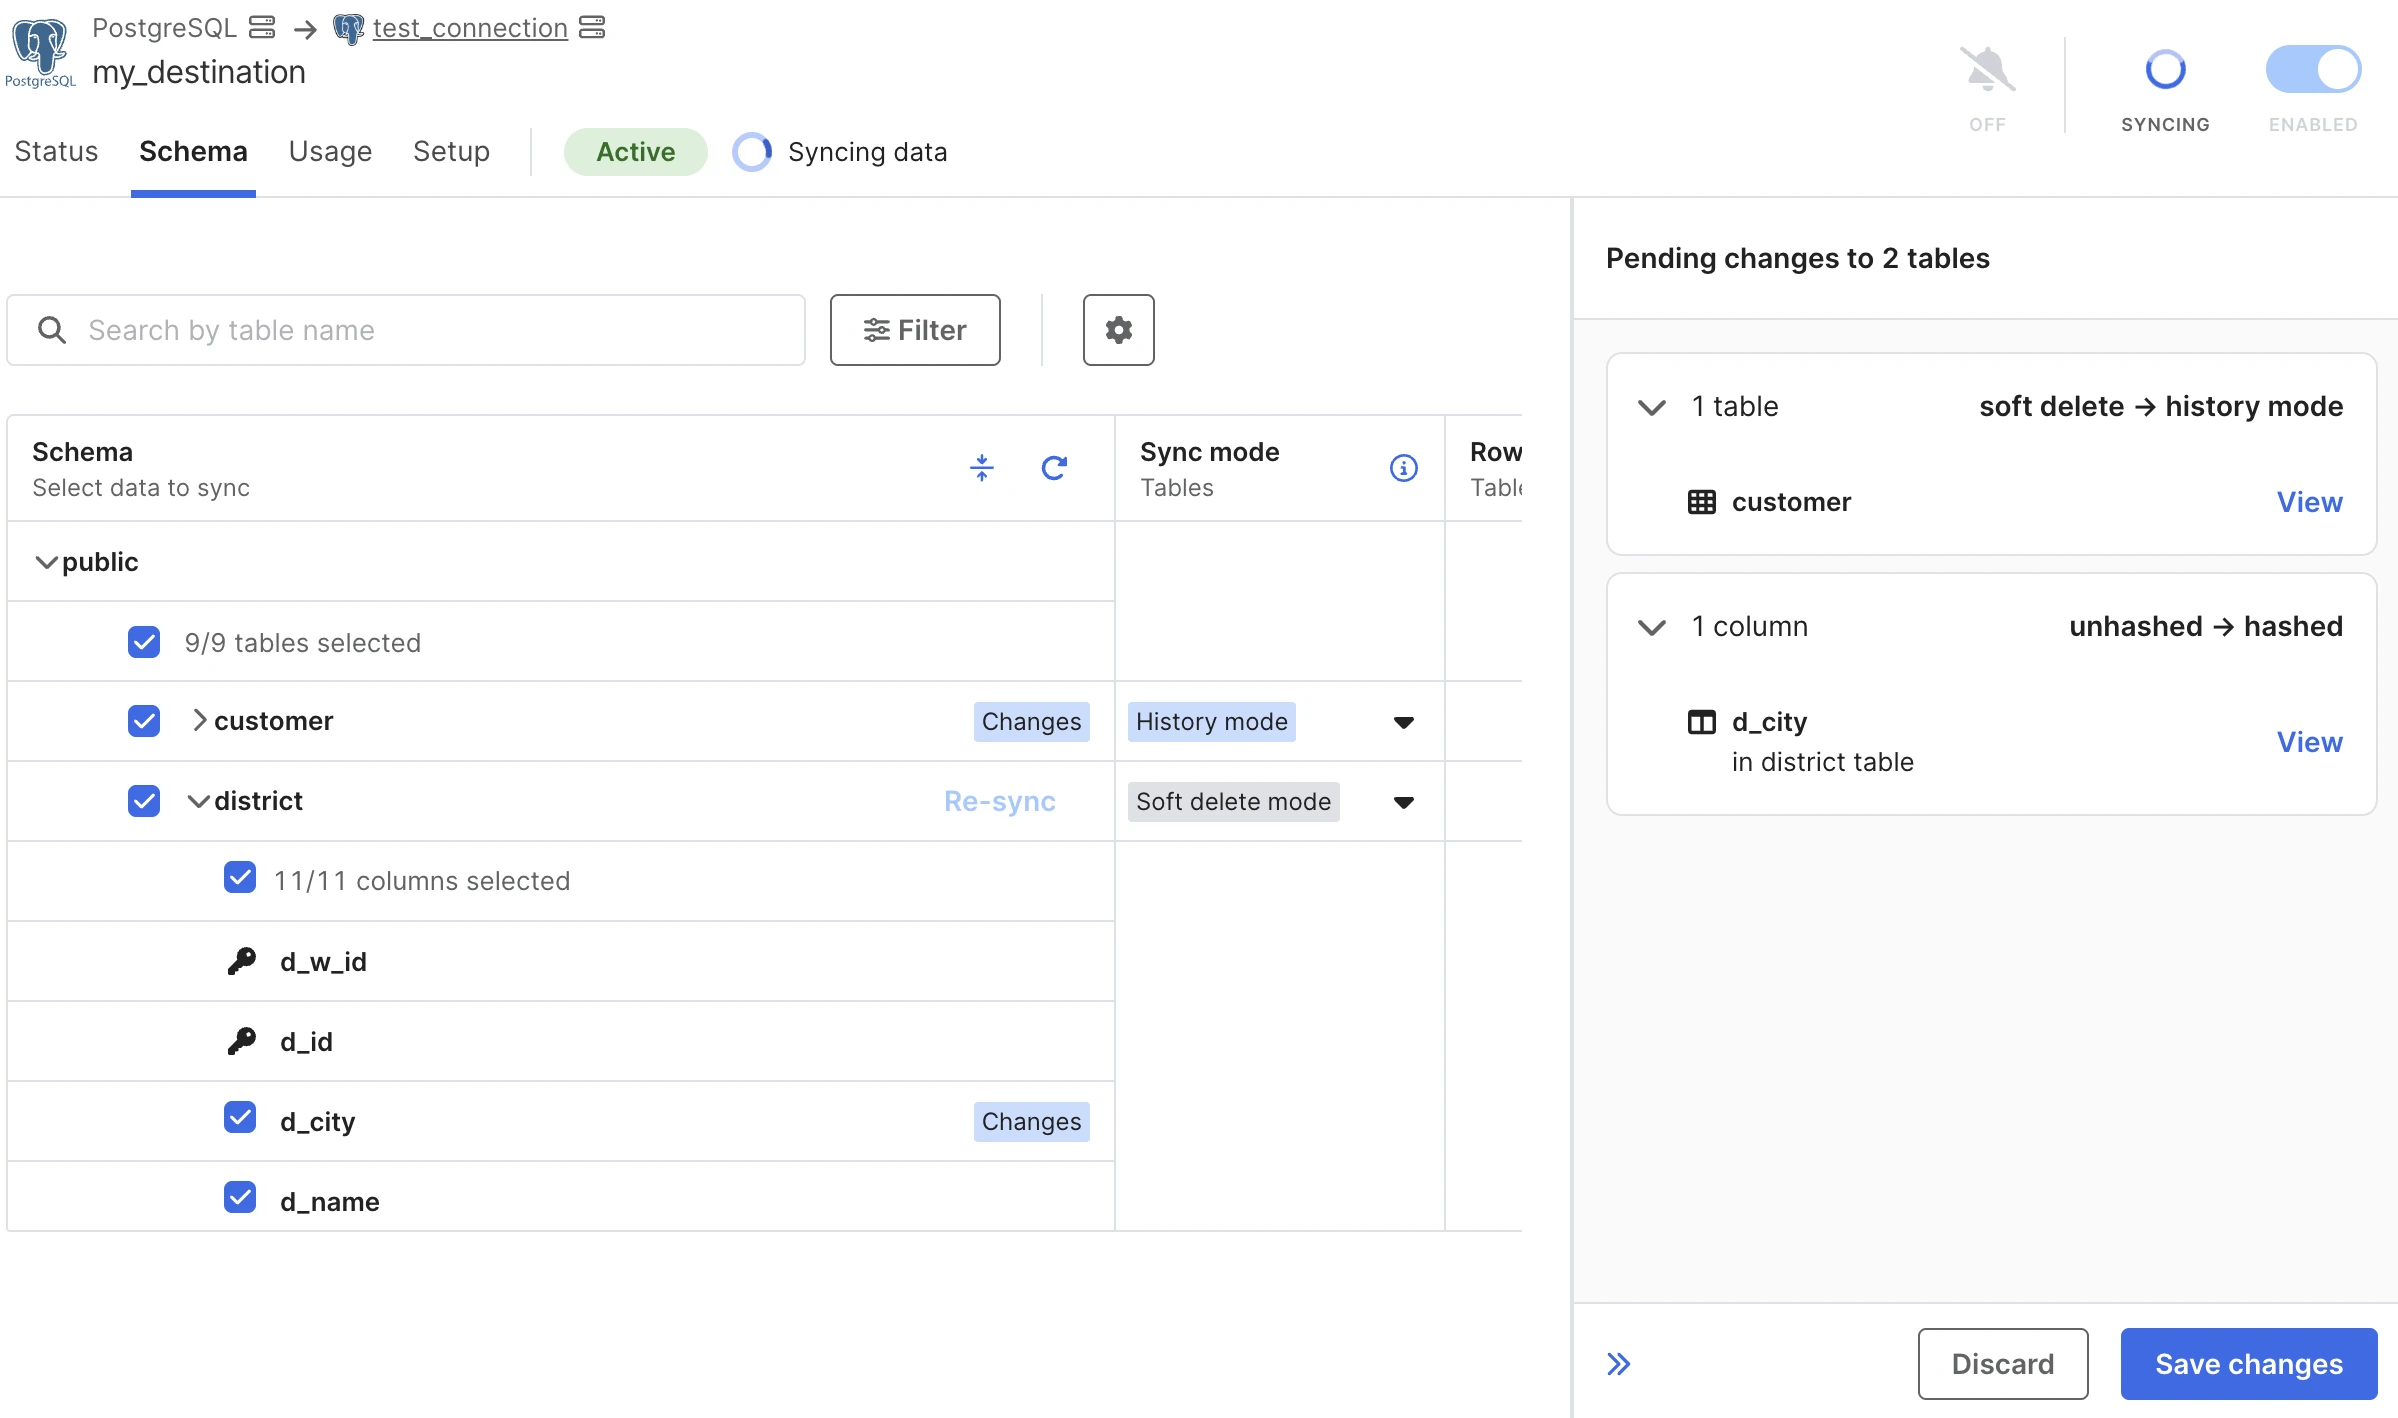
You can review any changes you are planning to make before applying them. To do that, click Review changes on the popup at the bottom of the page.
In the panel on the left, you can see all the changes and save or discard them.
Tables
View tables
To find a specific table, search for it by name using the search bar.
To see all active tables, click the filter icon and select Show selected tables only. To see all inactive tables, select Show unselected tables only.
Block tables
By default, all tables in a selected schema are automatically selected to be synced. However, you can choose to block certain tables from syncing.
To block a table, select the checkbox next to the table name, then click Save changes. You can block multiple tables at once.
If you want to un-block this table in the future, select the checkbox. Depending on how long you wait and connector, you may need to do a historical table re-sync to update that table's data in your destination, which increases your MAR.
View or change sync mode
If your connector supports history mode, the connection schema displays the Sync mode column. You can see the sync mode on the right side of the row.
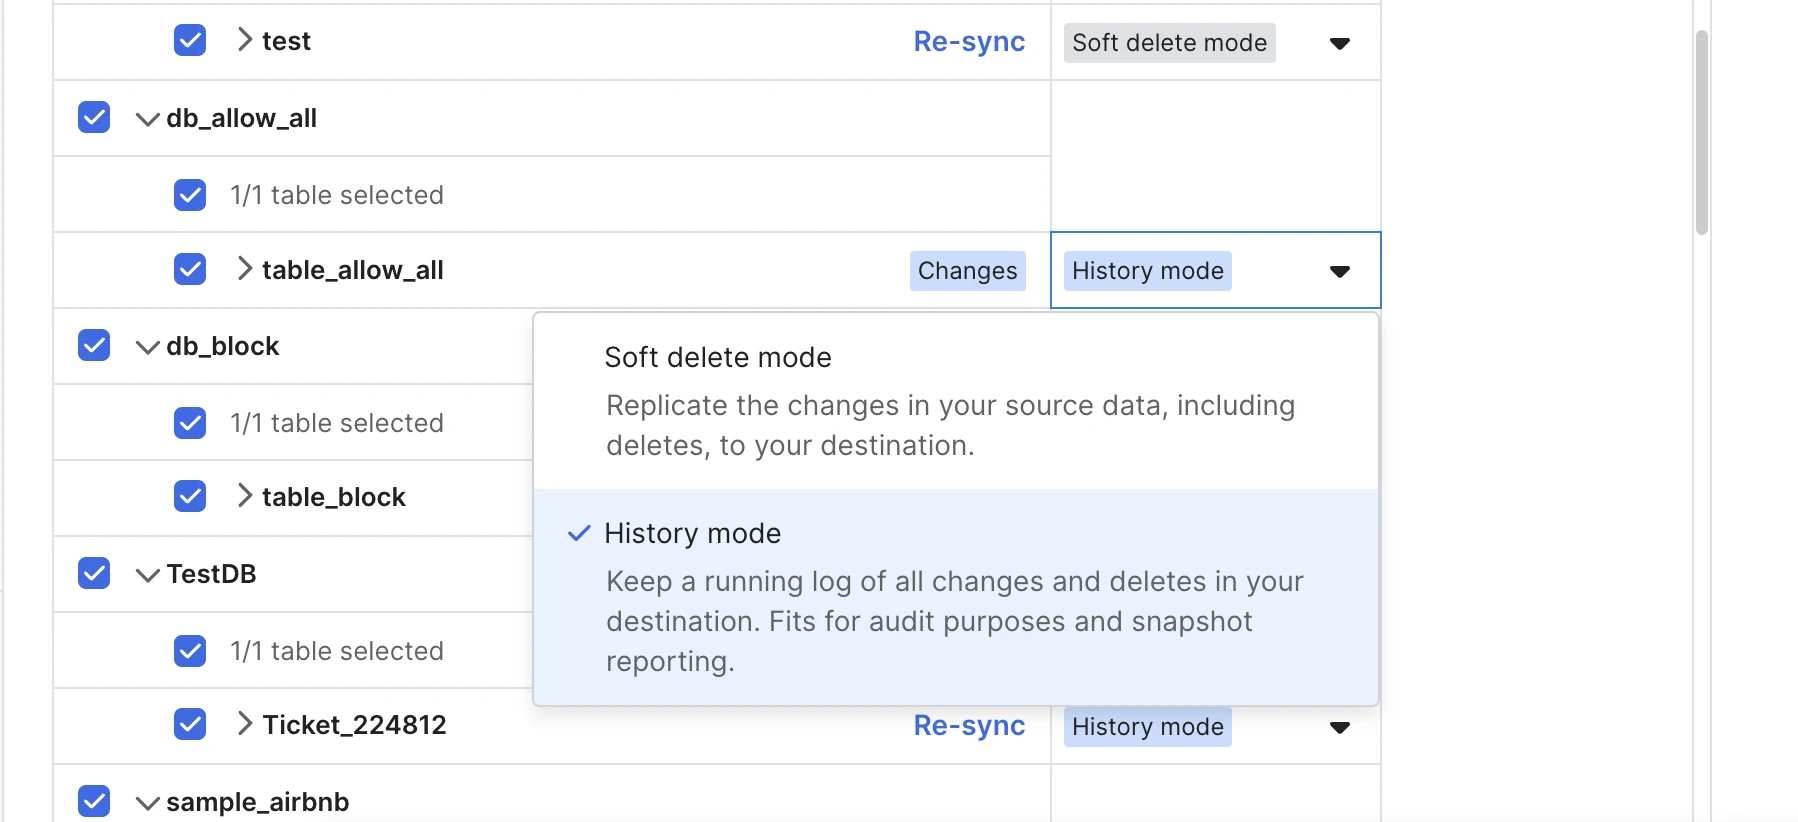
To change the table's sync mode, click on the mode name to open a drop-down menu. Choose the sync mode that best suits your purposes:
- Soft delete mode (enabled by default): Replicate the changes in your source data, including deletes, to your destination.
- History mode: Keep a running log of all changes and deletes. This sync mode works well for audit purposes and snapshot reporting.
To save the settings after you switch the sync mode, click Save changes.
Re-sync tables
To re-sync a table, click the Re-sync button.
You can only re-sync active tables.
Columns
Block a column
By default, all columns in a selected table are automatically selected to be synced. Primary key columns cannot be blocked.
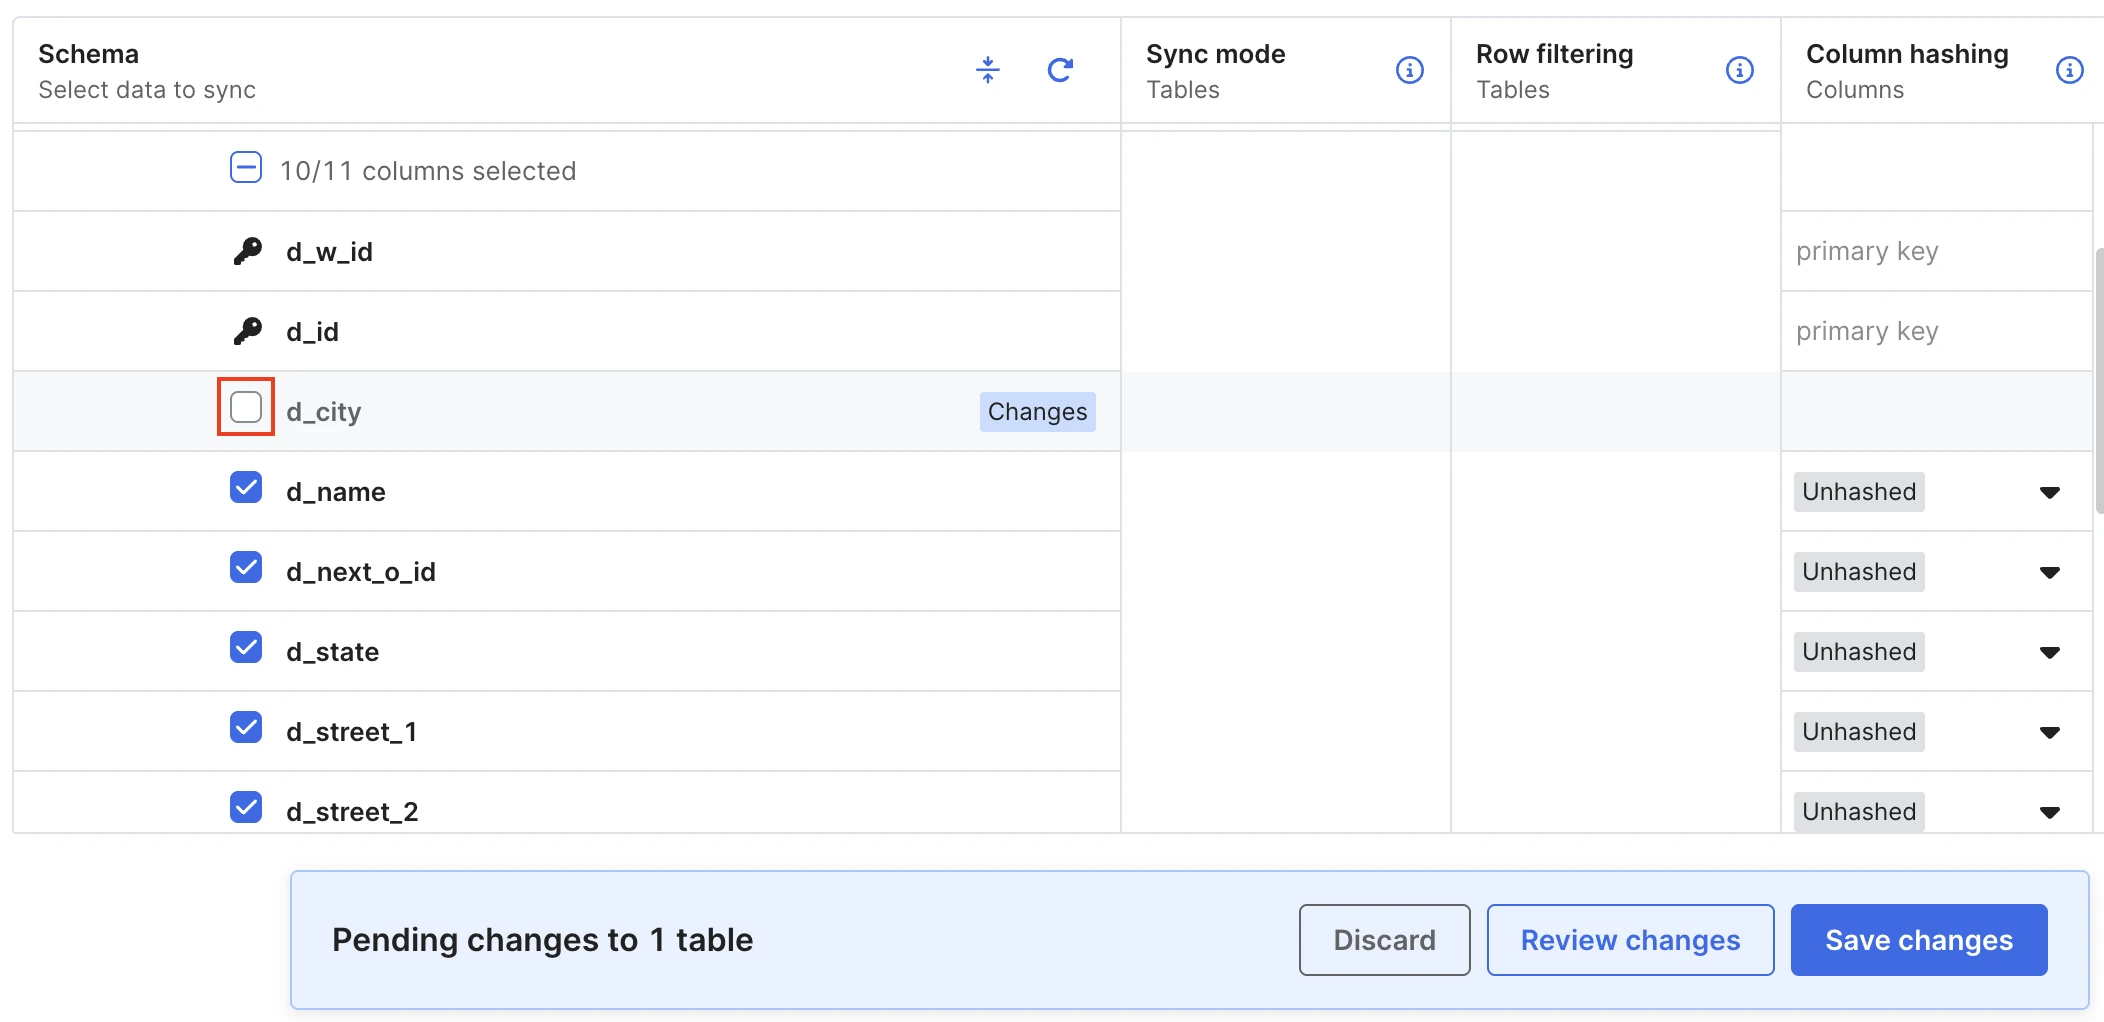
If you want to block certain columns, select the checkbox next to the column name, then click Save changes. You can block multiple columns at once.
Hash a column
If your connector supports column hashing, you can open any of the tables to see if each column is hashed or unhashed. Primary key columns cannot be hashed.
See which connectors support column hashing in our column hashing connector list.
To change this column's hash mode, click on the mode name to open a drop-down menu. Choose one of the following settings:
- Unhashed (enabled by default): Data values at the source will be replicated identically to the destination.
- Hashed: Hash data values in this column before syncing data to your destination.
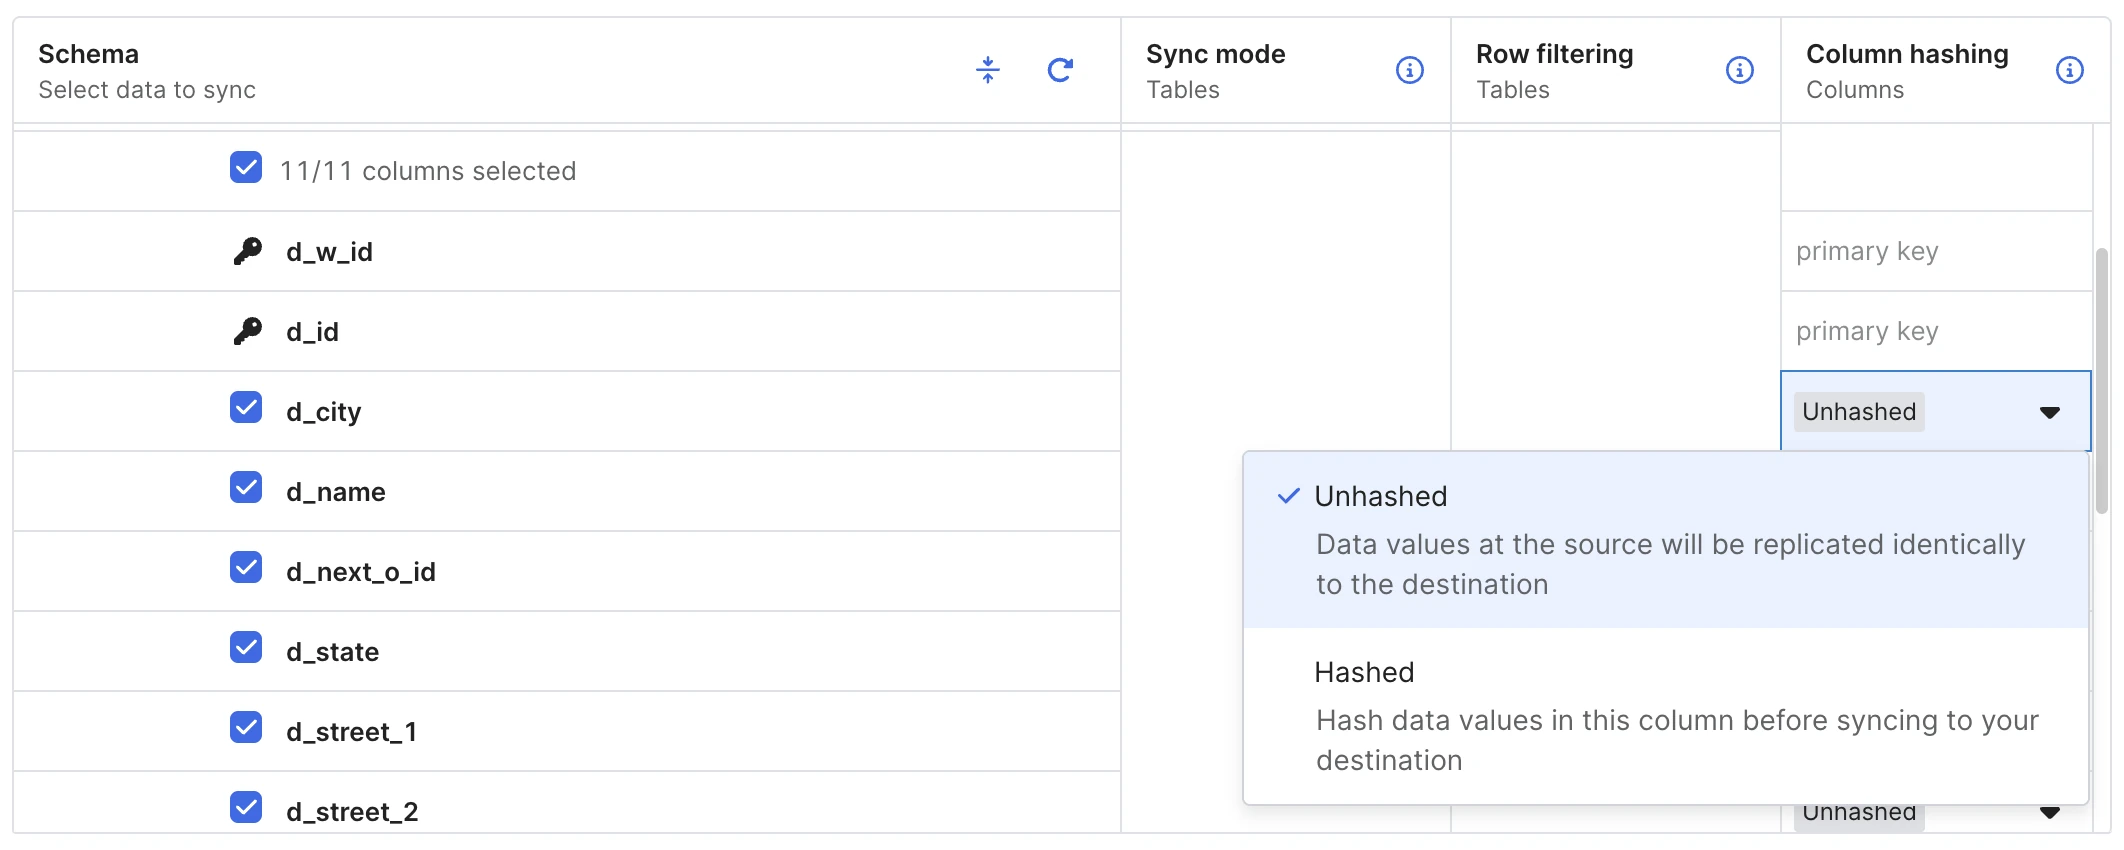
If you switch to a different mode, click Save changes to save your new mode. You can change the hash mode for multiple columns at once.