High-Volume Agent SAP ECC on SQL Server Setup Guide Beta
Follow the instructions listed here to replicate your SQL Server database to your destination using Fivetran.
The Fivetran connection setup form lets you specify essential information for creating a SQL Server connection, such as database credentials, connection method, High-Volume Agent (HVA) connection credentials, and other database-specific parameters. You need to set up your infrastructure, including network and database configurations, to obtain the parameter values required for this setup form.
Before entering details into the setup form, you must perform the following configurations:
- Ensure the prerequisites are in place
- Install and configure HVA
- Configure your network
- Configure database access and permissions:
For detailed instructions, refer to the relevant sections below.
Prerequisites
To connect your SQL Server database to Fivetran, you need:
- SQL Server 2012 - 2022
- No other currently running data replication or log-based CDC processes
- A user with
dbownerrole orsysadminfixed server role available for use in your Fivetran connection - A database in full recovery mode, with a full backup taken since full recovery mode was enabled
- Log backups in the native SQL Server format, accessible to the source server
- Your database host IP (for example,
1.2.3.4) or domain (for example,your.server.com) - Your database port (usually
1433) - High-Volume Agent (HVA) installation: If you have archive-log only mode enabled, you can install the HVA on any machine that has access to the database. Otherwise, you must install HVA on the same machine where your SQL Server database is running.
- The HVA IP address and port number (usually
4343)
HVA installation and configuration
This section guides you through the process of installing the HVA on various operating systems, as well as configuring and starting the HVA. You will find information on compatibility checks, disk space requirements, and system permissions necessary for installation. Additionally, you will learn how to integrate the HVA into their system's startup procedures to ensure it runs automatically upon boot.
HVA requirements
Before proceeding with the HVA installation, ensure that you have the following prerequisites in place:
Compatibility: Verify that the HVA version is compatible with your operating system and DBMS. Refer to the COMPATIBILITY section in the relevant release notes on the Downloads page of your Fivetran dashboard.
Sufficient disk space: Ensure that the machine where you want to install the HVA has ample disk space. We recommend a minimum of 10 GB of available disk space.
HVA installation:
Download the HVA installation file from the Downloads page of your Fivetran dashboard. Select the installation file for your database server's operating system.
If you have archive-log only mode enabled, you can install the HVA on any machine that has access to the database. Otherwise, you must install HVA on the same machine where your SQL Server database is running.
System permissions:
System permissions on Windows
- Elevated user account privilege is required for running the HVA executable/installer. User must provide an administrator password interactively.
- The user account (for example,
fivetran) that will operate the HVA must have Log on as a service policy enabled. - The user that installs, configures, and starts HVA must have access to the
.mdfand.ldffiles generated by your SQL Server database. We recommend using an Administrator user or a user with sufficient permissions to access the.ldfand.mdf, which is typically the service account running the SQL Server service.
System permissions on Linux
The user that installs, configures, and starts HVA must have access to the
.mdfand.ldffiles generated by your SQL Server database. The user account that usually has access to the.mdfand.ldffiles in a SQL Server database is determined by the user and group ownership of the files. During the installation process of SQL Server on Linux, you must specify a user account (for example,mssql) and a group (for example,mssql) that will own the SQL Server files, including the.mdfand.ldffiles.
Install HVA
Depending on your database server's operating system, follow the instructions below to install HVA.
Install HVA on Linux
Create folder structure:
i. As the
rootuser, create the HVA installation directory (for example,/opt/fivetran):mkdir /opt/fivetranii. In the
/opt/fivetrandirectory, create three key subdirectorieshvr_home,hvr_config, andhvr_tmp:mkdir -p /opt/fivetran/hvr_home mkdir -p -m 01775 /opt/fivetran/hvr_config /opt/fivetran/hvr_tmpConfigure environment:
i. Configure the
HVR_HOME,HVR_CONFIG, andHVR_TMPenvironment variables to point to the relevant HVA installation subdirectories:export HVR_HOME=/opt/fivetran/hvr_home export HVR_CONFIG=/opt/fivetran/hvr_config export HVR_TMP=/opt/fivetran/hvr_tmpii. Add the
$HVR_HOME/binexecutable directory path to the environment variablePATH:export PATH=$PATH:$HVR_HOME/biniii. Add the environment variables and the executable directory path into the startup file (for example,
.profileor.bash_profile):export HVR_HOME=/opt/fivetran/hvr_home export HVR_CONFIG=/opt/fivetran/hvr_config export HVR_TMP=/opt/fivetran/hvr_tmp export PATH=$PATH:$HVR_HOME/binInstall HVA:
Navigate to the
$HVR_HOMEdirectory and extract the contents of the HVA installation file (for example,fivetran-6.1.0_26-hub_and_agent-linux_glibc2.12-x64-64bit_ga_patch.tar.gz):cd $HVR_HOME tar xzf /tmp/fivetran-6.1.0_26-hub_and_agent-linux_glibc2.12-x64-64bit_ga_patch.tar.gzOnce completed, the HVA and all required components are installed into the
$HVR_HOMEdirectory (/opt/fivetran/hvr_home).
Install HVA on Windows using ZIP file
The HVA installation file for Windows is available in the .exe and .zip formats. The compressed file (.zip) distribution is normally used as an alternative for the Windows executable based (.exe) distribution. The steps to install the HVA are also different for both formats.
Create folder structure:
As the Administrator user, create an HVA installation directory (for example,
C:\hvr) with three subdirectorieshvr_home,hvr_config, andhvr_tmp:mkdir C:\hvr\hvr_home mkdir C:\hvr\hvr_config mkdir C:\hvr\hvr_tmpConfigure environment:
Configure the
HVR_HOME,HVR_CONFIG, andHVR_TMPenvironment variables, each pointing to the relevant HVA installation directorieshvr_home,hvr_config, andhvr_temp:The following instructions assume that the directories are created inside the
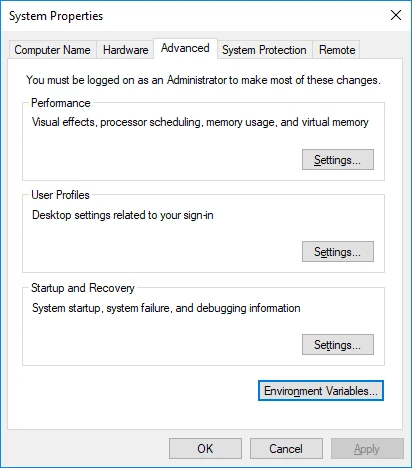
C:\hvrdirectory. Use your installation directory if it differs fromC:\hvr.i. Navigate to Control Panel ▶ System and Security ▶ System ▶ Advanced system settings.
ii. Under the Advanced tab, click Environment Variables....
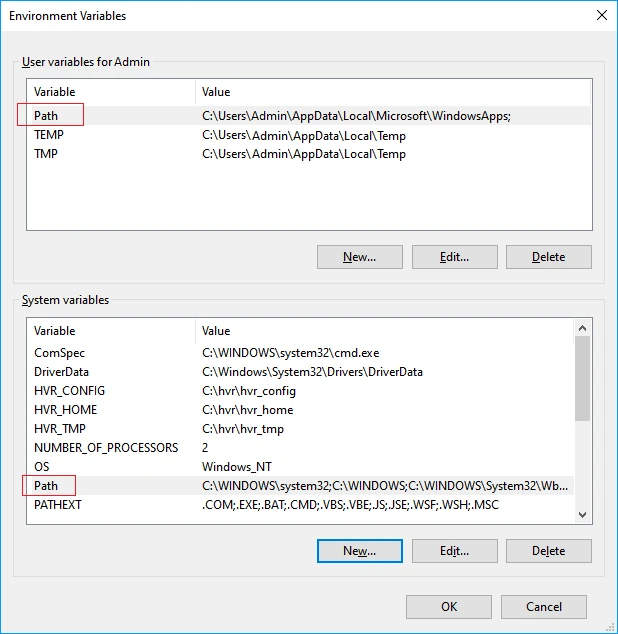
iii. In the System variables or User Variables for user_name section, click New.
iv. Enter Variable name (e.g,
HVR_HOME) and Variable value (e.g,C:\hvr\hvr_home).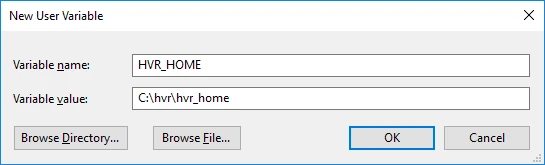
v. Click OK. Repeat the above steps iii and iv for environment variables
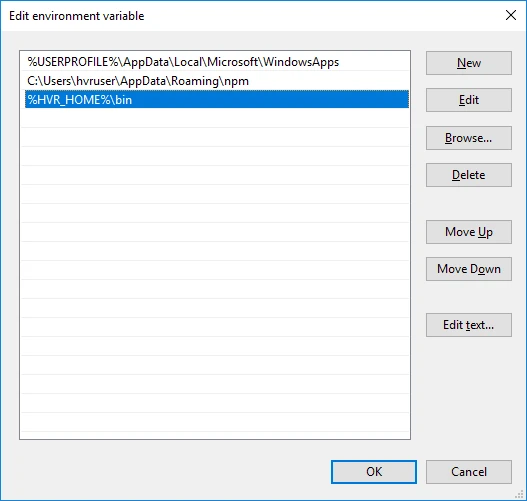
HVR_CONFIGandHVR_TMP.Add the HVR executable directory path to the environment variable
Path:i. In the System variables or User Variables for user_name section, from the list of variables, select Path and click Edit....
ii. In the Edit environment variable dialog, click New and enter the path for the HVA executable. Click OK.
Install HVA:
Navigate to the
$HVR_HOMEdirectory (C:\hvr\hvr_home) and extract the contents of the downloaded.zipfile.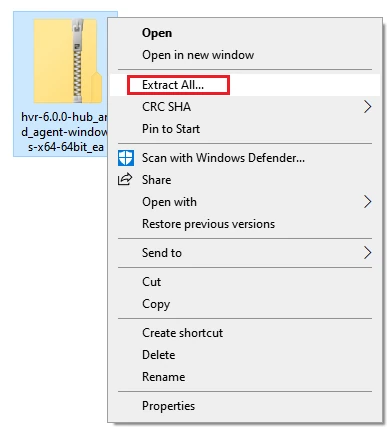
Once completed, the HVA and all required components are installed into the
$HVR_HOMEdirectory (C:\hvr\hvr_home).
Install HVA on Windows using EXE file
The HVA installation file for Windows is available in the .exe and .zip formats. The compressed file (.zip) distribution is normally used as an alternative for the Windows executable based (.exe) distribution. The steps to install the HVA are also different for both formats.
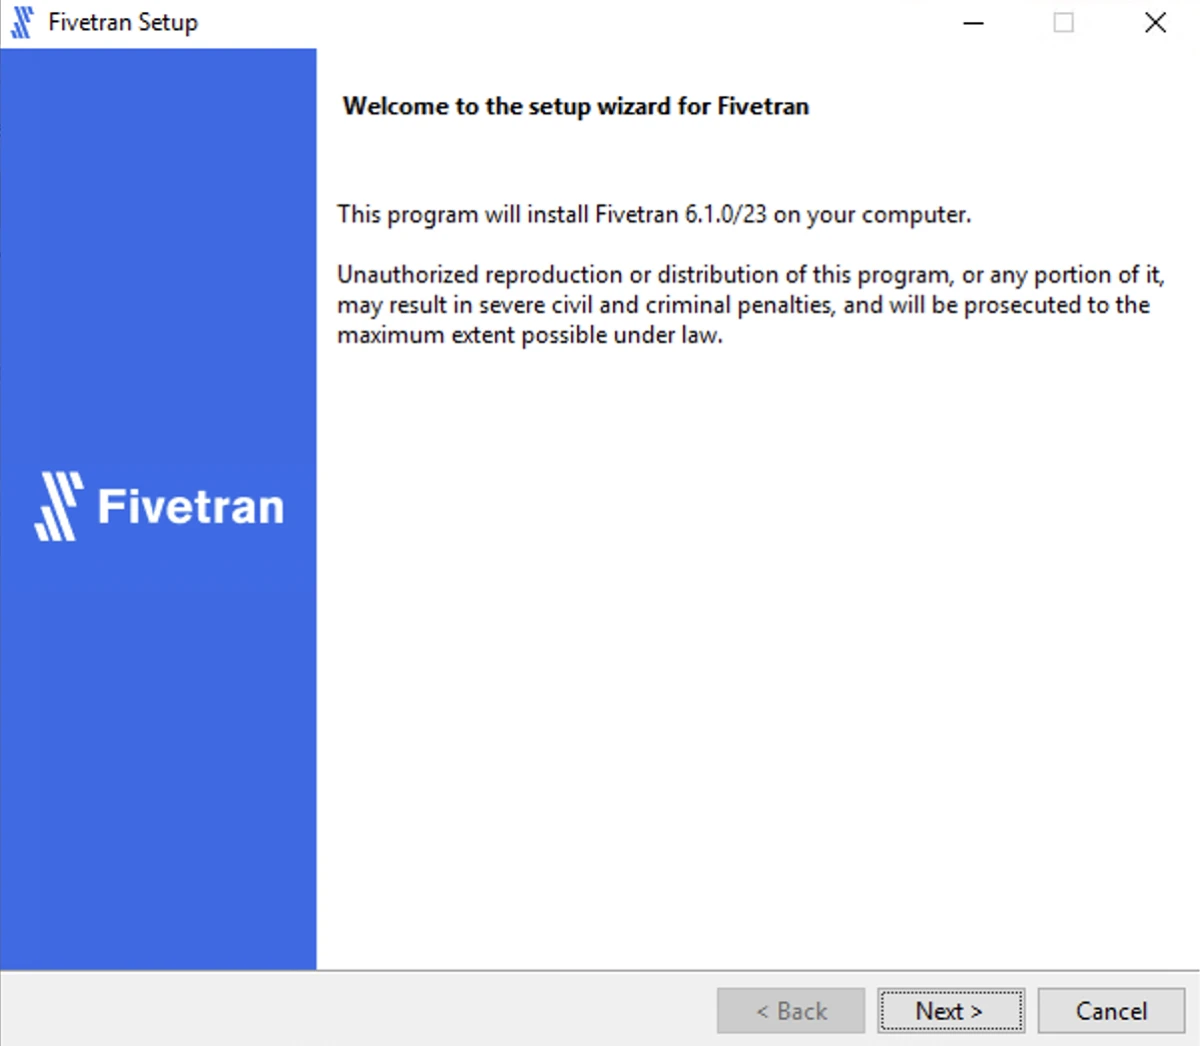
Run the downloaded
.exefile (for example,hvr-6.1.0_10-hub_and_agent-windows-x64-64bit_ga_patch-setup.exe).In the setup wizard dialog, click Next.
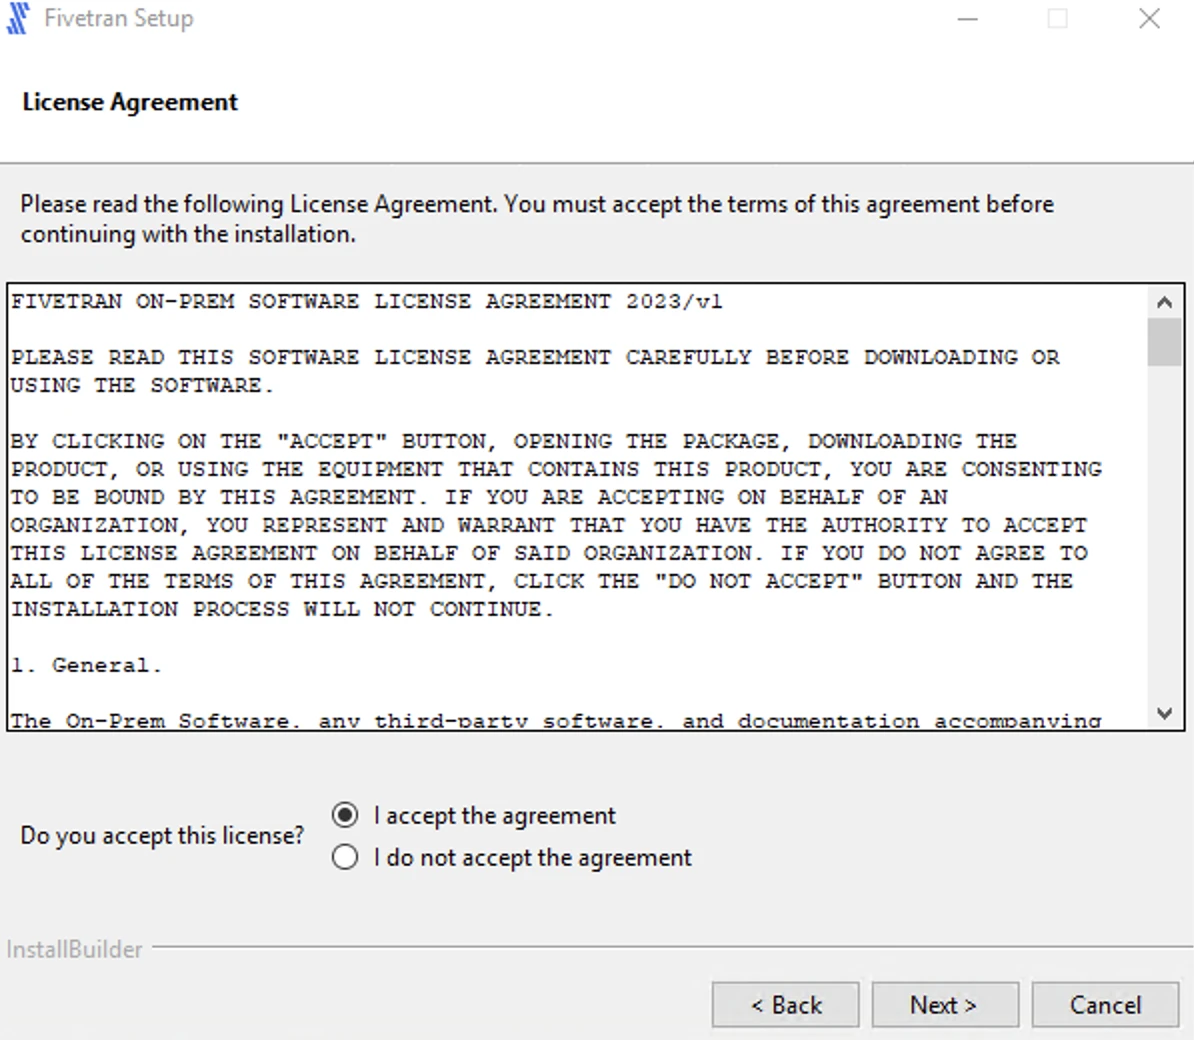
Read the License Agreement, select I accept the agreement and then click Next.
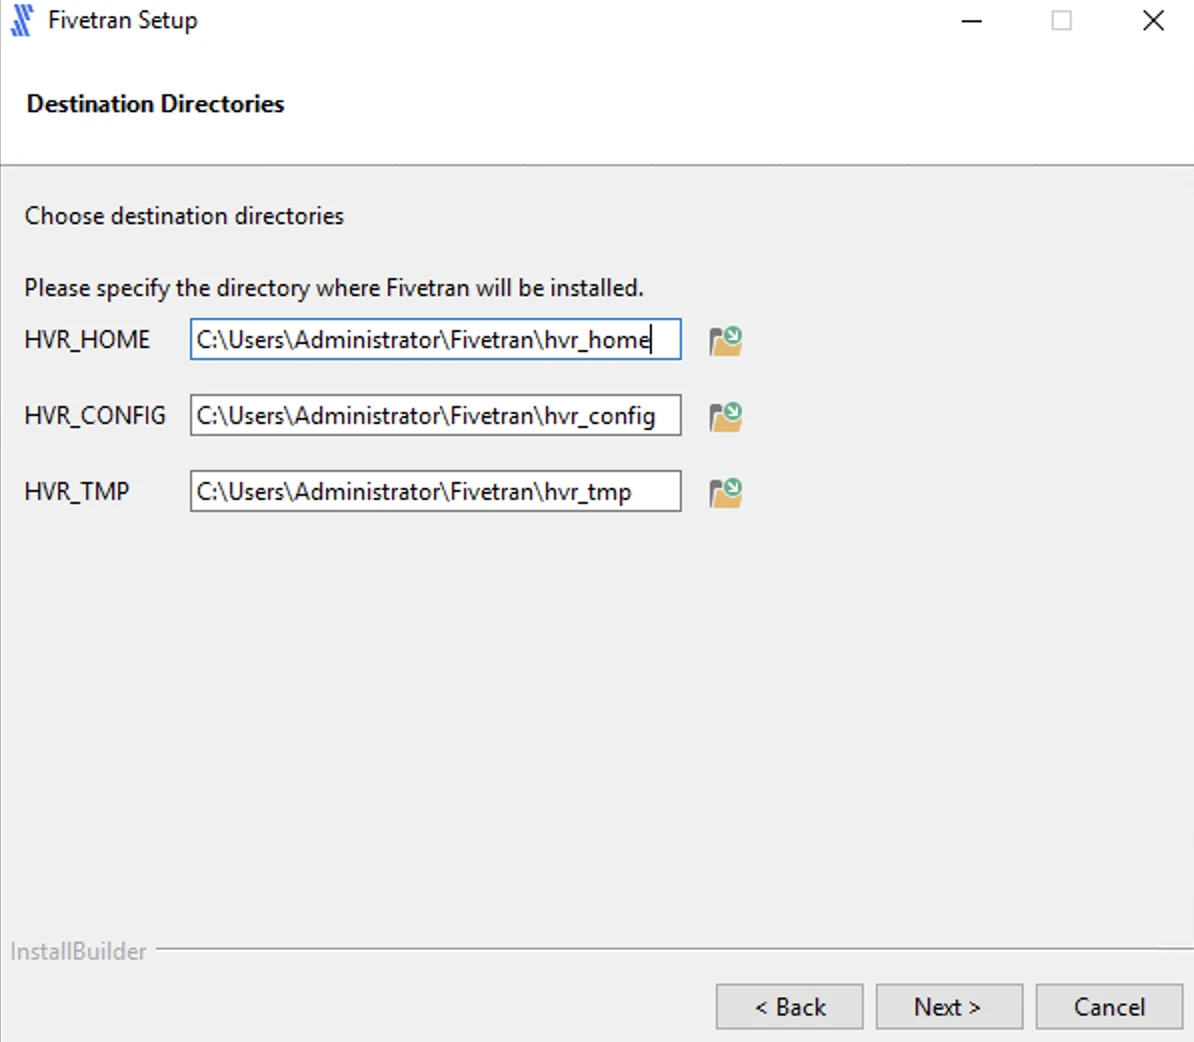
Specify the HVA installation directories and click Next.
Click Next to create a program folder for the HVA.

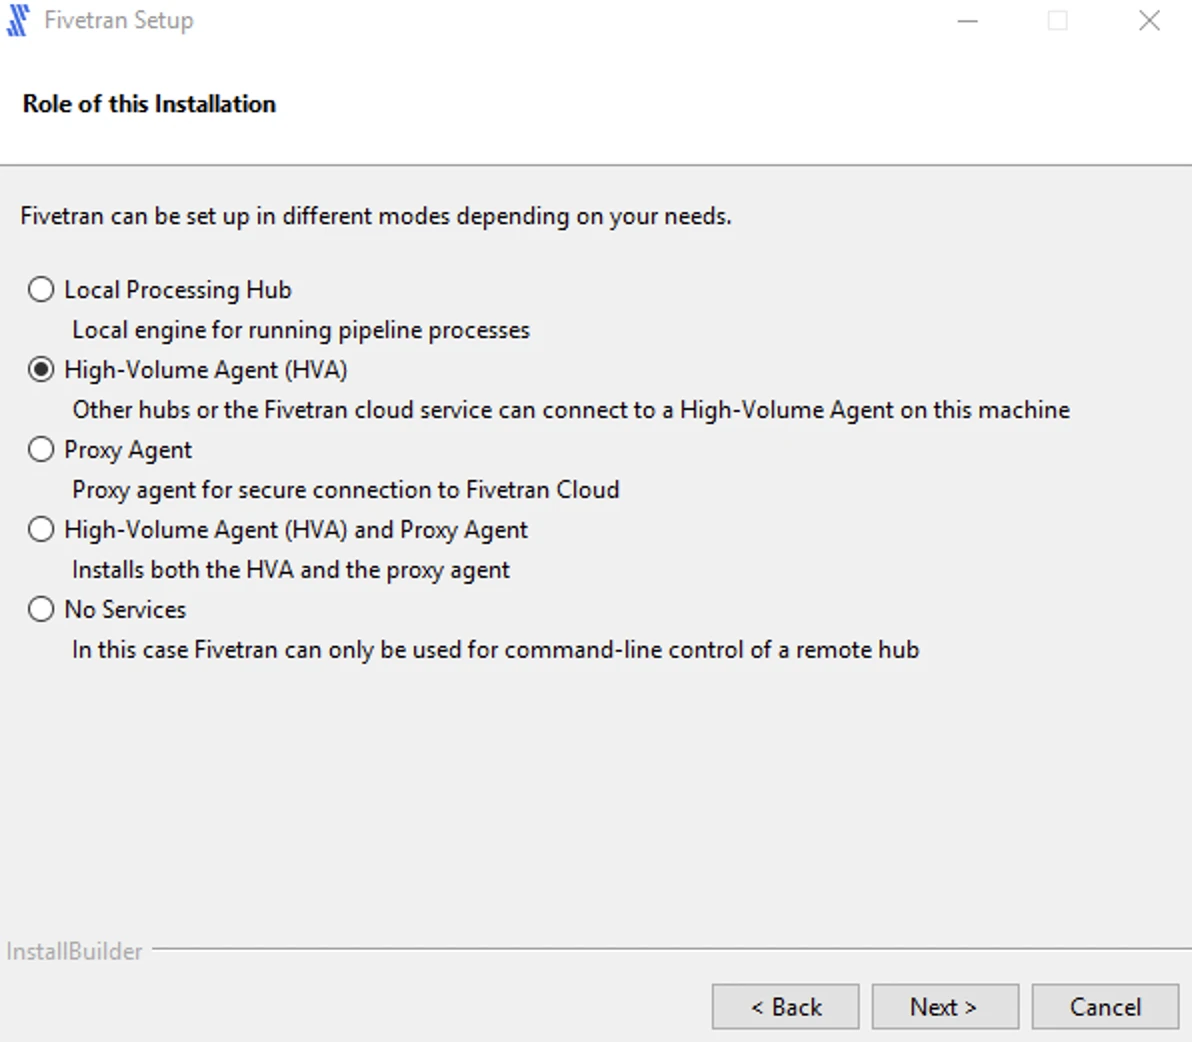
Select High-Volume Agent (HVA) and click Next.
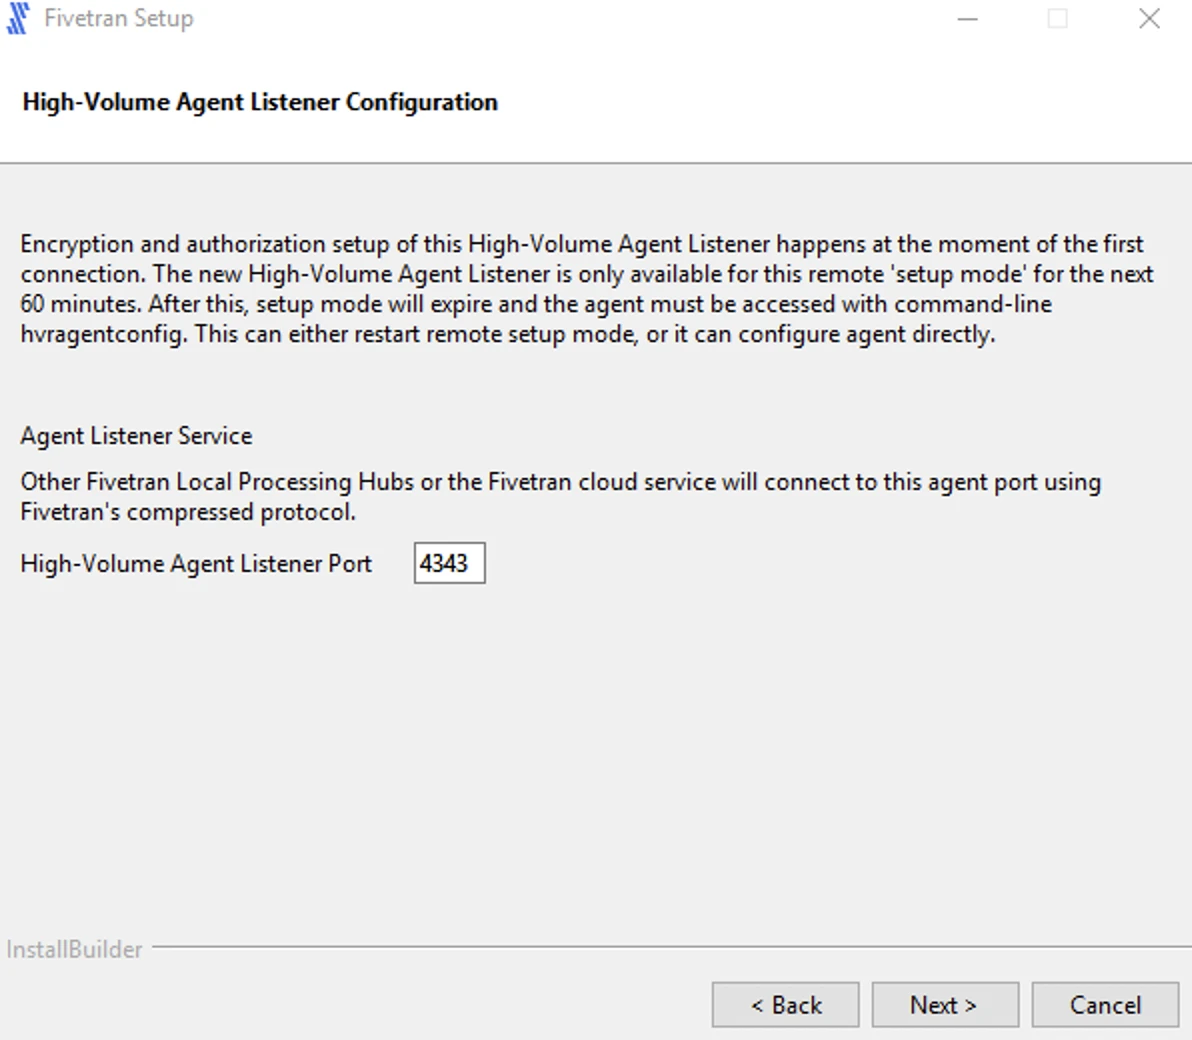
Enter a value for Agent Listener Port and click Next.
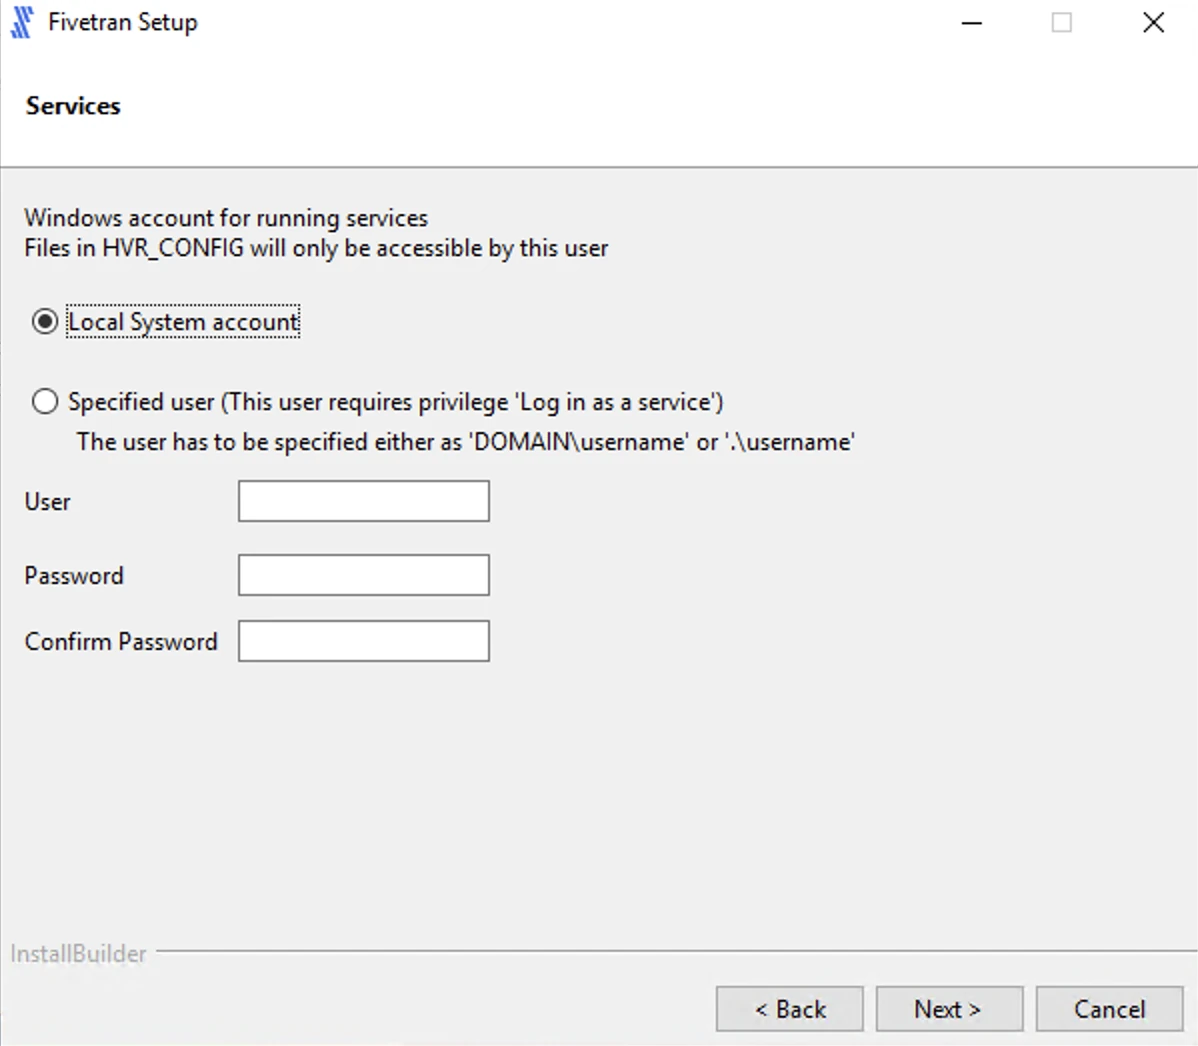
Select the user account to run the HVA service.
If you select Specified user, enter the values for User, Password, Confirm Password and click Next.
For user with Windows authentication (if applicable), specify your Active Directory domain and username in the format
<domain>\<username>.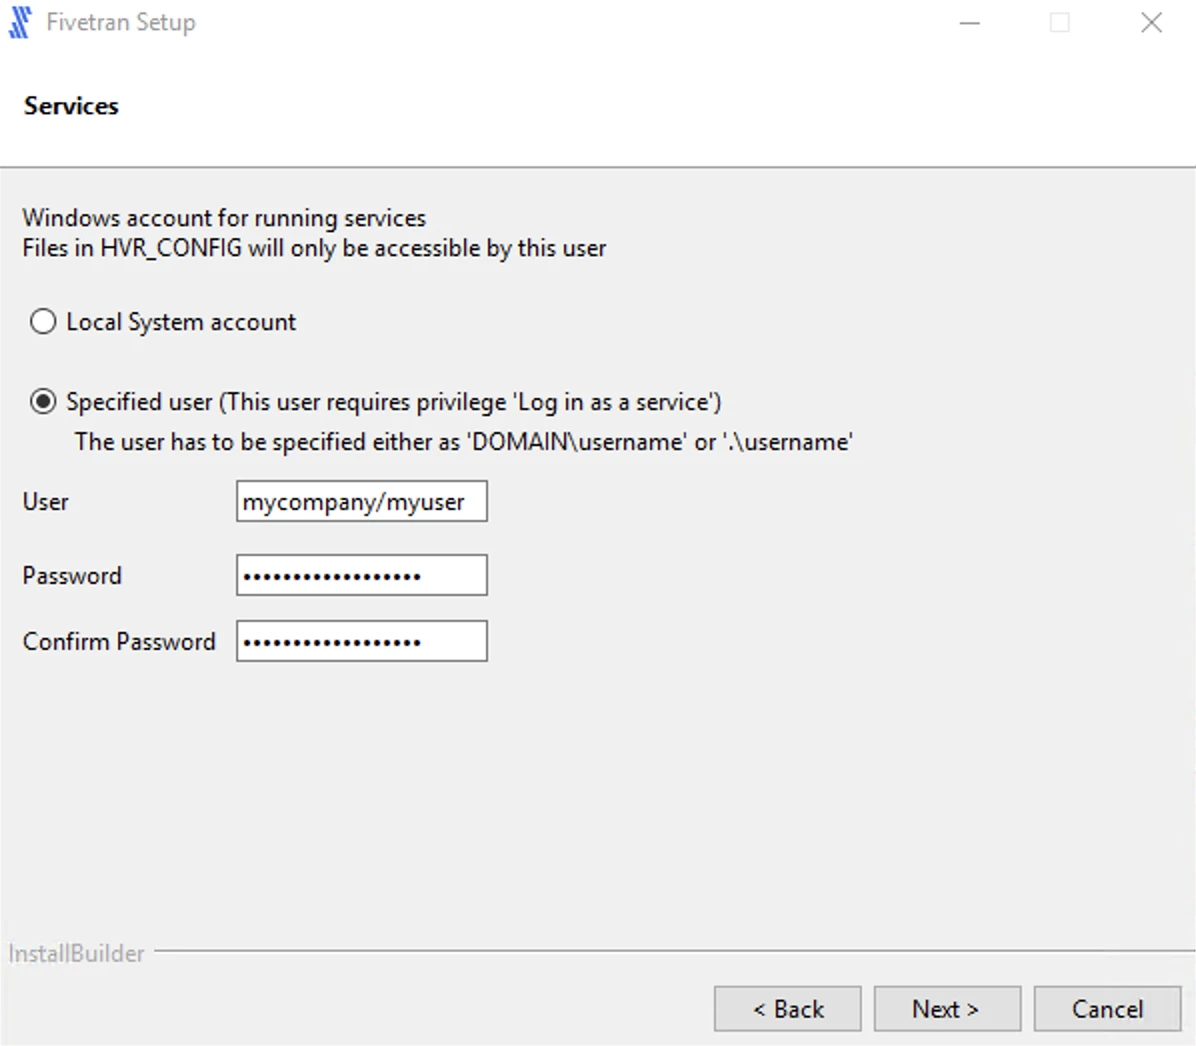
If you select Local System account, click Next.
Select Add HVR_HOME, HVR_CONFIG, and HVR_TMP (if required) and click Next.
This is to set the environment variables
HVR_HOME,HVR_CONFIG, andHVR_TMPin your operating system. These variables point to the corresponding directories created in step 4 above.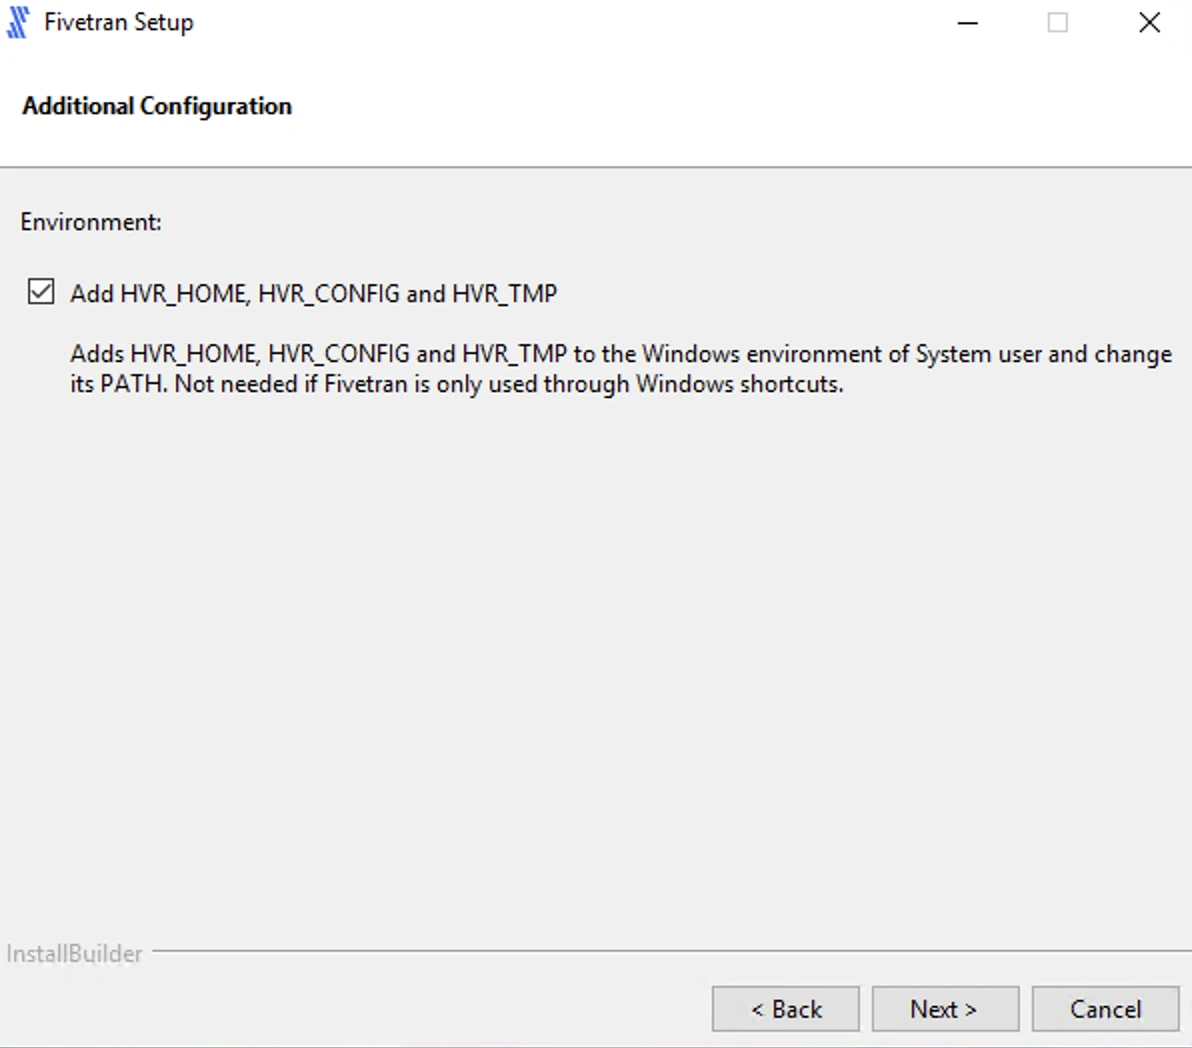
Click Next to initiate the installation.
Click Finish to start the HVA service.
Once the installation is complete, the HVA and all required components are installed into the
$HVR_HOMEdirectory (C:\hvr\hvr_home).
Configure HVA
Follow the instructions below to configure the HVA:
Create an HVA user to set up your Fivetran connector. Enter and confirm the password when prompted.
The password must be at least 10 characters long and must not contain any special characters.
hvragentuserconfig -c <username>Make a note of the username and password. You will need them to configure your connector in the Fivetran dashboard.
Run the following command to disable the setup mode:
hvragentconfig Setup_Mode_Timed_Until=Run the following command to extract the HVA public certificate:
hvragentconfig Agent_Server_Public_CertificateSave the output value of the
Agent_Server_Public_Certificate. You will need it to configure your connector in the Fivetran dashboard.
Start HVA
Perform the following steps as the user who runs the HVA.
To start the agent, use the hvragentlistener command. Follow the instructions for the operating system of your database server:
In Linux, add flag
-dfollowed by the port number that you want to run on. In the example, the default port is4343:hvragentlistener -d 4343In Windows, add flag
-acsfollowed by the port number that you want to run on. In the example, the default port is4343:hvragentlistener -acs 4343
Add HVA to system autostart (Linux only)
After completing the initial HVA setup, you must add the agent to your system’s startup and shutdown procedures.
Add HVA to system autostart on Linux
To configure systemd, perform the following steps as user root:
Create a service file called
agentListener.servicein the/etc/systemd/systemdirectory. TheagentListener.serviceshould contain the following:Change the
User=<your_linux_username>field to the Linux user that installed the HVA.[Unit] Description=Fivetran Agent Listener [Service] # The process start-up type 'forking' allows this service to spawn new processes Type=forking Environment="HVR_HOME=/opt/fivetran/hvr_home" Environment="HVR_CONFIG=/opt/fivetran/hvr_config" Environment="HVR_TMP=/opt/fivetran/hvr_tmp" # The user that owns HVR_HOME, HVR_CONFIG, etc. User=<your_linux_username> ExecStart=/opt/fivetran/hvr_home/bin/hvragentlistener -d 4343 # Restart this service after a crash Restart=always # The number of seconds to wait before attempting a restart RestartSec=5s [Install] WantedBy=multi-user.targetTo enable and start the service, execute the following commands:
sudo systemctl enable agentListener.service
sudo systemctl start agentListener.service
To verify whether the service is active, execute the following command:
sudo systemctl status agentListener.serviceThe output should show
active (running)in green.
Network connection
This section outlines the methods available for connecting Fivetran to your SQL Server database and steps to enable the TCP/IP protocol.
Choose connection method
Decide on your preferred method for connecting Fivetran to your SQL Server database, and then configure the necessary settings for that method.
Connect directly (TLS required)

You must have TLS enabled on your database to connect directly to Fivetran. Follow Microsoft's TLS setup instructions to enable TLS on your database.
Fivetran connects directly to the HVA installed on the database host. All communication between Fivetran and the HVA is encrypted. The HVA has a direct connection to your SQL Server database.
To connect directly, configure your firewall and/or other access control systems to allow incoming connections to your SQL server host and port (usually 1433) from Fivetran's IPs for your database's region. How you do this depends on how your SQL Server database is hosted (cloud platform, on-premises, etc.)
Connect using SSH (TLS optional)

Fivetran connects to your database through an SSH tunnel, providing secure communication between Fivetran processes and your database host. This connection method can be used when direct access to your database port isn’t possible or if you require a more secure connection. It allows Fivetran to securely access your database while maintaining your network’s integrity.
Once the SSH tunnel is configured, Fivetran connects to the SSH server using the specified SSH host, port, and user credentials. The SSH server then forwards the connection to the database host through HVA, which listens on a specific port (default 4343). The SSH server must be configured to accept connections from the Fivetran's IP.
You may need to configure your firewall or any relevant access control systems to allow incoming connections to your Oracle database port (usually port 1521) from the IP address of your SSH tunnel server.
To connect using SSH, follow our SSH connection setup instructions.
To connect using reverse SSH, follow our Reverse SSH connection setup instructions.
If you want Fivetran to tunnel SSH over TLS, you must first enable TLS on your database.
Connect using private networking

You must have a Business Critical plan to use private networking.
Private networking enables communication between private networks and services without exposing traffic to the public internet. Private networking is the most secure connection method. We support the following providers:
- AWS PrivateLink – used for VPCs and either AWS-hosted or on-premises services. See our AWS PrivateLink setup guide for details.
- Azure PrivateLink – used for Virtual Networks (VNets) and either Azure-hosted or on-premises services. See our Azure PrivateLink setup guide for details.
- Google Cloud Private Service Connect – used for VPCs and either Google-hosted or on-premises services. See our Google Cloud Private Service Connect setup guide for details.
Allow TCP/IP protocol
Verify that your database server is configured to allow TCP/IP connections. If your database instance does not have TCP/IP protocol enabled, follow the instructions below.
Enable TCP/IP protocol
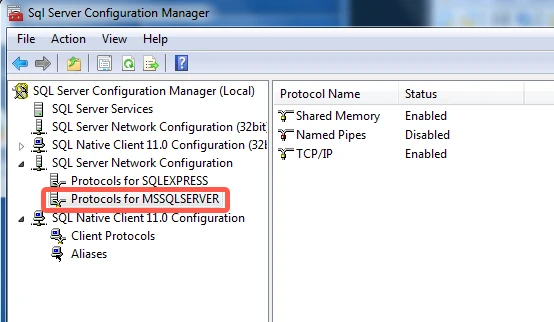
Open SQL Server Configuration Manager.
In the tree pane, click SQL Server Network Configuration to expand it.
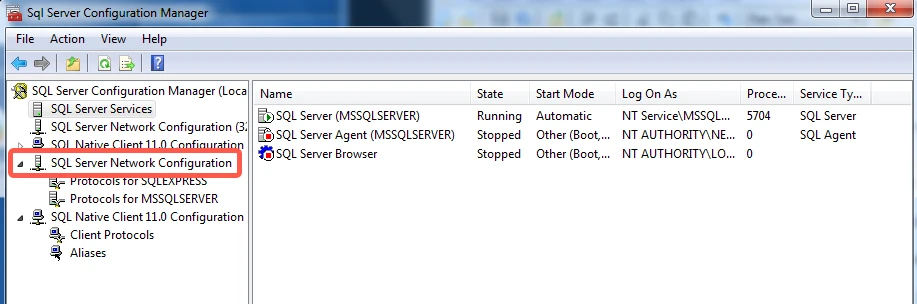
Click Protocols for YourInstanceName. If you specified the default instance during installation, the instance name will be MSSQLSERVER.
In the Status column, verify that TCP/IP is Enabled.
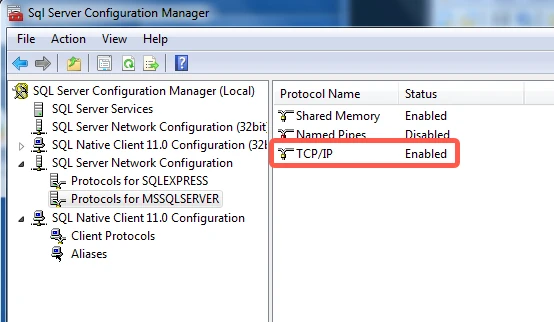
If Disabled appears, right-click TCP/IP, then click Enable.
Right-click TCP/IP, then select Properties.
Go to the IP Addresses tab and scroll all the way down.
In the IPAll section, enter your database's port number (usually
1433) for the TCP Port, then click Apply.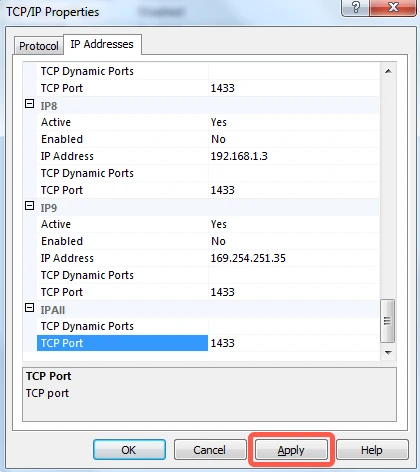
Click OK in the warning dialog box that pops up.

Click OK in the TCP/IP Properties dialog box.
In the tree pane, click SQL Native Client Configuration to expand it, then click Client Protocols.
In the right-hand column, verify that Enabled appears next to TCP/IP.
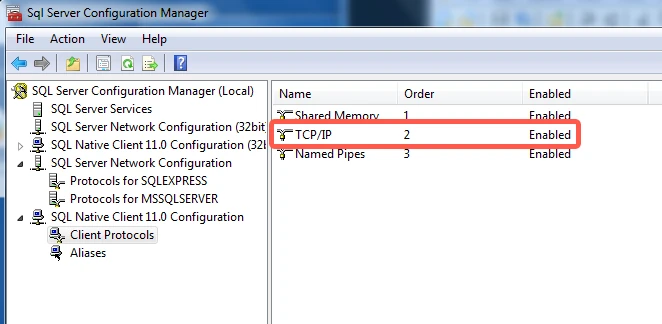
If Disabled appears, right-click TCP/IP, then click Enable.
Right-click TCP/IP, then select Properties.
Verify that the Default Port is
1433and that Yes appears next to Enabled.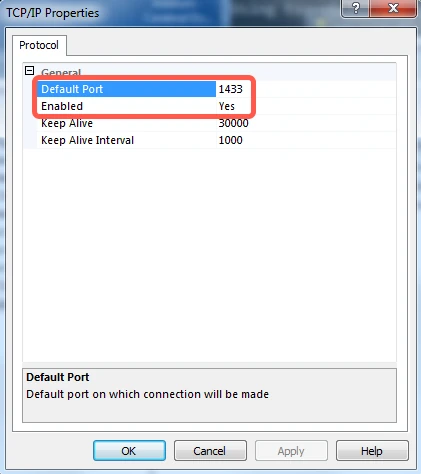
Click OK to exit the TCP/IP Properties dialog box.
In the tree pane, click SQL Server Services.
In the right pane, right-click SQL Server (YourInstanceName), then click Restart.
Database access and configuration
This section provides instructions for creating a dedicated database user for Fivetran and configuring the necessary user permission model (SysAdmin, DbOwner, and Minimal). It includes optional configuration steps for databases with Transparent Data Encryption or Always On Availability Groups configuration.
Create user
Create a database user for Fivetran's exclusive use.
Connect to your SQL Server database as an Admin user.
Decide whether the Fivetran user will authenticate using a database password or Windows authentication.
You can use Windows Authentication only if the HVA and the database are operating on a Windows platform.
Password Authentication
To create a user with database password authentication, execute the following SQL command. Replace
<database>with the name of your database,<username>and<password>with a username and password of your choice.USE [<database>]; CREATE LOGIN <username> WITH PASSWORD = '<password>'; CREATE USER <username> FOR LOGIN <username>;Windows Authentication
To create a user with Windows authentication, execute the following SQL command. Replace
<database>,<domain>, and<username>with the name of your database, your Active Directory domain name, and the existing domain username you would like Fivetran to use.The domain user must be the same user to start the High-Volume Agent process.
USE [<database>];
CREATE LOGIN <domain>\<username> FROM WINDOWS;
CREATE USER <username> FOR LOGIN <username>;
Grant user permissions
This section outlines the permissions required to capture changes from the SQL Server database. For simplicity, we have categorized these permissions into three models. Each model is compatible with both Direct Capture and Archive Log Only capture methods. Select the model that best fits your specific business needs.
- SysAdmin model: The easiest to configure and offers broad permissions and authority over the entire SQL Server instance. While easy to set up, it carries potential security risks.
- DbOwner model: Provides extensive permissions but is restricted to a specific database. It requires more setup effort than the SysAdmin model.
- Minimal model: Requires the least permissions and does not need
sysadminordb_ownerrights. However, it is the most complex to configure.
The DbOwner and Minimal models are available only for SQL Server 2012 and newer. For older versions, use the SysAdmin model.
Configure the SysAdmin permissions model
In this permission model, the Fivetran database user must be granted the sysadmin fixed server role. To grant the Fivetran login a sysadmin role in the SQL Server instance, run the following command:
ALTER SERVER ROLE sysadmin ADD MEMBER <loginname>;
Configure the DbOwner permissions model
In this permission model, the Fivetran database user must be granted the db_owner role. To grant the Fivetran user a db_owner role in the SQL Server database, run the following command:
ALTER ROLE db_owner ADD MEMBER <username>;
Additionally, the following configuration requirements must be met/performed for this permission model.
The High-Volume Agent must already be installed before performing the following steps.
Create wrapper stored procedures
This step is needed once when the High-Volume Agent is installed for a SQL Server instance. But in the Always On AG configuration, this step is needed on each Always On AG node.
The 'wrapper' stored procedures allow the HVA to interact with designated read-only SQL Server objects required for log-based capture on the source database.
Create special 'wrapper' SQL stored procedures in
msdbdatabase:A user with the
sysadminfixed server role must create special 'wrapper' SQL stored procedures calledsp_hvr_dblog,sp_hvr_dbtable, andsp_hvr_loginfoso that the HVA can call the required SQL Server's read-only functions, such asfn_dump_dblog.This must be done inside the SQL Server special database
msdb, not the actual source database. The SQL query to create these procedures is available in the filehvrcapsysadmin.sqlin the%HVR_HOME%\dbms\sqlserverdirectory. The database user must then be allowed to execute these procedures. For this, the user must be added to the specialmsdbdatabase and the following grants must be provided:use msdb; create user <username> for login <username>; grant execute on sp_hvr_dblog to <username>; grant execute on sp_hvr_dbtable to <username>; grant execute on sp_hvr_loginfo to <username>;
Grant special read-only privilege
This step is needed once when the High-Volume Agent is installed for a SQL Server instance. But in the Always On AG configuration, this step is needed on each Always On AG node.
A sysadmin user must grant the database user a special read-only privilege in the master database:
use master;
grant view server state to <username>;
In SQL Server 2022, the VIEW SERVER STATE permission was split into two permissions: VIEW SERVER PERFORMANCE STATE and VIEW SERVER SECURITY STATE. When capturing from SQL Server 2022, the user only needs VIEW SERVER PERFORMANCE STATE.
Enable supplemental logging
For the HVA to perform log-based capture, SQL Server needs to generate full row images and add supplementary information to the transaction log, which is referred to as supplemental logging. Supplemental logging must be enabled on all tables selected for sync. To do this, use a dedicated script called supp_log_add.sql, which should be executed on the source database before the initial sync.
This script is not applicable in scenarios where native Change Data Capture (CDC) or native replication is used for purposes unrelated to HVA.
The following is a sample of the supp_log_add.sql script. In the script body, substitute source_db parameter with your corresponding value.
use [source_db]
go

set implicit_transactions off
go

—- Enable CDC on the database
EXEC sp_cdc_enable_db
go
If you do not run the supp_log_add.sql for the required tables before the initial sync, Fivetran will automatically generate the necessary SQL statements and write them into the supp_log_add.sql script file on the source machine. An error message will be displayed in the UI specifying the script file name and the required permission level to execute it. The script must be manually run on the source database by a user with the sysadmin fixed server role.
The CDC tables will not be used by SQL Server and will not contain any actual data. They are created to log the primary key during updates. This process does not add any additional load to the database server and is different from running SQL Server's native CDC replication.
Configure the Minimal permissions model
In this permission model, the Fivetran database user is not granted or does not require sysadmin or db_owner roles at runtime. However, the following configurations must be performed for this permission model.
The High-Volume Agent must already be installed before performing the following steps.
Create wrapper stored procedures
The 'wrapper' stored procedures allow HVA to interact with designated read-only SQL Server objects required for log-based capture on the source database.
Create special 'wrapper' SQL stored procedures in
msdbdatabase:This step is needed once when High-Volume Agent is installed for a SQL Server instance. But in the Always On AG configuration, this step is needed on each Always On AG node.
A user with the
sysadminfixed server role must create special 'wrapper' SQL stored procedures calledsp_hvr_dblog,sp_hvr_dbtable, andsp_hvr_loginfoso that the HVA can call the required SQL Server's read-only functions, such asfn_dump_dblog. This must be done inside the SQL Server special databasemsdb, not the actual source database. The SQL query to create these procedures is available in the filehvrcapsysadmin.sqlin the%HVR_HOME%\dbms\sqlserverdirectory. The database user must then be allowed to execute these procedures. For this, the user must be added to the specialmsdbdatabase and the following grants must be provided:use msdb; create user <username> for login <username>; grant execute on sp_hvr_dblog to <username>; grant execute on sp_hvr_dbtable to <username>; grant execute on sp_hvr_loginfo to <username>;Create 'wrapper' SQL stored procedures in each source database:
This step is needed once when each new source database is being set up.
A user with
db_ownerrole orsysadminfixed server role must create 'wrapper' SQL stored procedures in each source database so that HVA can call the SQL Server's read-only proceduressp_helppublication,sp_helparticle,fn_dblog, etc. The SQL query to create these read-only procedures is available in the file calledhvrcapdbowner.sqlin the%HVR_HOME%\dbms\sqlserverdirectory. The database user must then be allowed to execute these procedures.The following grants must be granted to the user inside each source database:
  use <source_database>;
  grant execute on sp_hvr_check_publication to <username>;
  grant execute on sp_hvr_check_article to <username>;
  grant execute on sp_hvr_dblog to <username>;
  grant execute on sp_hvr_repldone to <username>;
  grant execute on sp_hvr_repltrans to <username>;
Grant special read-only privileges
A user with
sysadminfixed server role must grant the database user a special read-only privilege in the master database:This step is needed once when High-Volume Agent is installed for a SQL Server instance. But in the Always On configuration, this step is needed on each Always On AG node.
use master;
grant view server state to <username>;
In SQL Server 2022, the
VIEW SERVER STATEpermission was split into two permissions:VIEW SERVER PERFORMANCE STATEandVIEW SERVER SECURITY STATE. When capturing from SQL Server 2022, the user only needsVIEW SERVER PERFORMANCE STATE.A user with
db_ownerrole orsysadminfixed server role must grant the database user the following read-only privilege:This step is needed once when each new source database is being set up.
use <source_database>;
alter role db_datareader add member <username>;
Enable supplemental logging
For HVA to perform log-based capture, SQL Server needs to generate full row images and add supplementary information to the transaction log, which is referred to as supplemental logging. Supplemental logging must be enabled on all tables selected for sync. To do this, use a dedicated script called supp_log_add.sql, which should be executed against the source database before the initial sync.
This script is not applicable in scenarios where native Change Data Capture (CDC) or native replication is used for purposes unrelated to HVA.
The following is a sample of the supp_log_add.sql script. In the script body, substitute source_db, source_schema, table_name parameters with your corresponding values.
use [source_db]
go

set implicit_transactions off
go

-- Enable CDC on the database.
EXEC sp_cdc_enable_db
go

-- Enable CDC on each table needed for replication.
DECLARE @capture_instance NVARCHAR(500);
SET @capture_instance = CONCAT('hvr_', OBJECT_ID(N'[source_schema].[table_name]'));

EXEC sys.sp_cdc_enable_table
    @source_schema = N'[source_schema]',
    @source_name = N'[table_name]',
    @capture_instance = @capture_instance,
    @role_name = NULL;
go


-- If you do not use CDC with an existing process, you can safely drop the capture job to minimize the overhead introduced with native CDC.
EXEC sp_cdc_drop_job @job_type = N'capture'
go
If you do not run the supp_log_add.sql for the required tables before the initial sync, Fivetran will automatically generate the necessary SQL statements and write them into the supp_log_add.sql script file on the source machine. An error message will be displayed in the UI specifying the script file name and the required permission level to execute it. The script must be manually run on the source database. The first time the message is displayed, a user with sysadmin fixed server role is required to execute the script. Subsequently, a user with db_owner privileges can run the script.
The CDC tables will not be used by SQL Server and will not contain any actual data. They are created to log the primary key during updates. This process does not add any additional load to the database server and is different from running SQL Server's native CDC replication.
Adding new table
When you add a new table to the source database, it is essential to include the table in the supp_log_add.sql script and execute it once again on the source database. This will enable supplemental logging for the table. If you omit this step, it will cause an error during the initial and incremental syncs. The error will also generate the script that you can use to add the table.
Export transparent data encryption certificate (optional)
This step is necessary only for databases encrypted using SQL Server transparent data encryption (TDE).
Export TDE certificate
Run the following SQL command to export the TDE certificate and its private key to a file. Be sure to replace the placeholders with the actual values specific to your environment (
<TDE_certificate_name>,<path_to_TDE_certificate_file>,<path_to_TDE_private_key_file>, and<TDE_password>). Also, ensure that the SQL Server service account has write permissions to the specified paths:BACKUP CERTIFICATE <TDE_certificate_name> TO FILE ='<path_to_TDE_certificate_file>' WITH PRIVATE KEY ( FILE='<path_to_TDE_private_key_file>', ENCRYPTION BY PASSWORD='<TDE_password>' )Run the following commands in the command prompt to encode the certificate and private key:
If you are using a Windows machine, download a Base64 utility. Base64 encoding ensures that the certificate and key are in a format that is easily transferable, especially when they need to be imported into systems that require a specific format or do not handle binary files well.
base64 <path_to_TDE_certificate_file>
base64 <path_to_TDE_private_key_file>
Make a note of the command outputs. You will need them later to configure your connector in the Fivetran dashboard.
Finish Fivetran Configuration
This section outlines the steps to configure the HVA connection in the using the connection setup form within the Fivetran dashboard.
Configure connection in Fivetran dashboard
Enter a Destination schema prefix of your choice. This prefix applies to each replicated schema and cannot be changed once your connection is created.
Select an authentication method for your database:
You can use Windows Authentication only if the HVA and the database are operating on a Windows platform.
- Password Authentication: This authentication method uses the user credentials you created for database password authentication. If you choose this method, enter the following details:
- Host:
- If the HVA is installed on the database server, use
localhost. For named instances on the same, uselocalhost\<instance_name>. - If the HVA is installed on a different server:
- Enter the IP address of that server (for example,
1.2.3.4). - For domain-based access, enter the domain name of that server (for example,
my.server.com). - For accessing a named instance on that server, use the format
<host>\<instance_name>(for example,my.server.com\myInstanceName).
- Enter the IP address of that server (for example,
- If the HVA is installed on the database server, use
- Port:
- Enter the port number your database server listens on for incoming connections. The default port number is
1433. - If you are connecting to a named instance (
<host>\<instance_name>), use port1433. The SQL Server Browser will resolve the correct port for your instance.
- Enter the port number your database server listens on for incoming connections. The default port number is
- User: Enter the name of the user you created for database password authentication.
- Password: Enter the password for the user you created for database password authentication.
- Host:
- Windows Authentication: This authentication method uses the user credentials you created for Windows authentication. If you choose this method, in the Server Name field, enter the server name of your SQL Server instance.
- Password Authentication: This authentication method uses the user credentials you created for database password authentication. If you choose this method, enter the following details:
Enter the name of your Database (for example,
my_database).Choose your Connection method.
- If you selected Connect via an SSH tunnel (this option is applicable for both standard SSH connections and reverse SSH connections), copy or make a note of the Public Key and add it to the
authorized_keysfile while configuring the SSH tunnel, and provide the following information:- SSH Host: Enter the hostname or IP address of your SSH server. Do not use a load balancer IP address/hostname.
- SSH Port: Enter the port number of your SSH server. The default port is
22. - SSH User: Enter the username for SSH access.
- If you selected Connect via an SSH tunnel (this option is applicable for both standard SSH connections and reverse SSH connections), copy or make a note of the Public Key and add it to the
(Optional) If you enabled TLS on your database, ensure the Require TLS through Tunnel toggle is set to ON.
Enter the name of your SAP Schema. SAP tables reside under this SQL Server schema.
(TDE-encrypted database only) Set the Using Transparent Data Encryption (TDE) toggle to ON and enter the following information:
Set the Use archive log only mode toggle to ON if you want to use the Archive Log Only capture method instead of capturing directly from online transaction log files. Enter the following details:
Archive Log Path: Enter the directory path containing the transaction log backup files on the source machine where HVA is installed.
Archive Log Format: Enter the filename format (template) of the transaction log backup files. Fivetran will only read the transaction log backup files that match the specified format. Use the following variables for your filename format.
View file format variables
%d: Database name%Y: Year (up to 4-digit decimal integer)%M: Month (up to 2-digit decimal integer)%D: Day (up to 2-digit decimal integer)%h: Hours (up to 2-digit decimal integer)%m: Minutes (up to 2-digit decimal integer)%s: Seconds (up to 2-digit decimal integer)%n: File sequence number (up to 64-bit decimal integer)%%: Matches %*: Wildcard, matches zero or more characters
For example, the format
archive_%d_%Y%M%D_%h%m%s.logtranslates toarchive_<database_name>_YYYYMMDD_HHMMSS.log.
In the Agent Host field, enter the HVA's hostname or IP address depending on the connection method you have chosen and your database configuration.
- Connection method:
- Direct: Enter the database hostname or IP address.
- SSH: Enter the hostname or private IP address within your internal network, accessible by Fivetran through the SSH tunnel. For reverse SSH, set the value to
localhost. - Private networking: Enter the hostname or private IP address within your VPC, accessible by Fivetran through a private endpoint.
Ensure that your Firewall/Security Group allows Fivetran's IPs for your database's region.
- Connection method:
In the Agent Port field, enter the HVA port number. The default port number is
4343. For reverse SSH, use the value of<SSH_HIGH_PORT>(Linux) or Source port (Windows).In the Agent User ID field, enter the name of the HVA user you created.
In the Agent User Password, enter the password of the HVA user you created.
In the Agent Public Cert, enter the HVA Server Public Certificate you obtained.
Click Save & Test. Fivetran tests and validates our connection to your SQL Server database. Upon successful completion of the setup tests, you can sync your data using Fivetran.
Setup tests
Fivetran performs the following tests to ensure that we can connect to your generic SQL Server database and that it is properly configured:
- The Connecting to SSH Tunnel Test validates the SSH tunnel details you provided in the setup form. It then checks that we can connect to your database using the SSH Tunnel. (We skip this test if you aren't connecting using SSH.)
- The Connecting to Host Test validates the database credentials you provided in the setup form. It then verifies that the database host is not private and checks that we can connect to the host.
- The Validating Certificate Test generates a pop-up window where you must choose which certificate you want Fivetran to use. It then validates that certificate and checks that we can connect to your database using TLS. (We skip this test if you selected an indirect connection method and then disabled the Require TLS through Fivetran TLS-encrypted tunnel toggle.)
- The Connecting to Database Test checks that we can access your database.
- The Checking Access to Schema Test checks that we have the correct permissions to access the schemas in your database. It then verifies that your database contains at least one table.
- The Validating Agent Setup Test checks that we can connect to the HVA and whether it operates correctly.
- The Log Accessibility Test checks that the HVA can access the database log files.
The tests may take a few minutes to finish running.
Related articles
description Connector Overview
account_tree Schema Information