Amazon DynamoDB Setup Guide
Follow our setup guide to connect Amazon DynamoDB to Fivetran.
Prerequisites
To connect your Amazon DynamoDB database to Fivetran, you need an AWS account with administrator privileges.
For Hybrid Deployment only, this setup guide assumes that your agent container runs on an EC2 instance in the same AWS account as your DynamoDB database.
Setup instructions
Find External ID
If you use Hybrid Deployment only, skip ahead to the Create IAM Policy step.
Find the automatically-generated External ID in your connection setup form and make a note of it. You will need it to configure AWS to connect with Fivetran in Step 3.
The automatically-generated External ID is tied to your account. If you close and re-open the setup form, the ID will remain the same. You can keep the tab open in the background while you configure your source for convenience.
Create IAM policy
This step allows Fivetran to access your Amazon DynamoDB database.
Open the Create new AWS IAM policy page.
Go to the JSON tab.

Copy the following policy and paste it in the JSON editor:
{
    "Version": "2012-10-17",
    "Statement": [
        {
        "Effect": "Allow",
        "Action": [
                "dynamodb:DescribeStream",
                "dynamodb:DescribeTable",
                "dynamodb:GetRecords",
                "dynamodb:GetShardIterator",
                "dynamodb:ListTables",
                "dynamodb:Scan"
        ],
        "Resource": "*"
        }
    ]
}
This policy provides us access to all the source tables. However, you can modify the policy to restrict access to only specific tables.
If you use a customer-managed KMS key, add the following actions to the
Actionsection of the IAM policy to provide read access to the encrypted tables:"kms:Decrypt" "kms:Encrypt" "kms:GenerateDataKey" "kms:ReEncryptTo" "kms:GenerateDataKeyWithoutPlaintext" "kms:DescribeKey" "kms:ReEncryptFrom"Click Next: Tags.
(Optional) In the Add tags page, add custom tags to your Amazon DynamoDB database.
Click Next: Review.
In the Review policy page, enter a name for the policy (for example, Fivetran-Dynamo-Access).
(Optional) Provide a description for the policy.
Click Create policy.
Create IAM role
Open the Create new AWS IAM role page.
(Hybrid Deployment only) Select AWS service and select 'EC2' from the service dropdown field.
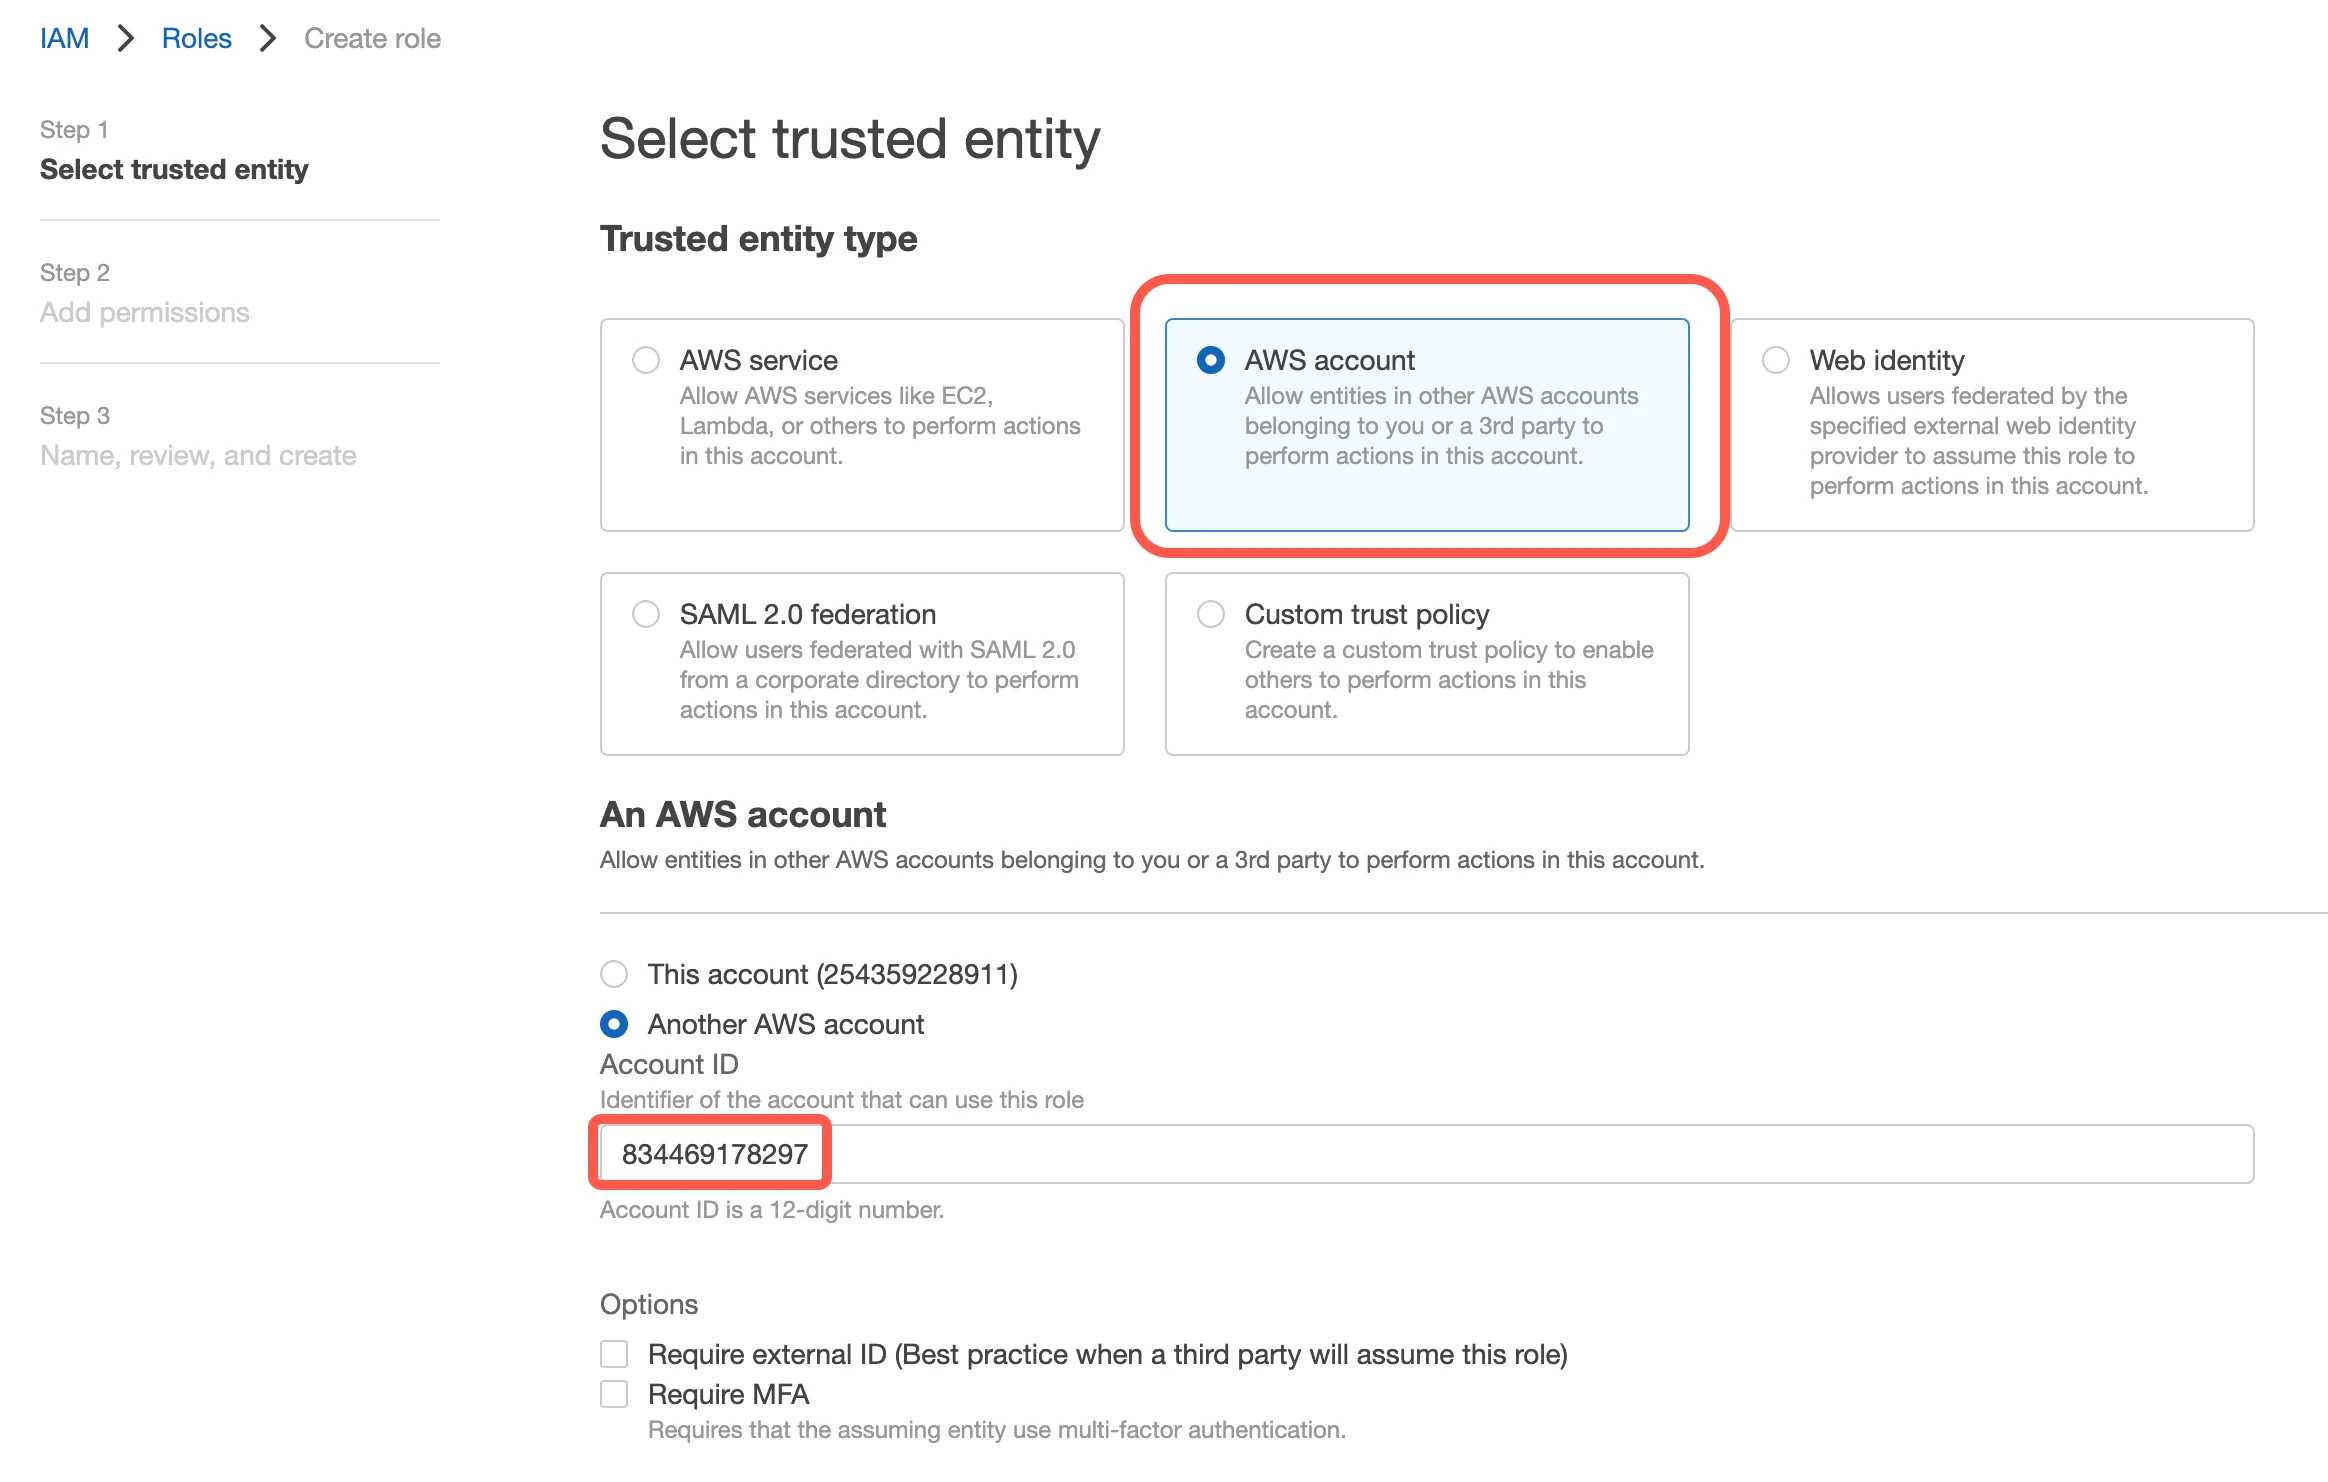
(Not applicable to Hybrid Deployment) Select AWS account and enter Fivetran’s AWS VPC Account ID,
834469178297, in the Account ID field.
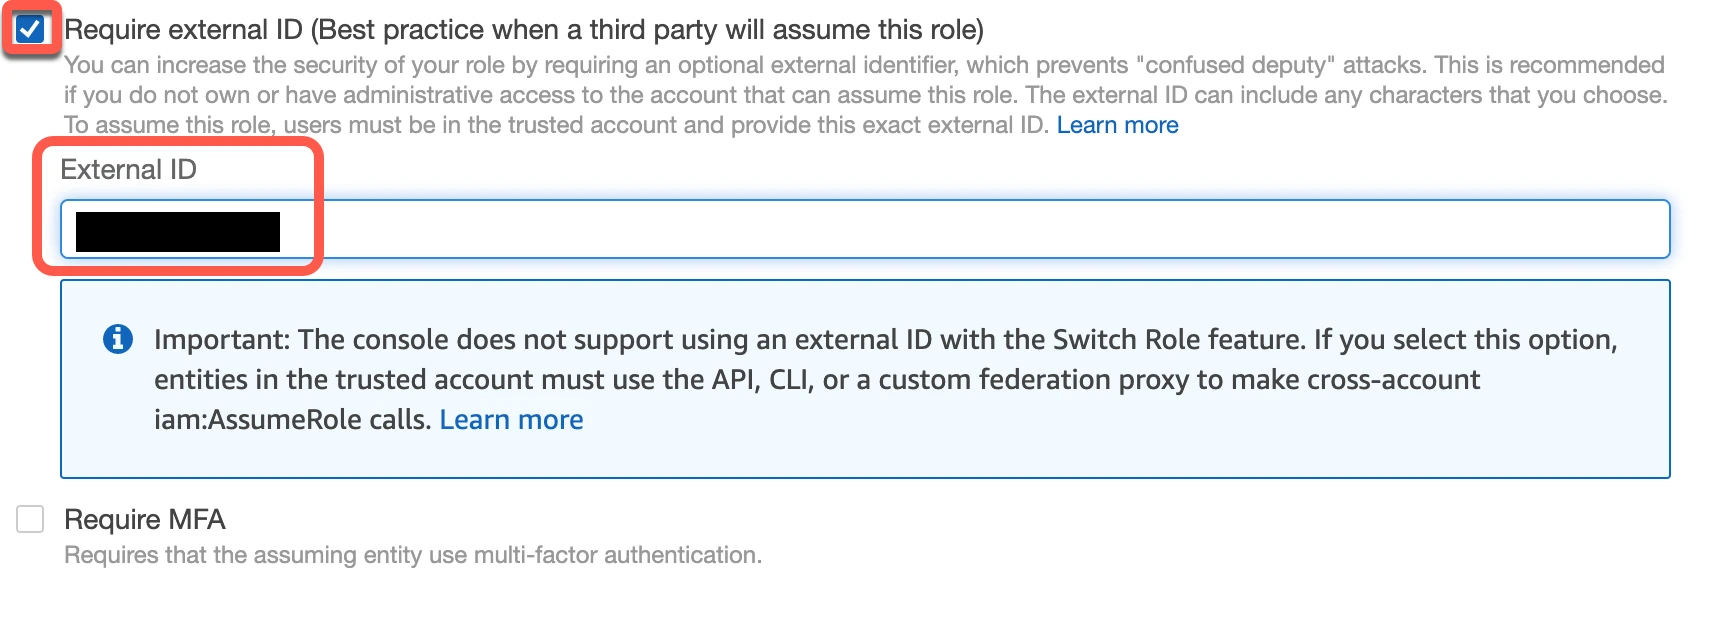
(Not applicable to Hybrid Deployment) Select the Require external ID checkbox and enter the External ID you found in Step 1, then click Next.

In the Add permissions page, select the IAM policy you created in Step 2, and then click Next.

Enter a name for the role (for example, Fivetran-Dynamo), and then click Create role.
(Hybrid Deployment only) Attach the role to your EC2 instance.
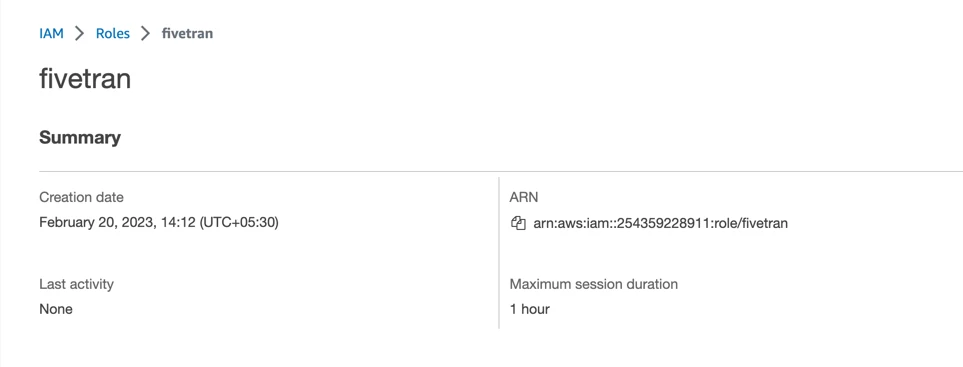
(Not applicable to Hybrid Deployment) Click the role you just created (it may take a few seconds to populate). Find the ARN identifier and copy it. You will need it to configure your connection in Step 6.

Enable streams for Amazon DynamoDB tables
In this step, you'll enable streams for all the tables that you want to sync through Fivetran.
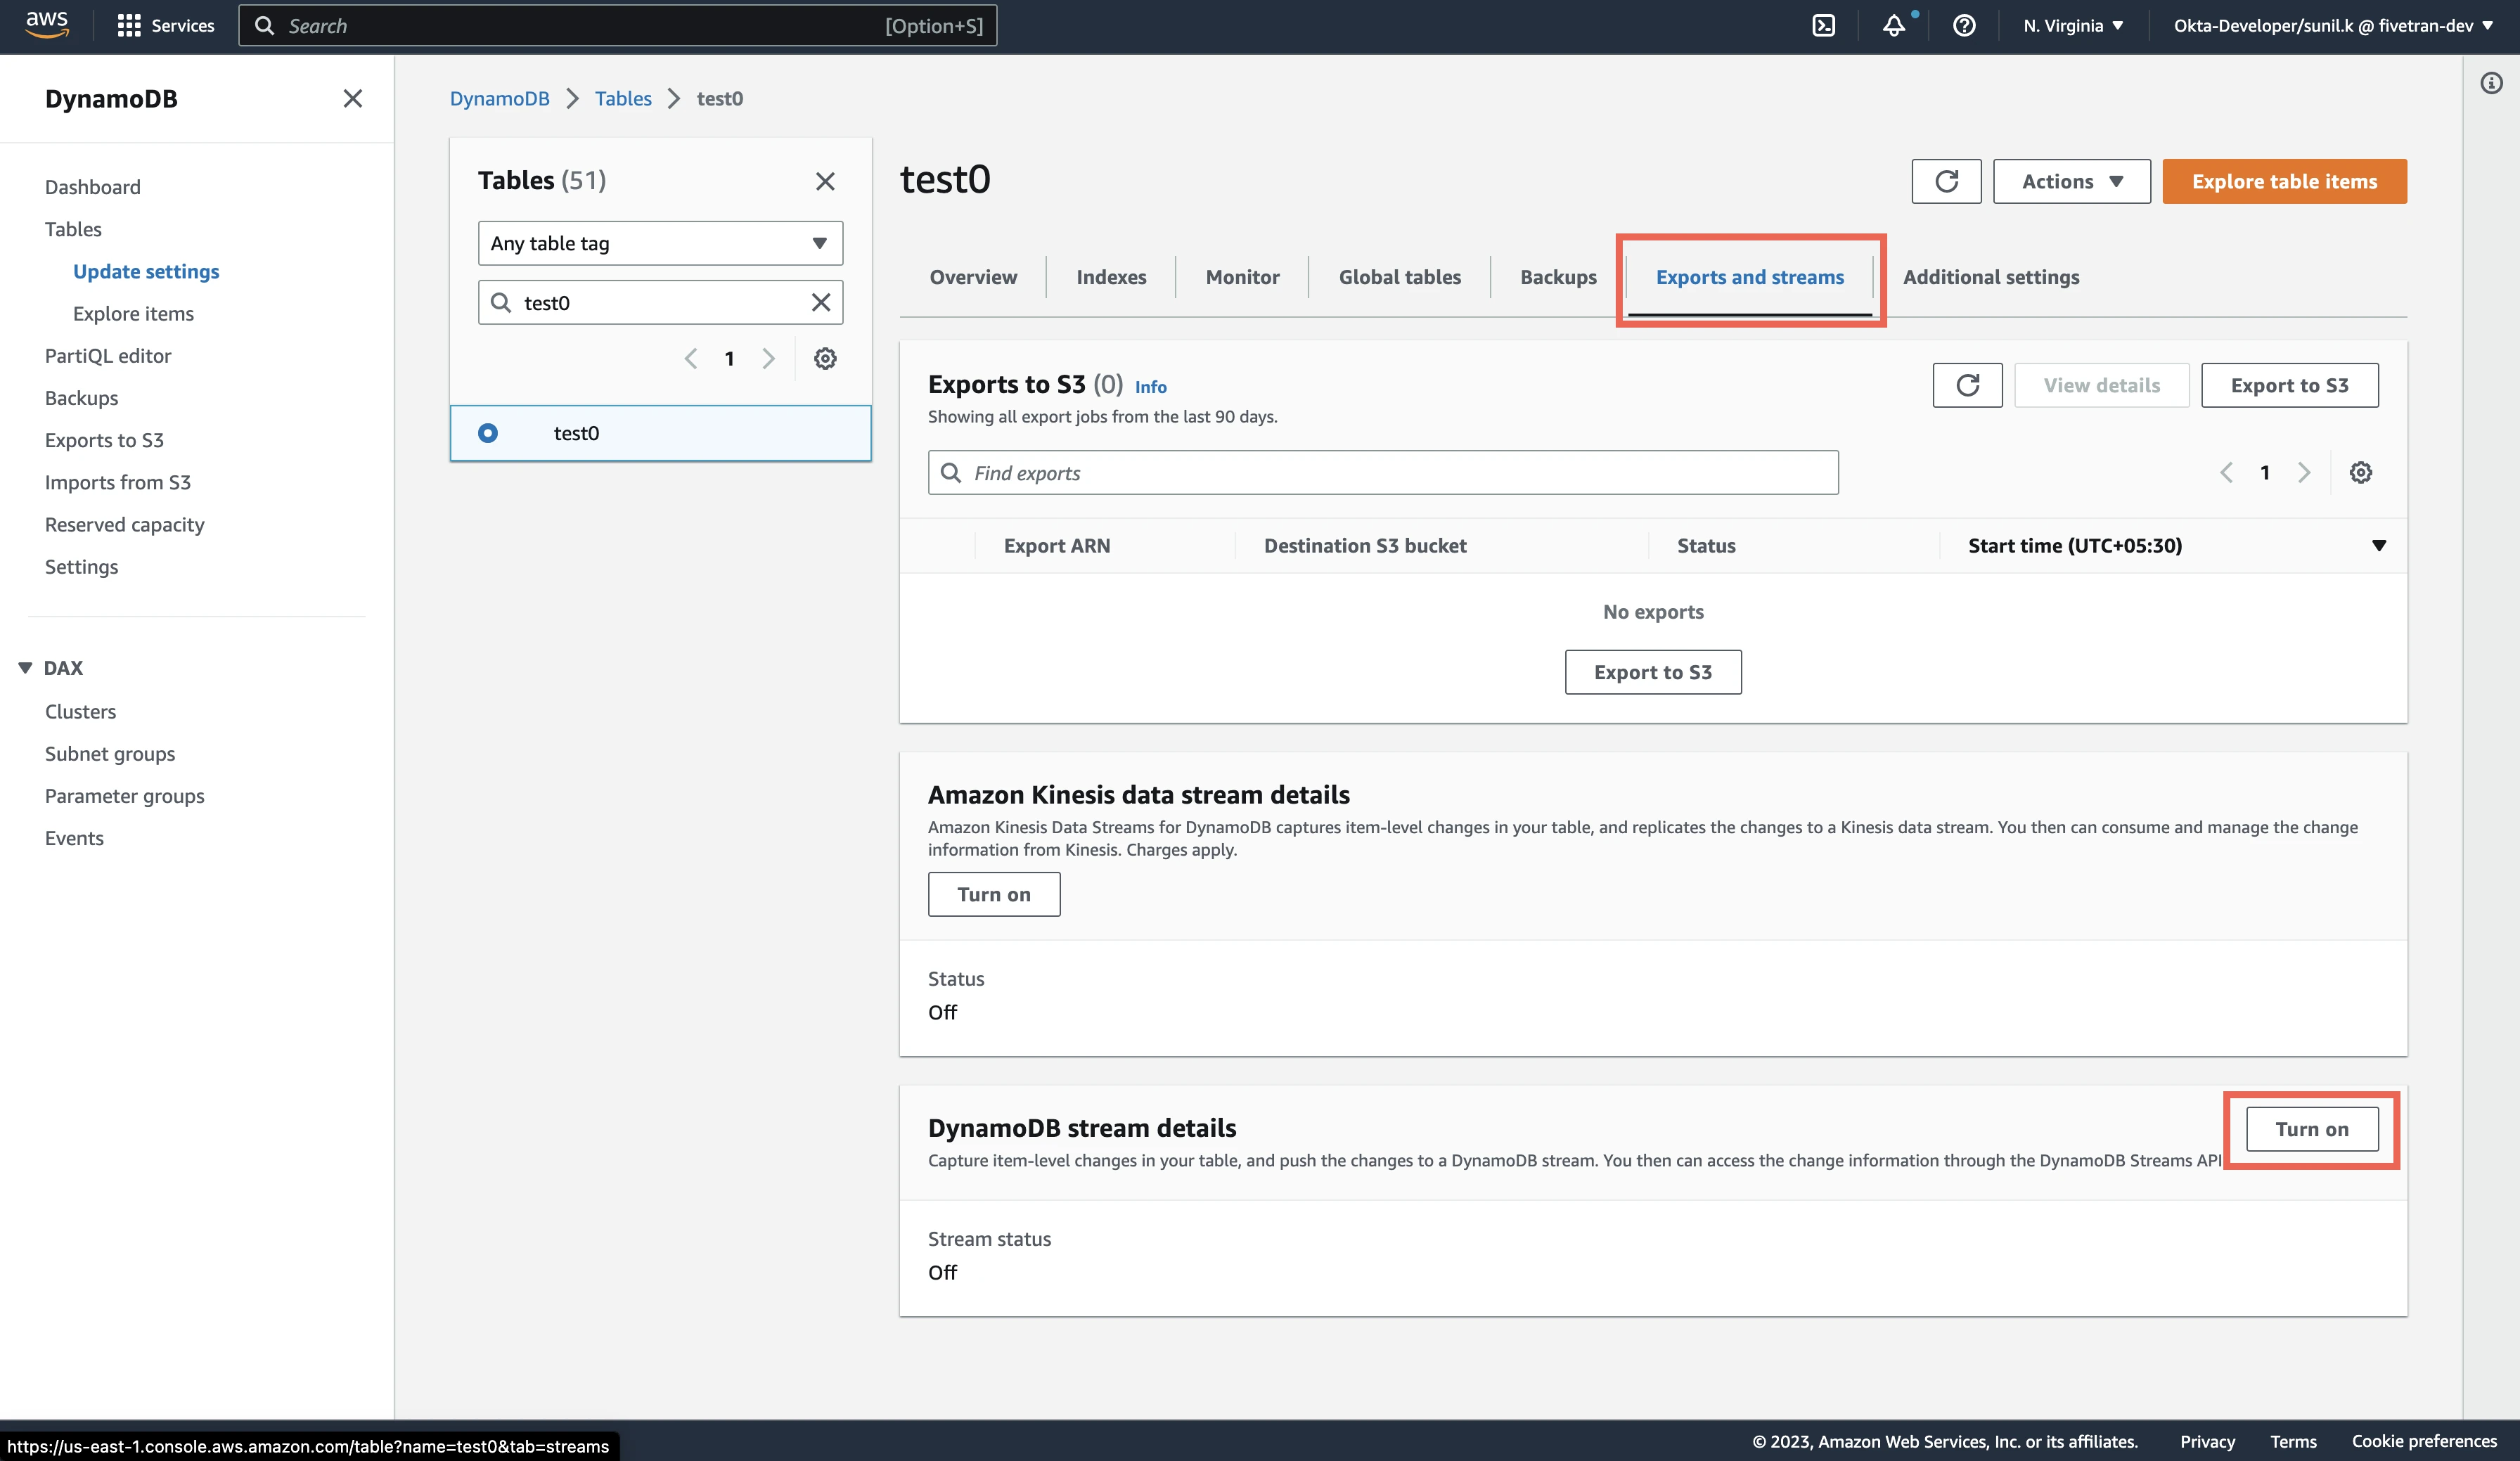
In your AWS console, select the DynamoDB service, and then select Tables.
Select a table.
Go to the Exports and streams tab.
In the DynamoDB stream details section, click Turn on.
Select New and old images - both the new and the old images of the item.
Click Turn on stream.
Repeat steps 1 through 6 for every table that you want to sync using your connection.

Enabling the New and old images - both the new and the old images of the item setting allows us to compare both images, ensuring we can capture deleted events and filter out excluded record attributes. Even if you only need new images, this setting ensures data integrity while you process the images you need.
(Optional) Configure AWS PrivateLink Beta
You must have a Business Critical plan to use AWS PrivateLink.
AWS PrivateLink allows VPCs and AWS-hosted or on-premises services to communicate with one another without exposing traffic to the public internet. PrivateLink is the most secure connection method. Learn more in AWS’ PrivateLink documentation.
Follow our AWS PrivateLink setup guide to configure PrivateLink for your database.
Finish Fivetran configuration
In your connection setup form, enter a Destination schema name of your choice.
In the Destination schema names field, choose the naming convention you want Fivetran to use for the schemas, tables, and columns in your destination:
- Source naming: Preserves the original schema, table, and column names from the source system in your destination.
- Fivetran naming: Standardizes the schema, table, and column names in your destination according to the Fivetran naming conventions.
If you want to modify your selection, make sure you do it before you start the initial sync.
Depending on your selection, we will either prefix the connection name to each replicated schema or use the source schema names instead.
(Hybrid Deployment only) If your destination is configured for Hybrid Deployment, the Hybrid Deployment Agent associated with your destination is pre-selected for the connection. To assign a different agent, click Replace agent, select the agent you want to use, and click Use Agent.
(Optional) Enable the Require TLS toggle if you want to use TLS.
In the Role ARN field, enter the ARN identifier you found in Step 3.
(Not applicable to Hybrid Deployment) In the AWS region code drop-down, select the AWS region where your DynamoDB instance is hosted.
(Hybrid Deployment only) Enter your AWS region. Specify the region where DynamoDB is hosted.
Select your Pack mode. For more information, see our Packed mode options documentation.
(Not applicable to Hybrid Deployment) (Optional) To always connect using AWS PrivateLink, set the Require PrivateLink toggle to ON.
By default, we use PrivateLink to connect if your database and Fivetran are in the same region. Enabling this option ensures that we always use PrivateLink to connect. If the regions differ, Fivetran won't create the connection. When you enable this option, requests to your Amazon DynamoDB endpoint within the AWS region are routed to a private Amazon DynamoDB endpoint within the Amazon network. You don't need to modify your applications running on EC2 instances in your VPC. The endpoint name remains the same, but the route to Amazon DynamoDB stays entirely within the Amazon network, without accessing the public internet.
Click Save & Test. Fivetran will take it from here and sync your data from your Amazon DynamoDB account.
Setup tests
Fivetran performs the Connecting to Database test to check that we can access your DynamoDB database using the credentials you provided in the setup form.
The test may take a few minutes to finish running.